SiteWorx email autoresponders allow you to configure automatic replies to emails received by your domain accounts. Email autoresponders are active until deleted.
Likewise, a vacation responder is meant to inform the person who sent the email that you are out of office and when to expect a response. You can enable and disable autoreply vacation emails as you need them.
Below, you’ll learn how to configure email autoresponders and how to toggle vacation automatic replies on a Magento or flexible cloud plan at Nexcess.
About email automatic reply functionality
An email autoresponder is helpful for much more than an out-of-office message. For example, an email autoresponder can be used to send a price list in response to a message sent to pricelist@example.com. Your customer support email address can also use an email autoresponder to let users know their feedback, question, or issue has been received.
Instead of sending out manually crafted individual welcome emails to each person who signs up for a newsletter, an autoresponder can send out a welcome email that can be personalized with user data, but in an automated fashion.
SiteWorx allows you to set up an automatic reply for a specific email box on your domain. Unlike email autoresponders, this type of email autoreply message can be enabled and disabled whenever you want.
Setup steps for configuring email autoresponders for Magento or flexible cloud plans
Keep in mind, the method described in this article is for Nexcess clients. Furthermore, only attempt this if using a Magento or flexible cloud plan at Nexcess. If you have a managed WordPress or managed WooCommerce plan, feel free to contact our 24/7 support team, and they’ll help you.
The setup procedures require access to your Nexcess Client Portal account. If your credentials aren’t working and you need to reset or change your password, click the Forgot Password? link on the login page. For more information about the portal, review the Nexcess hosting and Nexcess Client Portal guide.
Lastly, you need to be working with your email accounts managed in the Nexcess Cloud for this article to apply to your scenario. For non-cloud accounts with Nexcess, refer to the How to configure SiteWorx email autoresponders article.
Step 1: Open the Nexcess Client Portal
Sign in to the Nexcess Client Portal.
Step 2: Go to the Control Panel page
2a. From the main dashboard, click Plans in the left-hand sidebar:

2b. Then, select Plan Dashboard from the menu toggle of the Magento or flexible cloud plan you want to configure:
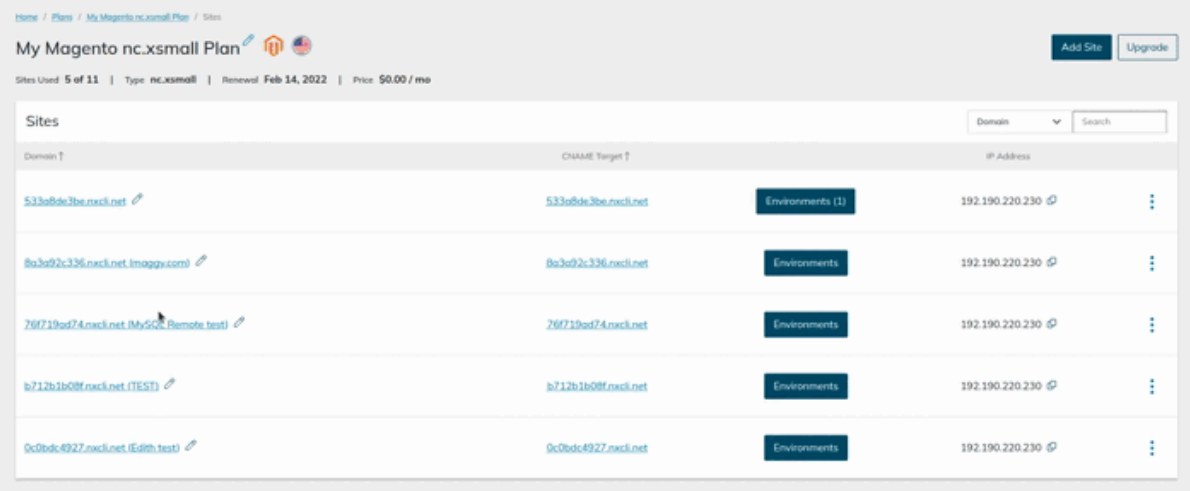
2c. From this dashboard, go to the left-hand sidebar and select the Control Panel option:

Step 3: Launch the SiteWorx Control Panel
3a. To navigate to the homepage of the SiteWorx Control Panel, click the Launch Control Panel button:
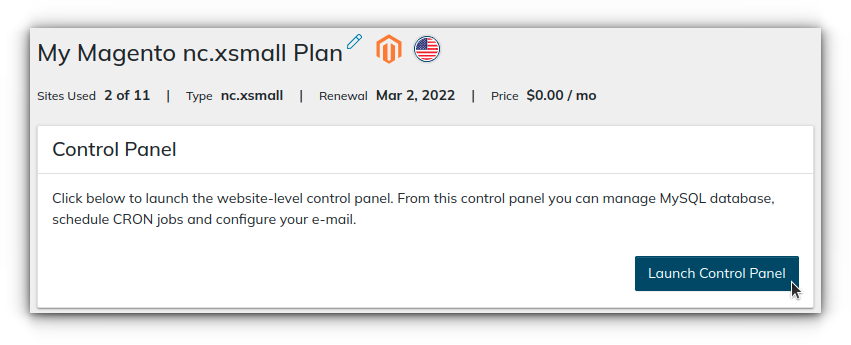
3b. The SiteWorx Control Panel screen will appear:
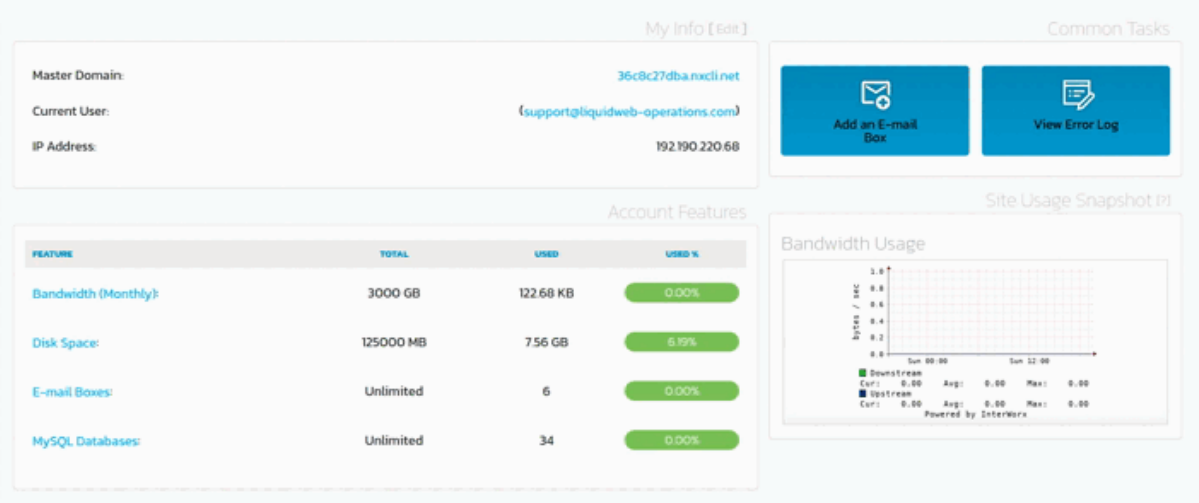
Step 4: Creating autoresponders
4a. Choose the preferred mailbox from the Managing Domain dropdown list.
4b. Click Hosting Features > Email > Autoresponders:

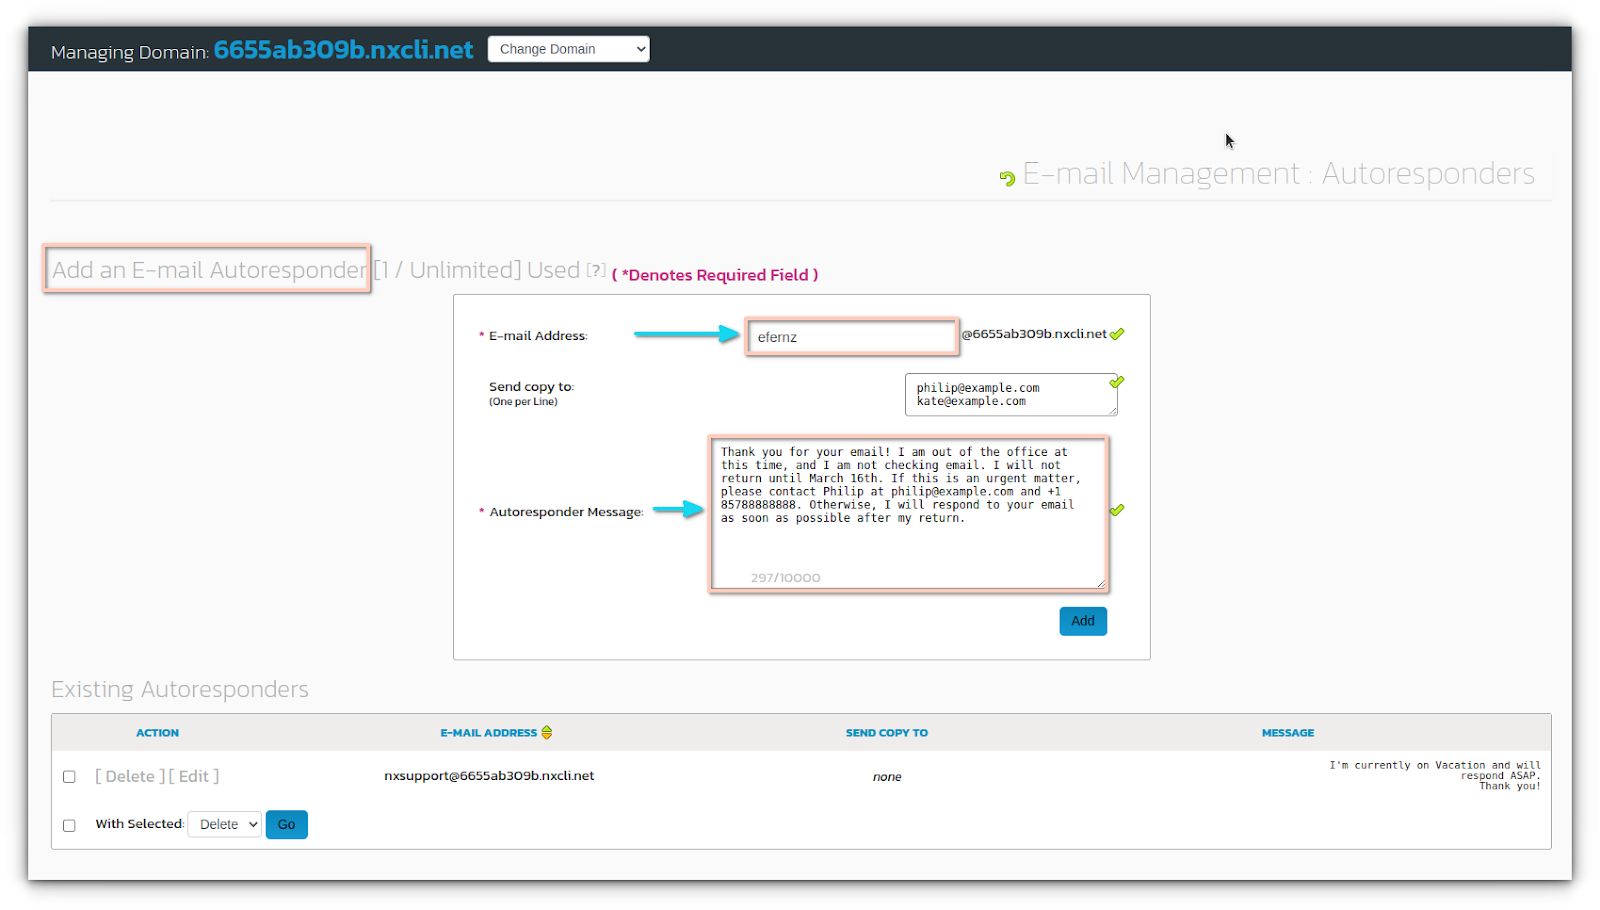
4c. After clicking Autoresponders, you will see a form on the right-hand side that is used to add an email autoresponder.
4d. Update the desired fields:
- Email Address: Supply the email address you wish to forward the automatic reply to.
- Autoresponder Message: Write the message you wish to send to recipients.
- Send Copy to: The email addresses listed will receive copies of messages sent to the autoresponder address.
- When you’re satisfied, click Add. If you need clarification, refer to the image below:
Step 5: Modifying autoresponders
5a. From the SiteWorx dashboard in the Nexcess Client Portal, click Launch Control Panel.
5b. From the main menu, click Hosting Features > Email > Autoresponders.
5c. In the Existing Autoresponders section, click the Edit option. This opens the form where you can edit your autoresponder details:

5d. Update the relevant fields. They’ll be the same fields as those found on the form used to add an email autoresponder.
5e. When you’re done, click Save:

Step 6: Deleting autoresponders
6a. From the SiteWorx dashboard in the Nexcess Client Portal, click Launch Control Panel.
6b. From the main menu, click Hosting Features > Email > Autoresponders.
6c. In the Existing Autoresponders section, click the Delete option corresponding to the autoresponder you want to remove.
6d. When prompted for confirmation, click Delete again:

Step 7: Enabling or disabling vacation email messages
The automatic vacation message feature might seem redundant compared to the email autoresponder functionality. However, the vacation email message function serves a different purpose. An autoresponder triggers whenever your domain receives an email. Vacation messages only trigger on incoming messages from specific email addresses.
Here’s how to set a vacation message to respond to incoming emails. You can then disable and enable the automatic reply as needed.
7a. After navigating to the control panel page within the Nexcess Client Portal, click the Launch Control Panel button. Your browser will redirect you to the SiteWorx Control Panel homepage.
7b. Choose the preferred mailbox from the Managing Domain dropdown list.
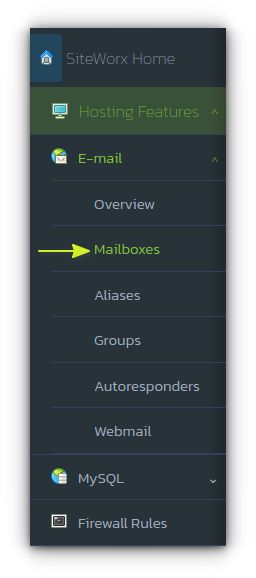
7c. From the dashboard, click Hosting Features > Email > Mailboxes:
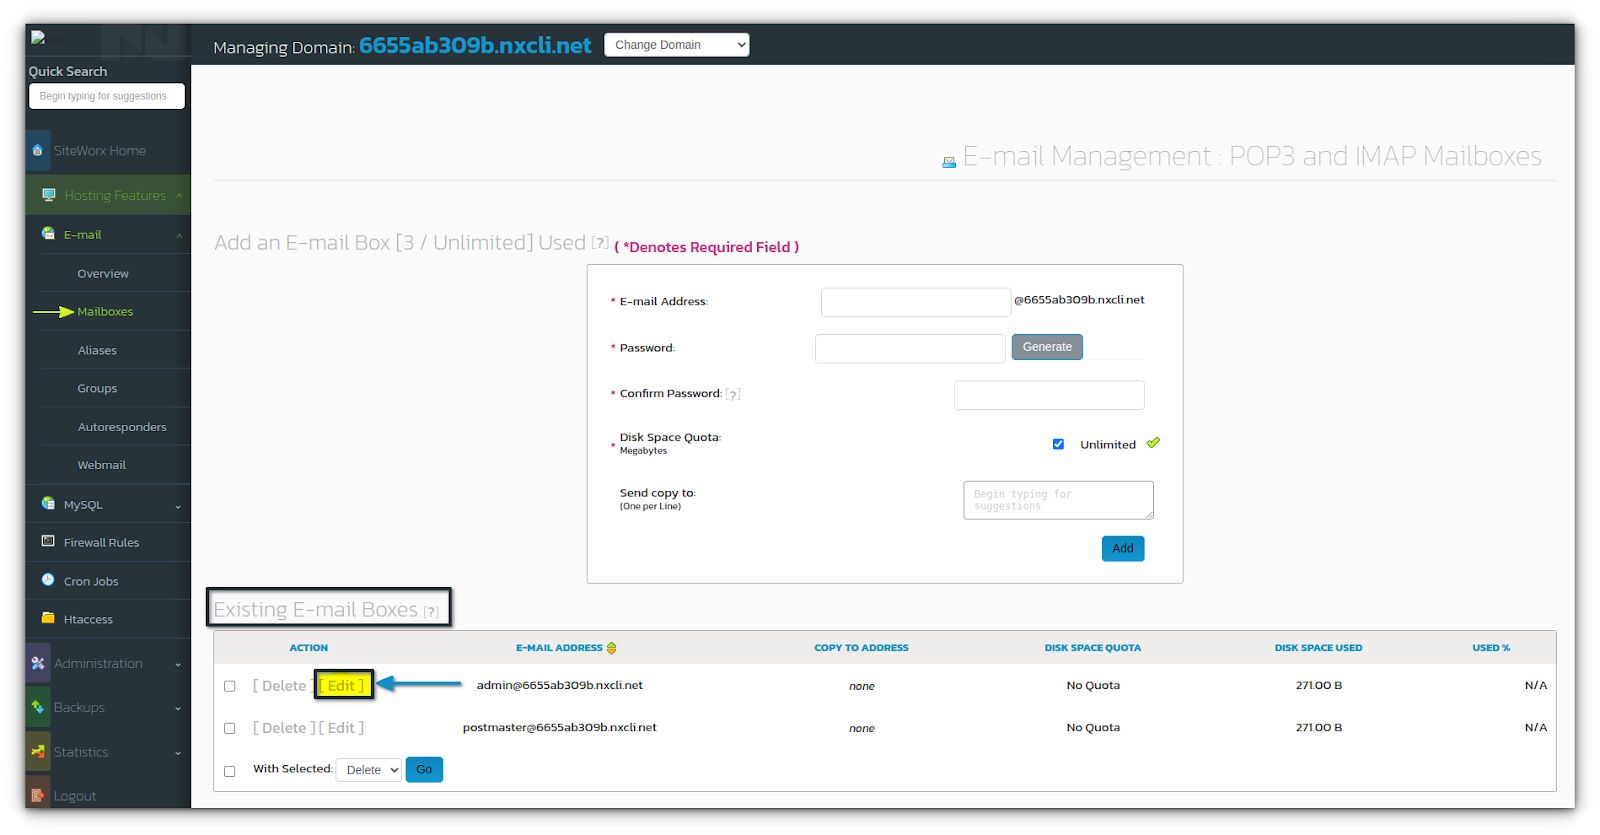
7d. Now from the Existing Email Boxes section, find the email address you want and click Edit:
7e. Type the text you want to use in the Vacation Message field:

7f. Select the Yes or No radio buttons to enable or disable the automatic message whenever you see a good fit:
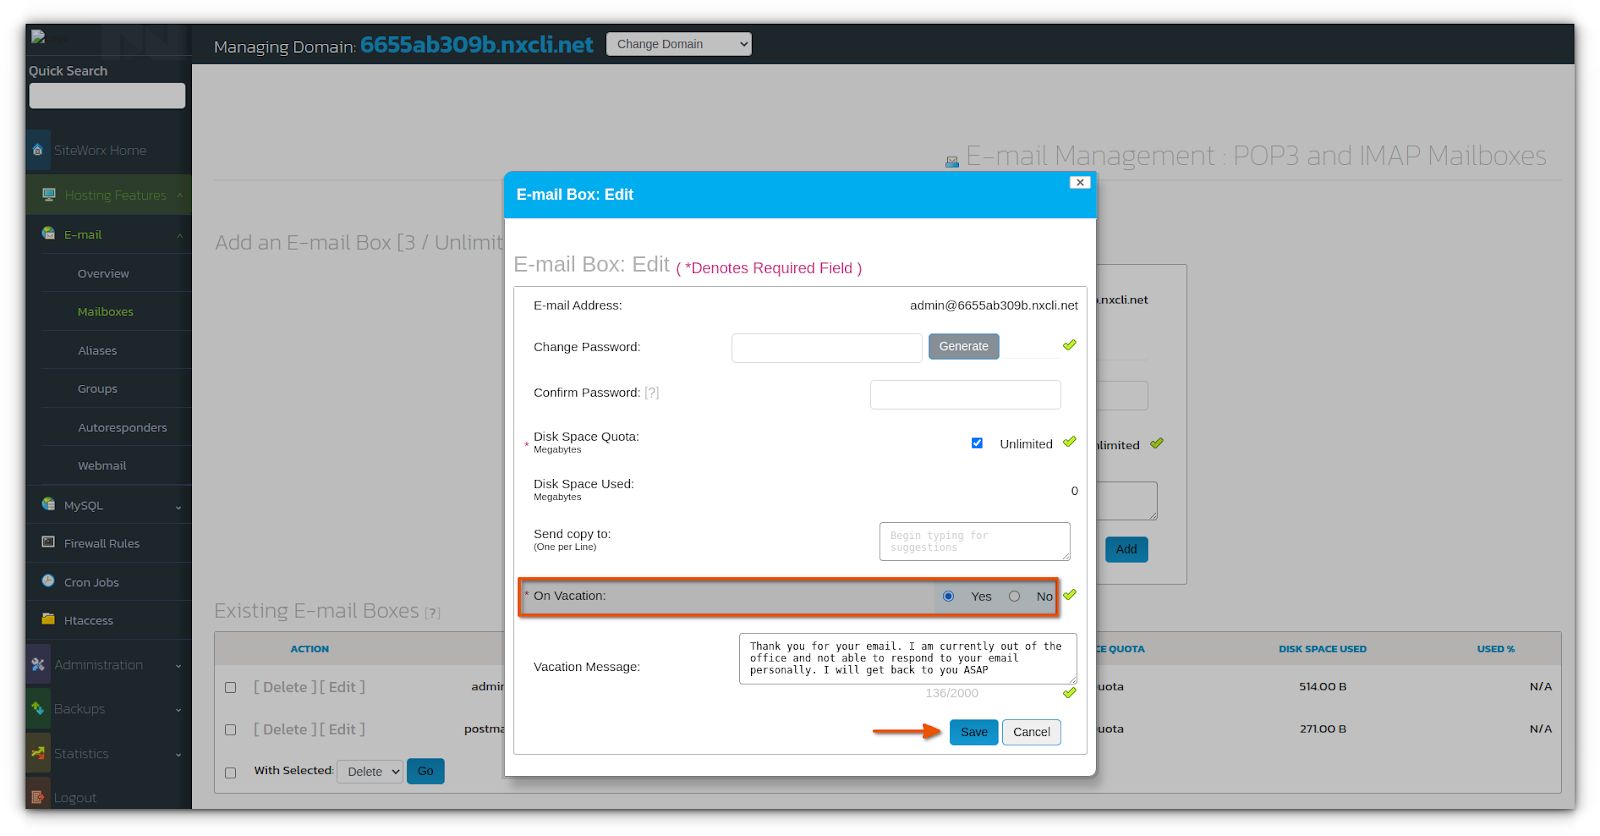
7g. When you’re satisfied, click Save.
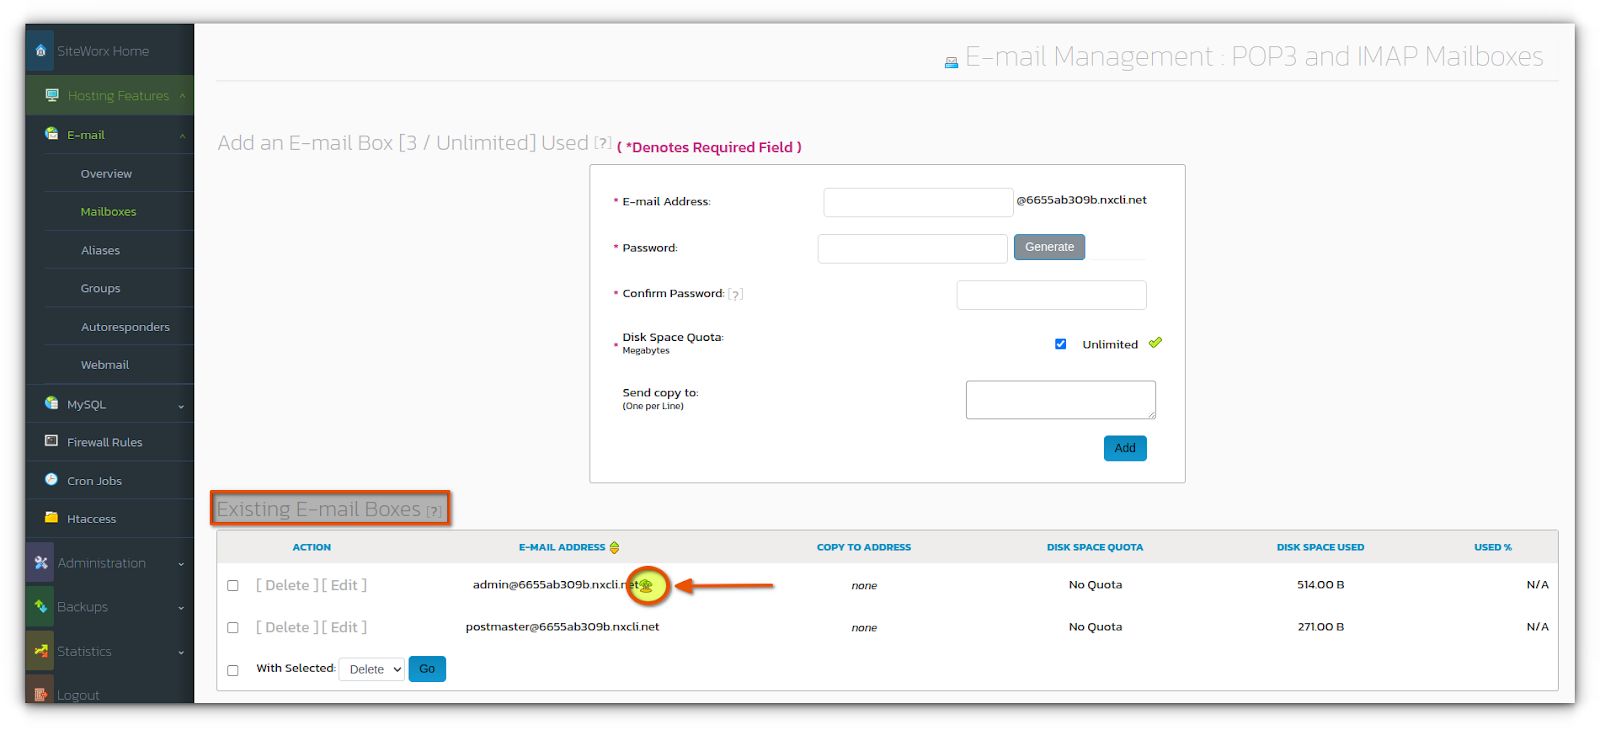
7h. Look at the Existing Email Boxes section. As you’ll see, a palm tree icon is displayed next to the email address with autoreply vacation email messages enabled:
Wrapping up
After reading this article, you will know how to create an email automatic reply message before you or a coworker go on vacation. Additionally, you can now use email autoresponders to deliver helpful emails to customers without having to send emails manually every time you need them sent.
If you want more help with your email autoresponder or anything else, please contact the Nexcess Support Team via phone, email, live chat, or the Nexcess Client Portal.
Consider email services and managed hosting with Nexcess
How can you make the most of Nexcess email services? They go hand in hand with fully managed hosting plans that prioritize speed, security, and scalability.
Find cloud hosting as flexible as your business
🗸 Serverless, high-impact hosting for websites using PHP-based applications.
🗸 Worldwide data centers and a CDN for fast and reliable performance.
🗸 Developer-friendly environments that don’t disrupt your workflow, deployment, or settings.
🗸 Server-level Redis included, alongside a powerful application stack.
🗸24/7/365 support from cloud hosting experts with application expertise.
When the technical parts of your website are fully managed, you get to focus on the core of your business. The plans include the necessary software and infrastructure, like PHP 7+, Varnish, and an integrated CDN.

