

A transactional email is a brief notification message sent to your customers in response to when they perform certain activities related to shopping at your Magento 2 online store. In Magento 2, there are many default email templates like new orders, invoices, newsletter subscriptions, etc.
When you customize your Magento 2 email templates, you add a polish to your ecommerce operations that savvy customers will appreciate. Let's delight them with high quality emails relating to their interactions with your web presence.
Customizing Magento 2 email templates
The default Magento 2 email templates contain the full format, the same as emails, like header, body, and footer content. However, the format is editable because it is in HTML and CSS format. To customize the default email templates, you must create custom templates and configure them instead of the default templates. This article will explain how to customize email templates, including dynamic data and files.
Overview of the Magento 2 email settings for email templates
When creating an email template for your Magento 2 store remember that a customer can open your email with any application or device. Different applications utilize various engines to render emails.
All Mail clients can add their styles to the emails initially decided by a developer for email distribution. So, you must choose a one-size-fits-all strategy due to the wide range of mail clients and render engines. To ensure your emails will be displayed correctly on different applications or devices, follow some Magento 2 email template layout rules.
Magento 2 Email Template layout rules
As best practices go, the following are the layout rules you should adhere to when building Magento 2 email templates:
- Set layout with inline CSS styles.
- Use table-layout (that is, <table> instead of <div>).
- Use HTML4 instead of HTML5.
- Use background-color instead of the background. You can also use the extended properties, such as padding-top, padding-left, etc.
- Use the HTML attributes instead of CSS.
- Use CSS2 properties instead of CSS3;
- Use background color instead of background images and add visual elements using the tag.
- Do not reduce the HEX codes for colors (using #FFFFFF instead of #FFF).
- Use standard system fonts to display email content.
How to edit Magento 2 email templates
In Magento 2, email templates are stored under the location <module_dir>/view/<area>/email directory of their respective modules. For example, the email templates of the basic module module-newsletter are stored under the location <Magento-root-directory>/vendor/<Extension-name>/module-newsletter/view/frontend/email.
Please do not change the Magento 2 default files. Suppose you want to customize the default Magento 2 email templates. In that case, you can create your custom Magento 2 email templates and configure the application to use them instead of the default Magento 2 email templates. You can add custom Magneto 2 email templates as physical files in your custom theme or create them using the Magneto Admin Panel.
The Magento 2 email templates have three components: Header, Content, and Footer. By default, the header and footer are stored under the locations /view/frontend/email/header.html and /view/frontend/email/footer.html, respectively.
How to edit Magento 2 email templates in the Magento Admin Panel
You can create or edit Magento 2 email templates from your admin panel by following the steps below:
Step 1. First, sign in to your Magento Admin Panel.
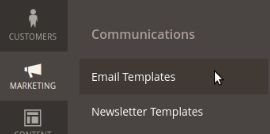
Step 2. Next, click on Marketing > Communications > Email Templates:

Step 3. If you have any existing Magento 2 Email templates, you can find them under the Email Templates.
Step 4. To edit an existing Magento 2 email template, you must choose it from the list.
Step 5. You can also create a new Magento 2 email template by clicking Add New Template:


How to edit the files of Magento 2 email templates
If you want to edit the files of Magento 2 email templates, you will need to connect your Magento account via FTPS or SSH and open the files in the respective modules.
For example, if you want to open a file named account_new.html under the Magento customer module, you can go to <Magento-root-directory>/vendor/<Extension-name>/module-customer/view/frontend/email and use the vi or nano command to open the file account_new.html.
How to create a brand-new email template using a theme
You must go to the folder with the module that you want to create a new email template and create an email_templates.xml file under the etc folder of your module, <Magento-root-directory>/app/code/<Vendor>/<Module_Name>/etc. This email_templates.xml file will contain the configurations of your email templates.
Step 1. Here are the sample contents of the email_templates.xml file:
<?xml version="1.0"?>

<config xmlns:xsi="http://www.w3.org/2001/XMLSchema-instance" xsi:noNamespaceSchemaLocation="urn:magento:module:Magento_Email:etc/email_templates.xsd">

    <template id="noufal_custom_email_template" label="Noufal Custom Email Template" file="noufal_custom_email_template.html" type="html" module="Noufal_email_template" area="frontend"/>

</config>- id: This value represents the unique template identifier.
- file: This value represents the path to the template file.
- type: This value represents the type of email (text or html).
- area: This value represents he area of application.
Step 2. You can also create email templates using a unique template identifier id and file for every module per your requirements. Here is the sample template:
<?xml version="1.0"?>

<config xmlns:xsi="http://www.w3.org/2001/XMLSchema-instance" xsi:noNamespaceSchemaLocation="urn:magento:module:Magento_Email:etc/email_templates.xsd">

    <template id="noufal_first_custom_email_template" label="Noufal Custom Email Template" file="noufal_first_custom_email_template.html" type="html" module="Noufal_email_template" area="frontend"/>

</config>
How to customize Magento 2 email templates
You can customize Magento 2 email templates from your admin panel by following the below steps:
Step 1. Load the default template.
1a. From your Magento Admin Panel, click on Marketing > Communications > Email Templates.
1b. Click on the Add New Template button from the top right of the admin panel.
1c. Select an email template in the Template field per your requirement and click on the Load Template button:


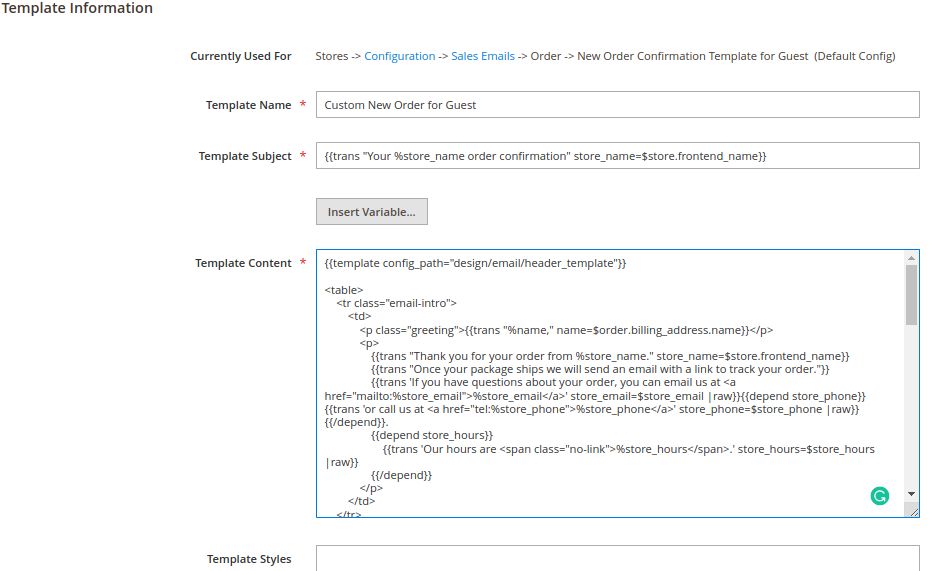
Step 2. Fill out the template information.
2a. You can now set the custom name of the template and change the Template Subject and Template Content per your requirement.
2b. You can also choose Template content for the list by clicking the Insert Variable button.
2c. If you want to declare any CSS, you can add the styles in the Template Styles:

2d. Once you have added the template details, click Preview Template to see how the changes will appear in the emails:


2e. If everything is fine as expected, click the Save Template button to reflect the changes.
Step 3. Assign the new email template.
3a. You must now assign the newly created Email Template to the store configurations.
3b. To find the newly created Email Template, follow the steps below.
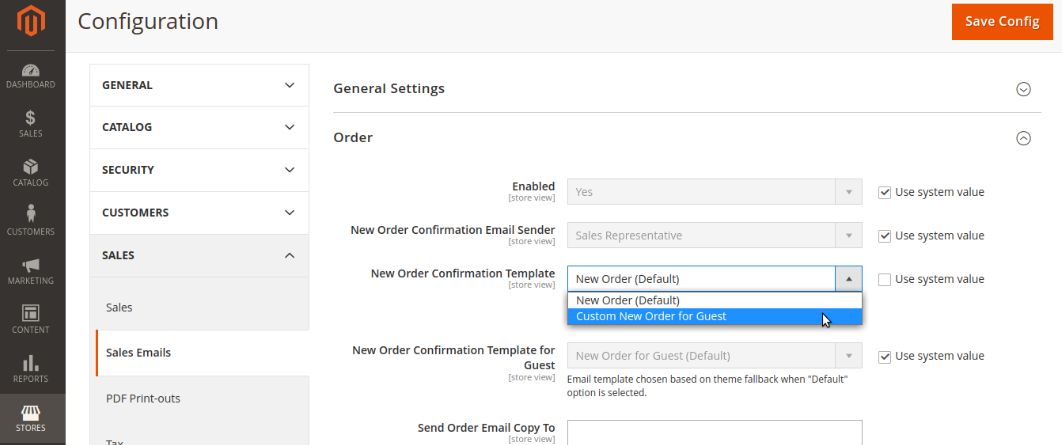
3c. Go to Stores > Setting > Configuration > Sales > Sales Emails.
3d. Uncheck the Use System Value checkbox on the right side of the New Order Confirmation Template field.
3e. Click the New Order Confirmation Template dropdown and choose your email template from the list:

3f. Click the Save Config button and flush the Magento caches to reflect the changes.
Step 4. Customize the email logo. To customize the email logo, you can follow these steps:
4a. Go to Content > Design > Configuration and choose the configuration scope to customize the email logo for:

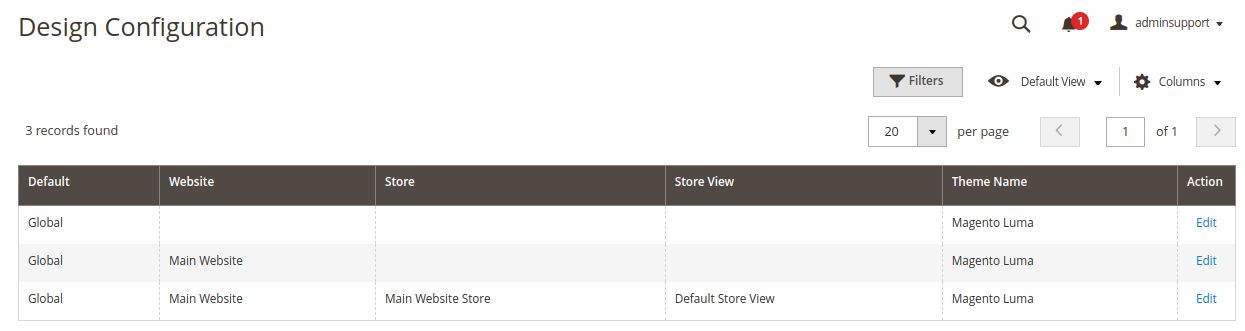
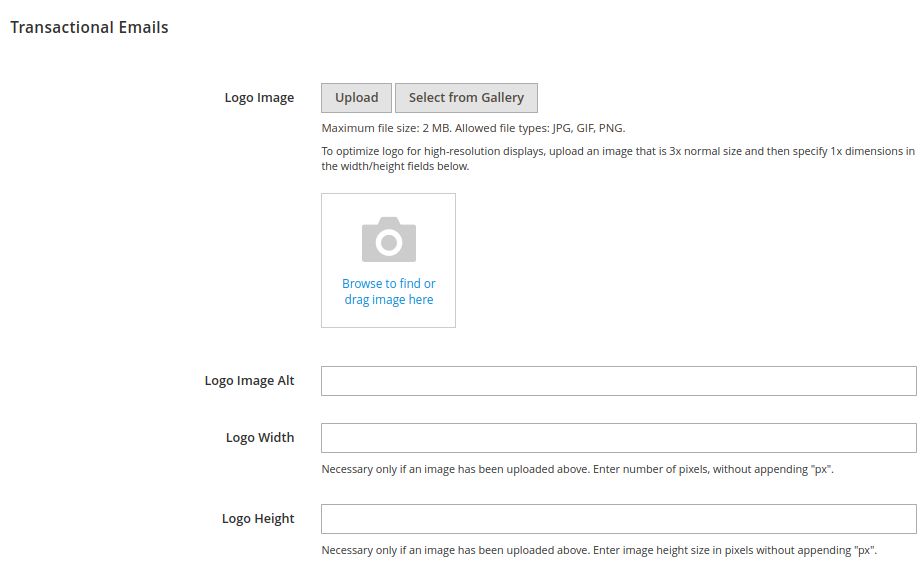
4b. Click on the Transactional Emails section tab and upload your logo into the Logo Image field. Then, you can fill out the other fields per your requirements:

4c. Click on the Save Configuration button to reflect the changes.
How to configure store email addresses in Magento 2 email settings
To configure store email addresses in the Magento 2 email settings area of the user interface, follow the steps below:
Step 1. From your Magento Admin Panel, click Stores > Settings > Configuration:

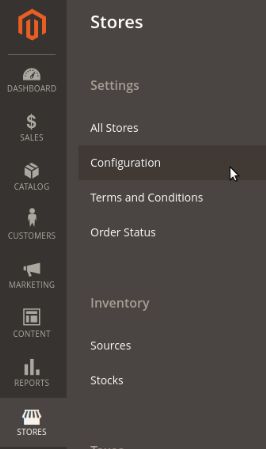
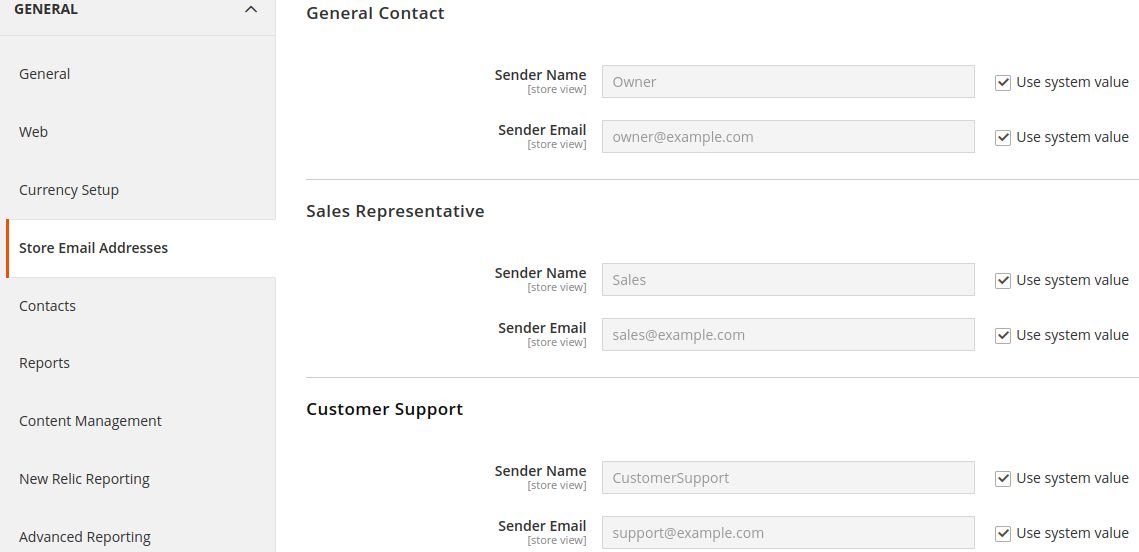
Step 2. Under General, click Store Email Addresses:


Step 3. Add Sender Name and Sender Email values for General Contact, Sales Representative, and Customer Support per your requirements:

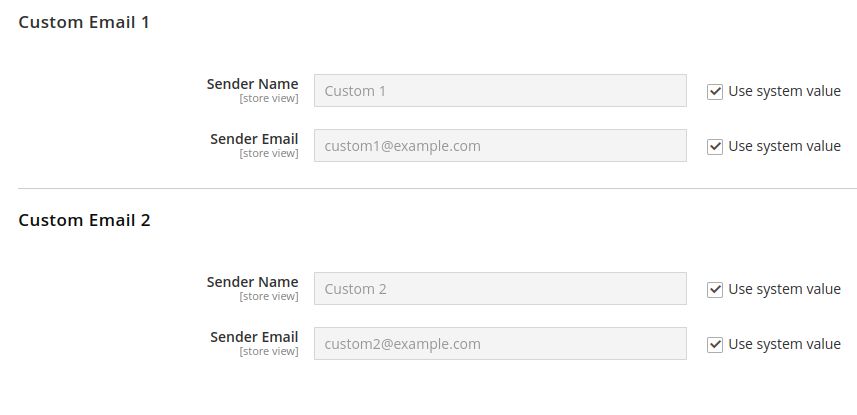
Step 4. If you use Custom Email, you can add Sender Name and Sender Email values in the Custom Email fields:

Step 5. Click Save Config to save the changes:


Dynamic data — about the powerful Magento 2 email template directives and predefined/custom variables
In Magento 2, you can edit dynamic data in Magento 2 email templates using directives and predefined or custom variables.
How to configure directives
A directive is added in a template with two curly braces — opening and closing the directive name.
A store directive can be used to include a link to the current store. The web address of the current store will be filled automatically if you leave the URL value empty:
{{store url = ""}}You can use the var directive to insert variables of a Magento 2 email template:
{{var customer.name}}If an email template contains the object, you can use suitable methods and properties:
{{var $ order.getStatusLable ()}}The directive of an email template permits the addition of other templates to the letter. It is frequently used to format the header and footer in the same style. The path to an email template is applied with the help of the config_path attribute:
{{template config_path="design/email/header_template"}}
{{template config_path="design/email/footer_template"}}
If you want to display basic static content, you must use a translation of the trans directive:
{{trans "sample string"}}If you want to add an image link to the corresponding image, you must use the media directive. It will extract the path to the file from the media folder:
{{media url="path/to/image.jpg"}}How to configure variables
Variables are portions of the data that can be created and then used in multiple places:
- predefined variables
- custom variables
Using Magento 2 email template predefined variables
Your Magento 2 store includes many predefined variables that can be easily used to personalize Magento 2 email and newsletter templates, as well as other types of content. You can also create Magento 2 email template custom variables to include information specific to your needs.
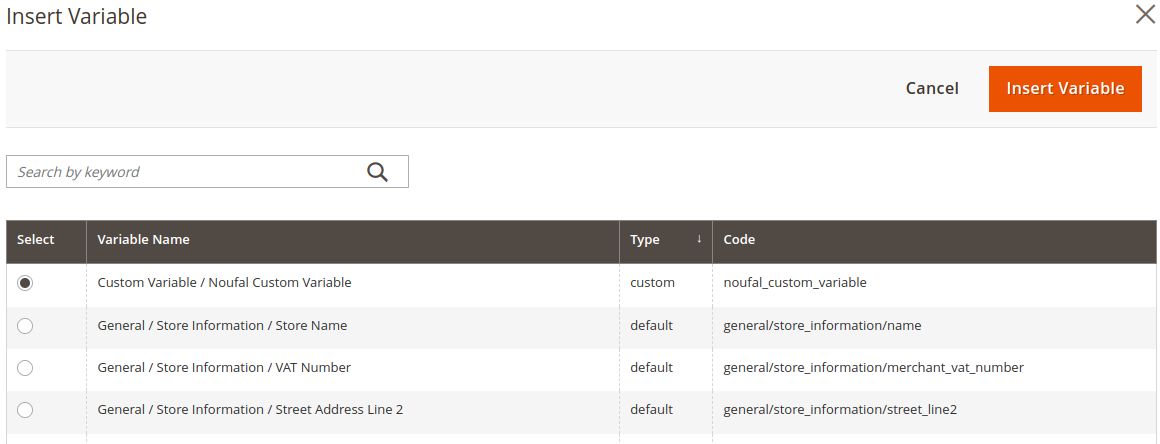
The allowed predefined variables will appear when you click the Insert Variable button:


The data associated with the template determines the list of accessible variables for a specific email template, as seen in the image below:


Using Magento 2 email template custom variables
Magento 2 email template custom variables can be created and included in pages, blocks, and email templates to match your requirements. To create a custom variable, follow the steps below:
Step 1. Create a custom variable.
1a. Log in to your Magento Admin Panel.
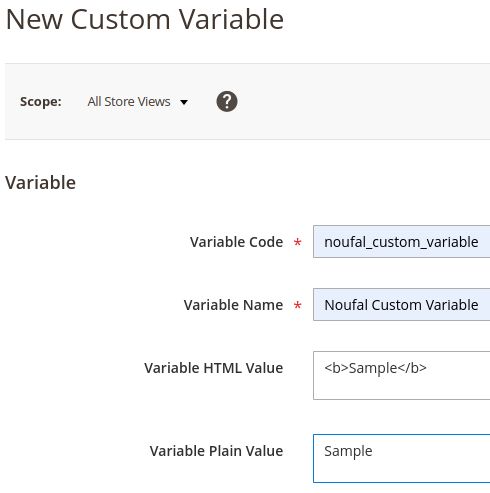
1b. Go to System > Other Settings > Custom Variables and click Add New Variable:


1c. Enter a code string to use for your custom variable — for example, noufal_custom_variable.
1d. Enter a name to use for your custom variable — for example, Noufal Custom Variable.
1e. Enter the variable value to use for your custom variable formatted with simple HTML tags — for example, <b>Sample</b>.
1f. Then, enter the variable value as plain text without formatting — for example, Sample:

1g. Click Save to save the changes:


Step 2. To Insert the custom variable, you can follow the steps below:
2a. Go to Content > Click on Pages or Blocks under Elements.
2b. Click the Edit link for the page or pages.
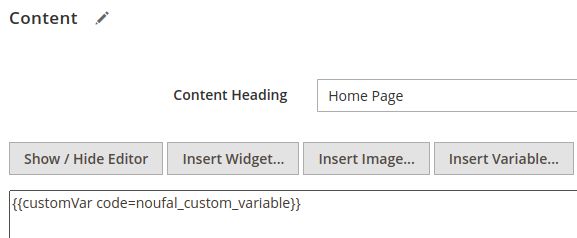
2c. Click the Content section, then click Show/Hide Editor to work in HTML.
2d. Click the Insert Variable option and select the custom variable from the list and then click Insert Variable again:

2f. Click the Save button to save the changes. Here is the sample output of the custom variable:

Conclusion
Customers must receive transactional emails to maintain communication with you and your business. Furthermore, you communication frequency and accuracy provide a professional impressive that your customers will take note of. Transactional emails may include confirmations of recent orders, invoices, newsletter subscriptions, and more.
Managed Magento hosting plans
Spin up instantly with free features like SSLs, an advanced Magento stack, RAM burst capacity, PCI compliance, SSH access, extensive support for M1 and M2, and more.
This article documents how you can customize Magento 2 email templates for transactional emails for your shop. If you require further assistance with Magento 2 email template customization, Magento 2 email settings, Magento hosting plans, and so on, please don't hesitate to get in touch with our Magento 2 specialists.


