

Are you an existing customer of a Nexcess web hosting product? If so, are you looking to order Secure Sockets Layer (SSL) certificates through the Nexcess Client Portal? Check out this step-by-step guide with images to help you with the installation process after ordering an SSL certificate for your website hosted with Nexcess.
We look forward to fulfilling your SSL certificate order.
Types of SSL certificates available from Nexcess
Secure Sockets Layer (SSL) certificates are available in several different varieties, and the method of acquiring each varies. The types available from a Certificate Authority (CA) are listed below:
- Standard SSL Certificate: The basic level of validation.
- Wildcard SSL Certificate: Validates one domain and an unlimited number of subdomains.
- Multi-Domain SSL Certificate: As implied, validates multiple domains and subdomains.
- Premium SSL Certificate: Slight upgrade over standard SSL certificates.
- Extended Validation (EV) SSL Certificate: No longer recommended.
- Extended Validation (EV) Multi-Doman SSL Certificate: As above but validates multiple domains and subdomains.
Ordering SSL certificates in the Nexcess Client Portal
Ordering SSL certificates in the Nexcess Client Portal is a straightforward process. First, you'll need your Nexcess Client Portal login credentials in order proceed. If you cannot locate them, click the Forgot Password? link on the login page.
Step 1. Access the Nexcess Order SSL Certificate page within the Nexcess Client Portal
Here is how to access the Nexcess Order SSL Certificate page within the Nexcess Client Portal:
1a. Attention! If you have already acquired an SSL certificate, either from Nexcess or elsewhere, instead follow the method in the article entitled, How to import SSL certificates.
1b. Log in to your Nexcess Client Portal.
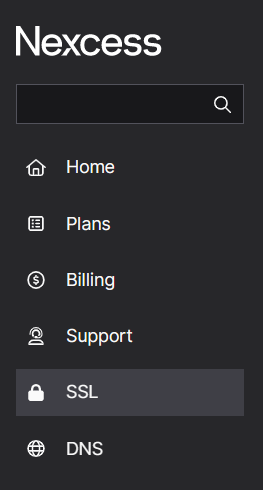
1c. Click the SSL menu option from the left sidebar:

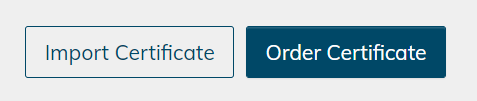
1d. Click the Order Certificate button on the next screen:

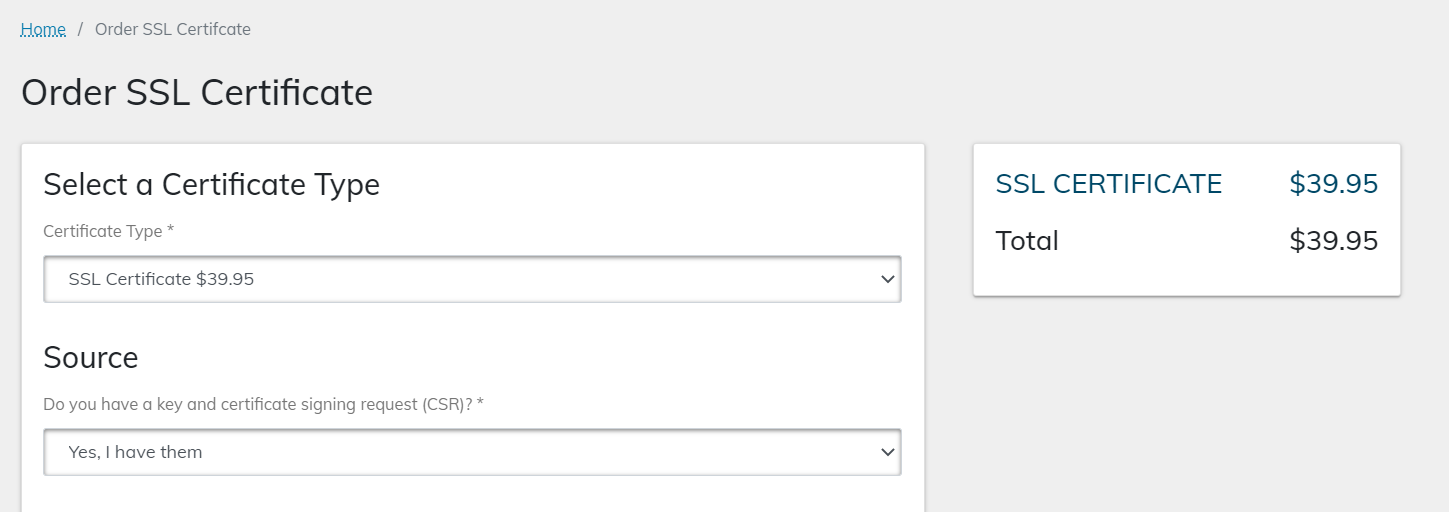
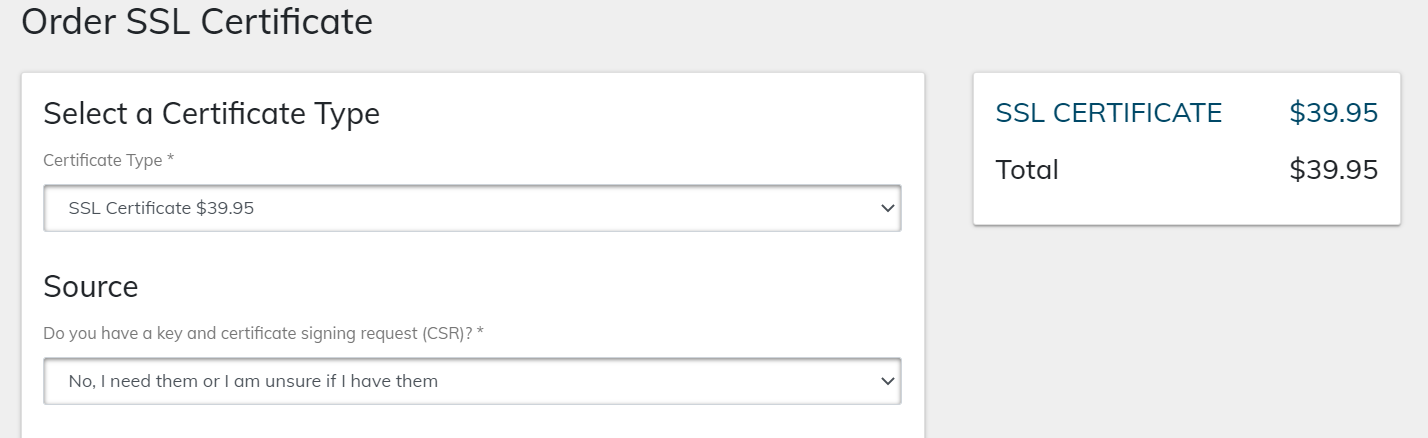
1e. Select your desired certificate using the Order SSL Certificate > Select a Certificate Type field. In many cases, a single domain standard SSL certificate will be adequate. If you are unsure, see What are SSL certificates? or contact our Nexcess Support Team:

1f. If you do not already have a Private Key and Certificate Signing Request (CSR) go to the Step 2 section below. If you do already have them, go to the Step 3 section below.
Step 2. Obtain your Private Key and Certificate Signing Request (CSR) from Nexcess
Let us provide your Private Key and Certificate Signing Request (CSR). Here is how to obtain your private key and CSR from Nexcess:
2a. Attention! If you already have a Private Key and CSR, skip ahead to the Step 3 section below.
2b. For the Order SSL Certificate > Source field, select in the dropdown menu, the picklist value that reads, "No, I need them...":

2c. In the Details area, the user interface will automatically fill most fields. Enter your Domain Name, Organization, and Organization Unit along with the other requested details, and then click the Generate CSR button:


2d. Review the Summary, then select your Approver Email Address from the dropdown list. Then, click the Order button when ready:


Attention! For security reasons, you may only select one of the provided emails from the picklist. It may be necessary for you to create one of these accounts in your preferred email service.
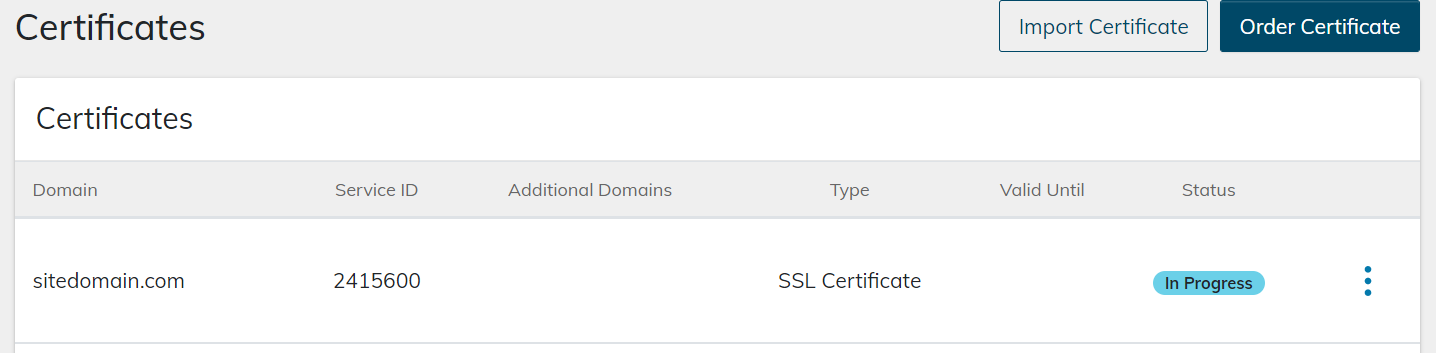
2e. If successful, your pending SSL certificate will show a status of In Progress, and the Approver Email Address you designated in the step above will receive a confirmation email. Follow the instructions provided in that email, then go to the Step 4 section below regarding the installation of your SSL certificate.
Step 3. Include your known Private Key and Certificate Signing Request (CSR)
If you already had them, here is how to include your known Private Key and Certificate Signing Request (CSR):
3a. For the Order SSL Certificate > Source field, select in the dropdown menu, the picklist value that reads, "Yes, I have them...":
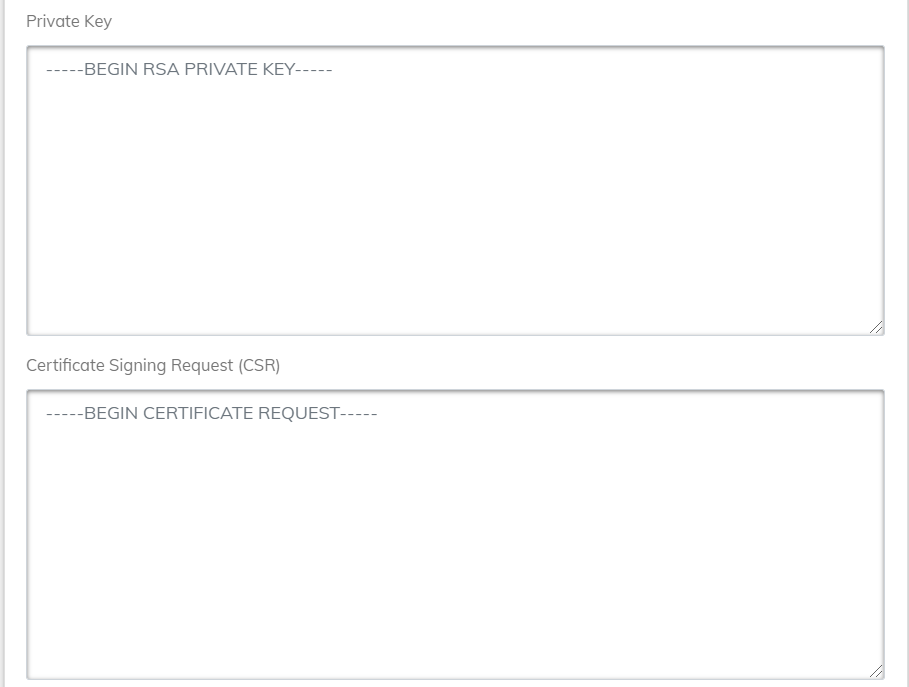
3b. Cut and paste your Private Key and CSR into the relevant fields:

3c. Review the Summary, then select your Approver Email Address from the dropdown list. Click Order when ready.
Attention! For security reasons, you may only select one of the provided emails from the list. It may be necessary for you to create one of these accounts in your preferred email service.
3d. If successful, your pending SSL certificate will show a status of In Progress, and the Approver Email Address you designated in the step above will receive a confirmation email. Follow the instructions provided in that email:

3e. When the status reads Ready to Use go to the Step 4 section below.
Step 4. Install your SSL certificate
Here is how to install your SSL certificate:
4a. If you are a client with an account on a physical (non-cloud) server, see How to install SSL certificates in SiteWorx.
4b. If you are a client with a Nexcess Cloud account, see How to install SSL certificates in your Nexcess Cloud dashboard.
Conclusion
As an existing Nexcess customer, we hope you learned how to order and install SSL certificate through the Nexcess Client Portal by reading the contents of this article. Furthermore, the Nexcess Web Hosting Blog and Nexcess Knowledge Base contain vast amounts of information on the many web hosting topics most website builders care about.
Cloud done your way
We believe in the promise of cloud: scalability, security, performance, and ease of use. Together with our team, clients, and partners, we’ve built better cloud hosting.
In addition, for 24-hour assistance any day of the year, contact our support team by email at support@nexcess.net or by a chat session on our website.
Related articles
- How to install SSL certificates for your WordPres Sites
- How to cancel an SSL certificate
- What is a self-signed SSL certificate?


