As a website owner, you can use File Transfer Protocol (FTP) to accomplish many things, such as uploading files to your website.
You can simplify many file-related tasks using an FTP client like FileZilla, since the software is generally more user-friendly than other modes of file transfer.
Setting up FTP using FileZilla with Nexcess
Let’s look at what FTP is, how Nexcess supports the process, then how to install and use FileZilla to transfer files. When you're done reading this article you will know how to FTP using FileZilla with your Nexcess hosting account.
FTP — the basics
File Transfer Protocol (FTP) is a communication protocol based on the client-server model. In this model, a client (such as a computer or smartphone) requests services from a server — a web server or file server.
The internet is a good example of a system within the client-server model. Whenever you visit a site, your browser requests data from the owner’s web server. When the data is delivered, your browser renders the data into a webpage.
FTP is similar but deals with the transfer of files, such as video and audio files. In the following sections, we will cover how to FTP using FileZilla.
FTP with more security —about the recommended types of secure file transfers at Nexcess
FTP by itself is not secure enough to be a recommended method of file transfer. Instead, use FTP over Transport Layer Security (TLS). This pairing is also known as FTP Secure (FTPS).
If Nexcess is your host, the first step is to locate your FTPS credentials for those using managed WordPress or managed WooCommerce. Alternatively, Nexcess also supports Secure File Transfer Protocol (SFTP). So, SFTP is a different method of file transfer, as it involves the Secure Shell (SSH) Protocol, which encrypts your data, meaning more security for you and your website visitors.
If you’re a Nexcess Cloud user, learn how to locate your SSH/SFTP credentials. Your information, and your customers’ information, is in secure hands when you choose managed hosting with Nexcess.
About FileZilla — the highly popular FTP client utility
An FTP client utility is an application that enables using FTP to transfer files to servers. Since websites often trade a lot of files, FTP clients are an excellent tool for any website owner.
Whether your website is built using WordPress or Magento, you’ll find use in an FTP client like FileZilla to manage your website files. FileZilla is a highly popular software that’s both free and open source. Notably, FileZilla supports both FTPS and SFTP — and is available on Windows, macOS, and Linux machines. The next section discusses FileZilla setup and how to FTP using the FileZilla FTP client application.
FileZilla setup
First, go to FileZilla-Project.org — on that page, download the FileZilla client:
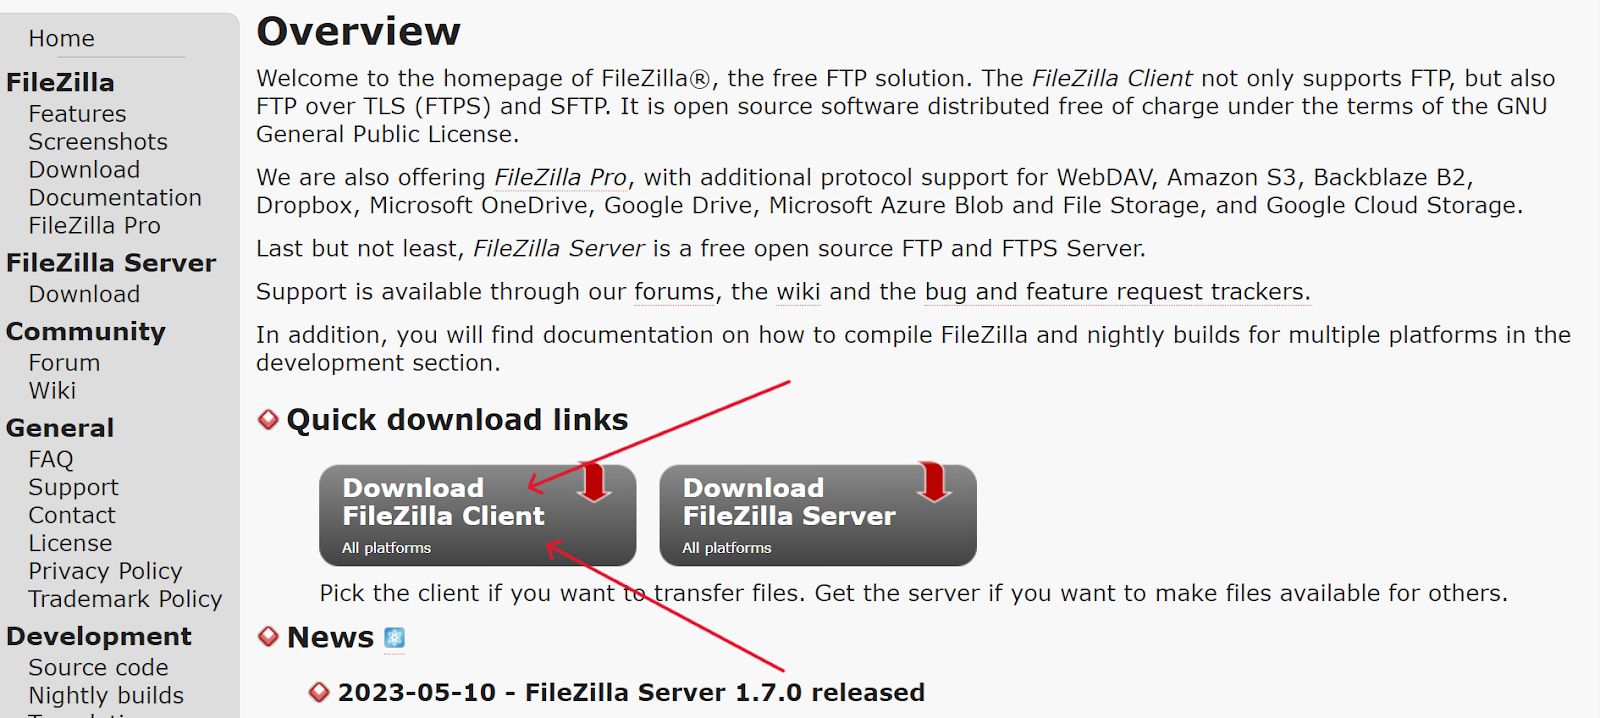
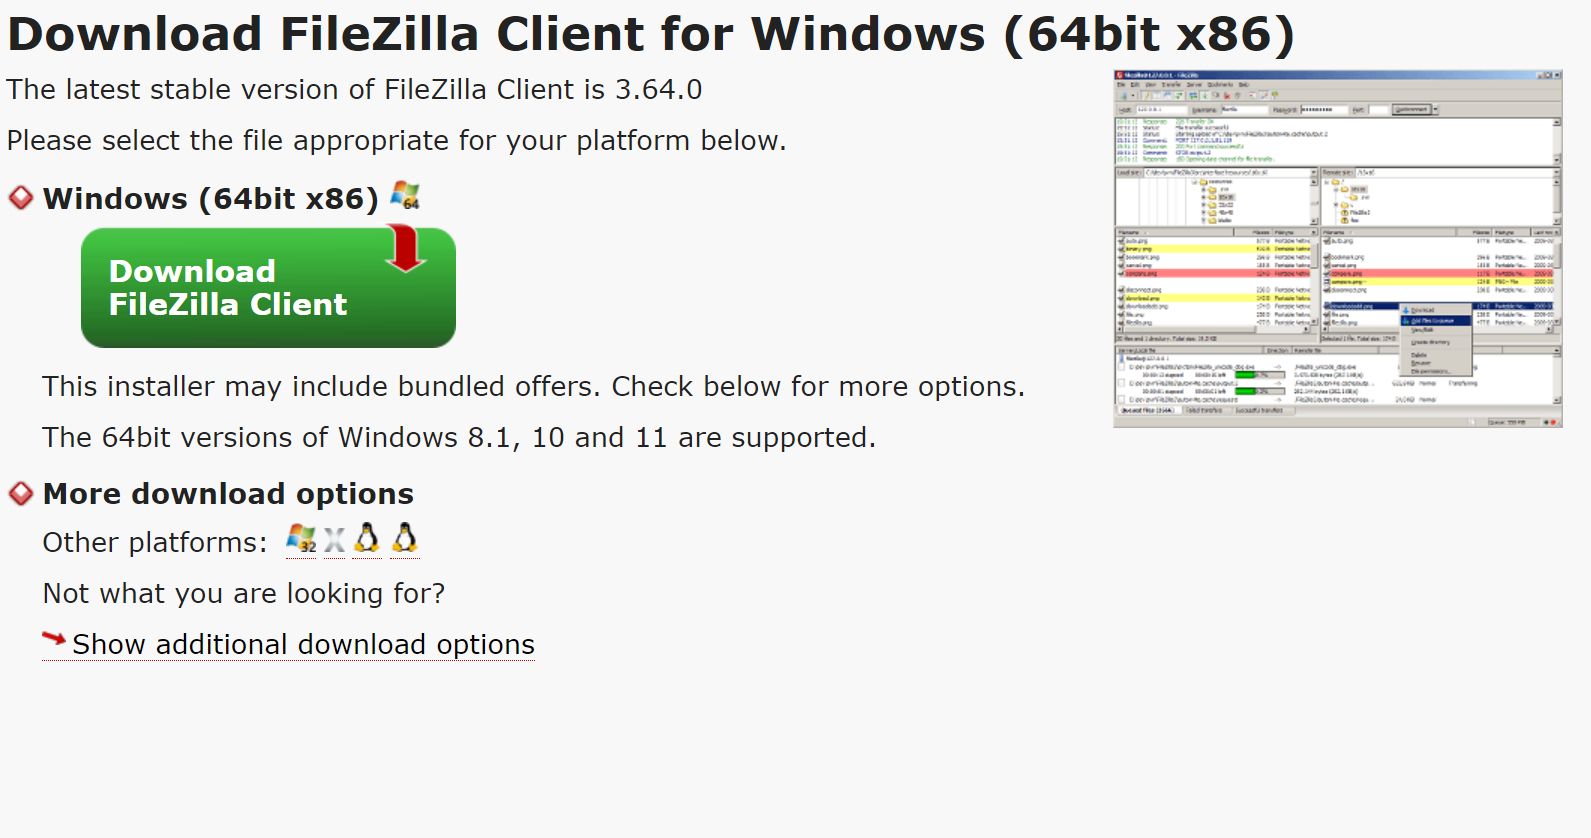
When you click download, you’ll see various operating system (OS) options, including Windows, OSx (for Macs, version 10), and Linux. Select the option that’s relevant to your computer. The 64-bit Windows version will be used as an example in this guide:
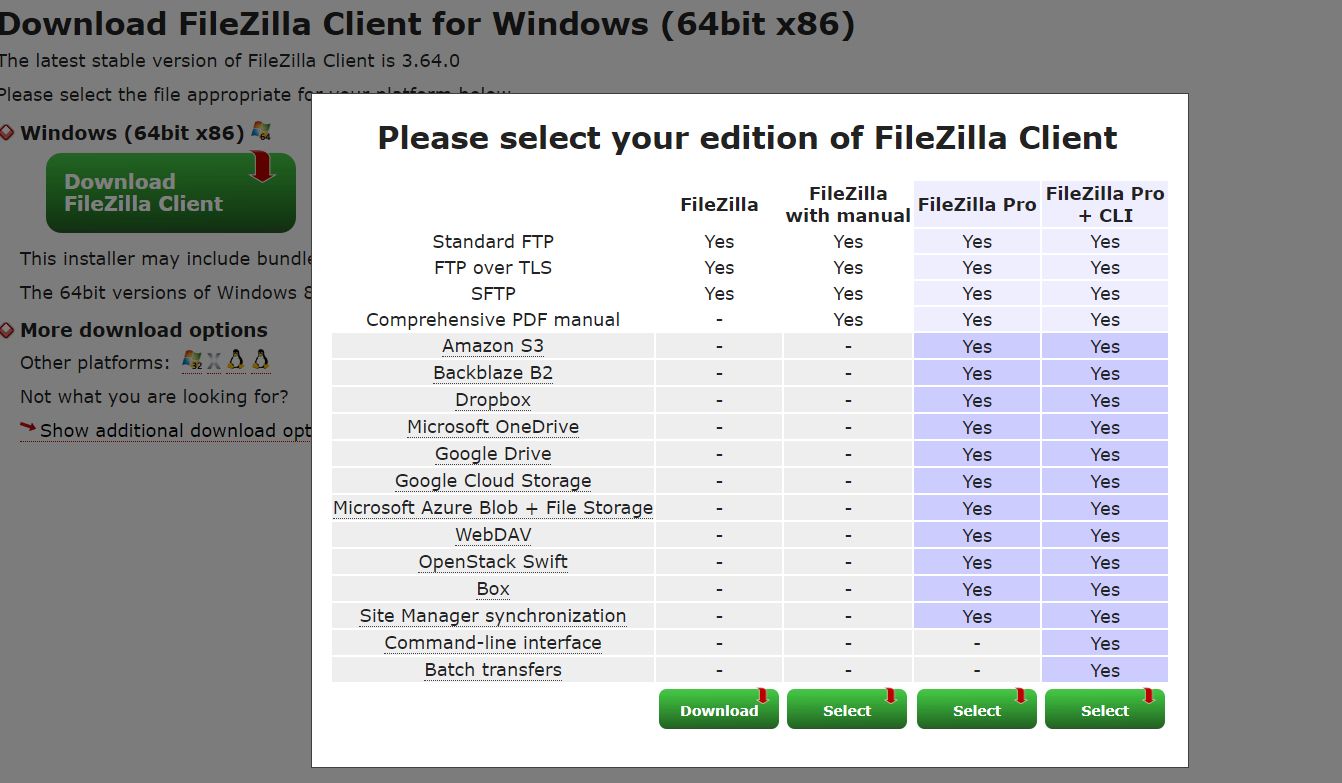
Now, you’ll be asked to choose a FileZilla FTP client edition. Choose basic FileZilla, with or without the PDF manual. Note that FileZilla Pro and FileZilla Pro + CLI are premium options:
After the download has finished, open the .exe file:

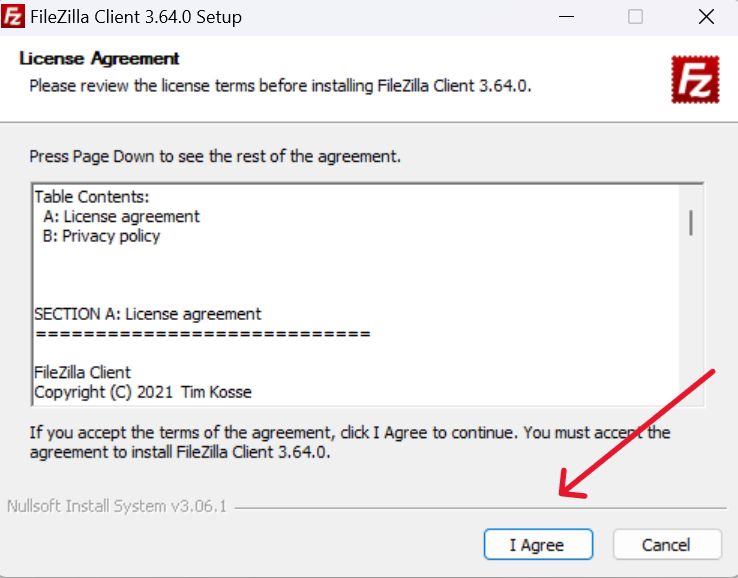
After setting the necessary permissions, read the license agreement and select I Agree if you wish to proceed:
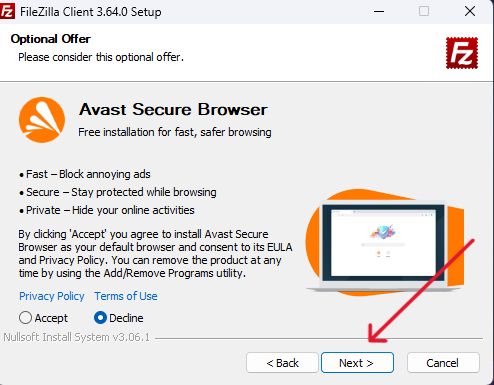
The setup will give you an optional offer. You can accept or decline — either way, click Next:
After assigning user privileges, move to the next step again. Then, choose the relevant components you wish to install and click Next:

After choosing your destination folder, go to the next step. You’ll see a loading bar. When your setup is complete, you’ll see the following:
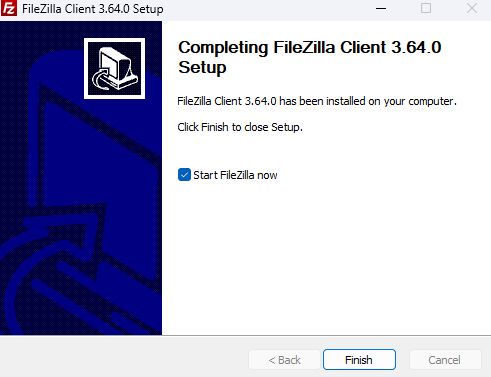
After you click Finish, the FileZilla FTP client should open automatically. If the FileZilla software program doesn’t open by default, please access it wherever you’ve stored it on your computer.
After FileZilla opens, your first task is to set up FTP using FileZilla. Go to File > Site Manager:

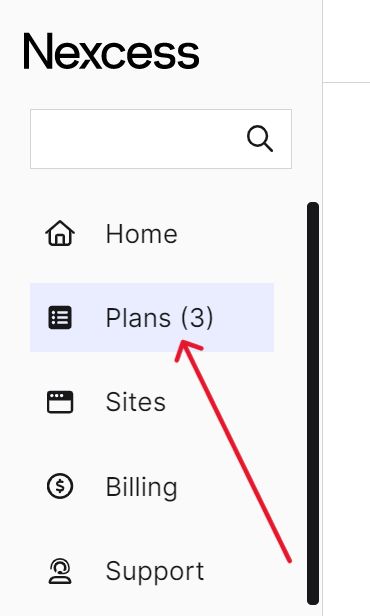
You’ll need your FTPS credentials from the Nexcess Client Portal For your Site Manager setup. Go to https://my.nexcess.net/login/, log into your account, and use the sidebar to navigate to Plans:
Select the plan and website you wish to view the credentials of:

Once you open your website dashboard, you’ll see your credentials for SSH/SFTP and FTP/SSL via explicit TLS. We’ll use FTPS credentials in this example:
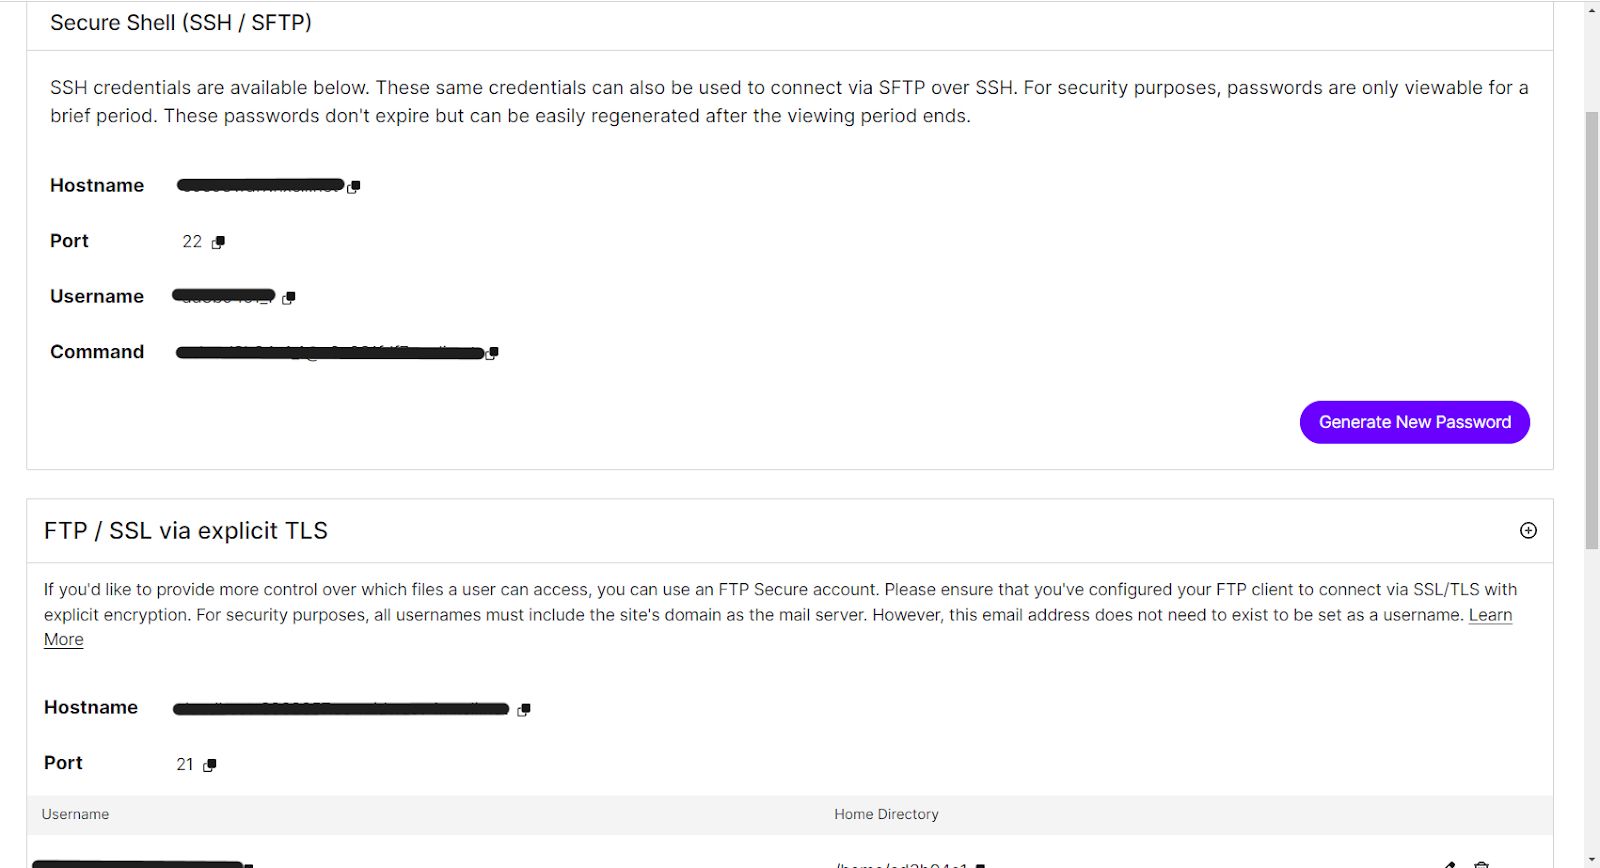
Under FTP/SSL via explicit TLS, click Edit FTP User:

Now, generate a new password and confirm the update:
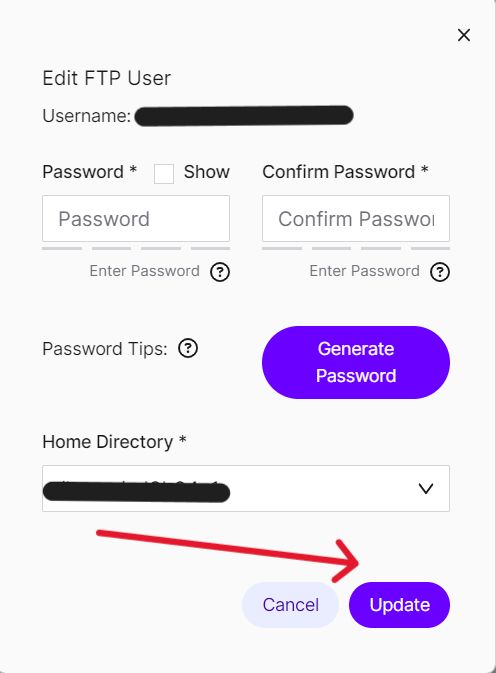
After you update your password, keep this part of the dashboard tab open, but return to FileZilla and the Site Management tab you’ve already opened.
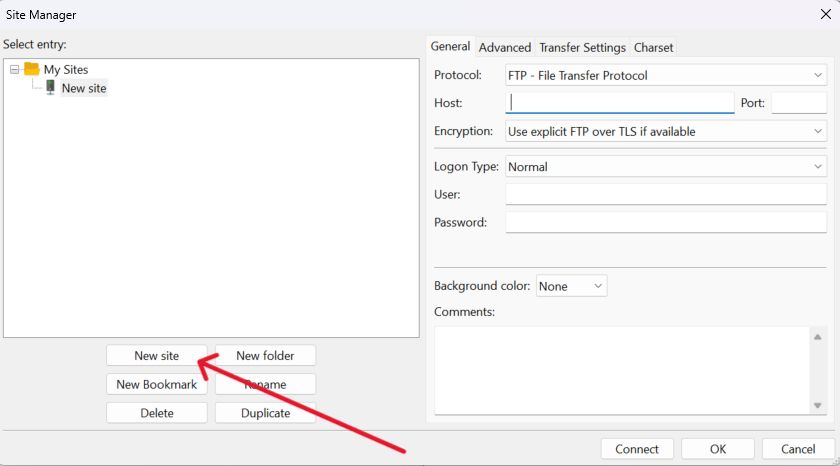
In FileZilla, select New Site:
Use the Encryption dropdown menu to select Use Explicit FTP over TLS if available since this is what Nexcess uses:
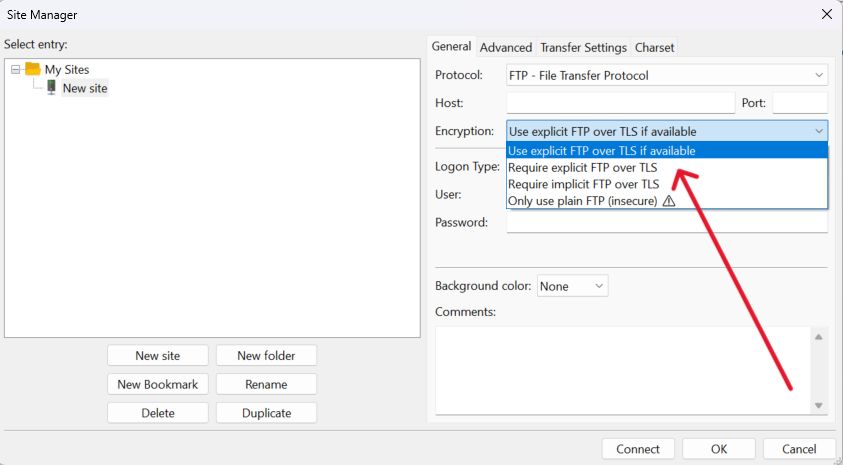
Enter the host name (called Hostname on the Nexcess dashboard), port number, user (Username on the Nexcess dashboard), and password from your Nexcess FTP section into FileZilla. Specifically, the fields are Host, Port, User, and Password.
After you’ve entered these details, click Connect:

After you connect, select Always Trust this Host in the popup. The following image shows the complete setup of FTP using FileZilla:

Now that you know how to FTP using FileZilla (and the corresponding setup steps) look around the program to see how it can improve your ongoing website maintenance activities.
For SFTP-based file transfers with the FileZilla client, see the guide on transferring files to a server with SFTP.
Consider managed hosting with Nexcess
With Nexcess, you can trust the security of file transfers and the process — including how to FTP using FileZilla. To learn more about the built-in security features of our hosting plans, get in touch with a sales agent.
Expect more performance from your web hosting provider
Whether you're creating a brand new site or looking for better hosting, we can help you find the right product or customized plan to help you get there.
You’ll get SSL certificates for free with many plans, including fully managed WordPress hosting. This security feature means your website visitors can shop for products freely, knowing that any sensitive information they provide is secure.
Whether you operate a blog or a small ecommerce website — or need enterprise hosting, Nexcess has a plan for you. In addition, you may use our free website migration service. You need to submit the migration request with details of the site that needs migration.

