

Truncating MariaDB/MySQL tables allows you to easily remove all data from the chosen MySQL database tables without having to manually delete and recreate them. You can truncate MySQL tables from the command line interface or use a database management tool like phpMyAdmin.
Nexcess provides a way to access your website database from the Client Portal and truncate MySQL tables from phpMyAdmin. In this Nexcess Knowledge Base guide focused on MariaDB administration, you will learn what truncating MariaDB/MySQL tables does and how to truncate MySQL database tables in the Nexcess Cloud.
MariaDB/MySQL database table truncation process
Truncate table is a statement used to empty a MariaDB/MySQL table without removing all rows one by one. For example, rather than removing all MariaDB/MySQL database table data or deleting and recreating a table manually, you can empty a MariaDB/MySQL table by truncating it.
For MariaDB/MySQL, the truncate table statement represents a combination of two operations — a DROP TABLE operation followed by a CREATE TABLE operation. Essentially, suppose you have decided to truncate a MySQL database table. In that case, two operations will be performed to make the process of data removal faster and more efficient, especially working with large MariaDB/MySQL tables. TRUNCATE TABLE has been proven to be much faster than DELETE for this reason.
Three main things to know before truncating MariaDB/MySQL tables
As truncate operations delete MySQL database tables entirely — thus removing all row data — you must be extremely careful. There are three main things you need to know before truncating any MySQL tables:
- Truncation operations cannot be rolled back as they cause an implicit commit. Therefore, once you have launched the truncation process, you cannot recover any data unless you restore the database table from a backup.
- The truncate table statement will fail for an InnoDB table referenced by other MySQL database tables using foreign key constraints. As a result, MariaDB/MySQL will throw an error message letting you know you cannot truncate a table referenced in a foreign key constraint.
- Truncation operations also cannot be performed if a current session holds an active table lock. Therefore, ensure that your website is not actively using the MariaDB/MySQL table that you will truncate in real time.
Two main ways to truncate MariaDB/MySQL tables
There are two main ways to truncate MariaDB/MySQL tables:
- Using the MariaDB/MySQL command line interface
- Using a database administration program like phpMyAdmin.
Truncating MariaDB/MySQL tables from the command line interface
Both truncating options will help you achieve the same result, but you must access your website via SSH to perform operations on its database from an SQL shell.
You can truncate MariaDB/MySQL tables from the command line interface by running the truncate table statement from the mysql command line client used by MariaDB and MySQL database servers. Ensure the database user assigned to your database has sufficient privileges, including DROP, and then connect to your database using the database connection information provided in the main website's configuration file.
Truncating MariaDB/MySQL tables in the Nexcess Cloud using phpMyAdmin
You can truncate MariaDB/MySQL tables from the Nexcess Cloud by using phpMyAdmin. phpMyAdmin is a powerful database management tool that allows you to perform many operations on your website database from a graphical user interface. In addition, you can easily access your website database from the Nexcess Client Portal.
Available on all plans, Nexcess Client Portal is a hosting admin panel offering advanced website administration options, including the web hosting database management interface. Nexcess allows you to add and remove MariaDB/MySQL databases and database users and grant privileges without having to access a separate web hosting control panel for this purpose.
Follow the three steps below to truncate MariaDB/MySQL tables in the Nexcess Cloud using phpMyAdmin:
- First, open the Databases management interface.
- Then, launch the phpMyAdmin tool.
- Next, truncate your MariaDB/MySQL database tables as desired.
Step #1 — open the Databases management interface
You can open the Databases management interface from the main menu in the Site Dashboard of the chosen website on WordPress and WooCommerce plans. For Magento and Drupal, the Databases page is available from the main menu of the selected cloud plan. You will find all MariaDB databases and database users you have created in the list:

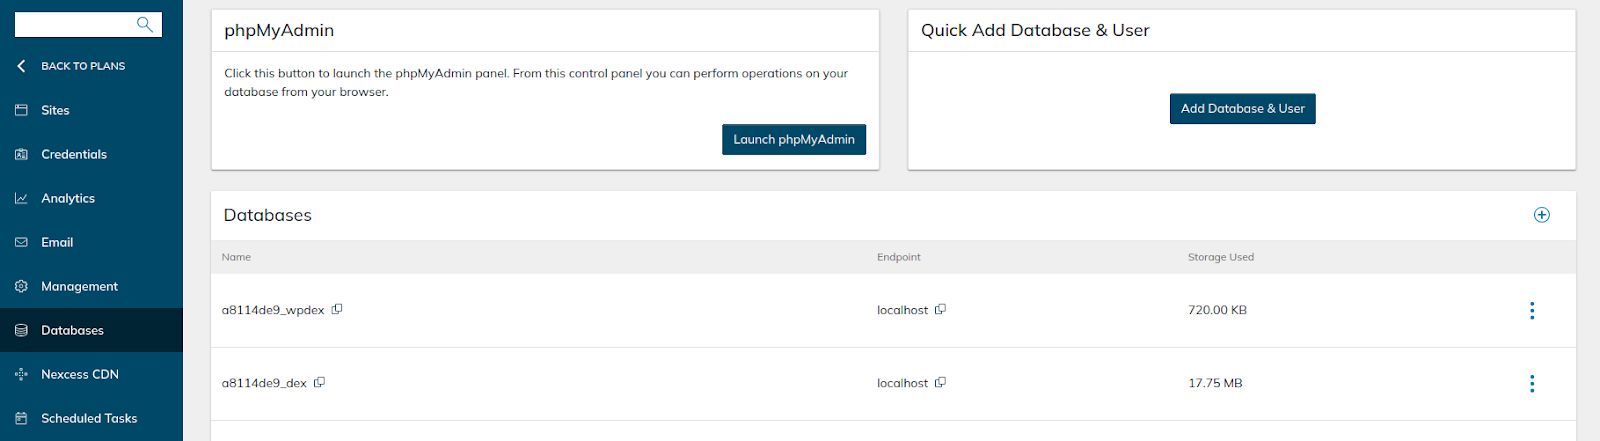
You can add and remove databases and users and change MariaDB user passwords from the Nexcess Client Portal using the options provided on the Databases page. The Quick Add Database & User menu is handy if you need to add a new database and create a database user for it.
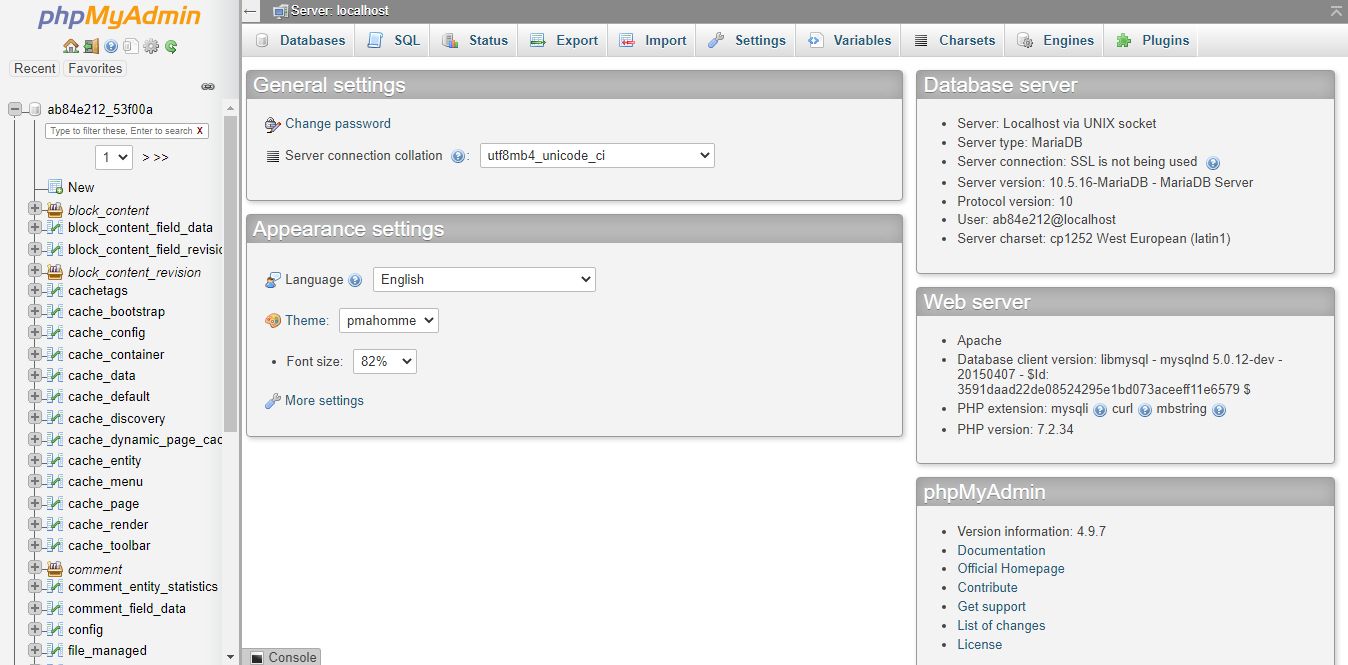
Step #2 — launch the phpMyAdmin tool
Click the Launch phpMyAdmin button, and the database management tool will open in a separate window. Ensure you have no browser extensions installed that can potentially block it to avoid any issues:

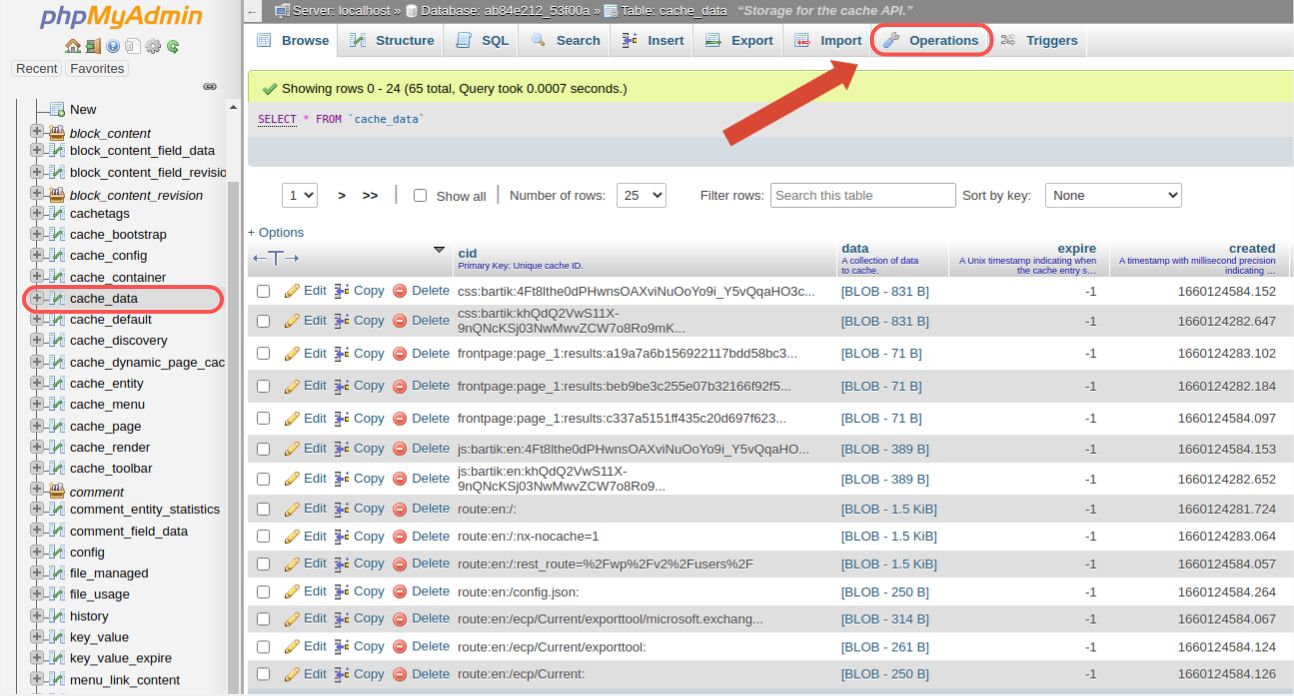
Step #3 — truncate MariaDB/MySQL tables
The phpMyAdmin tool is considered one of the best database management tools and can entirely eliminate the need for using the command line interface to work with your website database. In addition, it allows you to truncate MariaDB/MySQL tables by using the Empty the Table (TRUNCATE) operation it provides.
Choose the MariaDB/MySQL database table to truncate by clicking the corresponding table name in the list on the left side of the page. Then, click on Operations from the main phpMyAdmin menu at the top of the window:

Then, on the bottom of the page, choose Empty the Table (TRUNCATE). Next, confirm that you would like to perform the operation by clicking the OK button:


You should see the message saying that MySQL returned an empty result. This message means that the table has been successfully truncated, and you will see that it no longer has any data if you open it from phpMyAdmin again:


Conclusion
Truncating MariaDB/MySQL tables allows you to delete all row data fast and easily without performing any operations manually. phpMyAdmin is a great database management tool that will help you add and remove data from MariaDB/MySQL tables without using the command line interface. You can manage your MariaDB/MySQL databases and users from the Databases interface of the Nexcess Client Portal and access phpMyAdmin to work with your website database from a graphic user interface.
Fully managed hosting from Nexcess
Hosting optimized for the industry's leading platforms that are supported by our personal application experts.
We don’t talk in circles or keep you waiting. Our support team is here 24/7/365 to provide meaningful, accurate assistance for almost any PHP-based application.
Nexcess Cloud hosting plans make an excellent choice for websites of any size and complexity by providing a fully optimized platform for the chosen Content Management System (CMS).
Check out Nexcess Managed Hosting plans to leverage better performance, security, and scalability — risk-free.
Note about the original publication date
This article was originally published in September 2019. It has since been updated for accuracy and comprehensiveness.
Recent articles
- How to customize a WordPress site | How to customize the Nexcess MAPPS MU (must-use) plugin
- Nexcess-provided WordPress plugins for ecommerce and sites
- Convert MyISAM to InnoDB tables for database performance


