


A great way to test updates to your WordPress and WooCommerce websites without impacting the live site or running the risk of downtime is by setting up WordPress hosting with a staging site. The WordPress staging environment allows you to review all of the WordPress and WooCommerce site changes made in a "safe sandbox" without affecting the live site. Uncover bugs in a safe place! If there is an issue with changes or updates to your site, it can be revealed in the staging environment with less headaches.
Our technical sales team will assist you in selecting the best WordPress hosting plan — with staging included — for your needs from our fully managed WordPress hosting plans.
How to easily set up a WordPress staging site 2024
For those who want to make updates without running the risk of their live site going offline, staging sites are available. A blogger who wants to maintain their own website could be one of these people, as could a web developer, a content writer, or the owner of a small business or a large corporate website.
Setting up a WordPress staging site
Anyone who wants to maintain an updated and functional website absolutely needs to have WordPress hosting with a staging site. You can learn more about WordPress hosting staging sites using the information in this article and discover how to manually set up WordPress hosting with staging sites or accomplish this via your Nexcess Client Portal.
What is the purpose of a WordPress staging environment?
A WordPress staging site is a replica of your production environment. You can test updates without having them impact the live website by using the staging area. For instance, in the staging environment, you can safely change themes and test plugins. Your live website won't be affected if something goes wrong.
In addition to testing updates or code changes, a WordPress staging environment is helpful if you want to see how visual changes may appear to potential site visitors. Any changes you make in the editor on your staging site will look the same if you apply those changes to your live site.
Another use case for a staging site is if you want to make changes to your site but need to share those changes with someone before the general public sees those changes on your current website. A staging site is accessible through a different URL — oftentimes a string of random letters or numbers, or a slight variation of your website’s domain. You can then share the URL with stakeholders or anyone else who may need to see or approve changes before they go live.
What is the difference between a WordPress production site and staging Site?
A WordPress staging site serves as a link between your site's development and production versions. The changes should be thoroughly tested before being made ready for deployment in the staging area, where any unfixed issues should be fixed.
Making a staging environment for WordPress is a great way to test updates to your WordPress and WooCommerce websites without impacting the live site or running the risk of downtime if there are problems with the changes or updates to your site. By contrast, a WordPress production site is the live version of your website that users will see.
Why should you make changes in a staging environment?
Using WordPress hosting with staging, you can make changes to a website without having to worry about it collapsing or changing how it functions on the live website. This is significant because even minor changes that interact with website functionality and design can have an impact on the live website.
To avoid the possibility of your website going offline due to a technical issue, it is always a good idea to test your changes in a staging environment. A plugin or theme update, or a change to the code on your website, can occasionally break your site, causing it to be inaccessible to everyone, or to look or behave differently. Any changes you make won't have a negative impact on your live site because you have a staging environment.
For the same website, developers typically use a staging environment to make sure everything is running smoothly. A WordPress staging site serves as a link between the production site, which is seen by visitors to the live website, and the development site, where developers write code and carry out preliminary testing.
The staging site (or local development environment) is our "sandbox" when it comes to building websites. We have the most control over it that we could possibly imagine. The live site or online setting is more like the testing stage. It is an area where the environment is less stable and where there are more attainable and useful variables. Many benefits come with using WordPress hosting with staging environments.
Test for bugs before launching
Finding a bug in the code of your website is the worst thing that can happen. This might be bad for two reasons. One of the effects is that it will prevent users from engaging with your content and restrict their user experience. If your website serves as your primary lead generation strategy for converting visitors into customers, this is far from ideal.
The second justification has to do with the potential removal of your website entirely. You might need to completely shut down your website if the coding problem necessitates a drawn-out process to fix it. By completely eliminating a point of contact for potential customers, you also give your rivals an advantage by removing yourself from the competition.
Troubleshooting
A website can never be perfect. There will always be the occasional WordPress error, no matter how hard you try. You might experience plugin conflicts, bugs, and other unfortunate technical problems. You obviously want to make them better. But, you know, sometimes fixing one problem only leads to the creation of ten more.
To address those problems, a staging area is ideal. Since the experience of users using your live website will not be impacted in the slightest if you introduce more problems than you resolve. To work on your website in a secure environment while the technical problems are being fixed, create a staging site. It's an excellent location for determining quality.
Safety
A staging environment is a secure location where you can work on your website, as we've already mentioned. It is a good place to keep a working replica your website, in case of an emergency. Additionally, you'll always have access to the most recent version of your website, which will allow you to save a massive amount of time and ensure that your users are happy in the event that something goes wrong.
Optimize the user experience
A website with many errors does not encourage a user-focused experience. In fact, it could affect how a potential customer views your brand. In order to prevent this from happening, having a staging site is a huge advantage, but it has other uses as well.
In addition to the content on your website, the user experience also takes into account how your audience uses the site. Staging enables you to test your content across a range of devices, improve the speed at which pages load, assess how user-friendly your site is to navigate and determine whether your design is pleasing to the eye. Your website's potential success is influenced by each of these elements.
Practice
You should conduct your experiments at a staging area. Users won't encounter any issues or downtime because it's not accessible to the general public, which means they won't see your experiments. Your website's success depends heavily on SEO, so you might be limiting its potential if you make content changes while the site is still live. Search engines will flag this content as sending conflicting signals if there are any errors on your website. Due to the error-filled pages, your site's ranking may suffer as a result, rather than being seen as a reliable and authoritative source.
You can also ensure that Google or other search engines won't find this website by adjusting the settings, which will prevent you from experiencing negative SEO effects. In this area, you have complete control over your website. Change it completely, experiment, and practice with code samples, animations, and more without fear of negative consequences.
Choose a hosting provider that offers WordPress staging
As part of their service, many managed WordPress hosts include built-in staging sites. Choosing the right host is best way ensure that a WordPress staging site will be easily available — included with the standard hosting features. With Nexcess as your web hosting provider, staging functionality is included with your plan. Only one staging site can be made for free per domain.
In contrast, each domain can support multiple development sites. You will need to decide on disk space for the setup of the development environment. As a result, the same service carries an additional cost. Accordingly, depending on the package you select, the development site is billed monthly.
How to set up a WordPress staging site with your hosting provider
Depending on your web hosting company, there may be different ways to set up your WordPress hosting staging environment. For customers of Managed WordPress at Nexcess, however, setting up a staging environment is incredibly simple. You can do it by following the steps listed below.
WordPress hosting with staging setup step #1 — log in to the Nexcess Client Portal
To begin, you must sign in to your Nexcess Client Portal if you are a Nexcess customer:

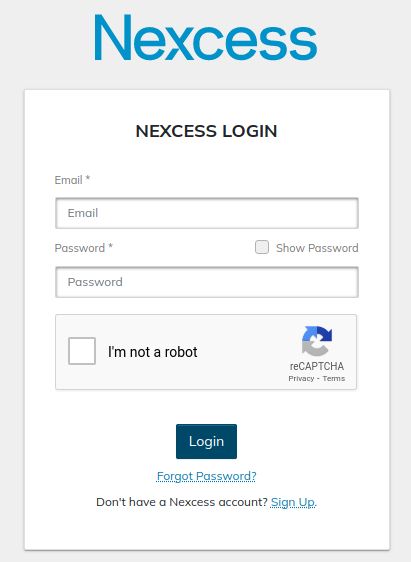
On the Nexcess login page, click the Forgot Password? link if you need to change your password.
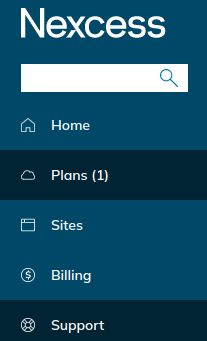
WordPress hosting with staging setup step #2 — add a staging environment
To view your site, click Plans in the left panel:

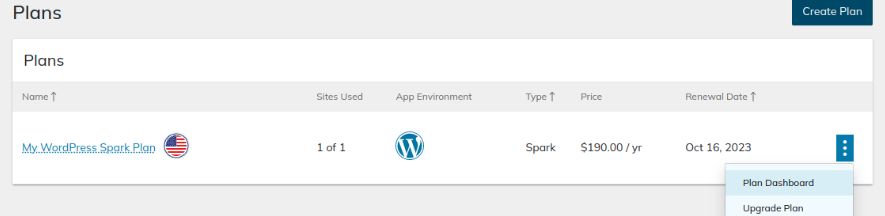
Click on the Plan name or the menu toggle, then click Plan Dashboard:

There should be two toggles available when you click on Environments. For Staging Environments, click on the small plus sign:

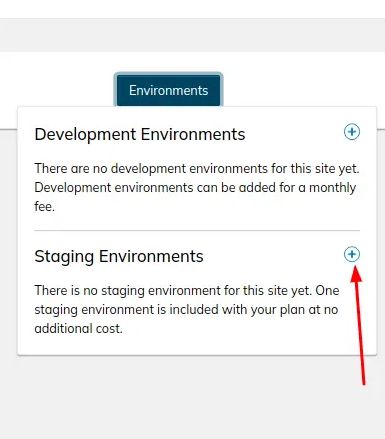
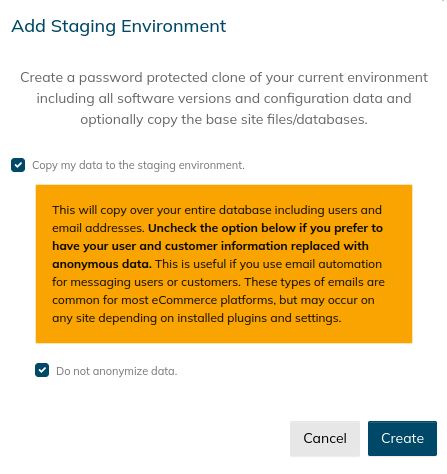
An additional box with two options should then appear. Click the Create button after making sure both boxes are checked:

WordPress hosting with staging setup step #3 — configure your staging site settings
When everything is finished, the new staging environment should be visible under the Environments tab. In a manner similar to how you access your live site, you can then access that site. Your SSH and SFTP credentials are also listed in case you need to securely access your website from a distance.
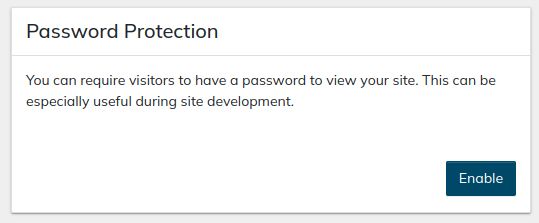
You can cross-check the functionality of Password Protection with the staging site once it has been created. If it isn't already, you can enable the Password Protection feature for your staging site by clicking Enable button from the Management tab in your Nexcess Client Portal:

To make the staging site function properly, you will need to search for and replace all www entries with non-www entries because CNAME URL does not work with www. You can use the following commands to search for and replace all www entries with non-www entries from the document root of your staging site:
Code snippet
wp db export
wp search-replace 'http://www.domain.com' 'https://domain.com' --recurse-objects --skip-columns=user_email,guid --all-tables --dry-run
wp search-replace 'http://www.domain.com' 'https://domain.com' --recurse-objects --skip-columns=user_email,guid --all-tables --dry-run
wp cache flush
Image of code snippet

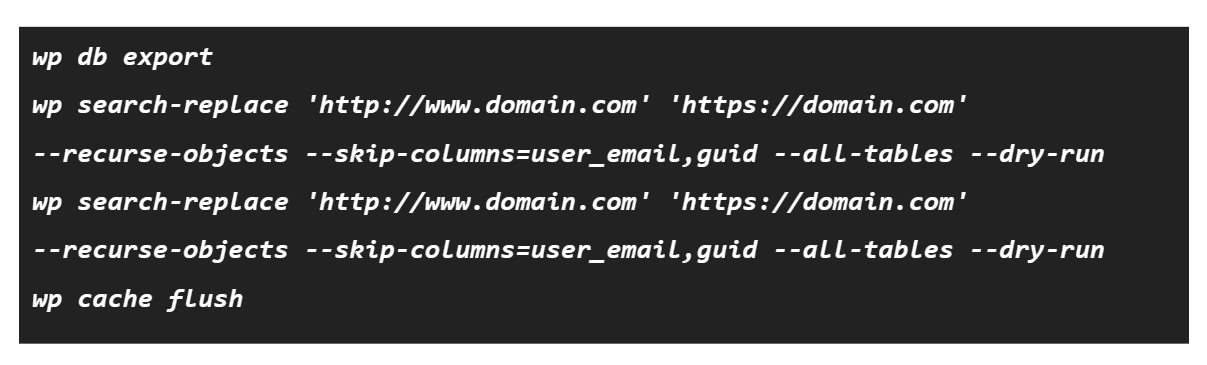
Replace domain.com with your domain name or CNAME URL.
For those without technical expertise or coding experience, plugins like Better Search Replace, Search & Replace, etc. are the best choice.
Setting up a WordPress staging site manually
While setting up a WordPress staging site manually takes longer than creating one using the Nexcess Client Portal, it can be done. So, keep that in mind. Review the guidance in the following sections.
Create a staging subdomain and install WordPress
Under your Managed WordPress hosting plan, create a staging subdomain (for instance, staging.example.com). WordPress will be installed automatically under the staging subdomain. Your SSH and SFTP credentials are listed under the Credentials tab once the staging subdomain has been created. The document root of the staging subdomain can be accessed using SSH or SFTP credentials.
Create a backup of your files and database
You can create a manual full backup of your site using the Nexcess Client Portal by following the steps below:
- Log into the Nexcess Client Portal.
- Click on Plan.
- Click on the Plan name or the menu toggle, then click Plan Dashboard.
- Click on Site Dashboard.
- From the main menu, click on Backups.
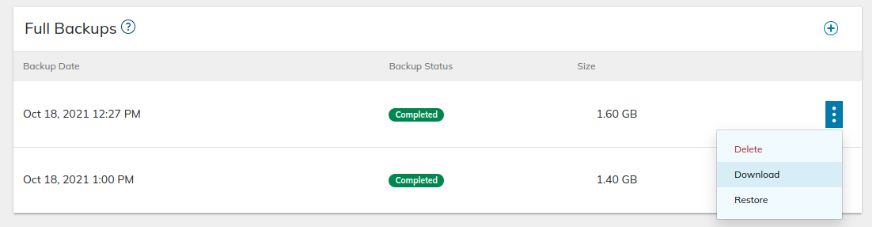
- Click on Create Backup and then click on Create Backup again to confirm. The backup file can be found under the Full Backups area once the manual backup process is complete.
- You can download manually created backups to your local machine.

Creating a backup of the site files using the zip or tar commands
You can also create a backup of the site files using the zip or tar commands:
Code snippet
zip -r <sitefile>.zip <wordpress_installation_directory>
tar -czvf <sitefile>.tar.gz <wordpress_installation_directory>
Image of code snippet


Alternatively, you can create a database backup from phpMyAdmin or by using the mysqldump command.
Creating a backup of the site files phpMyAdmin
You can also create a backup of the site using the phpMyAdmin utility:
- Click on Launch phpMyAdmin under Databases.
- Once you logged into phpMyAdmin, choose the Database from the left panel.
- 2. In the top center panel, select the Export tab.
- 3. Choose a Quick or Custom export method on the following page.
- 4. Select the format in which you want to save the file from the dropdown menu. Most people use SQL.
- 5. To proceed, press the Go button.
- 6. A popup window allowing the download of the file appears. (Note: It might also be downloaded by your browser on its own.)
Creating a backup of the site files using the mysqldump command
You can also create a backup of the database using the mysqldump command:
- Access your account using SSH login details from the command line.
- Run the following command to create a backup of your database.
Code snippet
mysqldump -u database_user -p database_name > database_name.sql
Image of code snippet


The password is requested when you run this command. Please enter the proper password to proceed.
Move your files to the new WordPress installation
You can use any of the following techniques to transfer your files to the new WordPress installation.
- To restore live site files (including the database) to the staging site, use WordPress migration plugins like Migrate to Liquidweb & Nexcess, BlogVault, etc.
- Use phpMyAdmin to restore the newly created database and upload site files using FTP after removing the default WordPress files from the staging subdomain.
- Using rsync, scp, or mv commands, move the live site files to the new WordPress installation after removing the default WordPress files from the staging subdomain then restore the new database from a database backup using the mysql command.
You can use the following commands to search for and replace all live site entries with staging subdomain entries from the document root of your staging site:
Code snippet
wp db export
wp search-replace 'https://live_site_URL' 'https://staging_site_URL' --recurse-objects --skip-columns=user_email,guid --all-tables --dry-run
wp search-replace 'http://live_site_URL' 'https://staging_site_URL' --recurse-objects --skip-columns=user_email,guid --all-tables --dry-run
wp cache flush
Image of code snippet

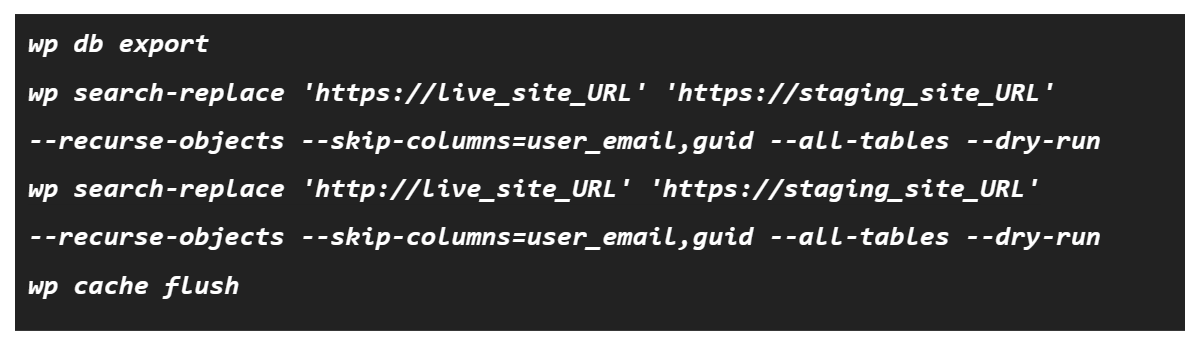
Replace live_site_URL and staging_site_URL with your live site URL and staging site URL.
Staging environment best practices for WordPress and WooCommerce
You can make any changes needed to your staging site but keep these important points in mind when making changes.
- It’s a good idea to test plugin and theme updates on your staging site before your live site. Plugin developers do their best to try their code with different environments, but an update will get pushed every once in a while, that may break your site. Consider making the updates first on the staging environment and then checking to ensure the site wasn’t affected. Once you’ve confirmed that, you can feel confident making those updates on your live site.
- Anything you do on the staging site is only reflected on the staging site, so you may not want to go too crazy with changes. However, anything you change on the staging site will need to be done the same way on the live site. If you want to make several changes, consider keeping a list of them, so you don’t forget what you did.
- Due to the long obscure domain name, this site may not be easy to find, but be aware that it’s still technically a live website. Although no one will likely find it unless you share a link, you should not publish any sensitive information on the staging site.
- Take advantage of the staging environment for code changes. Before pushing any code to your live site, you should always test it on the staging site first.
- WooCommerce is a plugin for WordPress, so the staging functionality works in the same way.
Frequently Asked Questions (FAQ) about WordPress/WooCommerce staging sites
Do all hosts offer staging environments?
Not all web hosts include staging sites in their hosting packages. You can still set up a staging server in that situation, but you'll probably have to pay more. We offer Managed WordPress Hosting with Staging Site Service at Nexcess. Only one staging site can be made for free per domain.
Can I push my staging site live once the changes are made?
Yes. You can migrate your WordPress site using plugins like Migrate to Liquidweb & Nexcess, BlogVault, etc., upload site files via FTP, restore the database using phpMyAdmin, or SSH into your server and use the rsync, scp, or mv commands to transfer site and database files to your live/production site.
Do I need to register a new domain for my staging site?
Yes. For your staging site, you have two options: either register a new domain or use the default CNAME URL.
Bottom line
When you use WooCommerce or WordPress hosting with staging website functionality, you can make changes to a website without worrying. New updates can be vetting in you staging area without collapsing or changing how it functions on the live website because even minor changes that interact with website functionality and design can affect the live website.
Nexcess raises the bar on hosting
Expert support, elite performance, and ultra-flexible infrastructure. Discover WordPress hosting with robust features.
You can always contact us to purchase a suitable hosting plan for your WordPress site.
Now that you’ve seen the advantages of a WordPress/WooCommerce staging environment and how easy it is to set one up, you’ll most likely want your next hosting plan to include this awesome feature. Managed WordPress hosting with Nexcess makes setting up your staging environment easy. And with 24/7 support, you can rest assured knowing you’ll have the Nexcess team to help you with any step of the process.
Recent articles
- Using the Query Monitor plugin for a WordPress site
- WordPress database setup — changing the database prefix
- How to open browser console for inspection
Related articles
- Nexcess: managing dev and staging environments
- Cloning and moving a WordPress site to a new domain
- What is a WordPress staging site?
Note About the Original Publication Date
This article was originally published in October 2019. It has since been updated for accuracy and comprehensiveness.


