

Changing your hosting provider might be challenging. You must get used to the new hosting management system and, more importantly, export all your data from the old server.
While some website owners prefer to delegate all migration tasks to web hosting professionals, others do not trust anyone with their data and prefer self-migration.
Discover the Nexcess WordPress migration plugin and review other migration options
A WordPress migration plugin is a great solution that automates website migration but leaves you in control of the entire process. In this Nexcess Knowledge Base guide for WordPress, you will learn how to use Migrate to Liquid Web & Nexcess — the easy-to-use Nexcess WordPress migration plugin for swift website transfers.
3 ways to transfer your website to Nexcess hosting
Nexcess provides the best WordPress and ecommerce hosting plans, combining reliable solutions and decades of experience to bring you the hosting your business deserves. Nexcess offers cloud, dedicated, and high-availability enterprise hosting solutions for WordPress and WooCommerce websites. So you can find the best hosting plan for your needs.
Once you have created a Nexcess account and chosen your hosting plan, it is time to bring your website over. If you have any difficulties choosing the best plan for your business, do not hesitate to contact the Nexcess award-winning 24/7/365 technical support for assistance.
There are three ways to transfer your WordPress or WooCommerce website to Nexcess:
- Nexcess migration services. Our team of professionals handles website migration from start to finish. Nexcess-managed migration services are free for all hosting plans. There is no limit on the number of website transfers we can handle.
- Self-migration. No one knows your website better than you. Manually transferring data might be the best method if you want complete control over the migration process.
- WordPress migration plugins. You can use various plugins to migrate WordPress or WooCommerce websites to Nexcess. But regarding speed and convenience, our custom Migrate to Liquid Web & Nexcess plugin is your best option.
Let's explore how Nexcess-managed migration services and self-migrations work before we dive into the functionality of the Nexcess WordPress migration plugin.
About our pre-migration checklist, Nexcess temporary domains, and DNS management
Prior to undertaking a website transfer to Nexcess hosting, a best practice is to review a pre-migration checklist:
When you’re migrating a WooCommerce or WordPress website you don’t want to waste any time. That’s why we’ve put together this checklist of helpful tips to make your migration as quick and easy as possible.
Nexcess combines the best features of a software-as-a-service solution and open-source software to bring a world-class hosting experience. If you have previously used VPS, dedicated, or shared hosting, getting used to some aspects of Nexcess hosting might take a while. One such aspect is temporary domains.
Nexcess temporary domains
Once you choose a hosting plan and create a new website, the website is assigned a temporary domain name. Nexcess uses temporary domain names to simplify the migration process and make it more convenient for you.
A temporary domain name allows you to test your website after it has been migrated to Nexcess without modifying your hosts file. It also provides several other benefits, so we usually recommend using a CNAME Target instead of pointing your website to Nexcess via an A record.
Domain Name System (DNS) management
Regardless of the migration method you choose, you must change all URLs in your website’s database to include the temporary domain name before you can update the appropriate Domain Name System (DNS) records and direct traffic to Nexcess. Performing a search-and-replace operation via the WordPress Command Line Interface (WP-CLI) or using phpMyAdmin requires updating your WordPress configuration to reflect the new database connection information.
All that takes time and effort and is needed for Method #1 and Method #2 documented in the sections below. But it does not have to be this way. The Migrate to Liquid Web & Nexcess plugin covered in Method #3 below can facilitate much of the process for you. Therefore, the Nexcess team always recommends its use for the level of convenience it provides our clients.
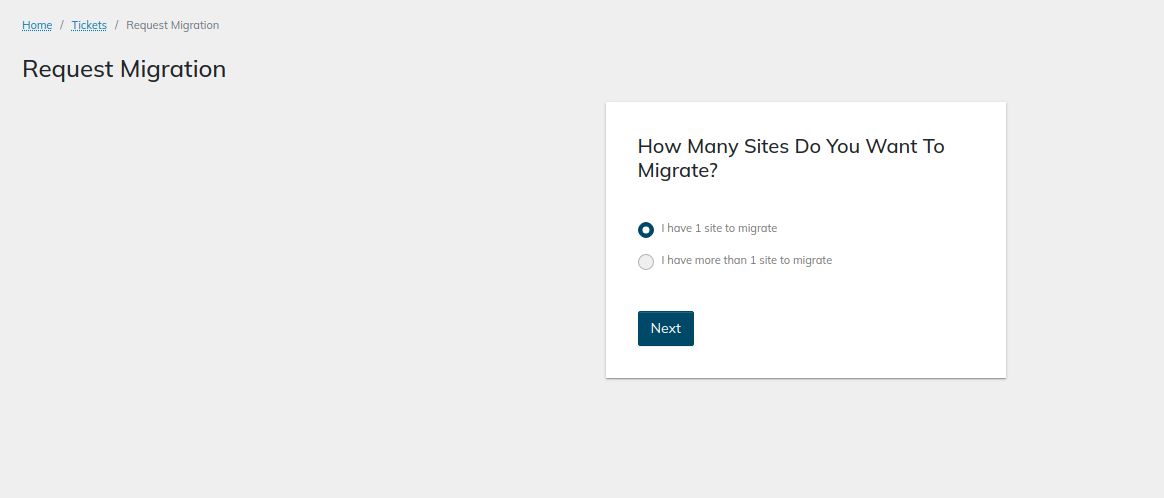
Method #1. Leverage our Nexcess migration services
Our migration team can transfer your website over to us and take care of technical aspects of the migration process, including DNS updates and infrastructure configuration, regardless of the content management system used and the number of websites you own. Once you fill in the Nexcess Web Hosting Migration Form from your Nexcess Client Portal, we will start moving your website.
A Nexcess migration and the associated process will vary in time required based on several variables. The amount of time needed primarily depends on how fast you test whether your websites work correctly on the new infrastructure. If any issues arise, the time involved in fixing them is a factor for the overall schedule:

Nexcess hosting is fully optimized for the chosen content management system, so issues during migration are rare.
Method #2. Perform a self-migration to Nexcess hosting
You can manually transfer your website to a new server. The process includes having all your data backed up and exported. Then, you will import this data from your previous hosting provider to Nexcess using SFTP/FTPS, Secure Schell (SSH), or the file manager.
We strongly recommend temporarily suspending your website on the old host by putting up a maintenance page to avoid data loss. After the data has been migrated, you need to test whether everything works correctly before updating DNS to point your website to Nexcess.
Method #3. Use a WordPress migration plugin
You can migrate your WordPress website in five simple steps using the Migrate to Liquid Web & Nexcess WordPress migration plugin.
A WordPress migration plugin allows you to automate the migration process while you remain in control of the data transfer. Theoretically, you can use any plugin to migrate WordPress and WooCommerce websites, as they all work similarly.
That stated, if you are coming over to Nexcess web hosting, leveraging the Migrate to Liquid Web & Nexcess WordPress plugin in combination with the built-in features of the Nexcess Client Portal, will help you transfer your WordPress website to Nexcess in less than a day while taking care of all updates to your WordPress database and configuration files. These features make it the best WordPress migration plugin for your website. Let’s get into it!
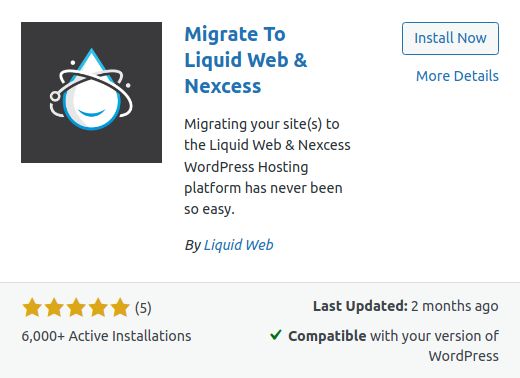
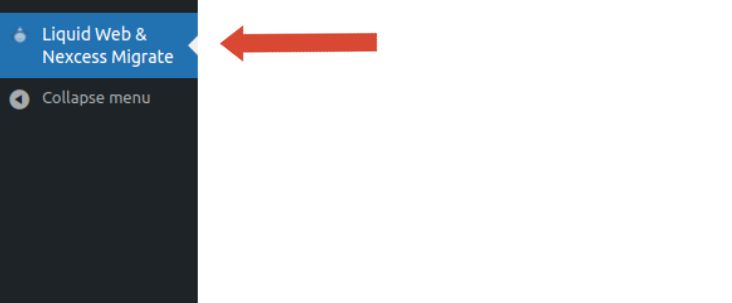
Step #3a. Install and activate the Migrate to Liquid Web & Nexcess WordPress migration plugin
Install and activate the Migrate to Liquid Web & Nexcess plugin from your WordPress Dashboard at your old host. Once you activate the plugin, a link to it will show up in the menu on the right-hand side of your WordPress admin area:

Step #3b. Provide your migration details
Open its user interface after installing the Migrate to Liquid Web & Nexcess plugin:

You will be asked to provide the following information:
- Your Email Address: Our migration plugin will send you automatic updates on the migration status and notify you once your website data has been transferred to Nexcess.
- Destination Site URL: The destination URL is the temporary domain name provided by Nexcess.
- Host/Server Address: You can use either the IP address of the newly created Nexcess website or the temporary domain name.
FTP type: You can choose whether to transfer your website via FTPS or SFTP. - FTP Username: Your FTPS/SFTP username.
- FTP Password: Your FTPS/SFTP password.
Provide your email address, confirm you agree with BlogVault’s terms and conditions, and then click the Migrate button:


You will be asked to provide all other information — including the destination address and FTPS/SFTP credentials — to connect to your newly created Nexcess website. Add the https:// protocol part to the destination domain name:


You can find your SFTP credentials and FTPS credentials information using the dashboard area for your specific website in the Nexcess Client Portal:


All usernames, passwords, hostnames, and port numbers to connect via FTPS, SSH, and SFTP are supplied for your use. Click Generate New Password to retrieve your FTPS or SFTP/SSH user password:


Typically, that is all you need to provide for the WordPress migration plugin we built for your convenience — Migrate to Liquid Web & Nexcess — to start the data transfer process. However, if your website is password-protected or you have any non-standard folders on your website, you need to provide additional information, as shown below:

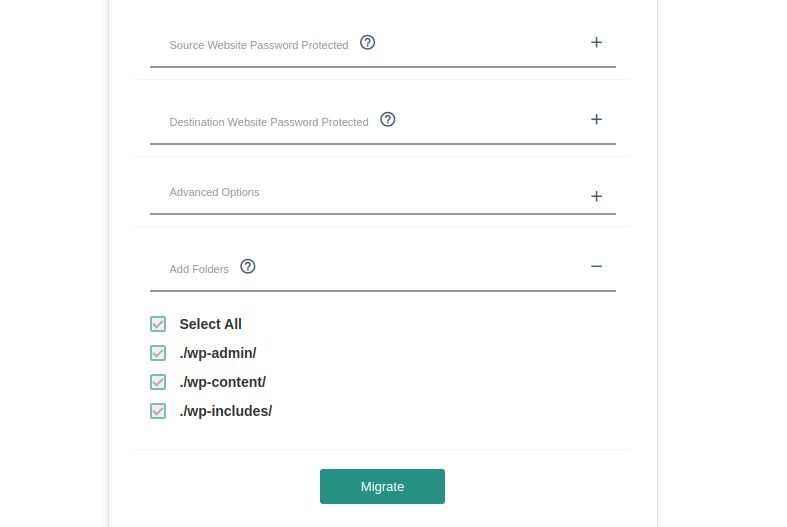
Click the Migrate button to start the migration process:

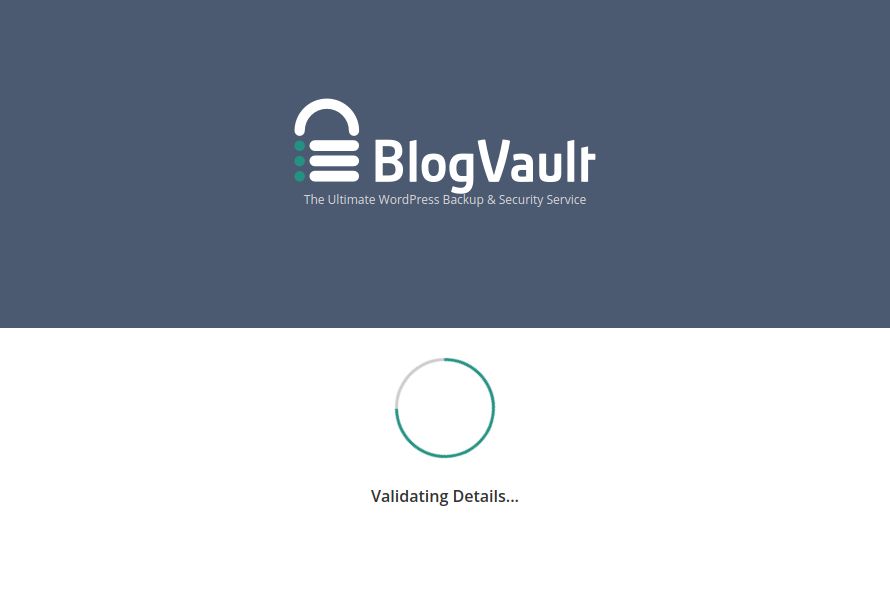
Step #3c. Wait until our WordPress migration plugin migrates your WordPress website
The migration process can take a few minutes or hours, depending on the size of your WordPress website. On average, migrations to Nexcess take about an hour. You can cancel the migration anytime by clicking the Cancel Migration button.
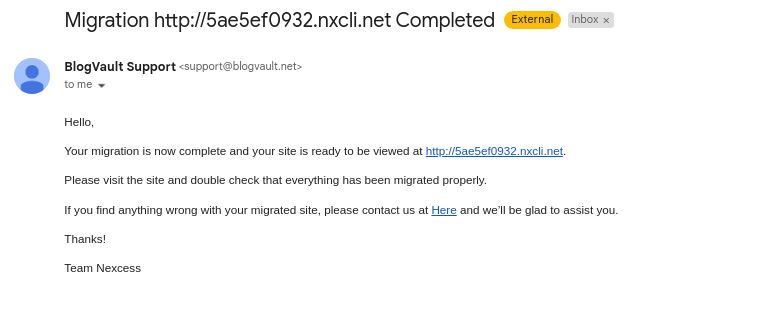
Please note that you do not need to keep your browser tab open throughout the migration process. You can close the window at any time and return to it later. Once the migration is complete, you will get notified via email:


Step #3d. Test your WordPress website
Once the Migrate to Liquid Web & Nexcess WordPress migration plugin notifies you that the process is complete, you can begin testing. Ensure no functionality is lost by browsing the temporary domain for your site.
You do not need to change to your wp-config.php file or your WordPress database — the plugin has done everything for you. If something does not work as expected and you cannot identify what is causing errors, our support team will help you resolve them before you update the DNS records:

Step #3e. Update DNS
Once you have verified that your migrated WordPress or WooCommerce website works correctly, update DNS to direct all traffic to Nexcess. You can either keep your existing DNS configuration and name servers or move them to Nexcess.
Update your domain registration information if you would like to use Nexcess name servers and manage DNS from the Nexcess Client Portal. In our portal, you can view your IP address and DNS NAME Target, which represent your temporary domain name in the Nexcess Client Portal.
A DNS zone and DNS records can be created using the Nexcess Client Portal if you have already set up Nexcess name servers for your domain name. You can also modify your existing DNS zone. Configuring a CNAME has many benefits, so we strongly recommend adding it.
Update your domain name
Your newly migrated WordPress website will still use the temporary domain name assigned to it until you update it from the Nexcess Client Portal. So, open the Domains page from the dashboard and click Modify Master Domain to edit your domain name.
Once this is done, Nexcess will automatically update your domain name in all WordPress configuration files and database tables, so you will not need to do it manually:


That’s it — your WordPress website has successfully migrated to Nexcess! Now you can leverage better performance and security while growing your business. Nexcess will do everything to help you succeed.
Final thoughts on this introduction to our convenient WordPress migration plugin
There is no doubt about it! Nexcess has developed with much care the ultimate WordPress migration plugin for transferring your WordPress or WooCommerce website to the Nexcess web hosting platform:
Our plugin fully automates the process, so you only need to provide migration information and let it move all data for you. After your website has been migrated to us, test whether it works correctly from the new hosting infrastructure and update DNS to direct all traffic to Nexcess.
Fully managed WordPress, WoCommerce, and Magento
Fast speed and top-notch performance for the world’s most popular content management platform.
When it comes to industry-trusted WordPress/WooCommerce hosting, your business deserves the one that expert web administrators rely on — Nexcess. With our infrastructure, you get a superior application stack, caching/performance/security options, a set of free premium plugins, and at least 10 PHP workers per site on all WordPress/WooCommerce hosting plans.
Do you anticipate frequent traffic surges? No problem — Nexcess Cloud autoscaling will not let your website go down. Check out curated web presence and managed ecommerce solutions to start today!
Note about the original publication date
This article was originally published in October 2021. It has since been updated for accuracy and comprehensiveness.


