


First, let us discuss what the staging environment is and its significance in website development and management.
What Is a Staging Environment?
A staging environment or staging site is a copy of your production website and is the last step in the deployment process before changes are deployed to your live production website that is visible to the general public.
The main aim of this staging environment is to catch and fix any mistakes or bugs before the changes are published. Thus, changes can be released to your live website without introducing errors.
Testing new changes on a staging environment before deploying them to your live website also reduces the risk of any errors or issues that will affect your users. This cautious plan for ensuring a bug-free production environment effectively means happier users and more uptime for your website.
The development environment and the staging environment are different from each other in their purpose and use in the majority of web development implementations.
However, here in the managed applications division of Nexcess, we treat both in the same way — as test environments for admins to create and verify the working of site before it is published to the live production environment.
Advantages of Using a Staging Environment
There are many advantages of a staging environment with site development. You can use it when you want to:
- Switch themes
- Add or remove plugins
- Change code
- Test major software updates
- Reorganize your website
- Upgrade functionality
After confirming the result in the staging environment, you can deploy the same software code to the live site.
Nexcess Staging & Dev Environments
Nexcess offers different content-related managed applications for the web. They are:
For these different managed applications, we provide a staging/development environment along with the live one. But the availability of staging environment or development environment depends upon the managed applications package you purchased.
For some packages, we provide a free staging environment and for other packages, we provide a development environment (that comes with an extra cost as per the Nexcess Dev Sites Pricing Model).
This article will explain those features and how you can set them up with your live environment.
Getting Started With Nexcess Staging Environments
Nexcess offers one free staging environment for each live site under managed WordPress and managed WooCommerce plans only. There is another option for users to create a development environment under the live site for these two packages. But that feature comes with an additional cost.
While for other Managed Applications packages like Managed Magento and Drupal, we provide only a development environment option, and that comes with an extra cost (see the Nexcess Dev Sites Pricing Model).
However, with flexible cloud plans, there is no option to create staging/development environments. Because under a flexible cloud plan you can install any custom site, it is not possible to spin up a staging/development environment for it.
In this article, we will guide you on how to set up a staging environment if you are using of managed WordPress or managed WooCommerce. First, log into your Nexcess Client Portal and select the Plans option:

Then locate your required plan containing the site under which you wish to create the staging environment. To the right of the site name you can find an option called Environments. Click that option:


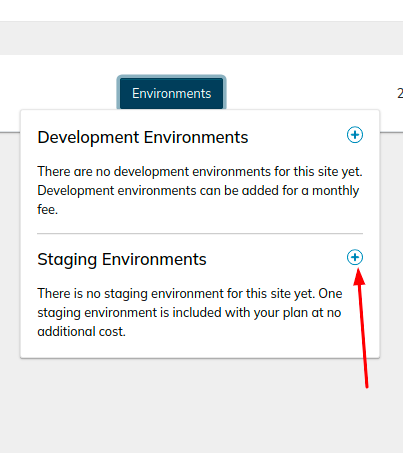
Upon clicking on the Environments option, the user interface will list two subsequent dropdown options for development environments and staging environments.
To the right of the Staging Environments option, you can find a Plus (+) button. Click on it.

Upon clicking Plus (+), the user interface will display the screen shown below. Make sure you check the checkboxes for “Copy my data to the staging environment” and “Do not anonymize data” as shown in the following screenshot.

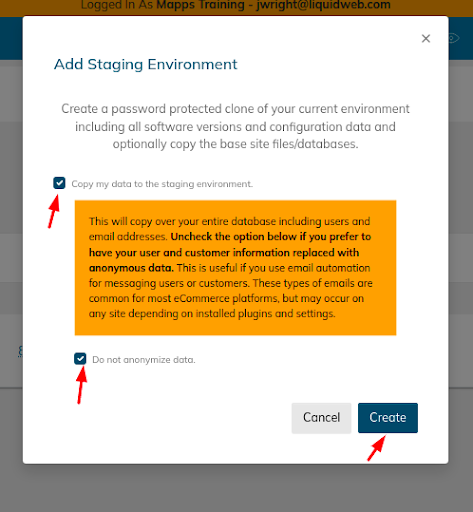
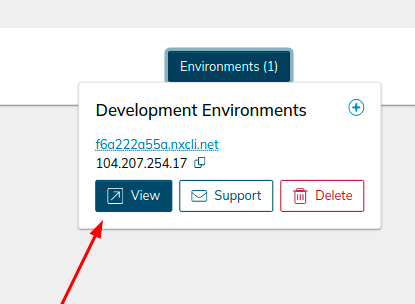
And after that, click the Create option. The staging site is created, which is a clone of your live production site. Then, once again, click the Environments (1) option to find your created staging site.
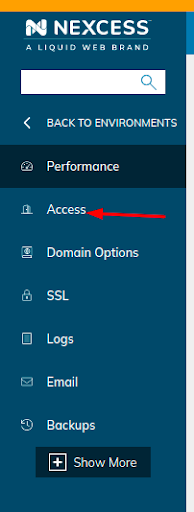
By clicking on the domain name, you will be taken to its management screen Once there, click on the Access option to find the corresponding SSH/FTP login details.
Using the SSH/FTP details for the staging environment, you can manage the staging site.
Getting Started With Nexcess Development Environments
Above we discussed how to set up a staging environment, and here will see how we can set up a development environment.
In this case, we are taking an example of a site that is created under a Managed Magento Plan. However, the steps are the same for all other plans, including Craft CMS, Drupal, etc.
But as mentioned earlier, Nexcess does not offer development or staging environment feature for sites managed under flexible cloud plans. To create a development environment, following these steps.
Log in to your Nexcess Client Portal, select the Plans option, and locate your required plan containing the site under which you wish to create the development environment.
To the right of the site name, you can find the Environments option. Click on that option.
The user interface will display the Development Environments option. To the right of that Development Environments option, you can find a Plus (+) button. Click on it.
Upon clicking the Plus (+) button, you can select the preferred Development Environment Package and make sure you check the checkboxes for “Copy my data to the Development environment” and “Do not anonymize data."
Then, click the Create option to complete the process. The development site will be created after a few minutes. You can find its details via the Environments(1) option of the live site.
Click on it, and then click the View option.

Then, within the left menu you can see the Access option. Click Access to obtain your development site SSH/FTP login credentials. When those in your possession, you are free to manage the site accordingly.

About the Nexcess Portal
Starting with a new hosting partner can be overwhelming. For that exact reason, we have prepared a Nexcess Portal Guide to make each client’s introduction to our Nexcess Portal easier.
How to Become a Nexcess Portal Pro
You signed up for an account with Nexcess but now what do you do? New systems can be intimidating to learn, so we’ve put together this guide to help explain what is in the portal and where to find it.
Nexcess is a world-class web hosting platform with integrated managed services built right in. Even though there are services like flexible cloud hosting and enterprise costing, the flagship offerings are managed WordPress hosting, managed Magento hosting, and managed WooCommerce hosting.
Nexcess is considered as 1 of the Top 5 Best Web Hosting Providers Perfectly Tailored for Your Website.
At Nexcess, we have our own portal and panels to manage your premium hosting and features, making it simple for you to control the hosting platform from your end. Like any robust web hosting admin panel, we have a host of advanced features suitable for sophisticated ecommerce scenarios.
Managed WordPress hosting and managed WooCommerce hosting puts superior WordPress and WooCommerce site management capabilities at your fingertips They both provide you with tools and resources to keep your sites running at optimal levels.
WordPress is a user-friendly application that is used by the majority of web hosting providers. The core tasks of the website are primarily managed over the WordPress Admin Dashboard (also known as the wp-admin page) by the client's admin user.
With regard to access to the wp-admin page, the credentials are used for logging in are the admin user's username and password. It is always best to use a strong password for the admin user's account.
24-Hour Assistance
In case you forgot the password or want to reset the password in traditional fashion, the Nexcess support team is always available to assist you. If you need any assistance with the above-mentioned, don't hesitate to reach out. For 24-hour assistance any day of the year, Nexcess customers can contact our support team by email or through your Client Portal.
Nexcess Web Hosting Admin Panel
Here at Nexcess, we provide admins a feature-rich Client Portal and Nexcess Web Hosting Admin Panel to manage your comprehensive set of web hosting features.
Our goal is to make it simple for you to control the hosting for optimal outcomes. Like any web hosting admin panel, we have a dynamic set of custom features suitable for the corresponding web hosting plans.
The core functionality of the portal allows management of all the details associated with your hosting plan.
Appearance
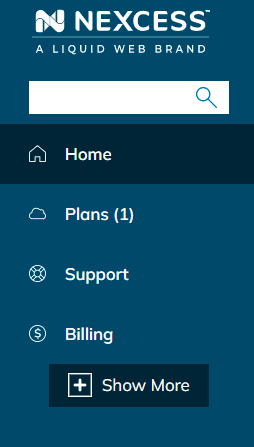
The basic appearance of the portal options would be as below, with core functionality and options available such as billing and other essential sections.
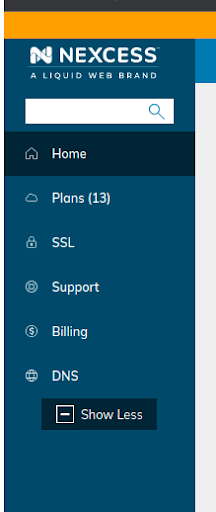
In the case of managed WordPress, WooCommerce, and Magento hosting plans, you may find the corresponding details under the Plans (#) option as shown in the following image.

You may click on the Show More option to find the advanced options such as DNS and SSL. As you proceed further with the Plans option, you will be shown a list of the active managed plans that you have with Nexcess.
Once you select a plan to review, you will see the list of domains that you have hosted on the plan. You may select any of the domains and access the domain-based Nexcess Web Hosting Admin Panel.
For all the managed hosting plans available from Nexcess, the listed options will be similar, but not identical, and there may be some additional features on a per-plan basis. The advanced options of the managed plan are shown by clicking the Show More option.
You will see some additional menu options such as Scheduled Tasks, MySQL, and Containers, for example, which are shown as a part of the advanced setup configuration set of options.
Basically, for any managed hosting plan, you may click Show More to access the additional features within the Nexcess Web Hosting Admin Panel that will help you manage your site and plan details.
Performance
Clicking on this option will show performance-related details, including the basic information like disk usage, bandwidth, PHP-FPM traffic/process, the information needed for configuring CDN, the domain, the cache settings (including purging the cache), cloud auto scaling, and more.
Access
Clicking on this option will show access-related details, including the SSH (Secure Shell Protocol) and FTP (File Transfer Protocol) access details.
Please note that there is only one SSH access account allowed per plan that is effective for all the sites hosted on the plan. Therefore, no additional SSH users can be created for the plan after the first.
As for FTP, access you may create a new FTP user and may limit the access to any particular directory.
Nexcess provides the feature to enable password protection for your site. You may enable or disable the password protection using the Password Protection option.
Domain
Clicking on this option will show domain-related details. You may change the master domain name and also create/add other domains using the CNAME or alias or pointer domain features.
By default, a temporary name will be provided for all sites hosted with Nexcess. The first step would be to modify the master domain in the Client Portal > Nexcess Web Hosting Admin Panel to use your custom domain. To take your application live, you may change the master domain by populating it with your planned domain.
Please be aware that once the master domain has been applied in place of the starting Nexcess temporary domain name, it is not possible to revert back to use of the temporary domain name originally supplied by Nexcess.
Environments
Clicking on this option will show environment-related details. You may find the information about the PHP version in use, the details needed for Redis configuration, and other important environment-related details.
For WooCommerce and WordPress, you may find the application admin panel access details in this area. The application admin username will be shown in an ongoing fashion, but the password for an application admin user (such as the WordPress Admin User) would only be shown for a limited time period of access. You may find the details related to the plugin and core updates in this section.
For Magento, the basic PHP version shown would be applicable for all the domains hosted under the plan. Basically, all hosted domains would be running on a single PHP version. If you change the PHP version, the change would be applicable to all the domains on the plan.
Not a Nexcess Customer Yet?
Check out our fully managed hosting plans to get started today.
Development & Staging Environment FAQs
In Web Development, What are the Differences Between Development & Staging Environments?
The staging environment is where you deploy your software code for the team to review before it goes to the production environment. The development environment is where you work on your new and revised software code, which is constantly being built, refined, and debugged.
In Web Development, Why Do You Need a Staging Environment?
The main purpose of a staging environment is to ensure that all new changes deployed from previous environments are working as intended before they are released to the live production website. By reviewing the staging environment and everything working in concert on it before deploying your software code to a public website, you will be able to identify and resolve issues found, so they never impact the end user.


