

Your ecommerce website performance relies heavily on the ability to serve static content fast and reliably.
Content Delivery Networks (CDNs) have been gaining popularity over the past years as an excellent tool to significantly increase performance and reduce load times by caching your content on their servers worldwide.
Cloudinary tutorial for Magento 2 setup by admins
We have been keeping pace with the development of modern CDNs and, beyond the shadow of a doubt, Cloudinary is one of the best Content Delivery Networks (CDNs) to integrate with your Magento 2 store in 2023 and beyond.
In this Cloudinary tutorial, we will answer the following questions: what is Cloudinary? how to integrate Cloudinary with Magento 2? and how to leverage Cloudinary's functionality to speed up your ecommerce website?
What is Cloudinary?
Cloudinary is a modern Content Delivery Network (CDN) and one of the market leaders in providing cloud-based image and video management solutions. As a CDN, Cloudinary maintains a geographically distributed network of servers that can speed up static content delivery, with advanced image optimization built in.
Content Delivery Networks (CDNs) can significantly speed up your website, especially if images and video make up a large part of your website content. Not only does Cloudinary offer better performance by having static content cached and served from the geographical location closest to each website visitor, but helps you optimize images and video to offer a great user experience.
Cloudinary provides robust cloud-based services for static content management. You can upload, transform, and optimize your images and video to achieve lower bandwidth usage without any substantial loss of quality. In addition, Cloudinary presents a dashboard with personalized insights into optimization metrics and data usage.
Cloudinary combines the power of a Content Delivery Network (CDN) with the best content optimization tools. Read on to learn how to make the best of it for your Magento 2 store.
Cloudinary Content Delivery Network (CDN) setup for Magento 2
Cloudinary is not just a potent tool for you as an ecommerce business owner to leverage — it is also very user-friendly and easy to integrate with your Magento store. However, please note that Cloudinary is not compatible with Magento 1. If Magento 1 still powers your ecommerce business, consider moving to Magento 2 or OpenMage, or let Nexcess keep your store secure with Nexcess Safe Harbor.
The process of setting up Cloudinary CDN for your Magento 2 store consists of three simple steps:
- Cloudinary tutorial for Magento 2 setup step #1: create a Cloudinary account.
- Cloudinary tutorial for Magento 2 setup step #2: install the Cloudinary extension for Magento 2.
- Cloudinary tutorial for Magento 2 setup step #3: configure Cloudinary on your Magento 2 store.
Our Cloudinary tutorial is going to cover each of the three steps above.
Cloudinary tutorial for Magento 2 setup step #1: create tour Cloudinary account
Using the Cloudinary extension for your Magento 2 store requires having a Cloudinary account. Before we can dive into the process of the extension installation and the CDN setup, we need to complete the account setup. Open the Cloudinary official website cloudinary.com and click on Get Started or Sign up for free:

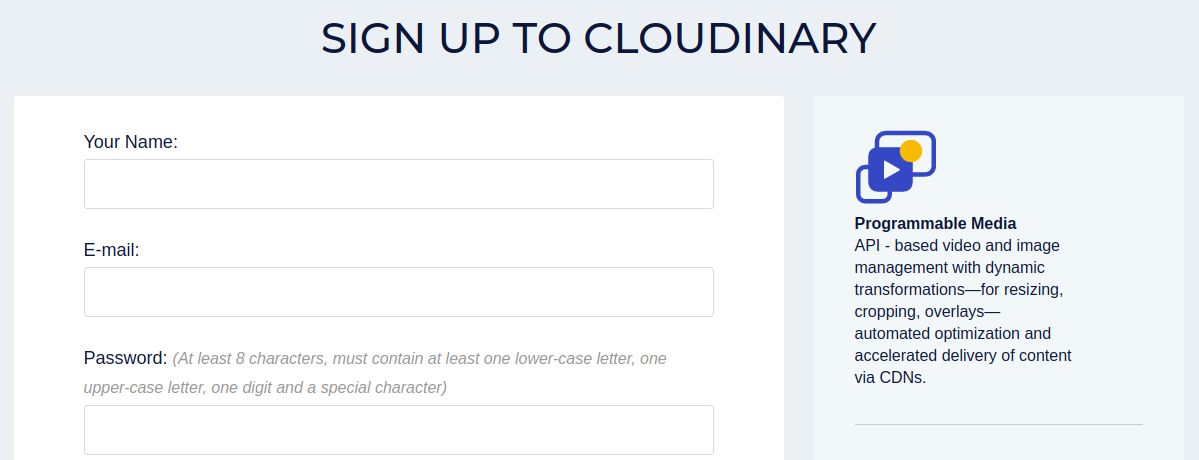
In addition to your name, email address, and country of business, Cloudinary will ask you to choose one of the three products they offer: Programmable Media, Media Optimizer, or Digital Asset Management. Select the solution for your account depending on what features your store needs most. If you need more clarification, we recommend going with the Programmable Media option, as it provides the core CDN and content management functionality.
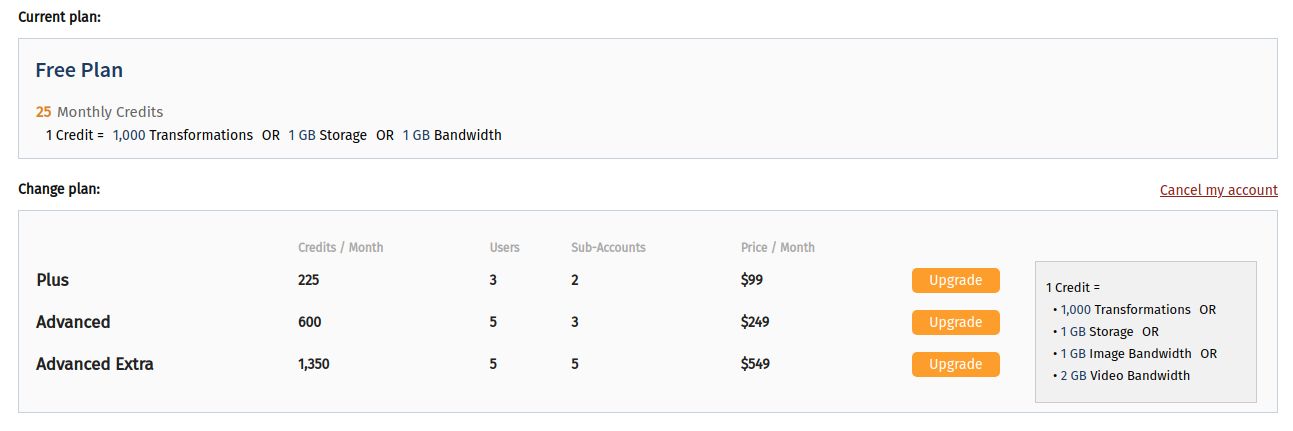
Start with the free Cloudinary plan
We can sign in with the free plan to use Cloudinary and explore its functionality. Cloudinary allows us to upgrade the plan anytime from your account settings menu to meet the growing needs of our store. Each plan provides a certain number of credits that offer a certain amount of storage, bandwidth, and media transformations. Media transformations allow you to optimize your images and video to be presented to your end users in the best possible way based on their device and browser details:

Cloudinary tutorial for Magento 2 setup step #2: install the Cloudinary Magento 2 extension
In this Cloudinary tutorial, we will install the Cloudinary extension via the command line interface using Composer; the installation process is straightforward. However, we strongly recommend that you backup your Magento 2 database before installation and put your store into maintenance mode during the installation process.
Add the Cloudinary extension
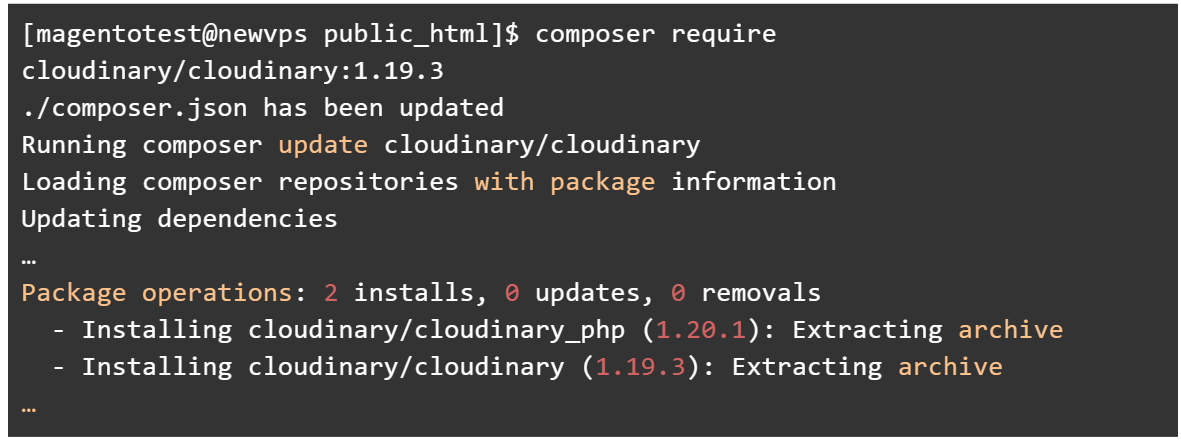
Run the composer require command to add the Cloudinary extension and its version to your composer.json file. As you can see below, we have chosen the 1.19.3 version, the latest version of Cloudinary:
Code snippet example
[magentotest@newvps public_html]$ composer require cloudinary/cloudinary:1.19.3
./composer.json has been updated
Running composer update cloudinary/cloudinary
Loading composer repositories withpackage information
Updating dependencies
…
Packageoperations: 2 installs, 0 updates, 0 removals
- Installing cloudinary/cloudinary_php (1.20.1): Extracting archive
- Installing cloudinary/cloudinary (1.19.3): Extracting archive
…
Image of above code snippet

The Cloudinary extension is recognized
Magento 2 should now recognize the Cloudinary extension and show it as disabled:
Code snippet example
[magentotest@newvps public_html]$ magento module:statusCloudinary_Cloudinary
Cloudinary_Cloudinary : Module is disabled
Image of above code snippet


Enable the Cloudinary extension
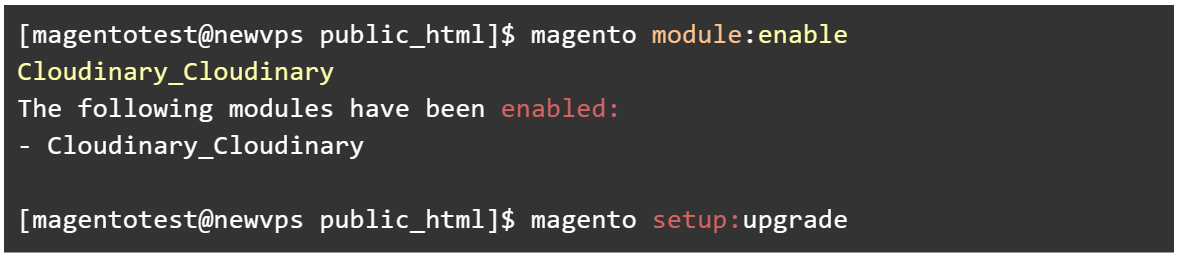
Enable the extension and register it using the magento setup:upgrade command as shown below:
Code snippet example
[magentotest@newvps public_html]$ magento module:enableCloudinary_Cloudinary
The following modules have been enabled:
- Cloudinary_Cloudinary
[magentotest@newvps public_html]$ magento setup:upgrade
Image of above code snippet

Finalize the Magento 2 + Cloudinary installation
Run the following commands to finalize the installation and verify the extension has been installed and enabled successfully:
Code snippet example
magento setup:di:compile
magento setup:static-content:deploy
magento cache:flush
[magentotest@newvps public_html]$ magento module:status Cloudinary_Cloudinary
Cloudinary_Cloudinary : Module is enabled
Image of above code snippet


Disable Magento 2 maintenance mode
With the installation is complete, ensure you disable the Maintenance mode, so we can move on to setting up and configuring Cloudinary from our Magento 2 Admin interface.
Cloudinary tutorial for Magento 2 setup step #3: configure Cloudinary on your Magento 2 store
Now that we have our Cloudinary account created and the extension installed, we can establish a connection between the account and our Magento 2 store.
Connect your Cloudinary account to your Magento 2 store
We first need to log in to our Magento 2 Admin Panel and navigate to Stores > Configuration. You will see Cloudinary added to the Configuration menu, as shown below. Next, choose Settings to open the extension configuration page:


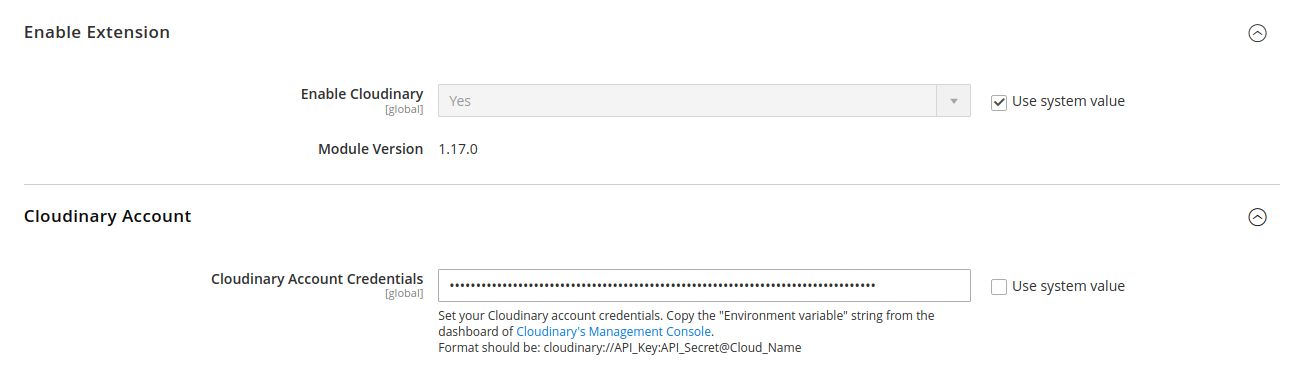
To link our Cloudinary account to the Magento 2 store, we need to provide our authentication information. To establish a connection, we need the API Environment variable value, which you can copy from your Cloudinary account dashboard:


Paste the API Environment variable into the Cloudinary Account Credentials field and make sure Enable Cloudinary is set to Yes. Now we can click on Save Changes to submit our connection details. That’s it, the connection is established!

Configure Cloudinary CDN
Now that we have established a connection between Cloudinary and our Magento 2 store, we can move on to the CDN configuration to make the best of the integration.
The first thing we want to enable is the auto-upload feature. By doing this, we can make sure any media that is already associated with our Magento 2 store is uploaded to Cloudinary when a visitor requests it for the first time after we have connected our store to the CDN. Any type of media that was uploaded to the website before will be delivered by the Cloudinary CDN. You can see all images and videos from the Cloudinary Media Library:


Default image transformations
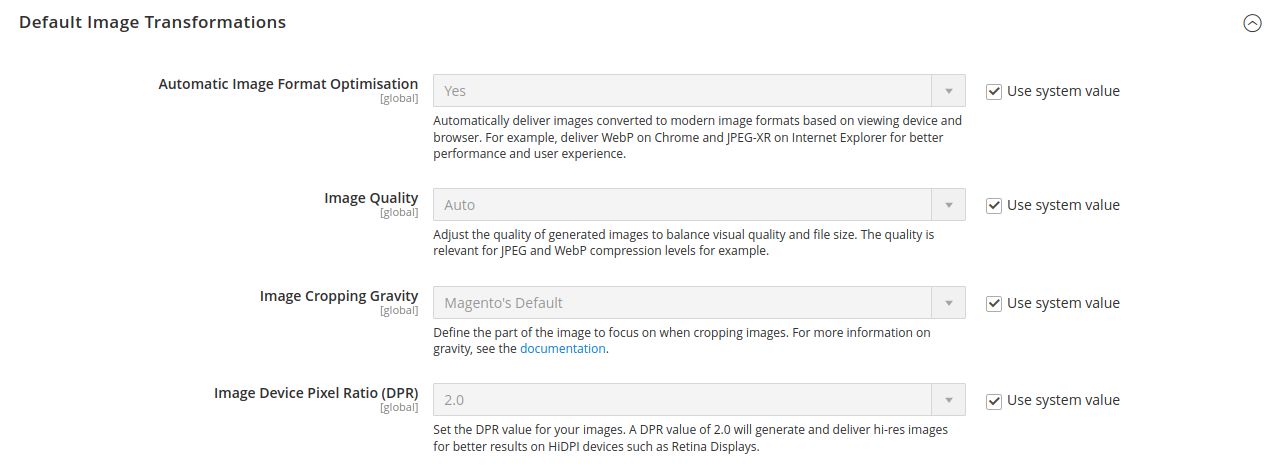
The Cloudinary configuration page has multiple options to customize the behavior of the Cloudinary CDN extension when delivering images and videos. The Default Image Transformations menu defines how images will be dealt with globally by providing multiple configuration options.
You can start by just using the default settings configured, as these are designed to meet the needs of most Magento 2 store owners. For example, the Automatic Image Format Optimisation option is already enabled, ensuring that the optimization of the delivery of images is based on the browser and device a visitor is using to view your store products.
The Image Quality setting set to Auto ensures the quality of the images served to your website visitors stays good while minimizing the image size and load times. In addition, you can explore more options to configure the image transformation taking all aspects of your Magento 2 store into account:

Product gallery
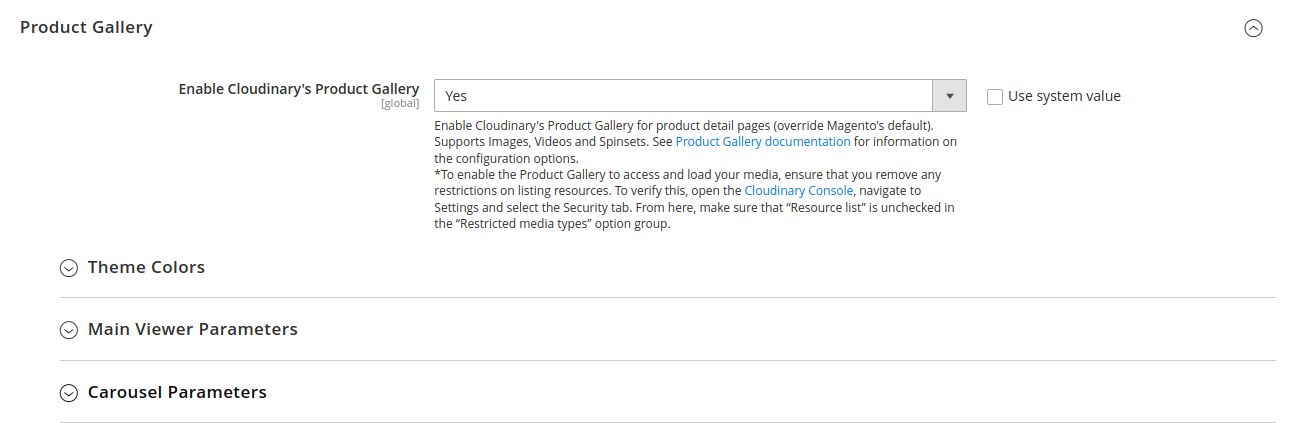
The Cloudinary CDN Product Gallery is disabled by default but can also be enabled and configured from your Magento 2 Admin Panel. The product gallery designed by Cloudinary provides numerous customization options to create the desired product detail page layout. Once enabled, Cloudinary's product gallery fully overrides the Magento 2 default one, which is essential to note. You can see all the customization options Cloudinary provides for setting up the product pallery from this configuration menu:

You will gradually become familiar with the Cloudinary configuration interface — and all features present — and will be able to make the best of what the Cloudinary CDN offers. As we mentioned, the default settings defined provide a great starting point for those who still need to learn what is necessary to use for their ecommerce website.
Conclusion: Magento 2 + Cloudinary — tutorial
Cloudinary is one of the best services you can integrate with your Magento 2 store. Providing all functionality of a Content Delivery Network (CDN), it goes even further offering a powerful cloud-based service for image and video storage and optimization.
You can sign up with Cloudinary completely free of charge, getting all functionality it presents. In addition, Cloudinary allows you to upgrade the plan anytime to get more storage, bandwidth, and content transformations as your business grows.
Nexcess hosting maximizes your store's potential
All the features and capacity you love in Magento hosting, without the hassle.
In this Cloudinary tutorial, we have covered the process of getting the CDN integrated with your Magento 2 store, including establishing a connection between your Cloudinary account and your Magento Admin Panel and customizing its functionality from there. You can enhance your Cloudinary user experience by enabling, modifying, or disabling all features introduced.
Nexcess Knowledge Base contains many tutorials to help you get the most out of the Magento 2 features and integrate the best software to improve your ecommerce store performance. We are proud to say that we keep pace with all technical advances and know precisely what your ecommerce business needs.
Our Managed Magento hosting is fully optimized for the platform making your website faster and more secure. Check out our fully Managed Magento 2 hosting plans to start today!
Recent articles
- Accessing the website database in the Nexcess Client Portal
- Modifying the PHP memory limit on cloud hosting plans
- DMARC email security: improving your email security infrastructure


