Google’s reCAPTCHA service defends websites against spam requests from bots and malicious users.
This article explains setting up and configuring the Google reCAPTCHA service with a corresponding plugin for your WordPress website, including how to generate Google reCAPTCHA keys. Readers should be aware of the fact that there are several plugins for WordPress that leverage the Google reCAPTCHA service, including:
- WordPress reCAPTCHA | Solid Security Pro
- Simple Google reCAPTCHA – WordPress plugin | WordPress.org
- Advanced Google reCAPTCHA – WordPress plugin | WordPress.org
- reCaptcha by BestWebSoft – WordPress plugin | WordPress.org
- Ultimate Member – reCAPTCHA – WordPress plugin | WordPress.org
- UsersWP – ReCaptcha – WordPress plugin | WordPress.org
The example Google reCAPTCHA plugin for WordPress documented in this article is the Simple Google reCAPTCHA plugin.
However, it should be noted that Nexcess customers using our Managed WordPress and Managed WooComerce solutions, get the Solid Security Pro plugin with WordPress reCAPTCHA functionality included for free — a $140 per year value.
About the Google reCAPTCHA free service
Google reCAPTCHA is a free software — it works by running an advanced risk analysis engine that generates adaptive challenges. Visitors to the website will be blocked from accessing certain functions until they complete the reCAPTCHA challenge. Malicious software can’t solve the challenges, so it can’t gain full access to your website and cause problems.
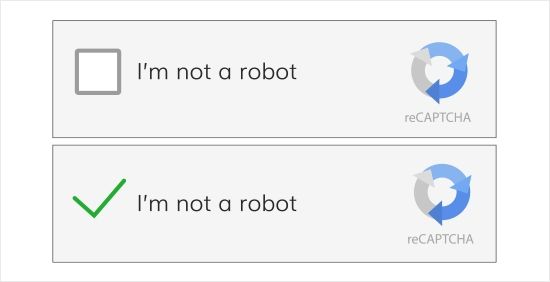
In the most common “CAPTCHA test,” users must check a box next to the text "I'm not a robot.” They’ll either pass the test immediately or receive a set of images; they must select the objects that match a text prompt, such as “traffic lights” or “stop signs” for example:
The benefits of using the Google reCAPTCHA service
Humans can usually solve CAPTCHA tests quickly, but bots (computer software) have difficulty understanding them. This difference is how CAPTCHA tests determine whether the user is a human or a robot. Therefore, by implementing reCAPTCHA, you prevent automated software from entering parts of your website.
It’s no coincidence Google reCAPTCHA is free. Google benefits from the removal of spam, which is why reCAPTCHA is made easily accessible. The plugin is quite simple to set up and integrate into WordPress for website owners to use on their contact forms, login sites, and comment forms.
About the free Solid Security Pro plugin with Google reCAPTCHA included
Solid Security Pro is a security plugin for WordPress which has many built-in features and smart defaults to help secure your site. You shouldn’t have to be a security professional to use a security plugin, so Solid Security Pro makes it easy to secure and protect your WordPress website free of charge for Nexcess customers.
Solid Security Pro plugin — a $140 value vs. the free Solid Security Basic plugin version
The paid Solid Security Pro plugin version includes all the free Solid Security Basic plugin version features, but the paid plugin version also has the following features: Security Dashboard, Two-Factor Authentication, Trusted Devices, reCAPTCHA, Version Management, User Security Check and User Logging, Settings Import and Export, Privilege Escalation, Passwordless Login, Malware Scan Scheduling, and Magic Links.
How to set up Google reCAPTCHA on a WordPress website
One of the simplest ways to increase the security of your WordPress website is to add a Google reCAPTCHA. Follow these steps provided below to configure WordPress with Google reCAPTCHA keys.
Step 1. Install and activate the Simple Google reCAPTCHA plugin
Go to your WordPress Admin Dashboard to install and activate the Google reCAPTCHA plugin for your WordPress website:
1a. From your WordPress admin sidebar, go to the plugins tab. Then click Add New.
1b. Using the search box, enter the “google recaptcha" text string and conduct a search.
1c. Locate the Simple Google reCAPTCHA plugin and install it.
1d. Once the plugin has finished installing, go back to the sidebar. Click on Installed Plugins.
1e. Locate the Google reCAPTCHA plugin and activate it.
1f. Go to the settings sidebar, then head to the Google reCAPTCHA tab.
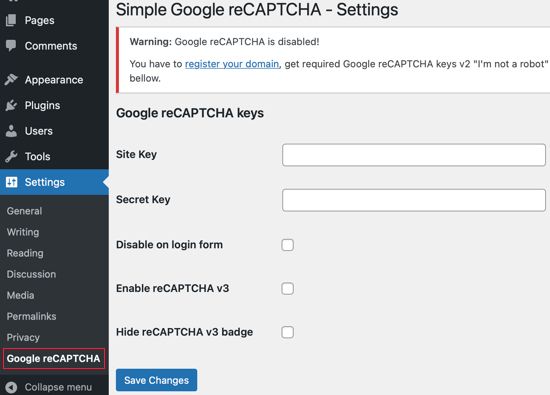
1g. The plugin will prompt you to provide your Google reCAPTCHA keys, which are obtained in the next step:
Step 2. Add Google reCAPTCHA keys to your WordPress website
You’ll need a pair of API keys to enable Google reCAPTCHA’s free service on your WordPress website.
Use this website to generate reCAPTCHA keys for free with Google. You must choose the type of reCAPTCHA you want to use before you can generate the keys. You have several ways to secure your website, including:
- reCAPTCHA v3 Invisible: An algorithm assesses the probability that the user is human.
- reCAPTCHA v2 Invisible: Performs background checks without requiring user interaction.
- reCAPTCHA v2 (Visible): In order to continue, the user must choose the "I'm not a robot" checkbox.
Once you have chosen which version of the software you want for your WordPress website, you can follow the steps below to generate the Google reCAPTCHA keys:
2a. At the top of the Google reCAPTCHA page, register your website.
2b. Enter a name for the label that identifies the keys for internal reference:

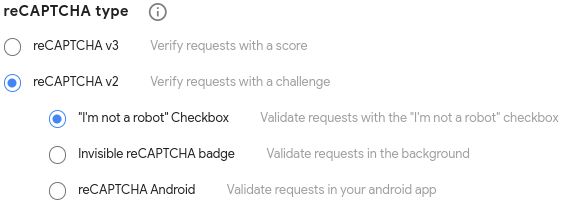
2c. For the reCAPTCHA type, choose the method that you want to use. For this Google reCAPTCHA example, we’ll pick the “I’m not a robot” checkbox from reCAPTCHA v2:
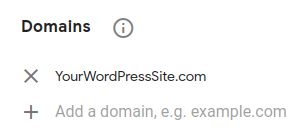
2d. In the Domains section, enter the URL address of your WordPress website:
2e. Accept the reCAPTCHA Terms of Service by selecting the checkbox:

2f. By checking the Send Alerts to Owners checkbox, you can be notified when Google finds problems or suspicious activity:

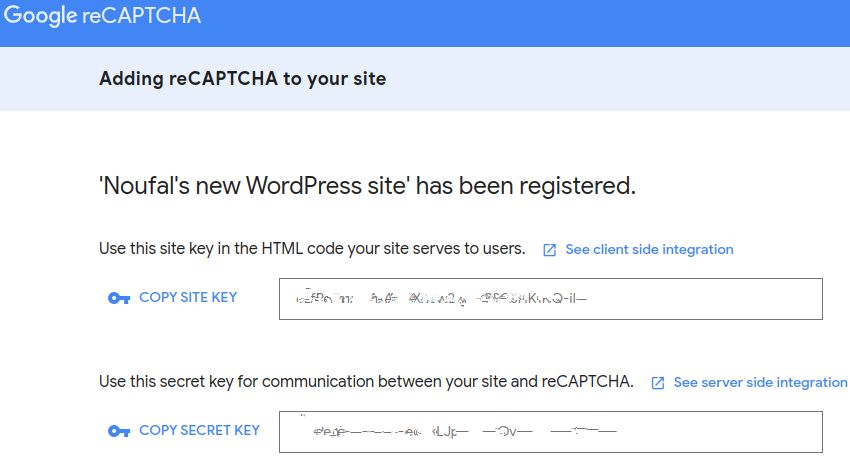
2g. Submit the form to finish your registration and receive your keys. Here’s an example of what the result should look like:
Step 3. Configure Google reCAPTCHA settings to protect your important pages
To add the Google reCAPTCHA keys to your WordPress website, take these steps:
3a. From your WordPress Admin Panel, go to the settings and find the Google reCAPTCHA section.
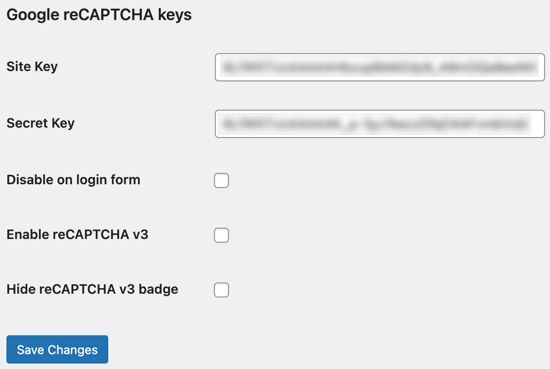
3b. Google reCAPTCHA keys — paste in the site key, then the secret key. You’ll also see options you can select based on your preferences. When you’re satisfied, save the changes. This stores the API keys (Google reCAPTCHA keys) and enables the Google reCAPTCHA service for your site:
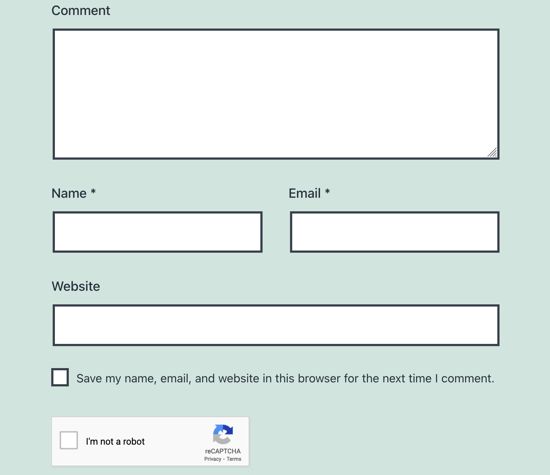
An example of Google reCAPTCHA verification implemented on a WordPress comment form
From now on, the plugin will add Google reCAPTCHA verification to any WordPress forms visitors use to register, comment, log in, and create or reset a password. For instance, here’s a Google reCAPTCHA example. This is what a WordPress comment form looks like with the plugin enabled:
Using Google reCAPTCHA to block malicious Internet traffic from your website
By using Google reCAPTCHA, you block malicious traffic from your website without negatively impacting your visitors’ experience. A safer website means users trust you. Since you’re safe from spam and attacks, you can grow without those hurdles in your path.
How does fully managed WordPress hosting work?
Fully managed means you can run your site without managing the technical details. Once you sign up, you won’t have to think about your WordPress hosting much — if at all. Our experts will migrate your site for free, or you can start building a new site with our page builder plugins in wp-admin. Simply point your site at our servers, connect your preferred services, and you’re hosted.
A verification method is only one step toward a fast, secure, and effective website. What’s the next step? You can always visit the website Nexcess Knowledge Board for the category of WordPress — or get a more personalized assessment by asking our WordPress solution experts. It takes much time to make all the changes needed to thrive in today’s market — which is why a good hosting plan offers WordPress upgrades straight out of the box.


