

For most business owners, our many sizes of Nexcess-managed hosting plans with ample flexibility offer the optimized resources they need to manage their websites and businesses. However, depending on your requirements, your website might need extra functionality. While you can ask your in-house IT team to develop a custom solution, a cloud container service is often better.
A cloud container service lets you add extra functionality to your cloud without any heavy lifting. Instead, you can just add the cloud container and get the functionality you want.
Cloud containers services at Nexcess
Cloud containers can be enabled for the following services at this time using the Elasticsearch, Varnish, RabbitMQ, and Apache Solr technologies when you host your website with Nexcess.
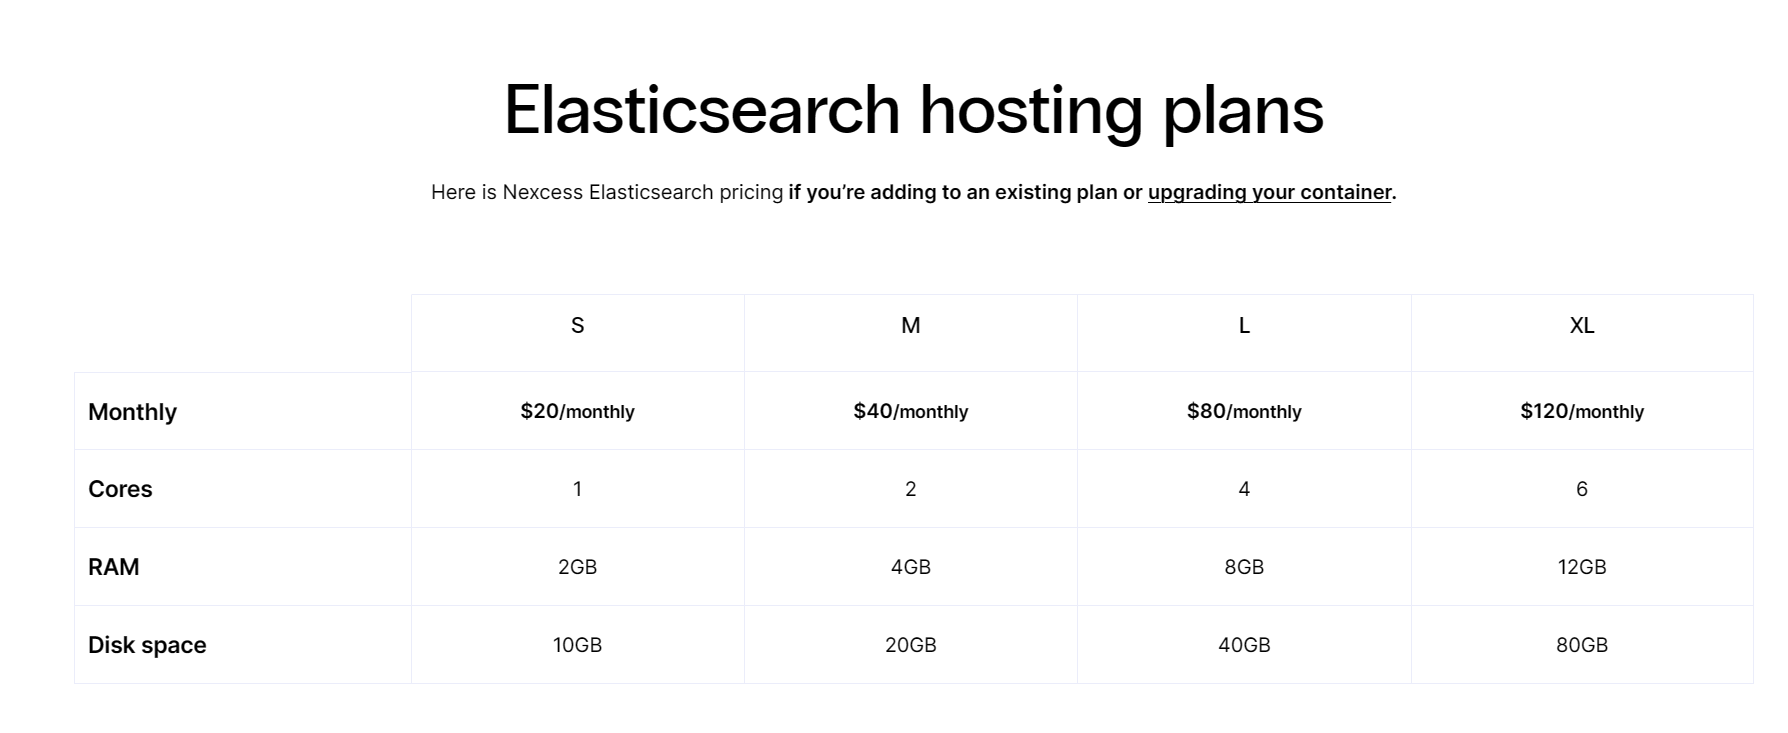
Elasticsearch cloud containers are the most popular of the currently available options at Nexcess. A variety of different versions are available, with new versions constantly being added. The Elasticsearch API provides some tools for accessing and troubleshooting Elasticsearch cloud containers at Nexcess.

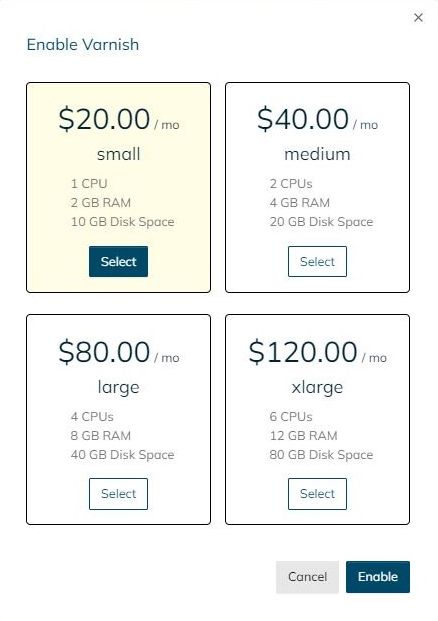
Varnish cloud containers at this time are tailored to only be used with Magento 2, as the Varnish Configuration Language (VCL) is customized for Magento 2. Enabling a Varnish cloud container and using it within the Magento is straightforward, however.
Read on to learn more about cloud container services, examples, and how to enable cloud container services in the Nexcess Cloud.
Here’s what we’ll cover:
- What is the purpose of cloud containers?
- What are some examples of cloud container services?
- Elasticsearch (ES)
- Varnish Cache (Varnish)
- RabbitMQ (Messaging Queue)
- Apache Solr (Searching on Lucene with Replication)
- How to enable cloud container services in the Nexcess Cloud
- Consider Nexcess web hosting services with optional cloud container addons
What is the purpose of cloud containers?
Cloud container services are standalone services you can add on to your cloud infrastructure to enhance functionality without worrying about the operating environment, integration issues, and required dependencies.
As a business owner, you can leverage cloud container services to get a specific benefit. For instance, you can use cloud container services to enhance the search functionality, add caching system, or balance load across the server.

As a developer, cloud container services let you add specific functionalities to your application without any strings. In addition, you don’t have to worry about any dependencies since a cloud container already contains all the required files to provide functionality.
What are some examples of cloud containers?
Cloud container services come in different forms and shapes. Let’s go through our four cloud container offerings at Nexcess:
- Elasticsearch (ES)
- Varnish Cache (Varnish)
- RabbitMQ (Messaging Queue)
- Apache Solr (Searching on Lucene with Replication)
See the next sections for more details regarding each cloud container technology available to Nexcess customers.
Elasticsearch (ES)
Elasticsearch (ES), first introduced in 2010, is an advanced search and analytics engine built on Apache Lucene. It’s a NoSQL database that’s entirely open source and created with Java.
Elasticsearch, in contrast to most NoSQL databases, heavily emphasizes search capabilities and features. The simplest way to acquire data from Elasticssearch to search for it by way of the robust Elasticsearch API.
ES is one of the most used cloud container services on Nexcess plans. With Magento 2.4.x versions, it’s a mandatory requirement since Magento now requires Elasticsearch as a catalog search engine:

Varnish Cache (Varnish)
Varnish, or Varnish Cache, is a web application accelerator that provides a scalable caching solution. You can install it in front of any HTTP server to cache the contents. As a cloud container service, you can deploy it on any infrastructure to benefit from its caching:
Varnish comes with its own configuration language, VCL, which offers incredible flexibility. For example, you can specify policies in VCL for how incoming requests should be processed:

RabbitMQ (Messaging Queue)
RabbitMQ is an open source communication broker that offers a safe and practical messaging system while giving your applications a common platform. In addition, it provides a very dependable, adaptable, and portable communications system:

As a powerful message broker, RabbitMQ can improve your website speed by decreasing the load on your MySQL server.
RabbitMQ also enabled asynchronous messaging in Magento 2. Now, web servers can react to queries by relaying them to a third party for processing rather than completing them immediately with message queuing. In other words, RabbitMQ helps you avoid resource-intensive queries and reduce the consumption of server resources.
Apache Solr (Searching on Lucene with Replication)
Built using the Java programming language, Apache Solr is an open source search engine with a vibrant development community, regular updates, and widespread use cases. It powers the search and navigation of many enterprise-scale websites:

Solr offers full-text indexing, database integration, and rich document (for example, PDF, Word) handling. Check out Nexcess Knowledge Base for more insights.
How to enable cloud container services in the Nexcess Cloud
Nexcess offers several cloud containers with valuable features to maximize a website's performance. Let’s see how you can enable containers in the Nexcess Cloud. Follow the steps below to get started:
1. Log in to your Nexcess Client Portal. You’ll need your login credentials. If you can’t remember your password, click Forgot Password? For more information, check out Nexcess Client Portal guide.
2. Go to the Plans area the user interface:

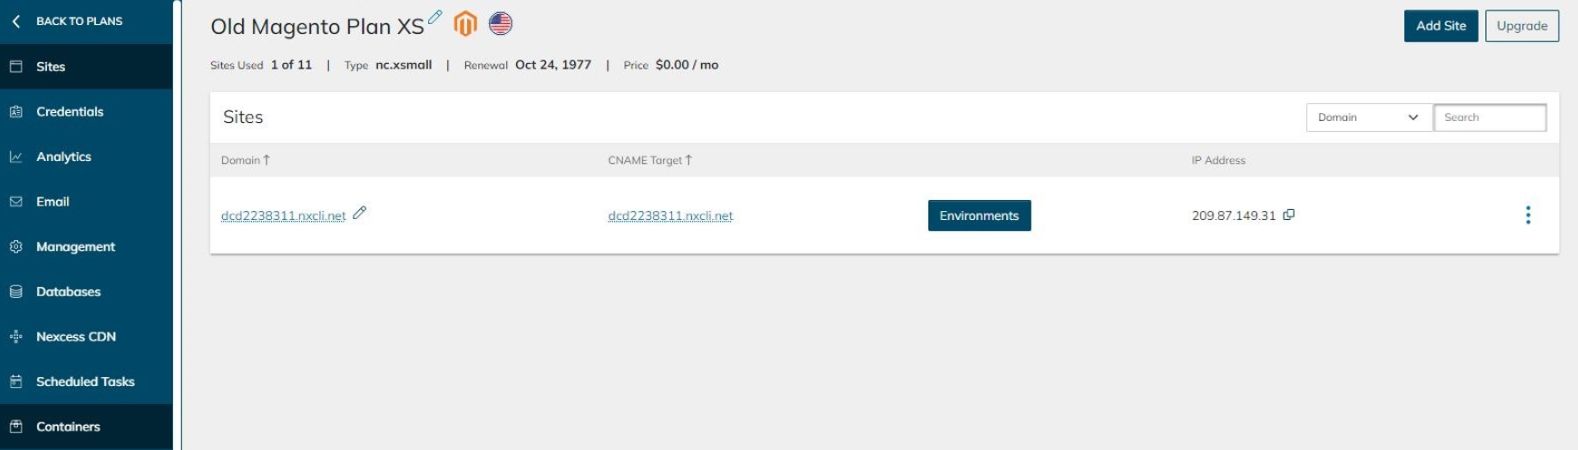
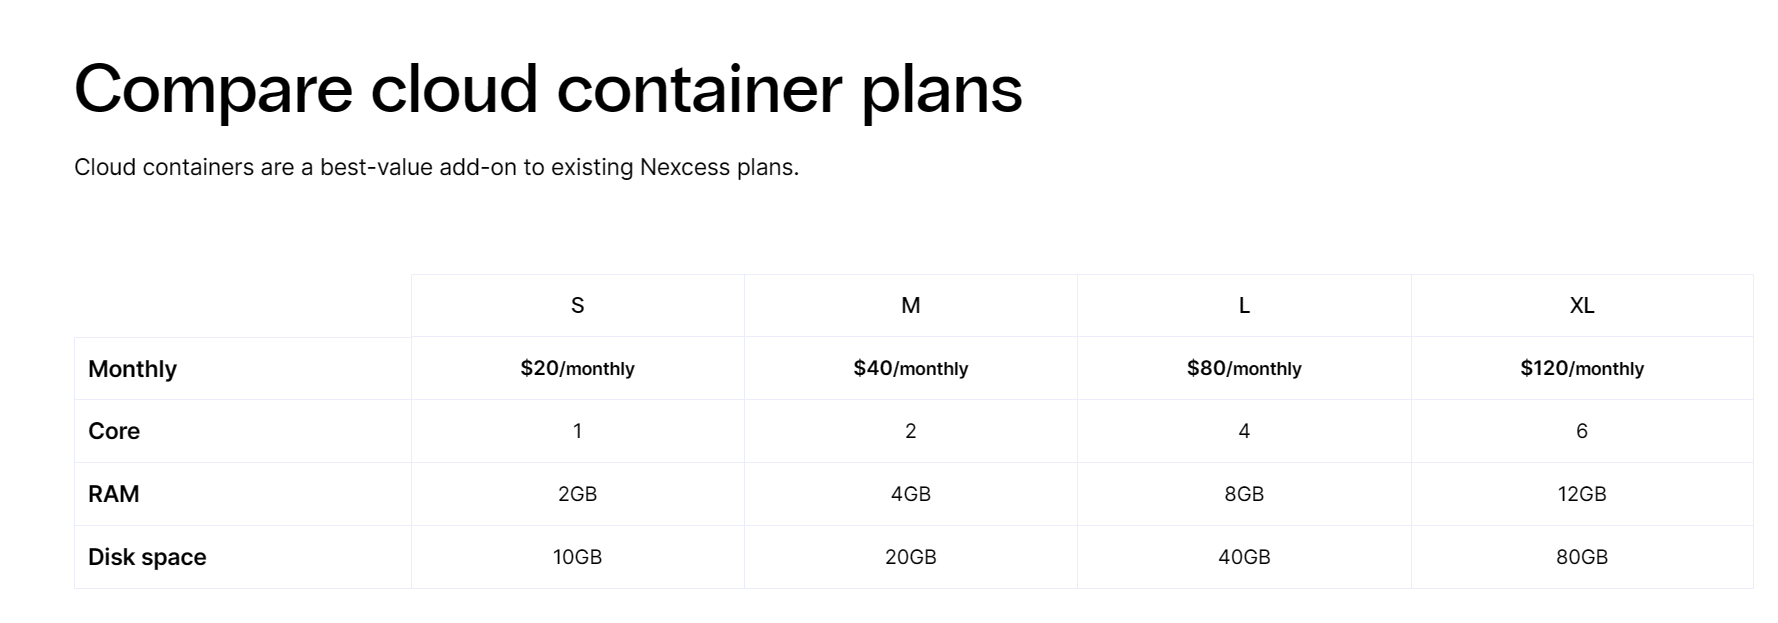
3. Navigate to the Containers screen. Depending on the plan, you’ll have a couple of options to select from:

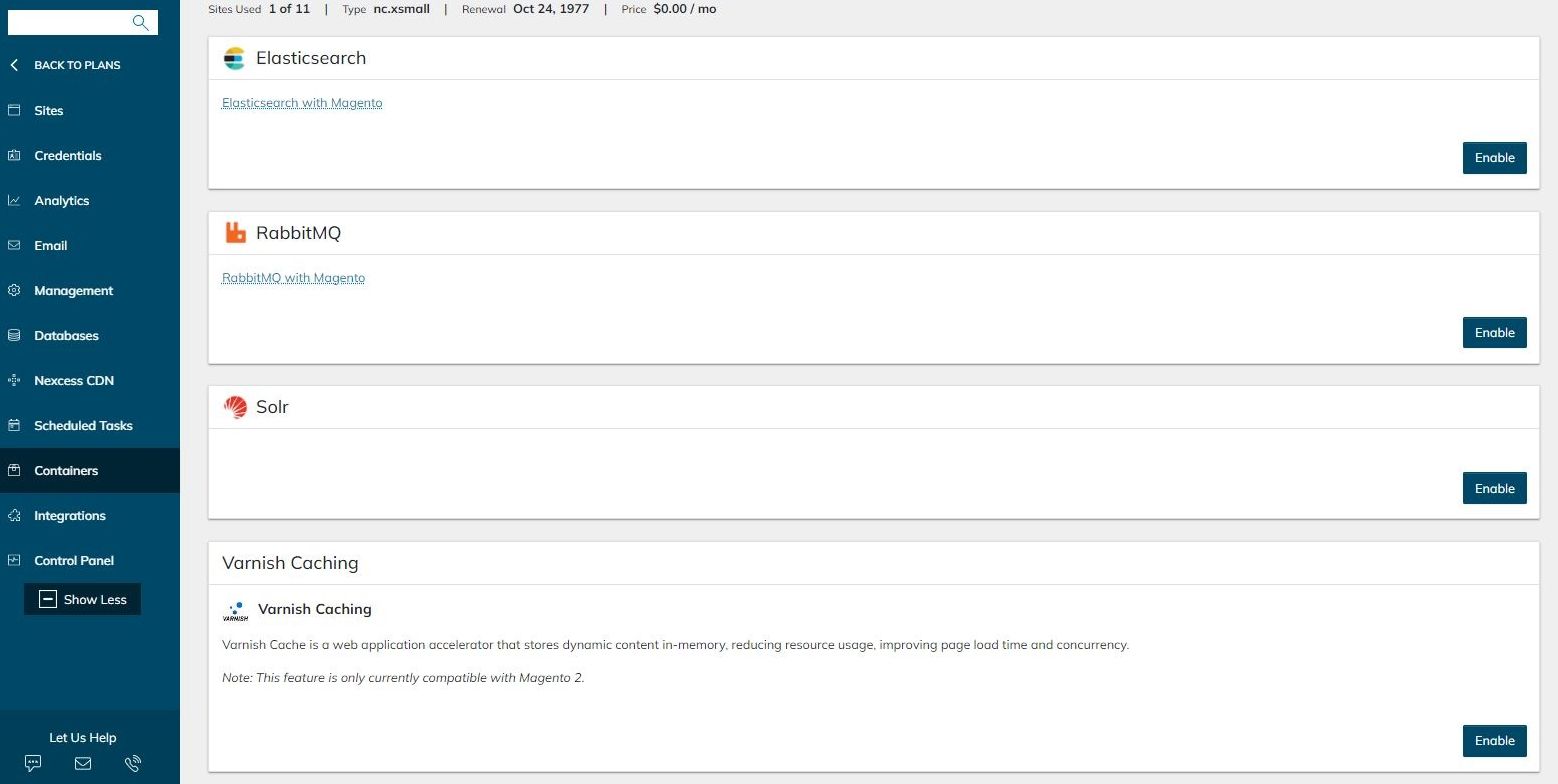
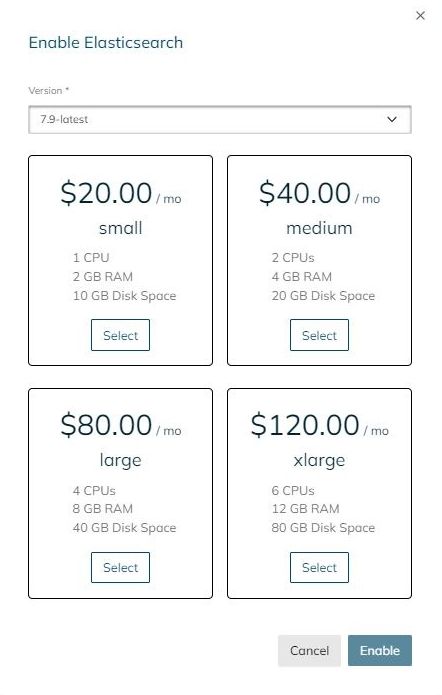
4. Click Enable to enable the corresponding container. We opted for Elasticsearch in the current example provided.
5. Select the version of the Elasticsearch software you want to enable:

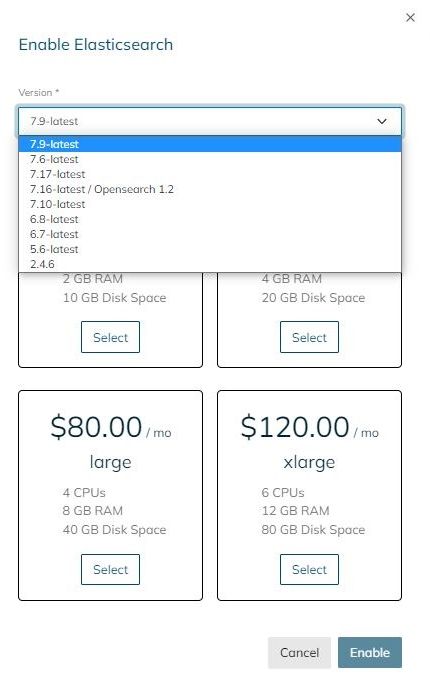
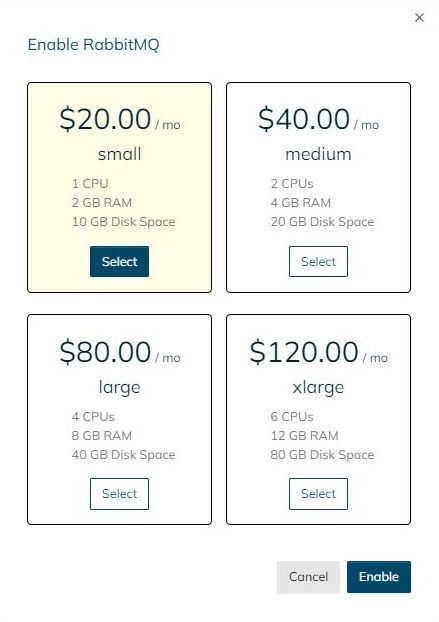
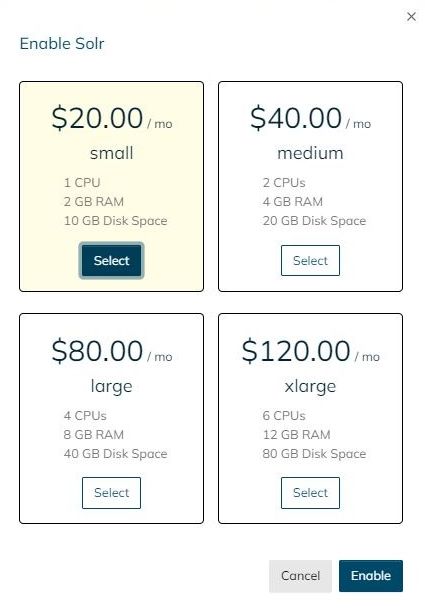
6. Select the container size you want to add to your plan and click Enable:
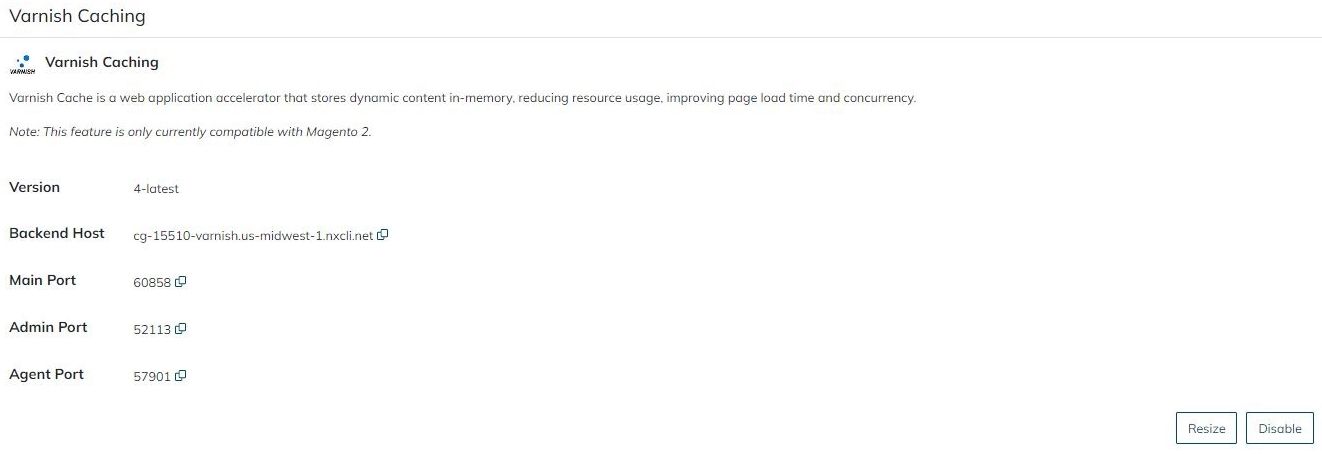
7. Once your container is enabled, you’ll see the configuration information you need to use for your Nexcess-hosted website that will leverage the addon cloud container services.
Elasticsearch


RabbitMQ


Solr


Varnish

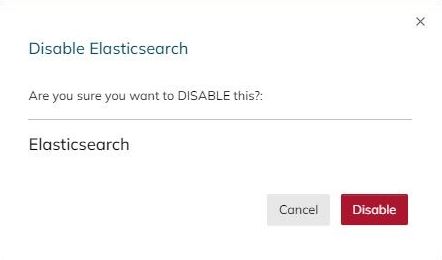
8. If you selected the wrong size (or version) of a cloud container, you could also disable it and re-enable the correct one:

Consider Nexcess web hosting services with optional cloud container addons
If you’re a growing business, you need a trustworthy business partner who understands your requirements and needs. At Nexcess, we offer flexible cloud and managed hosting plans for WordPress, WooCommerce, and Magento that grow with you. And if you need additional addons, we also offer smarter cloud containers as scalable extensions.
What are cloud containers?
Containers are units of software that can be added to your cloud solution to expand performance, functionality, and management. Cloud containers bundle code, dependencies, and libraries into a tidy, reusable format so it can run anywhere. They are lightweight, secure, and external instances that do not take resources from your main cloud solution.
In other words, by signing up with Nexcess, you get a reliable, trustworthy hosting partner who makes things easier for you. Not to mention, Nexcess offers 24/7/365 support with expert reps who’re always ready to help you should a problem arise.
Note about the original publication date
This article was originally published in September 2019. It has since been updated for accuracy and comprehensiveness.


