

Any modern and professional web presence of significance and scale will leverage the benefits of using a Content Delivery Network (CDN). Those of us working in online industries full time know a CDN is an essential part of any website's content delivery architecture. Without a CDN in place, the performance of your website will suffer — period.
A CDN will allow your site images, videos and assets — including JavaScript (JS) and Cascading Style Sheets (CSS) files — to be served from the CDN's Point of Presence (POP) nearest to the customer. Implementing the CDN improves load times for your site, which is it vital given that your site is constantly being ranked for how fast it is. For example, Time to First Byte (TTFB) is often used to rank a site with regard its end-to-end content delivery speed.
The good news is that all our Managed WordPress and Managed WooCommerce hosting plans for sites include the Nexcess CDN. In addition, our plans provide the WordPress CDN Enabler plugin by KeyCDN to facilitate the setup required to turn on your CDN in the context of your Nexcess-hosted website.
Understanding how a CDN speeds up your site
Many businesspeople wonder How a CDN works to speed up your ecommerce site? but they will discover that the reasons are remarkably straightforward. Review the content, resources, and links in the referenced article above to learn more about those reasons in full detail. Once you gain a good grasp of "the why," let's move on to "the how" in the sections below.
Nexcess-provided WordPress CDN Enabler plugin by KeyCDN
Nexcess customers will be happy to learn that all new Managed WordPress and Managed WooCommerce sites come with the WordPress CDN Enabler plugin by KeyCDN automatically preinstalled. The nuance to be aware of here is that although it comes in installed, it is not yet activated. In this article, we will walk through the steps involved with activation of this important WordPress CDN Enabler plugin for your WordPress site.
Step #1. Activate the WordPress CDN Enabler plugin
To activate the WordPress CDN Enabler plugin, follow these steps:
1a. Log in to your Nexcess Client Portal.
1b. Then, navigate to the WordPress Admin Panel for your site.
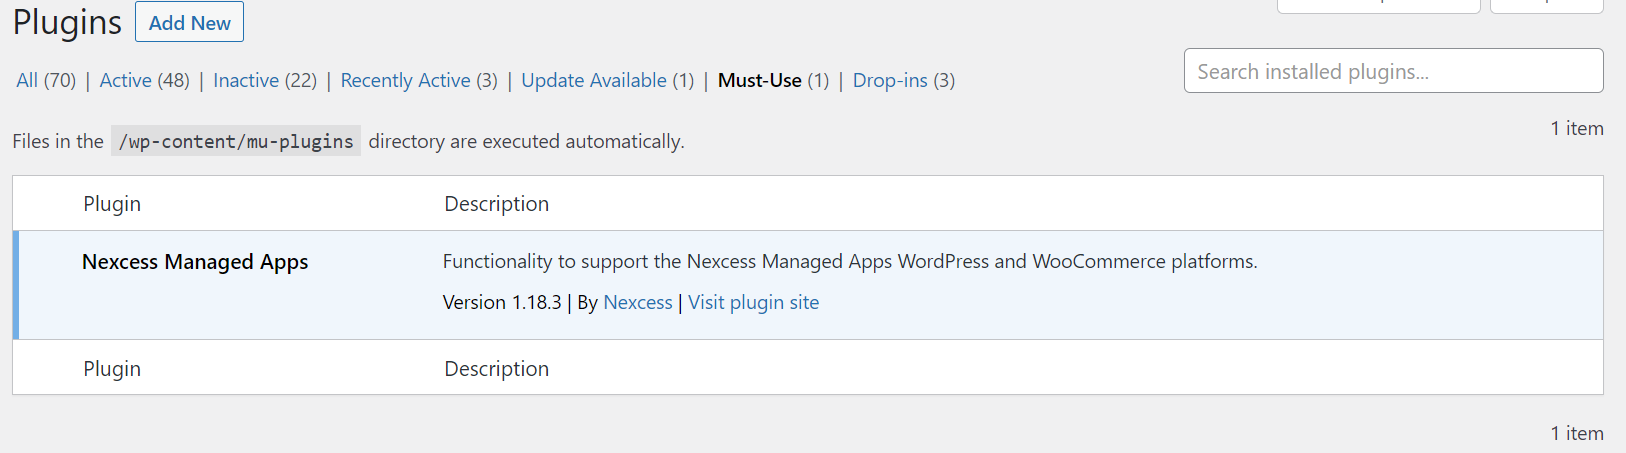
1c. From the admin panel, select Plugins and click the Add New button:

1d. Type the text string “cdn enabler” in the plugin search bar to the right of the Keyword ▼ button, which is located on the right side of the Add Plugins screen:

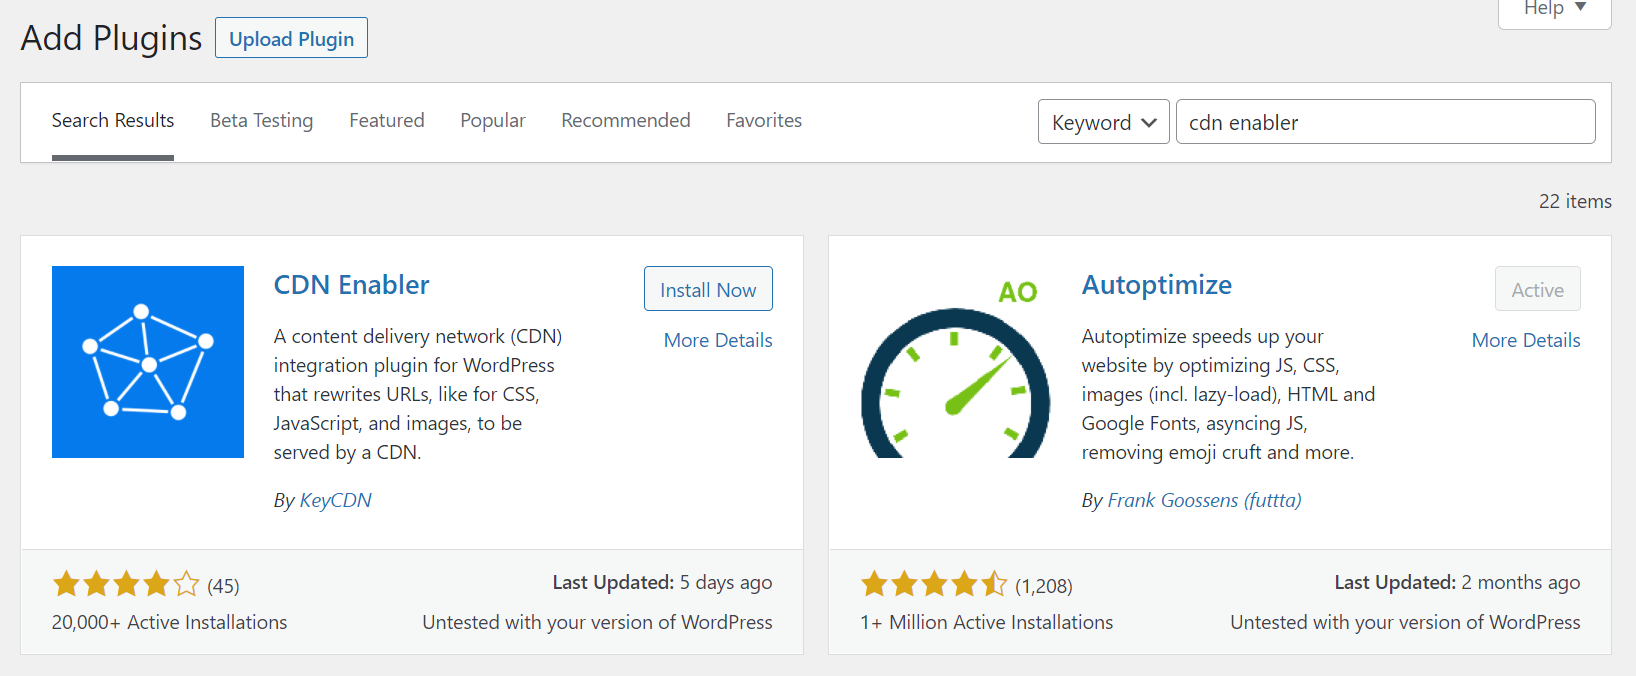
1e. The CDN Enabler plugin will be shown in the search results. In the CDN Enabler tile, click the Install Now button:


This step was included in case the plugin is not showing as already installed. But remember, it comes preinstalled with all Managed WordPress and WooCommerce plans we offer.
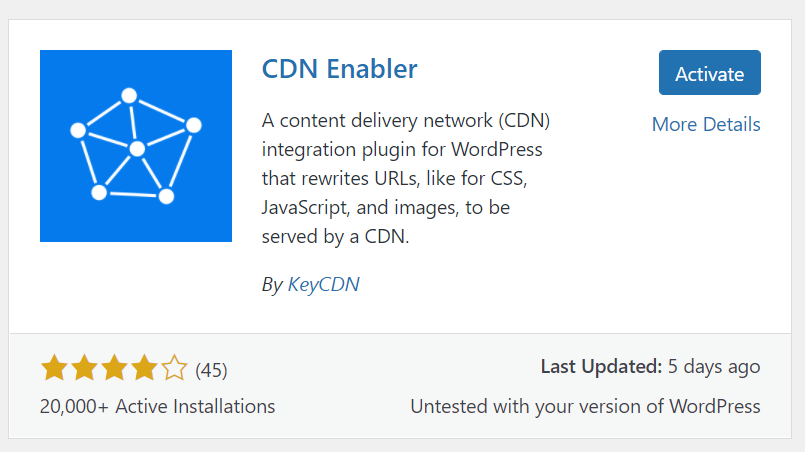
1f. If the WordPress CDN Enabler plugin is already installed on the site (as expected), then you will not need to install it. You can just activate it.
1g. When the installation completes or if the WordPress CDN Enabler was already installed (as expected), next you can click the Activate button within the tile:

Step #2. Configure the WordPress CDN Enabler plugin
This part of the process covers the proper configuration of the WordPress CDN Enabler plugin. Follow the steps below:
2a. From your WordPress Admin Panel, select Settings > CDN Enabler.
2b. In the CDN Hostname text box, type your CDN hostname or copy it from the Nexcess Client Portal:


2c. When copying your CDN hostname from the Nexcess Client Portal, you can find the CDN hostname information in the Content Delivery Network section under the Performance tab. An example is shown below.
Example:
eadn-wc01-693205.nxedge.io
2d. If you are using the Nexcess CDN on a live domain that matches the site domain set in the site plan, then set that detail in the CDN Enabler settings area. Remember to click the Save Changes button after you do.
2e. Note that the Nexcess CDN endpoint no longer needs the /cdn value included to work as expected.
2f. Please review the following sections very carefully to fully understand more about the Autoptimize plugin and when to purge/clear/flush the Nexcess CDN:
- Step #3. Configure the Autoptimize plugin — optional
- Step #4. Why would you need to purge the Nexcess CDN?
In most cases, there is a need to clear the cache even if your decision was not to configure the Autoptimize plugin. For more information, see the sections below.
Step #3. Configure the Autoptimize plugin — optional
If you are using the Autoptimize plugin on your site, you will need to update the CDN Base URL field in the settings for the Autoptimize plugin. Doing so allows Autoptimize to serve minified JS and CSS from the CDN.
Here are the steps involved:
3a. From your WordPress Admin Panel, select Settings > Autoptimize.
3b. In the CDN Base URL text box, type your CDN origin URL:

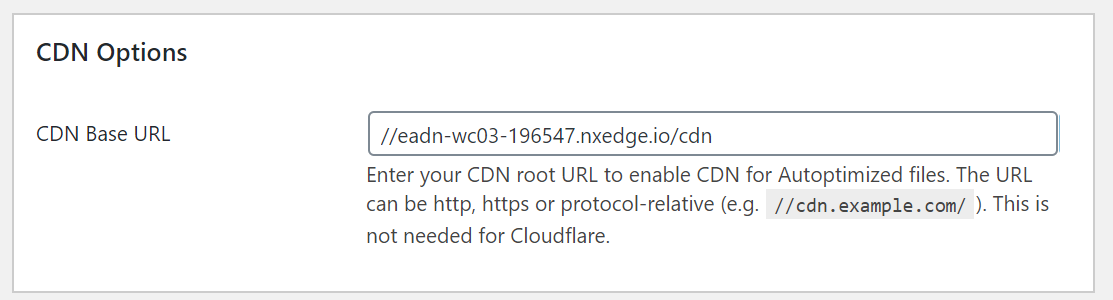
3c. Next, click the Save Changes and Empty Cache button:


3d. When you are testing your site with the Nexcess CDN turned on using GTmetrix or WebPageTest, it should be tested from multiple continents.
3e. If you're testing from a geographical region close to the origin server, the performance benefit will not be as apparent as it would if the speed test was done using a different region of the world.
3e. If you do need to purge/clear/flush the content being stored in the Nexcess CDN, you can do so directly from the Nexcess Client Portal with the options shown using the Performance tab. This purge process is explained in more detail in the following section.
Step #4. Why would you need to purge/clear/flush the Nexcess CDN?
If you do not see recent content changes made to your site for rendered assets that are being served from the Nexcess CDN, then you should purge/clear/flush the CDN, clear your browser, and retest your site.
Here's how:
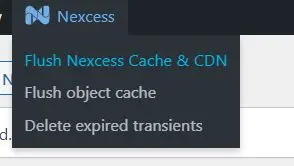
4a. The Nexcess CDN can be purged/cleared/flushed in the admin bar inside of the dashboard of your WordPress site and also directly in the Nexcess Client Portal.
4b. Click the Nexcess logo, followed by the Flush Nexcess Cache & CDN option in the dropdown menu as shown in the image below:

4c. If you are using the Nexcess CDN on your site, then you can also purge/clear/flush the CDN directly from the Performance tab in the Nexcess Client Portal:

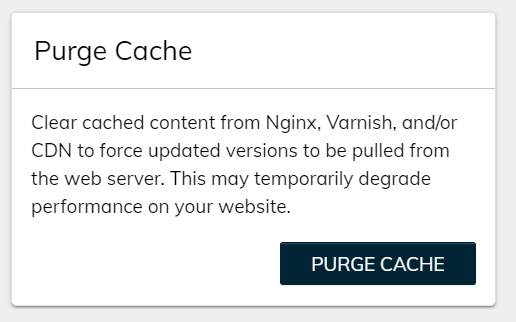
4d. Click the Purge Cache button to do the needful.
Nexcess staff is available to help 24/7
If you run into issues using the current version of the WordPress CDN Enabler plugin on your site, please contact our technical support staff. For 24-hour assistance any day of the year, contact our Nexcess Support Team by email/chat or through your Nexcess Client Portal.
Connect to our Nexcess Edge CDN
Improve page speed with our purpose-built Content Delivery Network (CDN). Our edge network is integrated into our platforms for easy use without configuration complexity.
Note about the original publication date
This article was originally published in December 2019. It has since been updated for accuracy and comprehensiveness.
Related articles
- Nexcess Edge CDN — Content Delivery Network
- Enable CDN: Nexcess CDN access in the Nexcess Client Portal
- How to reconfigure your site from using CDN


