How Nexcess clients on physical (non-cloud) servers can manually install Joomla.
1: Download Joomla
Download Joomla from their website.
- Extract the file, and note its location on your computer.
2: Configure FTP credentials to transfer the Joomla files
ATTENTION: If you already have Nexcess FTP credentials, skip to the next section.
- Log in to your SiteWorx control panel.
- If you do not know your password, click Forgot your password on the login page.
- If you do not know the web address for your SiteWorx login page, either refer to your Welcome Email or contact our 24/7 support team for assistance.
- From the SiteWorx main menu, click Hosting Features > FTP > Accounts.
 ATTENTION: In Step 2C, note the username and password you create for use in Step 3.
 - In the Add an FTP Account section, fill the FTP Username, Password, and Confirm Password fields, then click Add.

Step 3: Transfer Joomla files to your Nexcess server
Your exact method of transferring files will vary according to your choice of application. Whatever the method, you will need the username and password you created in Step 2C. For detailed instructions and an example using Cyberduck, see How to transfer files to a server with SFTP.
Step 4: Configure your database
- From the SiteWorx main menu, click Hosting Features > MySQL > Databases.

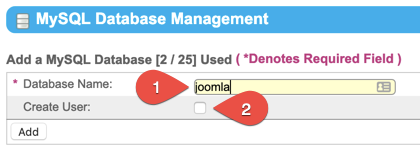
- Fill the DatabaseName field, though we recommend "joomla" Select the Create User check box.

- Fill the Username field, though we recommend "joomla." Fill the Password and Confirm Password fields, or click Generate. Note this information for use in Step 5. Verify all MySQLUserPermissions are selected, then click Add when ready.

Step 5: Configure Joomla
ATTENTION: Your actual screen images may vary.
- Navigate to your domain, along with the path of your Joomla installation. For example, if your domain is example.com, and your Joomla installation is Joomla, go to: example.com/joomla.
- When prompted, select your preferred language.
- On the Main Configuration page, fill all fields.

- If you are developing a site or do not want public access, set the Site Offline toggle to yes.
- Click Next.
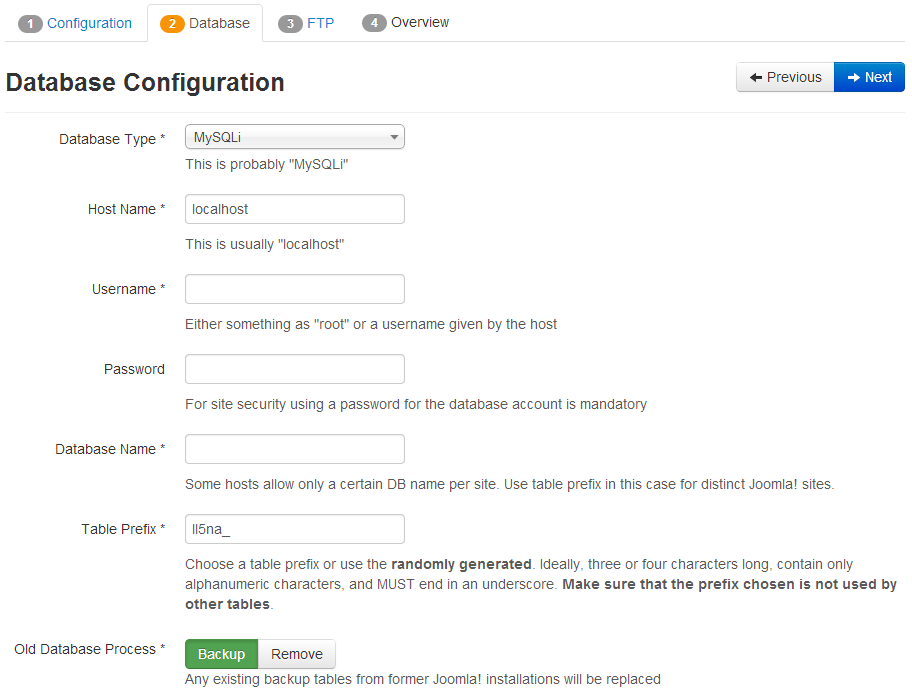
- On the Database Configuration page, enter the database credentials you created in Step 4C. Click Next when ready.

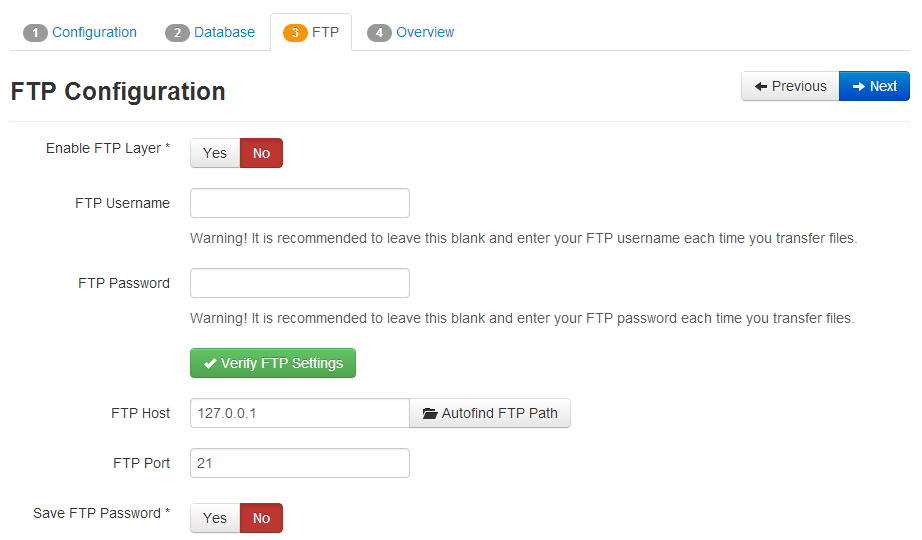
- On the FTP Configuration page, leave all fields empty for security reasons, then click Next.

- The Finalisation page provides several options. You may adjust these as desired, or leave them on their default settings. Click Install when ready.

For 24-hour assistance any day of the year, contact our support team by email or through your Client Portal.


