Using phpMyAdmin
Learn about how to access phpMyAdmin from What is phpMyAdmin?, then begin at Step 3.
1. Log in to your portal.
- If you do not know your password, click Forgot your password on the login page.
- If you do not know the web address for your SiteWorx login page, either refer to your Welcome Email or contact our 24/7 support team for assistance.
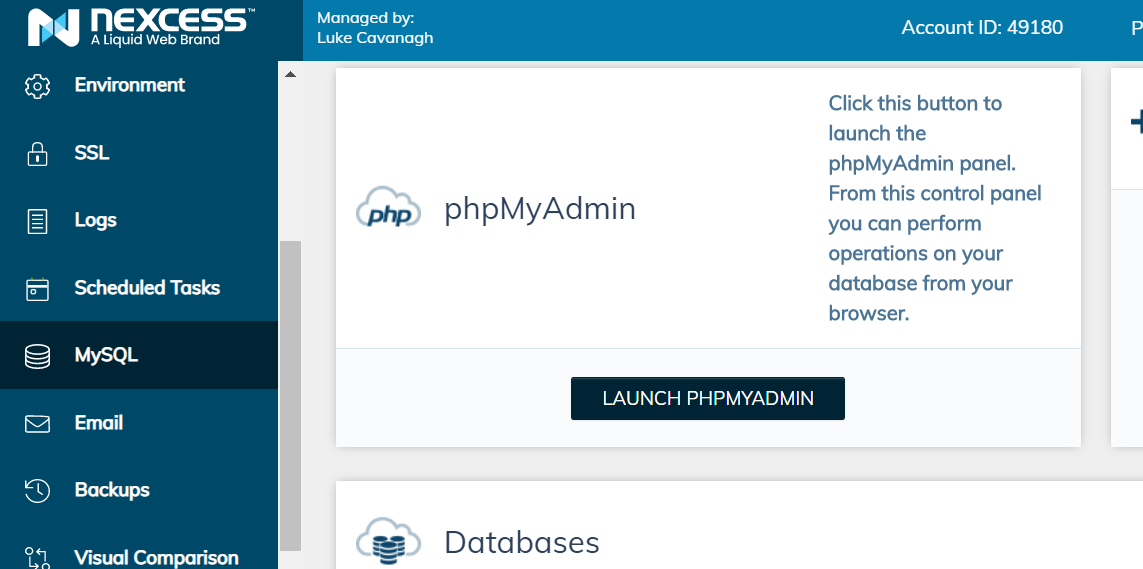
2. From the portal got to the plan and the site, then select MySQL > PhpMyAdmin.

3. You will need to click on the LAUNCH PHPMYADMIN button to load phpMyAdmin for your site.
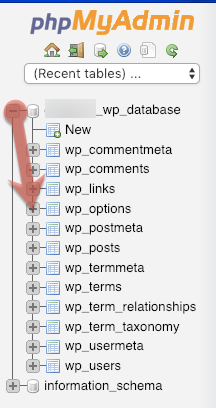
4. From the main menu, select the desired database, then click wp_options.

5. In the main table, locate the wp_options table.

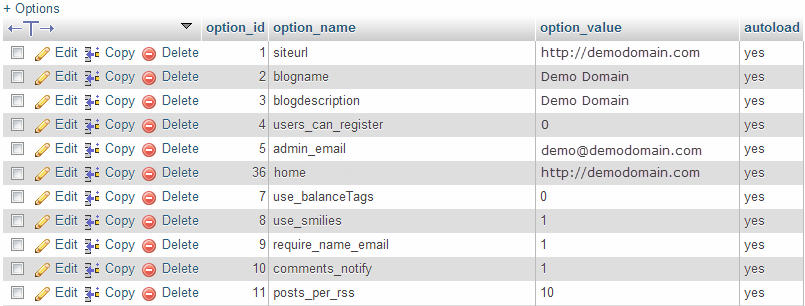
6. In the option_name column, locate the siteurl entry and click the corresponding Edit option.

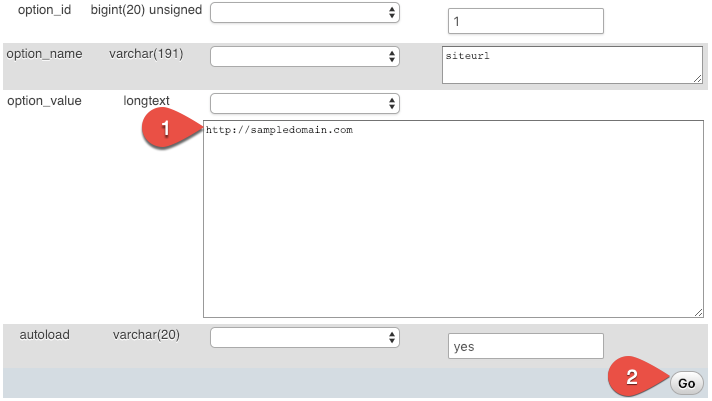
In the option_value field, enter the URL, then click Go.

7. Under the option_name column, locate the home entry, and corresponding Edit option.

As in Step 5, in the option_value field, enter the URL, and then click Go to save the change.
8. If you have a WordPress caching module, flush the module's cache, and the new URLs should work correctly.
Using the command line (CLI)
This method requires SSH access. First see How to enable SSH access. If you are a Nexcess Cloud client, SSH access is on by default.
- Log in to your server, using SSH credentials provided from the portal of your site.
- Enter your MySQL database by executing the below command, but replace the angled brackets (<>) and everything between them with the name of the WordPress database:use <database>
- Execute the following commands, replacing the angled brackets (<>) and everything between them with the indicated information:UPDATE wp_options SET option_value = replace(option_value, 'http://www.<old_url>', 'http://www.<new_url>') WHERE option_name = 'home' OR option_name = '<siteurl>';UPDATE wp_posts SET post_content = replace(post_content, 'http://www.<old_url>', 'http://www.<new_url>');UPDATE wp_postmeta SET meta_value = replace(meta_value,'http://www.<old_url>','http://www.<new_url>');
- If you have a WordPress caching module, flush the module's cache, and the new URLs should work properly.
Using WP-CLI
Log in to your site's server using the SSH creds in the portal. In order to be able to use WP-CLI, you will need to be using Terminal (Mac) or Putty (Windows).
lscd public_html
You have to be in the valid folder of the WordPress install in order to be able to use WP-CLI commands.
The WP-CLI commands to use will be as follows;
wp search-replace '73955dabdf.nxcli.net' 'sitedomain.com' --recurse-objects --skip-columns=user_email,guid --all-tableswp search-replace 'https://73955dabdf.nxcli.net' 'https://sitedomain.com' --recurse-objects --skip-columns=user_email,guid --all-tableswp option update home 'https://sitedomain.com'wp option update siteurl 'https://sitedomain.com' wp rewrite flushwp cache flush
You will need to replace sitedomain.com with the actual live domain that are you going to change to. For long-term assistance, Nexcess offers managed WordPress hosting options so you can focus your attention elsewhere.
For 24-hour assistance any day of the year, contact our support team by email or through your Client Portal.


