


How Nexcess clients with Dedicated, VPS, or Reseller accounts can configure custom nameservers, provided Nexcess was the registrar for their domain.
What you need…
A dedicated, VPS, or Reseller account with Nexcess
A domain that used Nexcess as the registrar. If Nexcess was not the registrar, contact that registrar's support team for assistance.
Step 1: Create nameservers
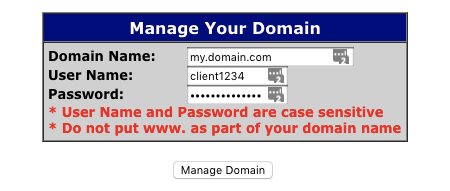
Log in to the OpenSRS control panel. Enter your Domain Name, User Name, and Password, then click Manage Domain. If you are unsure of your login information, contact our 24/7 support team.
Scroll down to click Domain Locking. If your domain is set to Disable, go to Step C. If it is set to Enable, click Disable, then Submit.

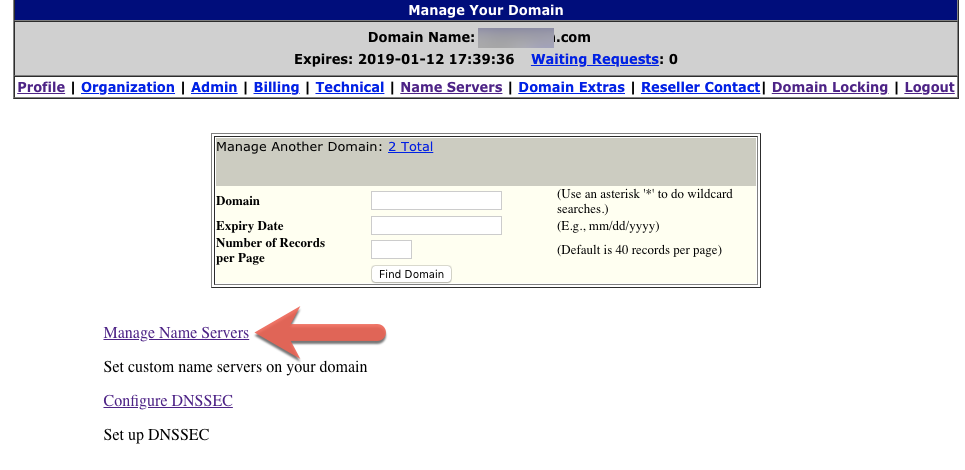
At the top of the main page, click Name Servers.

Click Manage Name Servers.
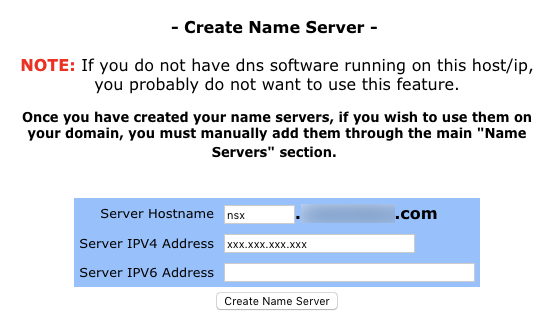
Near the bottom of the page, where it says “If you want to create or modify a nameserver which is based on yourdomain.com, click here,” click as directed.

- In the Create Name Server section, enter the Server Hostname and Server IP Address, then click Create Name Server. If you do not know this information, contact our 24/7 support team.
Step 2: Configure nameservers in NodeWorx
- Log in to NodeWorx.
- If you do not know your password, click Forgot your password on the login page.
- If you do not know the web address for your NodeWorx login page, either refer to your Welcome Email or contact our 24/7 support tTeam for assistance.
- Specify the primary, secondary, and tertiary nameservers as necessary:
- If this is your first time logging in to NodeWorx, you will be prompted to specify Primary, Secondary, and Tertiary nameservers.
- If you are not prompted to specify any nameservers, access the DNS Management page from the main menu: System Services > DNS Server > Overview.

- Click Update.
Step 3: Add A records
After specifying your nameservers, create an A record for each one.
- From the NodeWorx main menu, click System Services > DNS Server > Zones.
- Click Records next to the domain name servers you registered.
- From the Add a new: drop-down list, select A, then click Go.

- In the Host field, type the name of the primary name server you created in Stage 2, Step 2.

- Leave TTL field default as 43200 (see above).
- In the IP Address field, type the IP address registered with the name server.
- Click Save.
- If necessary, repeat Steps 3-7 for your secondary and tertiary custom nameservers.
For 24-hour assistance any day of the year, contact our support team by email or through your Client Portal.


