
Moving your WordPress site to a new domain is a great way to shake things up and keep your website fresh.
Maybe you want to switch to a new host or would like a new domain name. Whatever your reason for wanting to transfer domains, correctly doing it requires careful preparation and precision.
The last thing you want is for your visitors to experience broken links or missing content when they visit your newly migrated site.
To ensure a smooth transition, we’ve put together this step-by-step guide on how to move a WordPress site to a new domain. We’ll cover everything from backing up your existing website to transferring WordPress files and setting up a new WordPress database.
Plus, we'll offer troubleshooting tips and advice on avoiding common WordPress migration issues along the way.
Here’s what we’ll cover:
- Step 1: Back up your existing website
- Step 2: Transfer files from old domain to the new domain
- Step 3: Set up the new database
- Step 4: Troubleshoot common issues
- Step 5: Go live with the new domain name
- Step 6: Perform an initial maintenance check
- Final Thoughts: How to easily move your WordPress site to a new domain
Step 1: Back up your existing website
When it comes to moving a WordPress site to a new domain, you want to ensure that the transition is smooth and secure. After all, you don't want to lose any of your hard work in the process.
That's why it's absolutely essential that you back up your WordPress website before you attempt to move it. That way, you can rest easy knowing you have a complete and secure copy of your website should anything go wrong during the transfer.
You can back up your WordPress website using several methods. Let's go over a few of the most popular options.
Using a backup plugin
One of the easiest ways to back up your WordPress website is by using a backup plugin like Solid Backups, BlogVault, or UpdraftPlus.
These plugins will automatically create and store your backups for easy access in case you need them later.
As an example, here are the steps to back up your site using BlogVault:
- Sign up on the BlogVault website.
- Install and activate the plugin on your WordPress website.
- Let the plugin automatically back up your entire website.

Once you've finished the above steps, you can rest assured that your website is backed up safely and securely.
Running FTP backups
Another way to back up your WordPress website is through FTP. This involves making a copy of all the files and folders on your hosting server.
You'll need an FTP client program like Cyberduck or FileZilla to do this. Once you've downloaded the program, connect to your server using the credentials provided by your hosting provider.
Once connected, you can manually select the website files and folders you want to back up and transfer them to your computer for safekeeping.
Experience fully managed WordPress
Power your site with the industry's most optimized WordPress hosting
Using a hosting provider’s backup options
Some hosting providers offer their own tools to back up your website, which will be integrated with their control panel.
For example, if you're using cPanel as your control panel, then you can use the Backup wizard to make a copy of your WordPress website.
Once you've backed up your existing website, you can move on to the next step: transferring files.
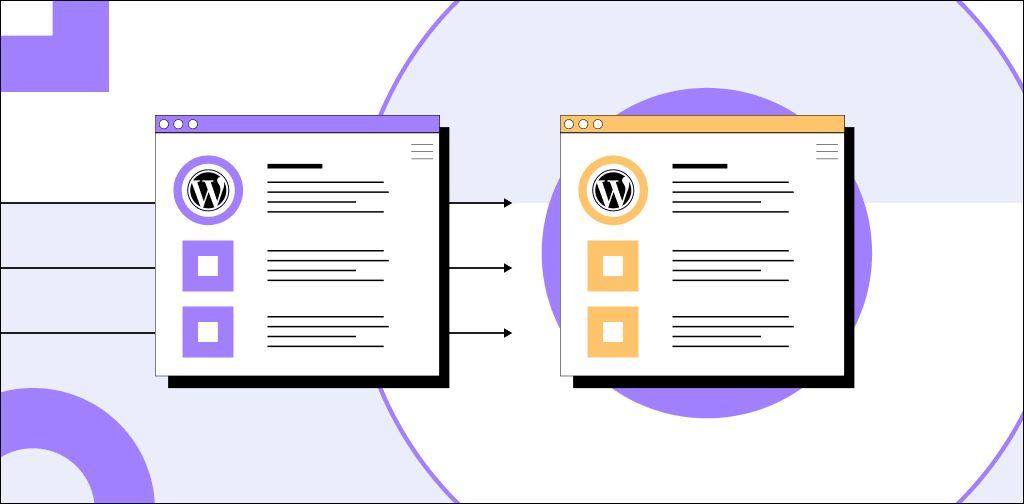
Step 2: Transfer files from the old domain to the new domain
Once you have a complete backup of your website, it’s time to transfer the files and databases from the old domain name to the new domain. This can be done via FTP or by using a WordPress plugin.
Using an FTP client
Do you want to use an FTP client for your WordPress migration? If so, all you need to do is connect the old and new domains using the credentials from your web hosting provider.
You have to configure the connection settings for both the old and new domains. Then, you can transfer the files from one domain to the other.
Using a WordPress plugin
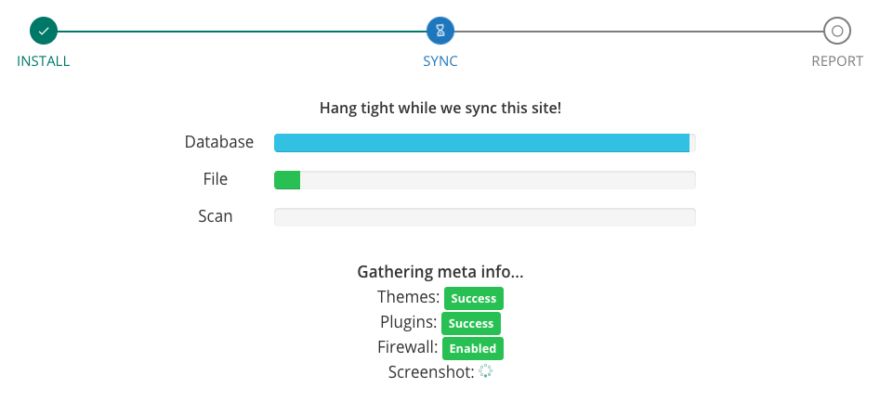
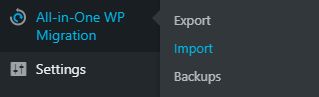
Do you want a more secure and hassle-free way to transfer your files and databases? In that case, using a migration plugin like All-in-One WP Migration is a good option. Another option is the Duplicator plugin.
These plugins will automatically generate a package of your WordPress website’s files and databases and then transfer them to the new domain.
Using a plugin to transfer your files and databases typically involves the following steps:
- Install it on both the old and new domains.
- Export your old site.
- Import it to your new domain.

Making sure that you have safely and correctly transferred your data is a crucial step in the WordPress migration process. Double-check that all of your files transferred and that you haven’t missed any steps before moving on.
Step 3: Set up the new database
Next, you'll need to set up a new database for your website on the new domain. By doing this, you can ensure that the data from your old website is properly stored on the new one.
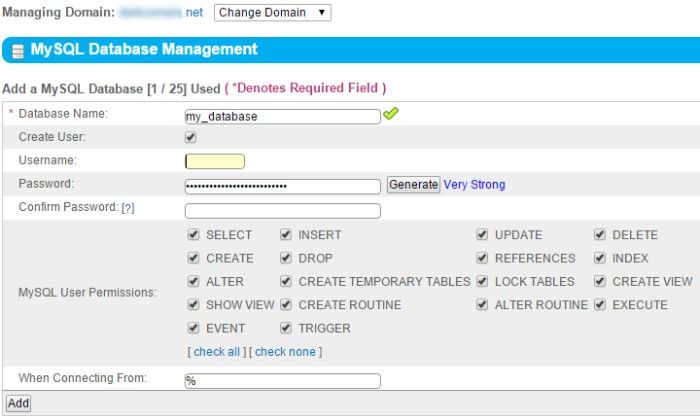
To begin, log in to your web host control panel and create a new database name. Make it unique, typically something specific to the website.
You'll need to create a new database user and grant the necessary permissions if you’re using a MySQL database.

Once you're done creating a new user, you'll need to edit the configuration file of your WordPress website and update it with the new database credentials. This includes the database host, your username, and your password.
Finally, you need to import the data from your old website into the new database. You can do this by using a tool like phpMyAdmin.

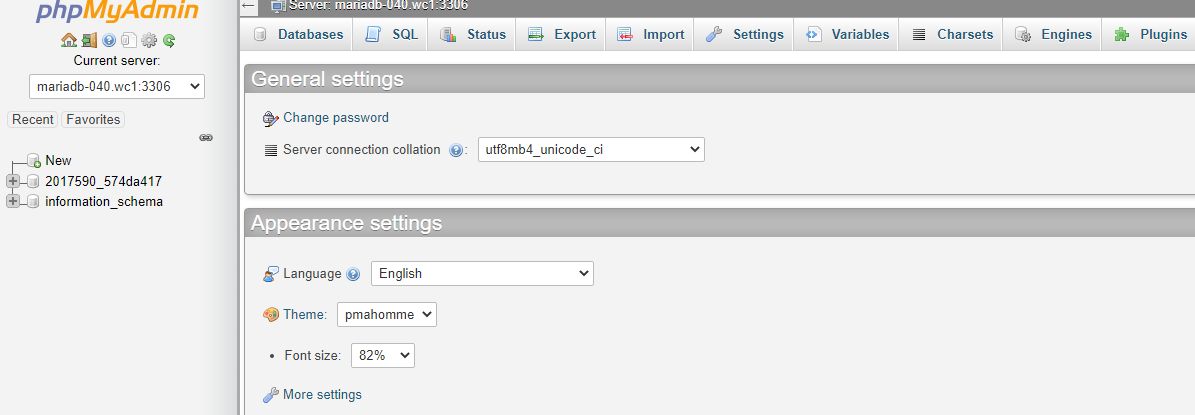
Once you have imported the data, you should be able to see your content in the database.
Step 4: Troubleshoot common issues
When moving your WordPress website to a new domain, it's essential to double-check each step thoroughly before going live with the updated setup. This will help ensure that visitors don't encounter any errors when they navigate pages within the newly transferred website.
But you also need to be familiar with the common problems associated with transferring WordPress websites between domains.
These issues may include:
- Permalinks not working properly.
- Images not displaying correctly.
- Incorrect URLs in the database.
If you’re experiencing any of these problems, the first step should always be to check that you have a valid .htaccess file on the new server. To do this, simply copy over the old .htaccess file and upload it to the new server.
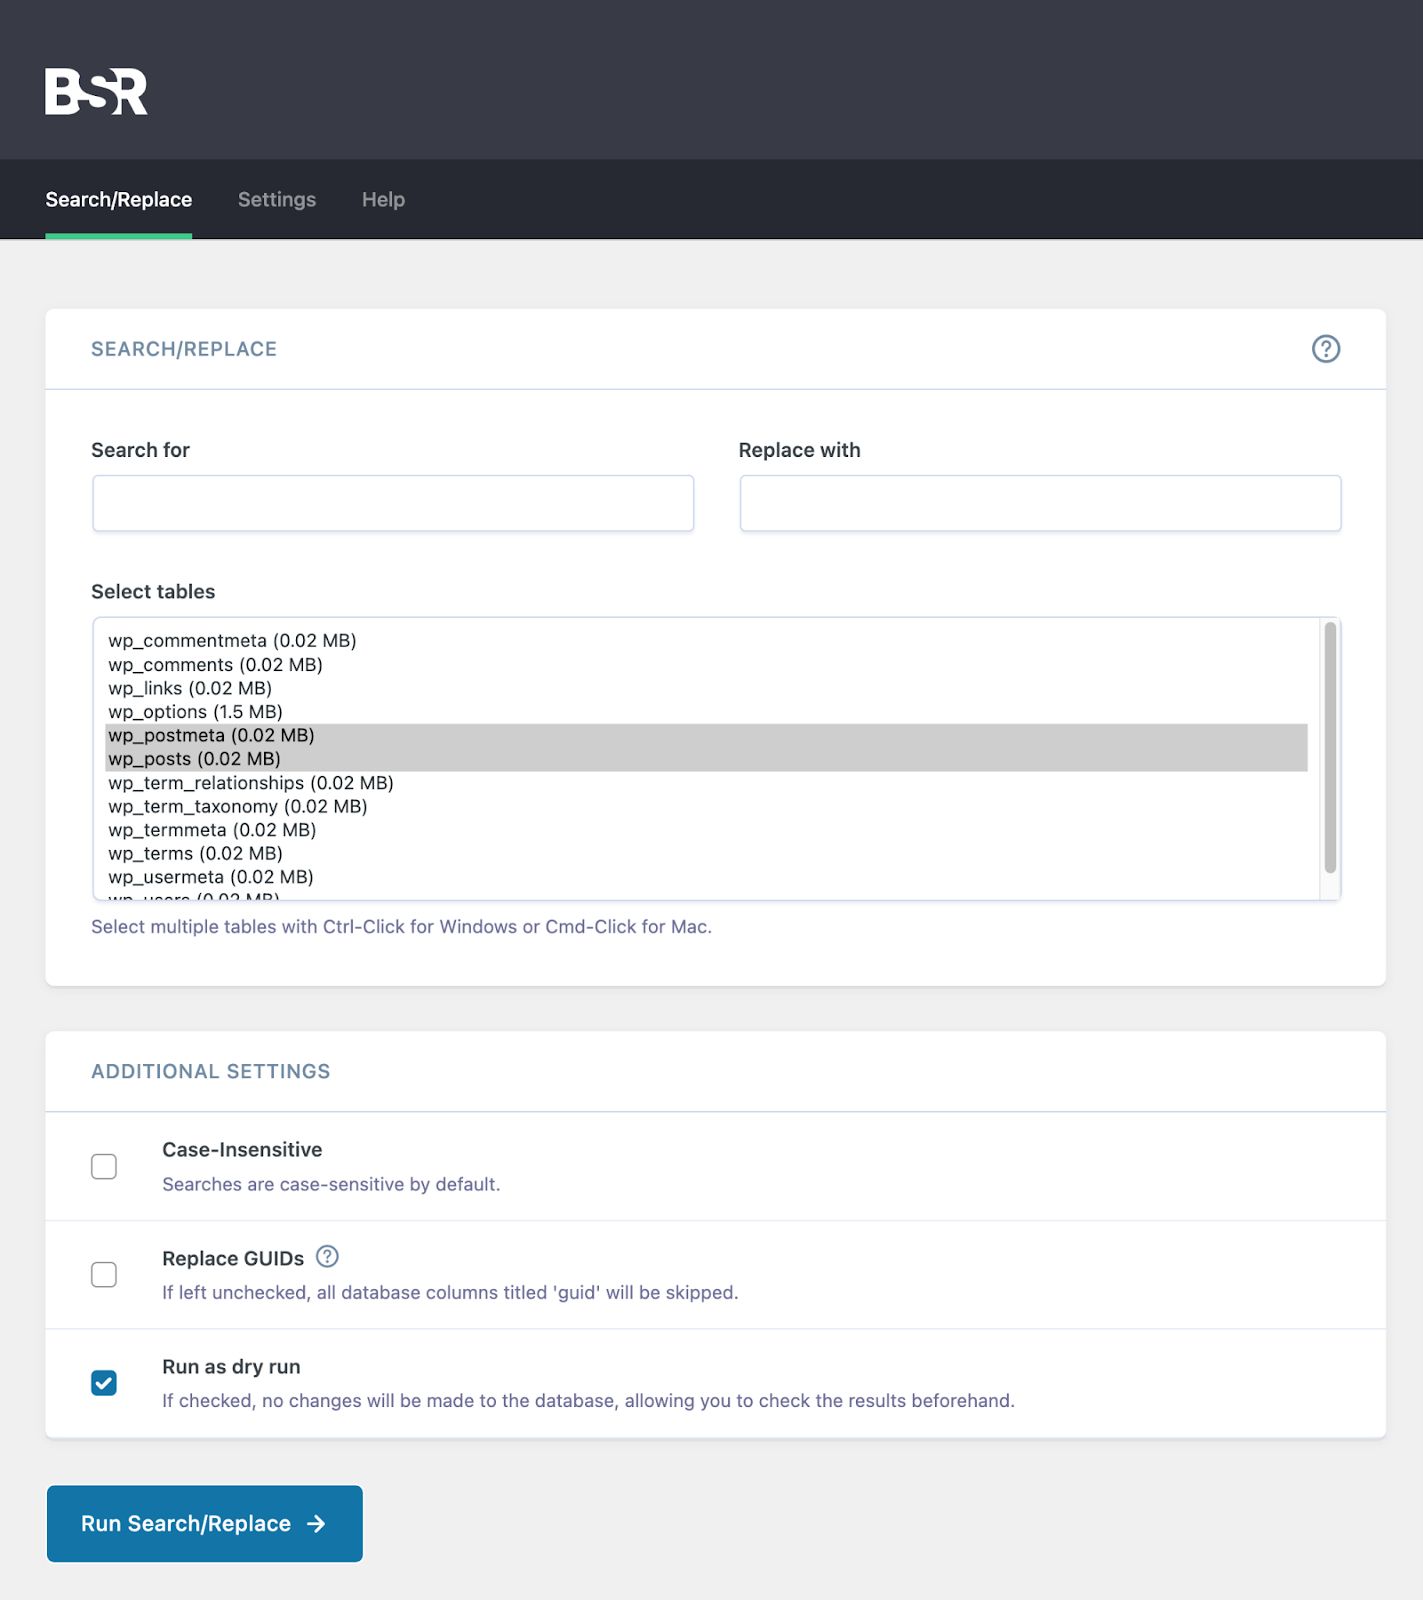
Did you use a plugin like All-in-One WP Migration? If so, you may need to manually update any internal URLs in the database. You can do this with a plugin like Better Search Replace.

Finally, incorrect URLs in the database or a permissions issue with the server could cause images to not display properly.
To fix this issue, use a WordPress plugin like Velvet Blues Update URLs to ensure you’ve updated all links and images within your WordPress website.
Following these steps can help you fix the technical issues associated with transferring a WordPress website to a new domain.
Step 5: Go live with the new domain name
Once you’re finished with the migration process, you need to take a few final steps before the new website can go live.
The first step is to go through the WordPress dashboard settings and check that you set all options correctly.
This includes updating any URLs, enabling the correct plugins, and double-checking any other necessary settings. If you have an ecommerce website, you also need to check that the subdomain for your online store is correct.
Next, you'll want to test all pages to ensure everything is working correctly. This includes checking for broken links, images not displaying properly, and any other errors.
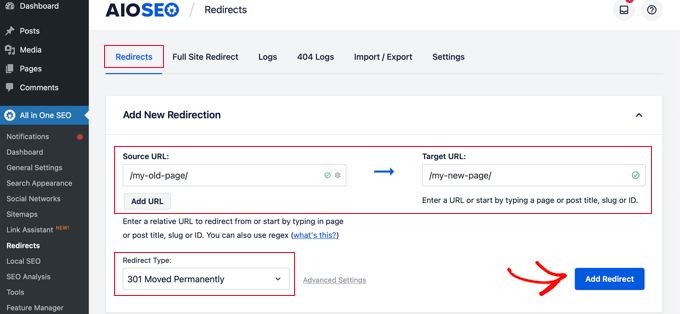
Finally, once you are satisfied with the new WordPress site, you can make it live by setting up a 301 redirect. This will help ensure that all of the old site URLs redirect to the new URLs, preserving your existing search engine rankings and SEO backlinks.
You can create a 301 redirect using a WordPress plugin like All in One SEO (AIOSEO).

Once you have completed these steps, your WordPress website will be successfully moved and live.

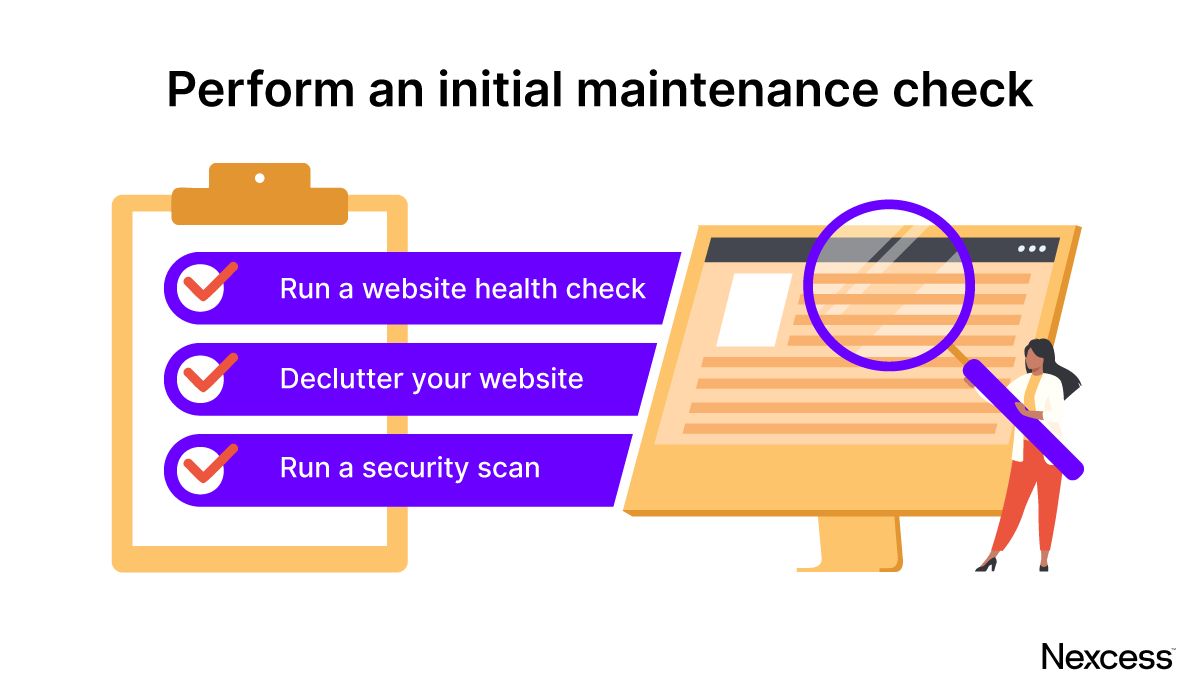
Step 6: Perform an initial maintenance check
Now that your WordPress website is live on the new domain, it's a good idea to do an initial maintenance check. After all, you just migrated an entire website, so you want to make sure it's secure and running smoothly.
Here are a few things you can do to ensure your WordPress website is working as expected.
Run a website health check
Running a website health check is a simple process that can help you quickly spot any potential issues.
To do so, log into the wp-admin dashboard and navigate to the Tools section. From here, you can select Site health and run a full check of your website. This will help you identify any areas that need improvement, such as security issues, outdated plugins, or missing updates.
First, you should check the Status page. It displays notifications on performance and security issues. Then, you can browse the Info page for detailed information about your website's configuration.
When there are issues, use the provided links to get more context and take the recommended steps to fix them.
Declutter your website
Next, you should perform any necessary maintenance tasks, such as cleaning out old files or databases that you no longer need. Remember, the less clutter your website has, the faster and more efficient it will be.
To do this, start by deleting any unnecessary plugins, images, and files. Then, check for outdated or broken links and any redirects you need to update.
You should also go through your database and delete any unnecessary tables or entries that are taking up space. This can help your website run faster and smoother.
Run a security scan
Finally, you should run a security scan to check for any potential vulnerabilities and malware on your website. Regular scans allow you to identify any suspicious activity that could put your website at risk and take the necessary steps to protect it.
One option is to see if your hosting provider has a security scanner. You also can use a plugin. Since 43% of websites on the internet run on WordPress, plenty of security scanning plugins are available.
But don't use just any plugin. The best security plugins for WordPress offer comprehensive protection, including brute force attack prevention, virus and malware scanning, and file integrity monitoring.
Final thoughts: How to easily move your WordPress site to a new domain
New beginnings come with exciting new opportunities and a bit of work. Moving a WordPress website to a new domain is one of those tasks that you need to do carefully and systematically.
Hopefully, this tutorial has helped you understand what you need to do to successfully move your WordPress website to a new domain. By following the steps outlined in this guide, your website will be safe and secure on the new domain in no time.
If you’re looking for a reliable way to move your WordPress website to a new domain, managed WordPress hosting is the ideal choice. Managed WordPress hosting from Nexcess comes with built-in features like automated backups, security scanning, and WordPress updates.
At Nexcess, we make it easier and faster to migrate your website. All plans come with free white-glove site migrations, so you can avoid downtime typically associated with manual migrations.
Get started with managed WordPress hosting today.

