
If you’ve never made a website before, the idea of creating an ecommerce store may feel daunting. After all, you’re a business owner — not a web designer. You’ve also likely seen Shopify and Wix stores that all look the same and find yourself wanting more.
If you’ve done your research, you’ll know that WooCommerce stores offer unlimited customizability, lower costs, and better SEO. You may have also heard it’s not for beginners — but that’s not the case.
The more complicated the setup is, the more likely you’ll be tempted to give up or pay a ton of money to have someone do it for you. But it doesn’t have to be that way.
If you’d like a better, easier, and more economical way of setting up your ecommerce website, keep reading. Check out these tips that will demystify where to start and explain how to make it easier for yourself.
Keep in Mind Customer Interactions When Setting Up Your Ecommerce Website
The primary way you’ll interact with customers is via email. This is how they receive their order information, shipping information, and marketing campaigns. These three considerations are things to make sure you’re on top of so your customers are always aware of what’s going on with their orders and your products.
Simple Mail Transfer Protocol (SMTP) for Email Deliverability
Spam filters can be super aggressive — and we’ve all been told to check our spam folder if we haven’t gotten an email. When it comes to your customers, they NEED to get your emails. They want their order confirmations and shipping confirmations, alerts for delays, etc. Email is how you will primarily communicate with your customers so it’s very important.
Out of the box, WordPress uses the PHP mail function on their server. Depending on where you’re hosting your store, that’s probably not configured with the proper records that ensure your email gets through and doesn’t end up in the spam folder. WordPress CAN send emails, but once it gets out of WP, you have to make sure it’s being routed properly.
Therefore, It’s very important to get a good Simple Mail Transfer Protocol (SMTP) set up. A free and easy to use SMTP is WP Mail SMTP. It’s our pick because it can hook up to a number of different SMTP services. If you’re a high-volume store, try SendGrid or Mailgun.
Default Emails
Default WooCommerce emails come preloaded with content. That’s fine, and you can use them, but it’s a better customer experience when everything isn’t boilerplate.
Updating subject lines, greetings, and signatures breathe life into your correspondence. Some companies go all out and make it a humorous story. Others personalize it. Placeholders function like mail merge fields, so you can customize it to include customer names, for example. Think about what would be on-brand for your store.
If you’re working with a developer and a marketing team, you can also change the look and feel of the email as a whole.
From your dashboard, navigate to Settings > Settings. The menu on the settings page has an emails tab where you can access all the emails that will get sent out.

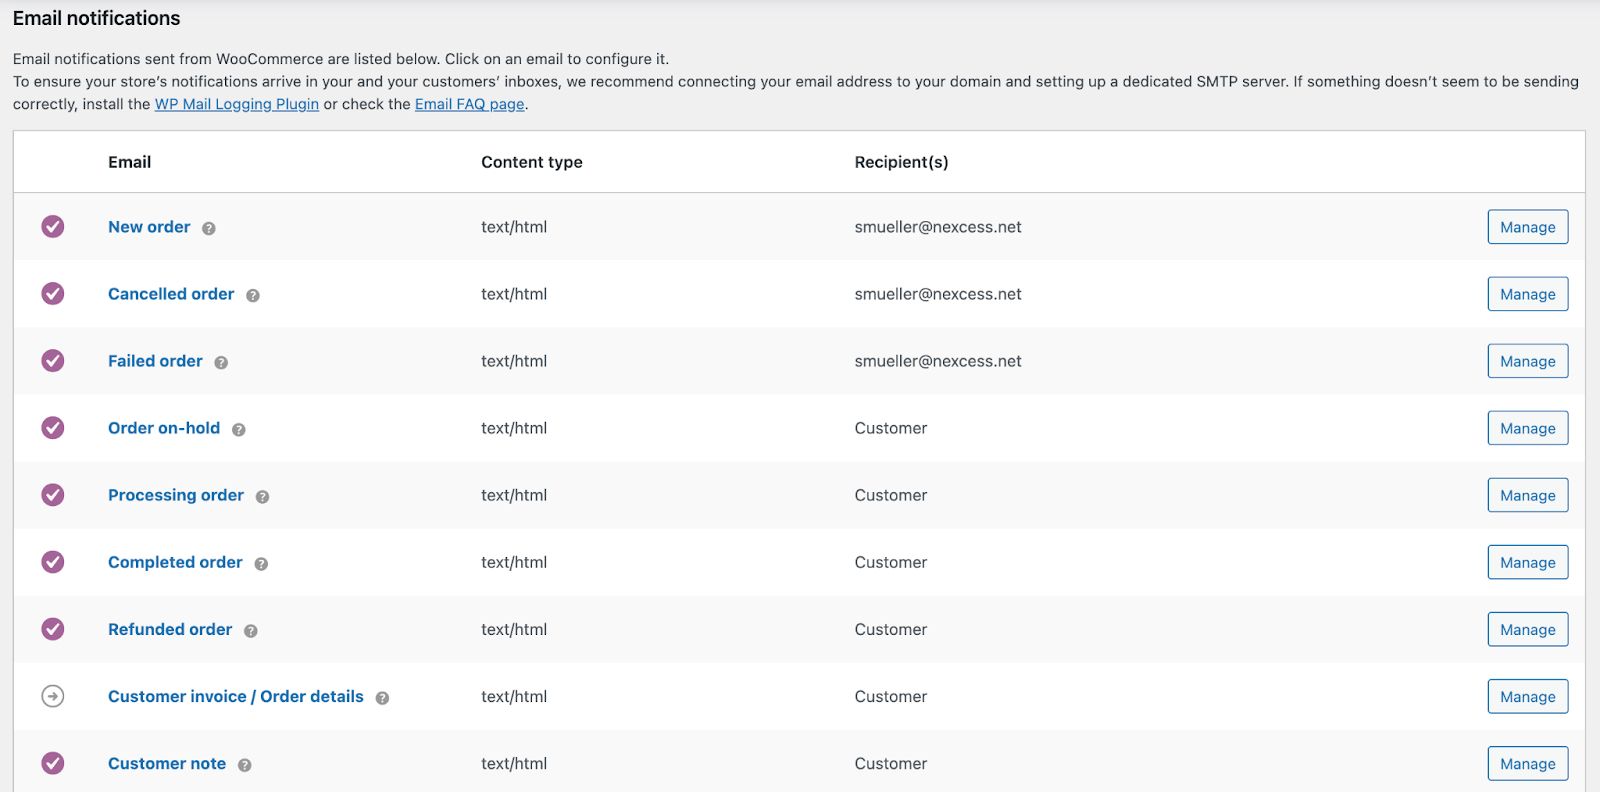
The first three are emails that are automatically sent to you as the store owner every time you get an order or other transaction alert. The rest of the emails are routed to the customers. Emails sent to you as the store owner don’t matter as much branding wise — but the ones that get sent to your customers do. These are called transactional emails. The template options like “Thanks for shopping with us” are totally fine, but there is something to be said for more original content.
If you click “Manage,” you’ll be brought to a screen like this:

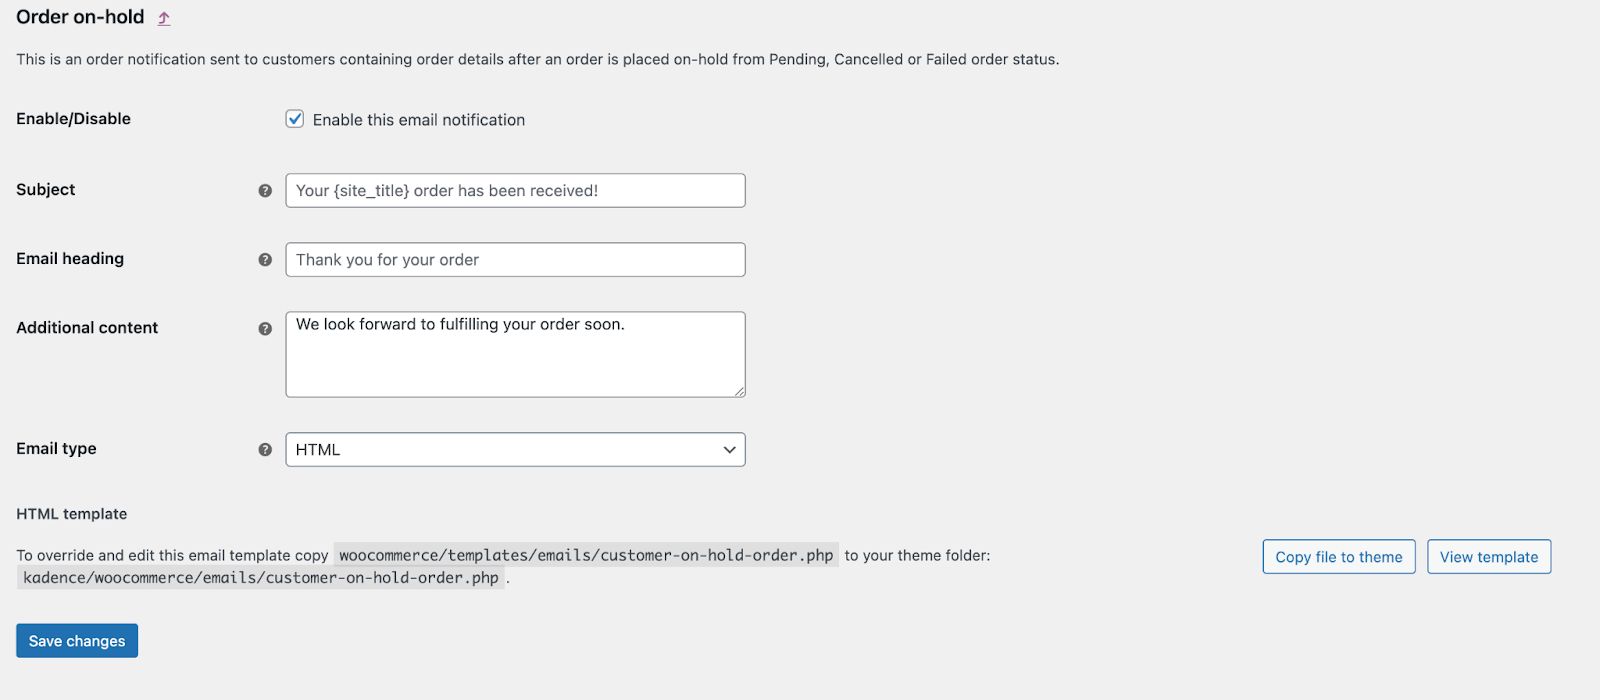
You can edit the text, the email type, and even override the template as a whole — we recommend working with a developer if you’re new to this.
The sense that you care about your customers can drive customer loyalty. Taking a few minutes to update email copy helps set you apart from stores that leave everything on default settings.
Something else to keep in mind is that if you add additional features to your WooCommerce store, more automated emails appear in that section without notifying you. Check in regularly to ensure that your emails are customized to your liking and are still relevant.
Connecting to Email Marketing Platforms
It may seem less crucial to handle this right away, but setting your store up with an email marketing platform from the get-go is actually pretty helpful. You might be hesitant, but we’re here to tell you — bite the bullet and pick one right away. You can migrate later if you’d like, but the sooner you’re capturing every email, the better.
Knowing if your customers are opening your emails and which campaigns work is vital, no matter what stage your store is at. Track as soon as you can, because the sooner you establish baselines and A/B test campaigns, the sooner you’ll find your groove. Being able to track engagement is an important ecommerce KPI.
MailChimp has a fantastic free tier, and it integrates with WooCommerce. There are also plenty of other plugins that are available in the WooCommerce marketplace and from developers themselves.
Check out our resource on choosing the right email marketing software for your store.
Setting Up Your Ecommerce Site: Products and Shipping
You’re running a store. Stores sell products. In order for your customers to see your products, you’ve got to get them on your site. Then you’ve got to get them to become your customers. Here are some no-brainers that a lot of people forget about when setting up an ecommerce website.
Importing Products Via CSV
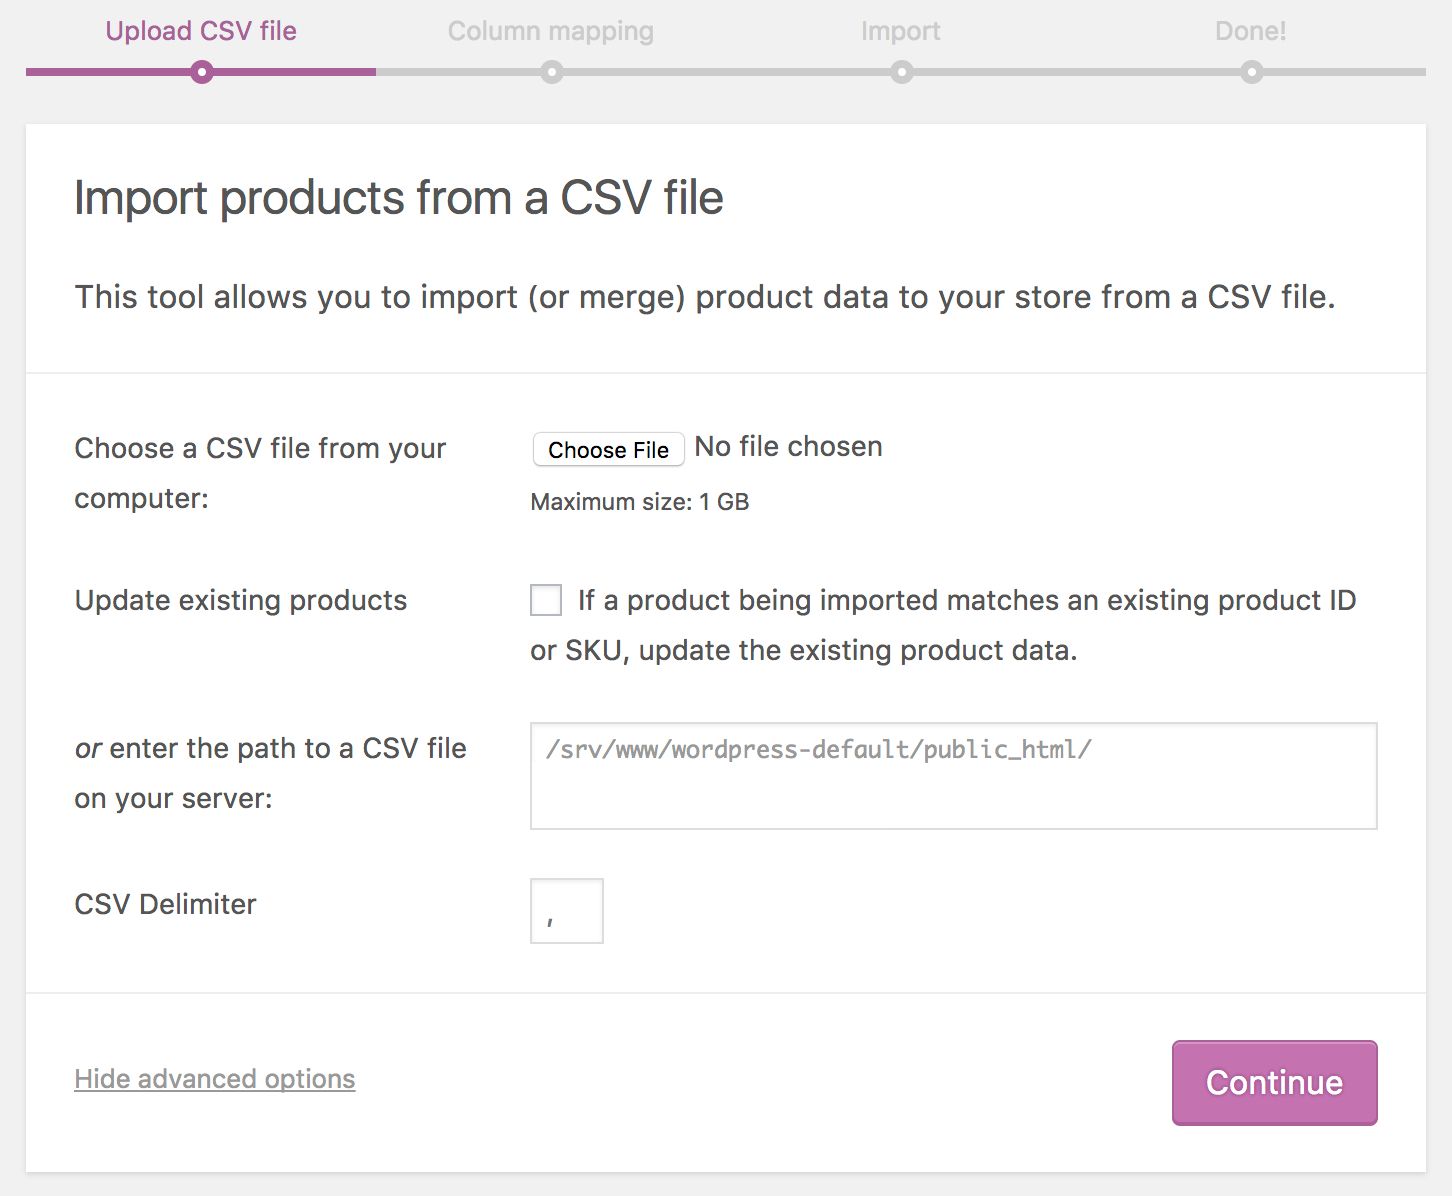
Something many people forget they can do is import their products using a CSV. Larger stores do this all the time, but small business owners may not realize it’s possible. If you’re only selling a handful of products, this might not be a big deal. But if you have a dozen, a hundred, or a thousand products, it makes no sense to do that much work yourself. You can easily upload a CSV file. This will save you a considerable amount of time and effort.
If you’re brand new to this, you can download the standard form from the WooCommerce repository on GitHub.
First, head into your dashboard and navigate to your products area. You will see options to “Add New,” “Import,” and “Export.”

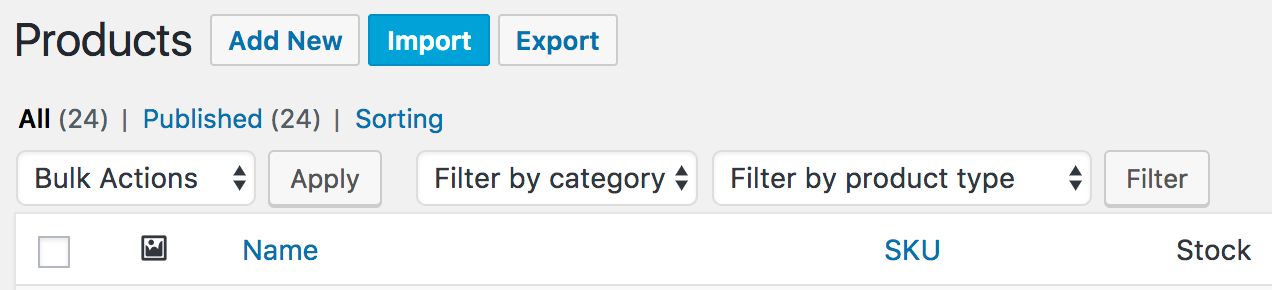
Selecting “Import” will allow you to upload your CSV.

If you have an existing store, you can also choose “Export” and then upload your existing products as a CSV.
Crucial to this process is that you correctly map the fields from your CSV to your products. If you have questions about fields, you can check out the Product CSV Import Schema.

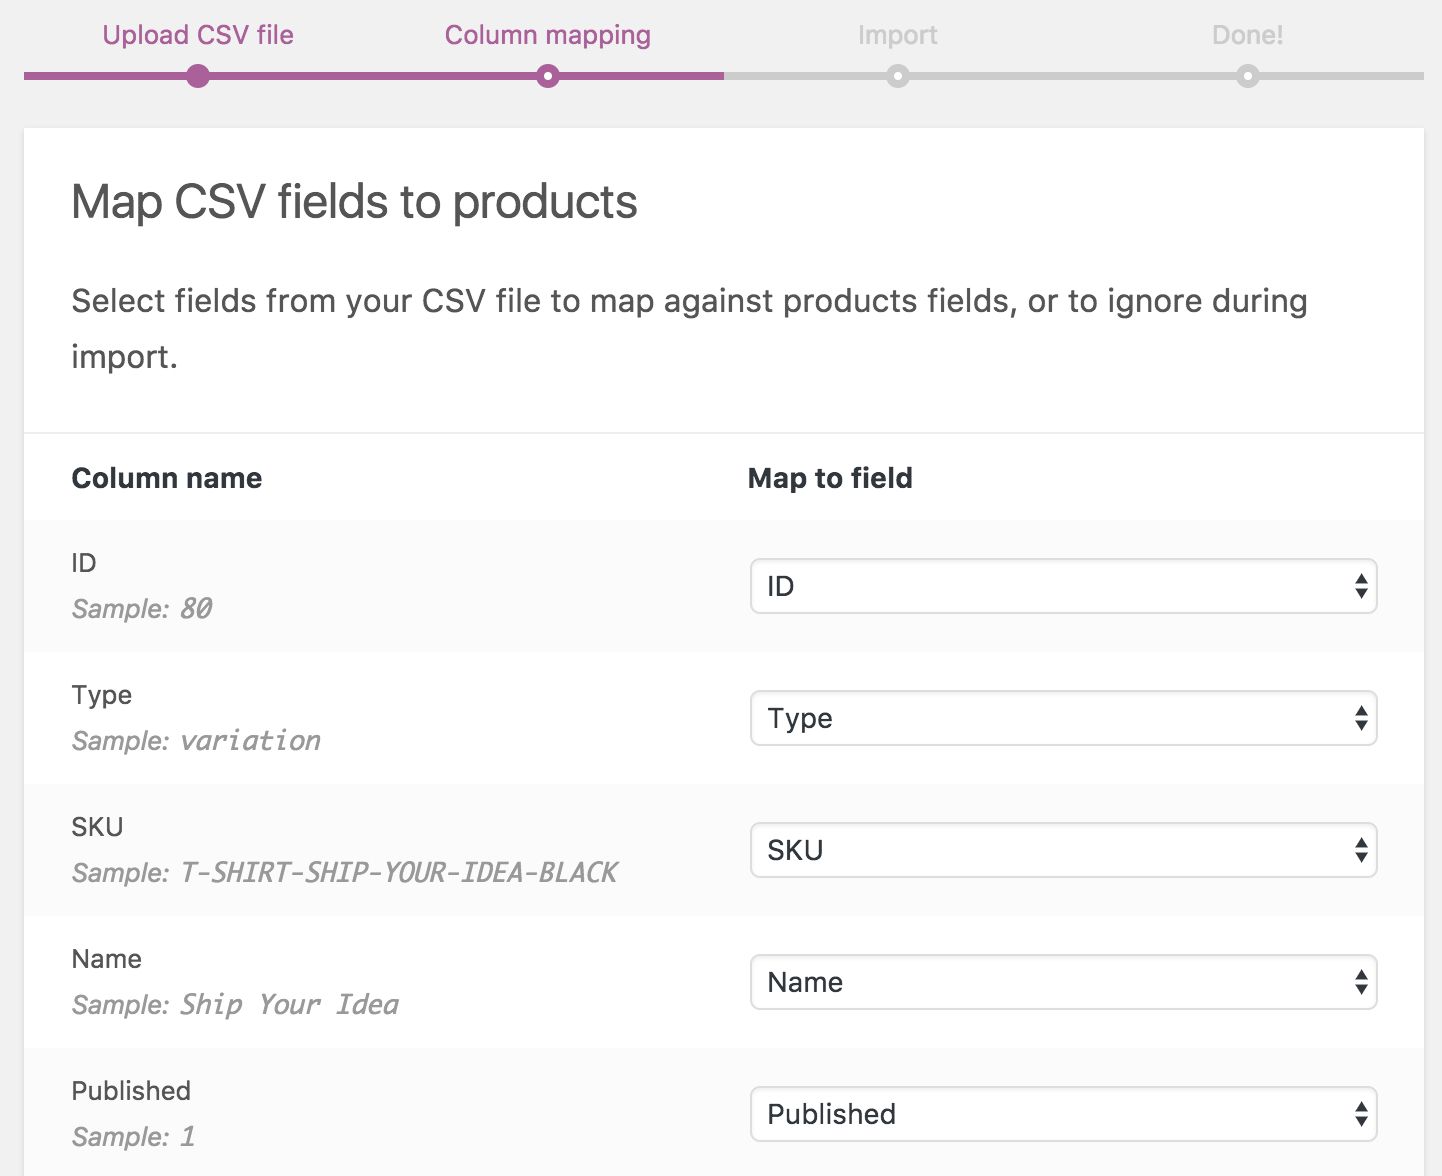
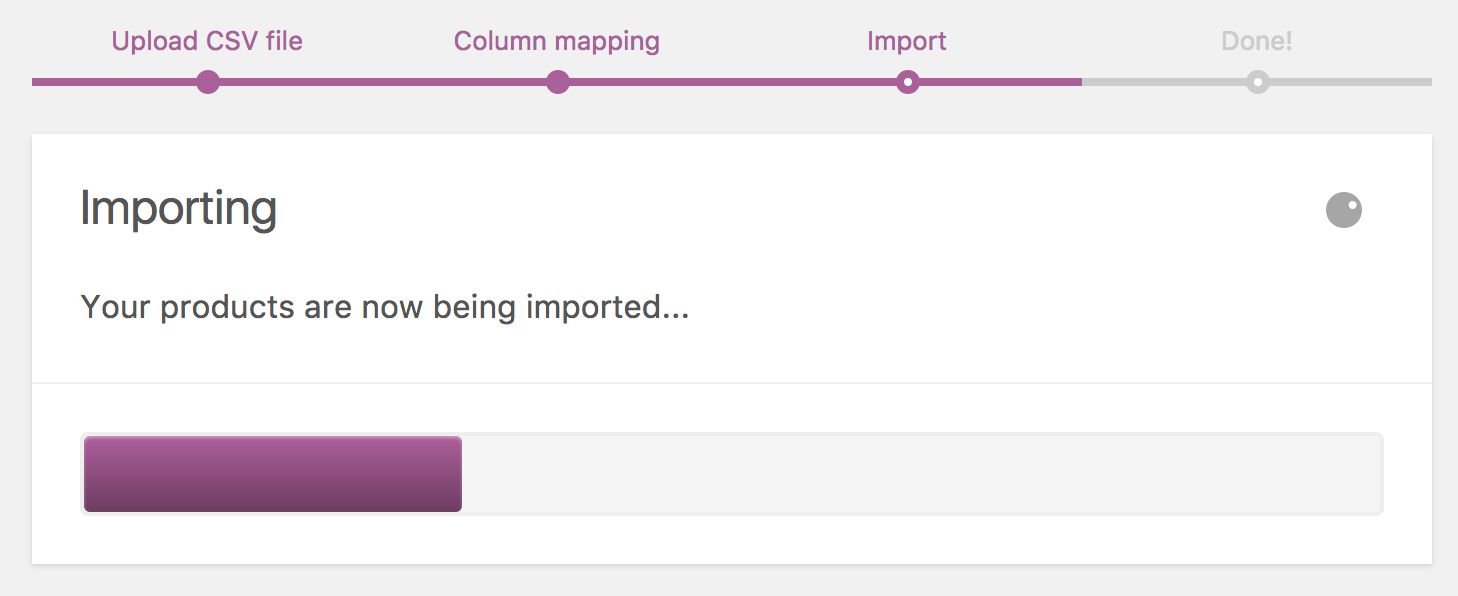
Be sure to check over them before uploading them, and use the “Column mapping” screen to link your document to the uploaded data correctly. One you’ve correctly mapped your data, click continue and import your file.

It is also possible to use the CSV to update product images, but the images need to be stored online already. It is often easier to upload the data and go back and add the images.
Using a CSV template makes it easy to upload, and it also makes it easier to request the necessary data from your staff or clients.
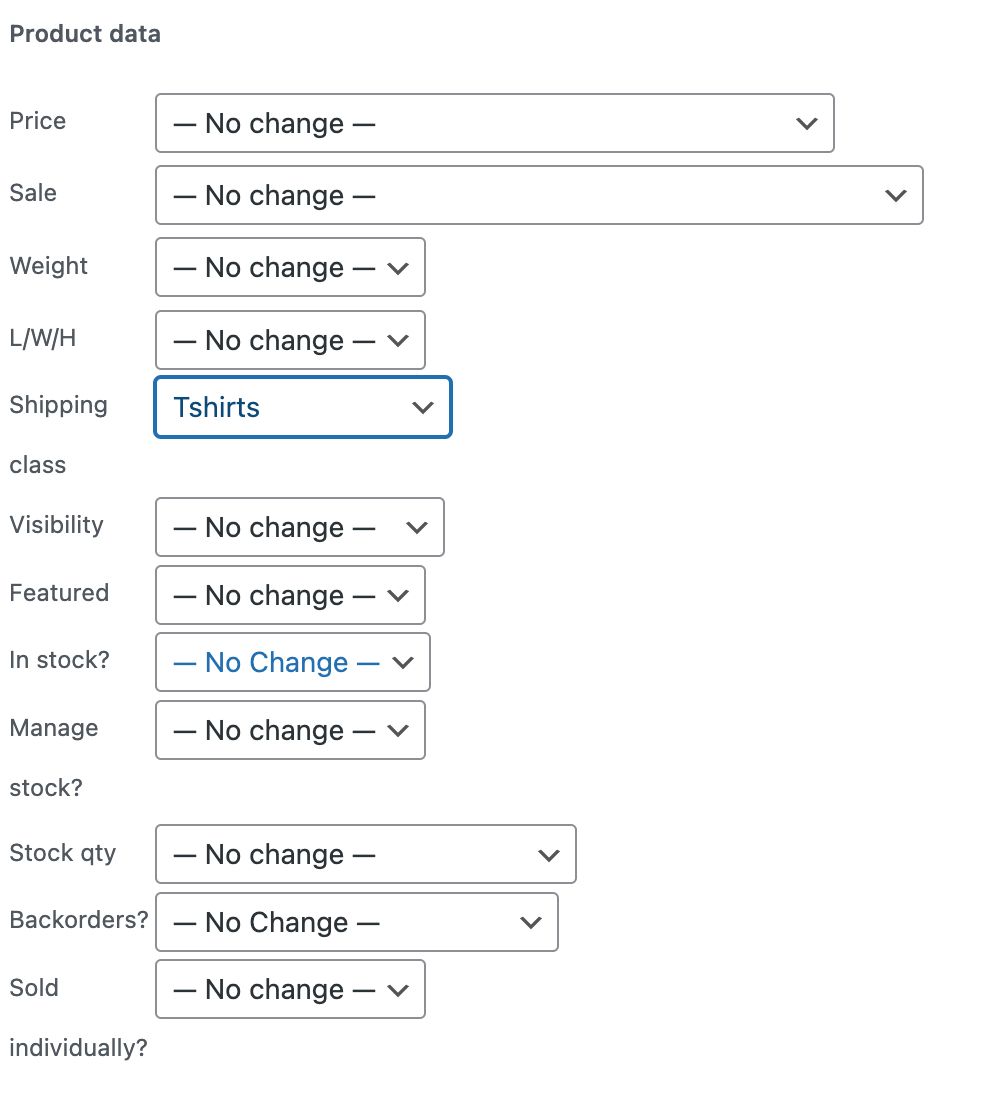
Product Bulk Editor
You’ve already imported all your products and are ready to implement flat rate shipping. You might be thinking, “Great! Now I have to edit each item to add a shipping class.” Don’t worry — you don’t!
There are two easy options you have. First, you can re-upload your CSV with new, added information. As long as the SKUs are the same, WooCommerce is smart enough to overwrite the existing data. If you’d rather not do that, you can use the Bulk Editing process that already exists in WordPress.
Select the relevant products, and click “Edit” from your Bulk Actions. Here you can make changes, add your shipping class, and just update.

You can do more than just edit shipping classes in the bulk editor, but let’s just focus on that for now. Selecting every “heavy” item from “All Products” will quickly and easily gain a “Heavy” shipping class, ensuring every item you carry that’s, say, over 10 pounds, gets upcharged.
Related reading: Ecommerce Tips: How to Ship Large and Heavy Items >>

You can do this for every shipping class you have now, ensuring you charge the correct amount for every product, every time.
Linked Products
When setting up your ecommerce website, a great way to boost sales is by linking your products. This is called cross-selling and upselling. This takes a bit of effort because it must be done on a product by product basis, but it can be very beneficial.
Back in your products area, if you click “Edit” on a product, you’ll have a number of options. Clicking on “Linked Products” will give you options for upselling and cross-selling. Let’s talk about when you should use each.

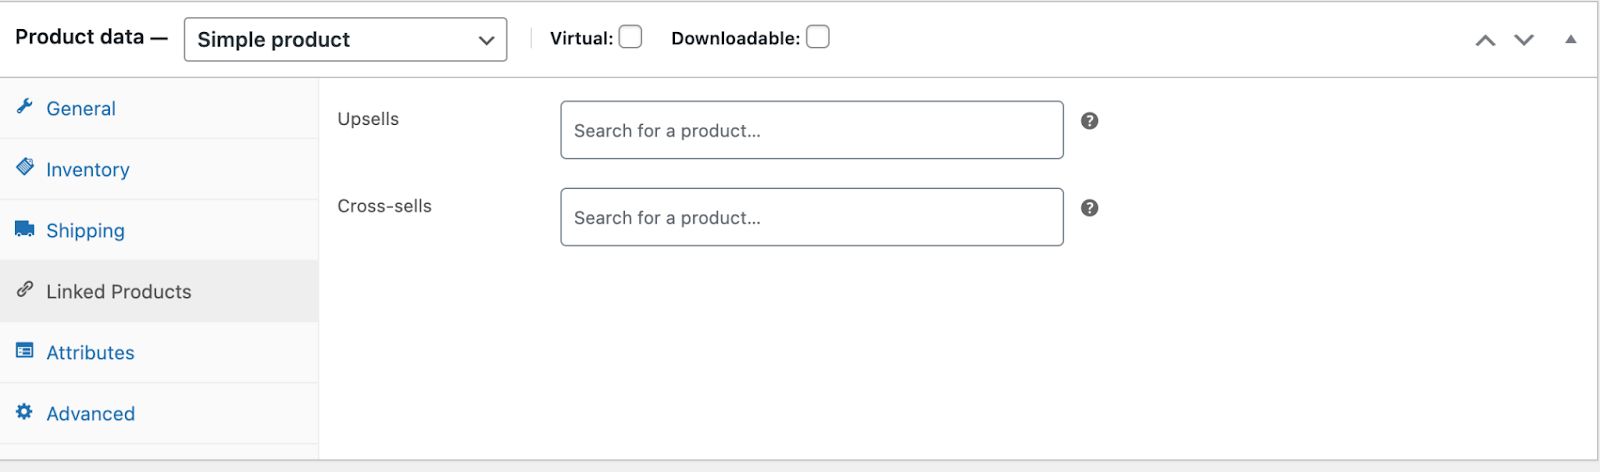
For a cross-sell, maybe you offer a less expensive version of a product and also carry an upgraded or more expensive but similar product. Customers may be viewing the cheaper version and you have the opportunity to say, “We also carry this!”

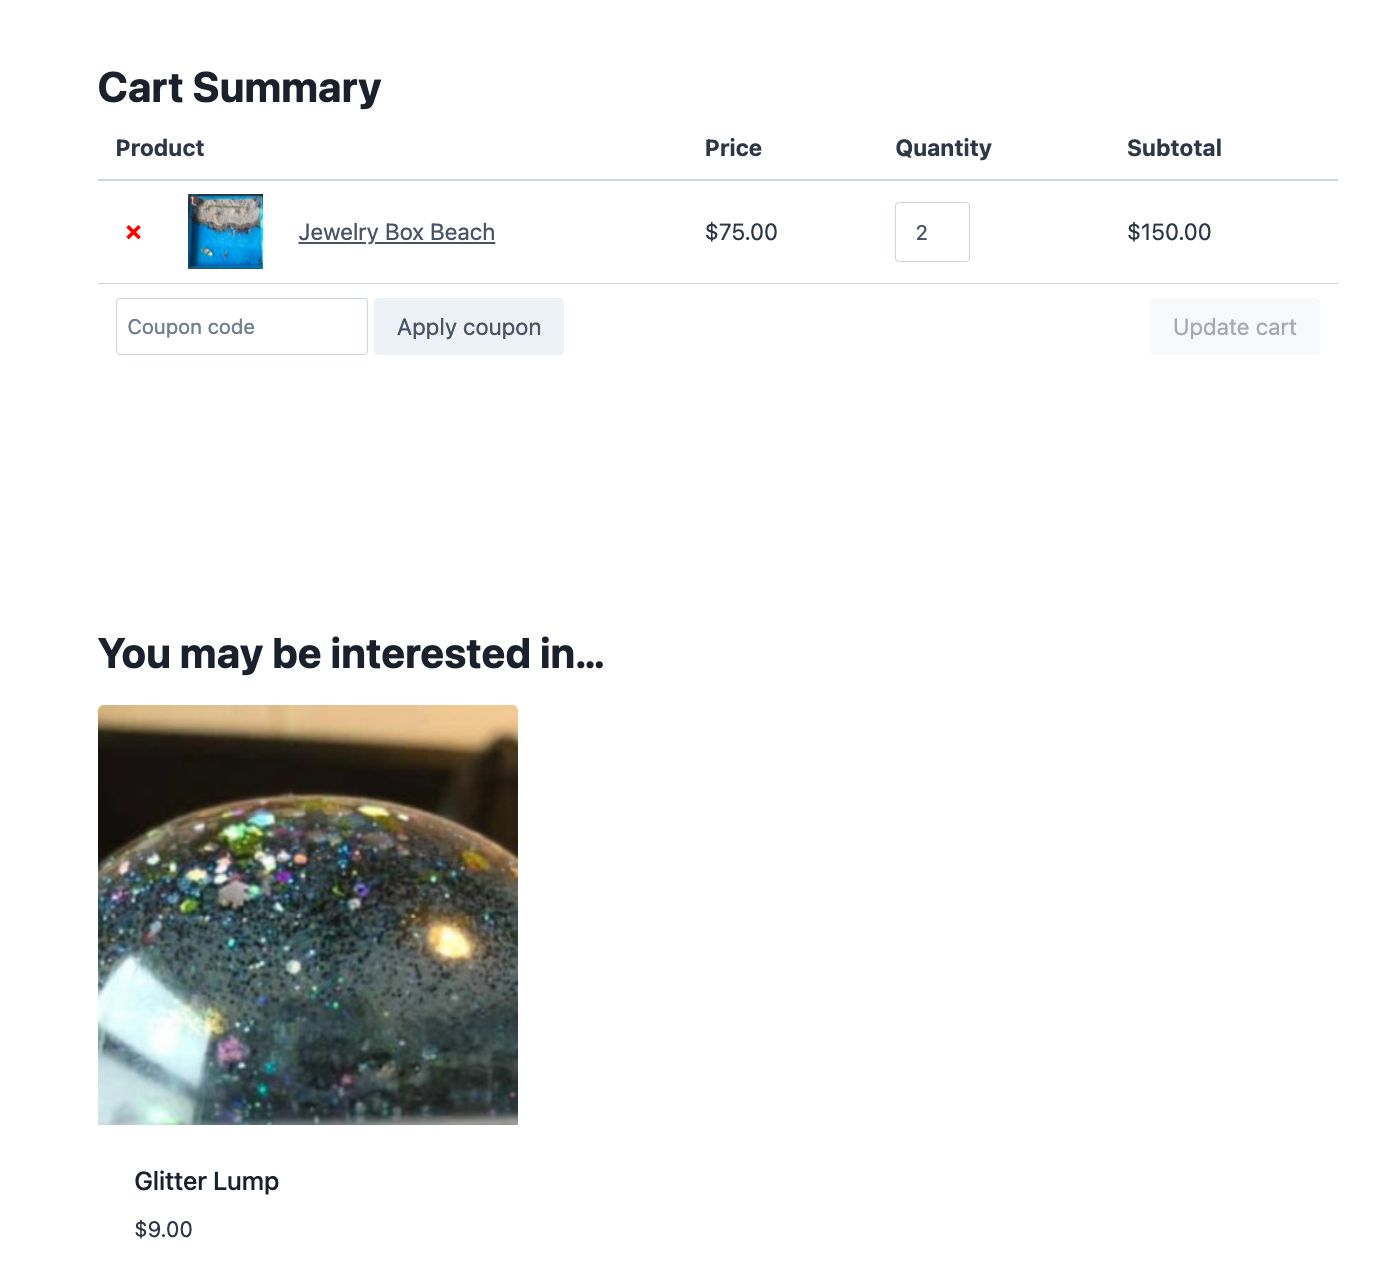
Adding an item or items to the cross sell area will generate a “You may also like…” product linked underneath your original product. Customers may be enticed to purchase the more expensive product, netting you some additional revenue.
When you choose to upsell an item, once a customer adds an item to their cart, your chosen item will appear as a suggestion in their cart.

You see this all the time when you order pizza online. You’ve already ordered your Meat Lover’s pizza, and then you get a reminder that they sell soda too. Who doesn’t need a drink after a few slices? Upselling in your ecommerce store is the exact same thing. Linking relevant products is great, free marketing. It also helps get eyes on more items in your catalog.
Using Flat Rate Shipping & Shipping Classes
When setting up your ecommerce website, adding WooCommerce shipping charges can seem complex, especially if you think you need to calculate shipping based on the weight of each item. The easiest option for most people is to use Flat Rate shipping and create shipping classes.
Shipping options can be found in Settings > Settings > Shipping.

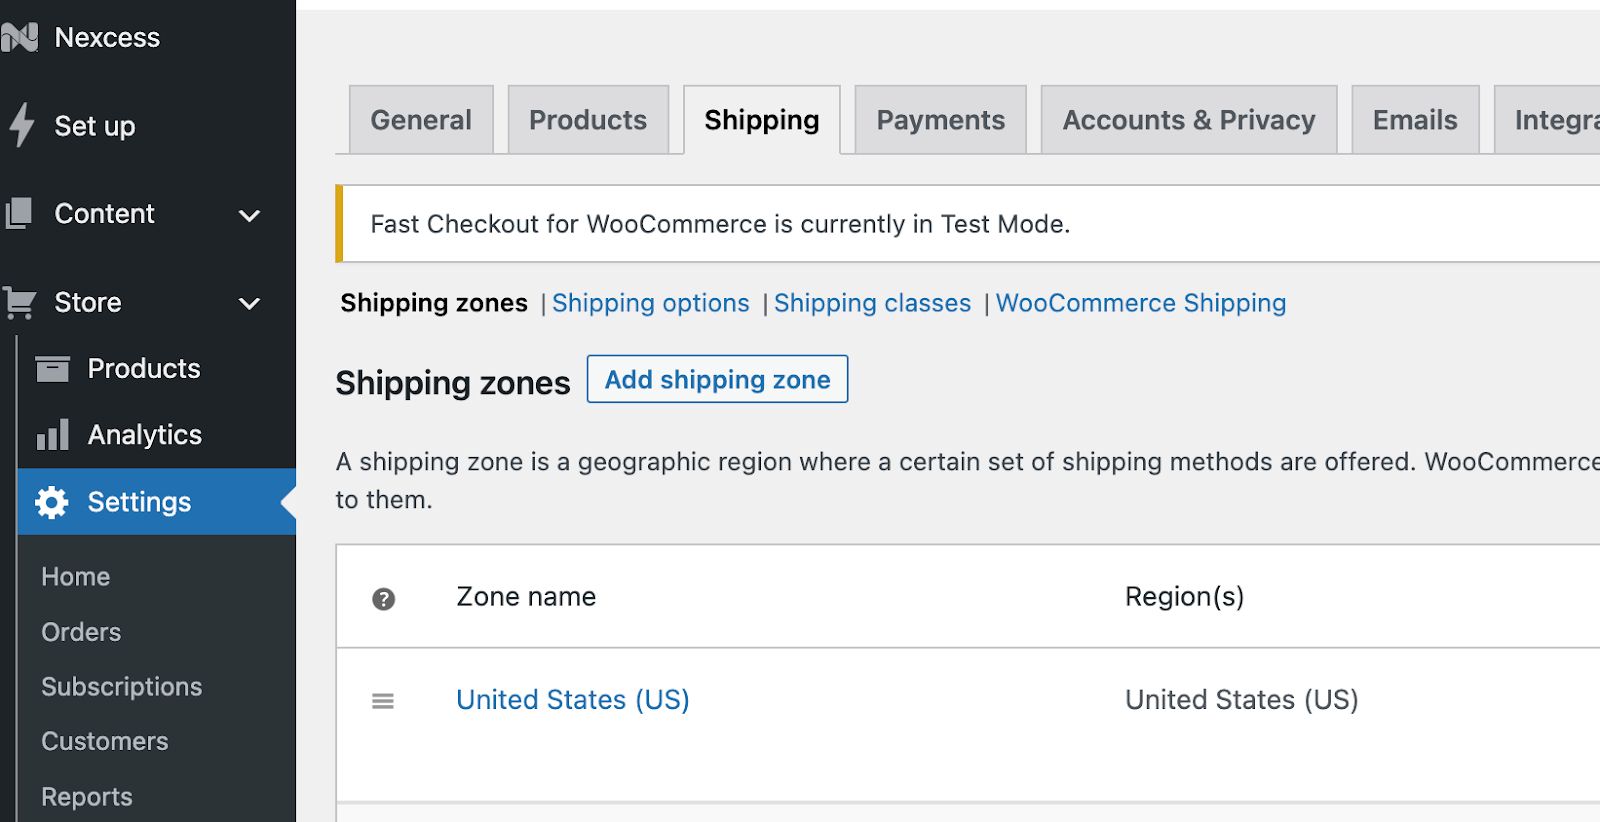
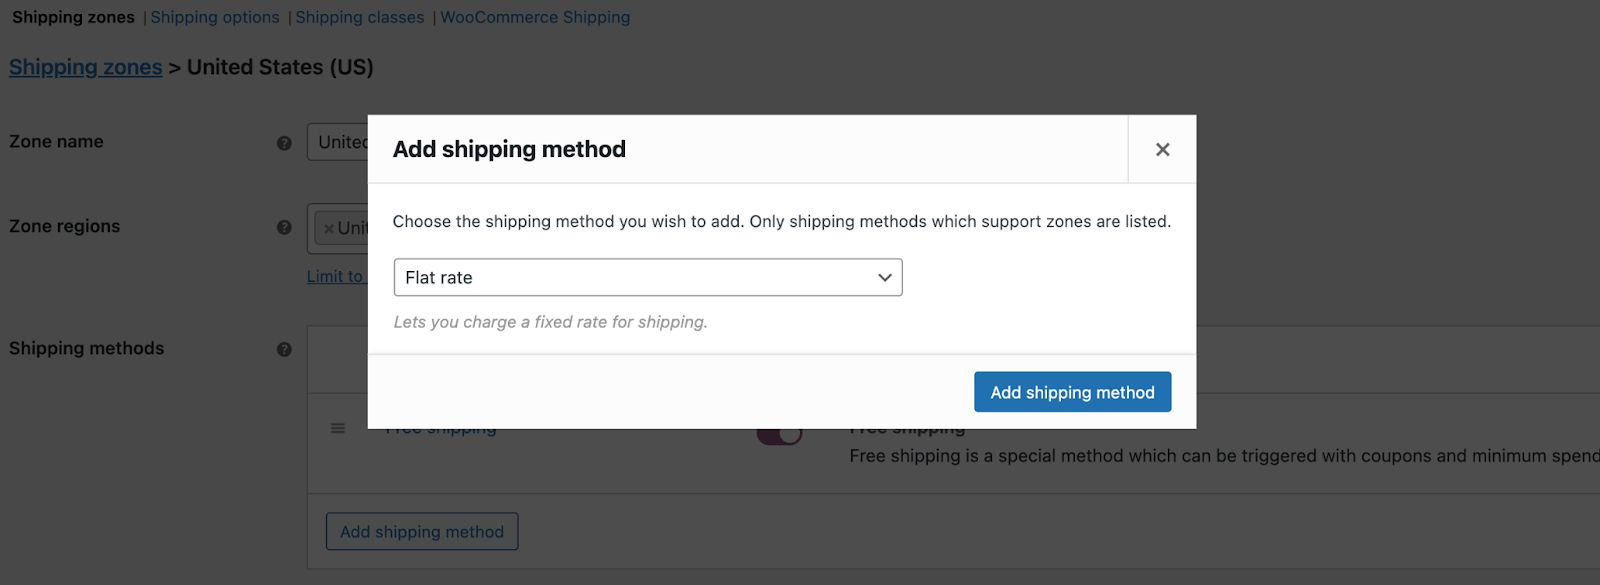
After you’ve set up your shipping zones, if you click on a zone’s edit option, you can add shipping methods, such as Flat Rate.

One myth we should dispel is that every order costs the same to ship. It’s a bit deceptive in its name, because while you can set it up that way, it’s certainly not the only way. In the Flat Rate Shipping cost field, you can absolutely set it as a fixed price like $5, but you can also input a formula that charges a percentage of the overall cart cost.

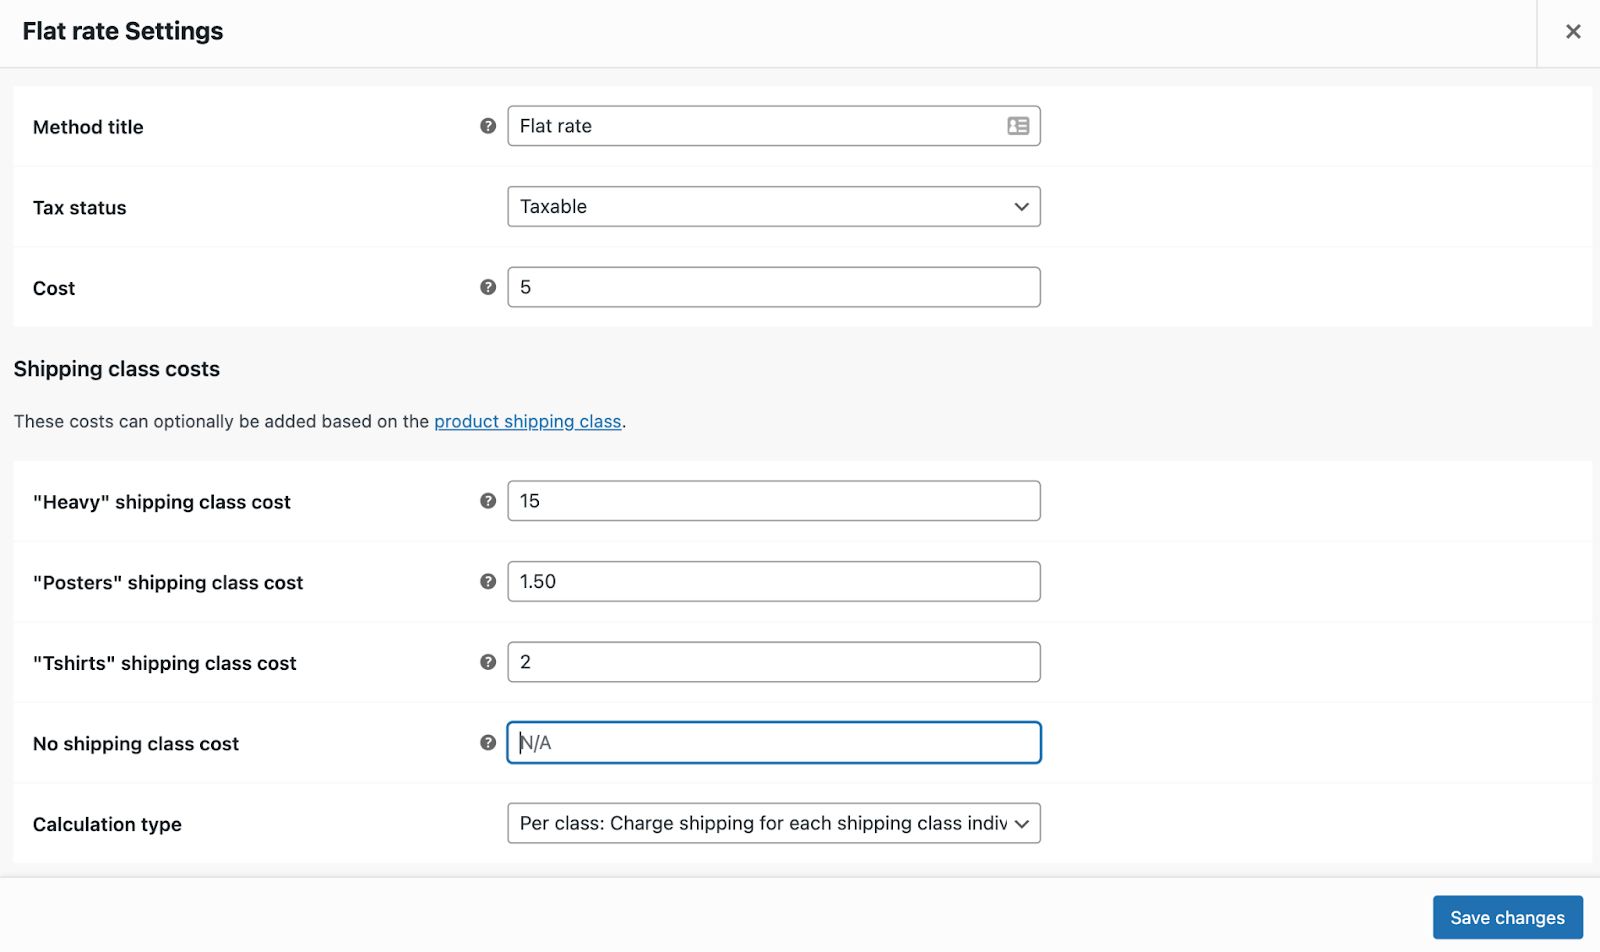
As you can see above, you can also designate shipping classes. Adding in a shipping class will designate items as a certain “category” but it doesn’t function like a product category. Think of it as a subcategory for your product.
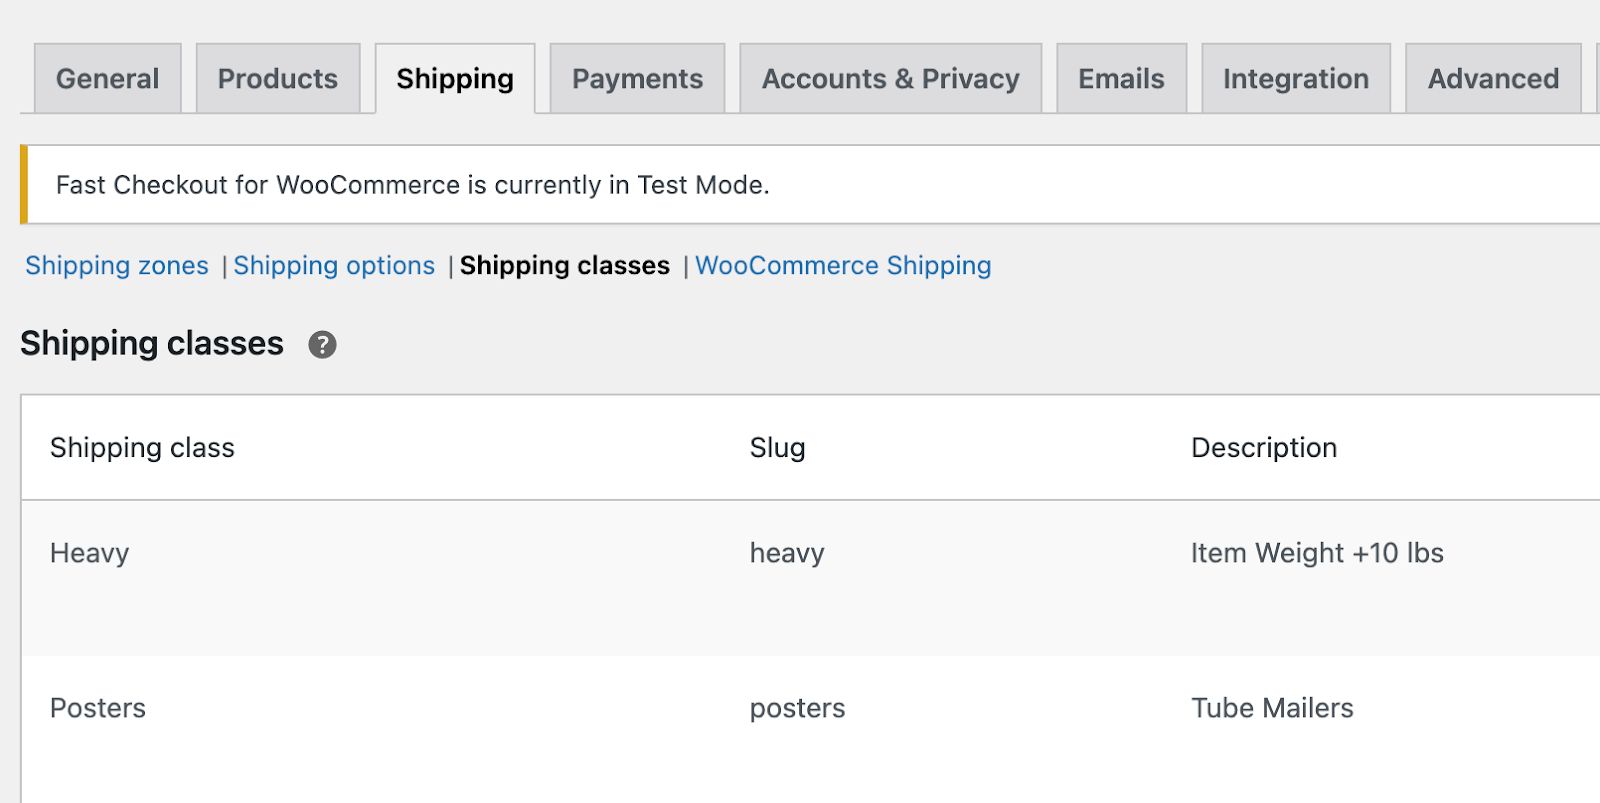
It’s much more costly to ship a case of bottled water than it is to ship a case of water bottles, right? Designate a shipping class for “Heavy” items, and you may choose to add a predetermined flat fee to those items. To do that, you must add shipping classes first. That can be found in Settings > Settings > Shipping > Shipping Classes.

You can also set up multiple shipping classes, so that when items in an order are combined, it enables much greater specificity for how you’re charging shipping to your customers. Charging shipping for each class individually enables you to charge individual rates for each part of an order. That way, you’re not charging the same fee for a case of water as you would a poster. Don’t forget, heavier and more fragile items will add to your packing costs.
Check out our full guide on WooCommerce shipping for even more tips on how to make this fast and easy.
Setting Up Your Ecommerce Site: General Stuff
Once your site is set up, you’ll start getting customers. Something many new store owners tend to do is finish their site and just … leave it. The site’s made, orders start coming in — that’s it right? Think of a site as an ongoing investment, both with time and money.
You’ve got either a monthly or annual fee, you’ll make changes, and sometimes your site may go down. You’ll want to stay on the up and up with ecommerce trends, too. Here are some things to think about that’ll keep everything going smooth.
Monitoring and Testing
Regular testing is important because delays in processing and loading your site can affect conversions. The longer it takes to load, the more impatient a customer gets. You need to check in regularly to make sure every page presents the way you intend it to.
Making sure your cart loads and everything is fast is often overlooked because you think everything is ready to go. The moment you add a plugin or make changes to a page, you may inadvertently cause some slowdown.
How can you be best prepared? There are plenty of SaaS solutions, plugins, and extensions that can help you monitor your store’s performance. Smaller stores without huge budgets may want to utilize Google Lighthouse, which runs right in your browser.
A few resources that may help include:
- What Is User Acceptance Testing? How to Do Ecommerce UAT
- How to Create a Test Plan for Your Ecommerce Website
- Guide to A/B Testing Tools for Beginners
- The 8 Most Critical Ecommerce Website Testing Test Cases
- Performance and Load Testing Your WooCommerce Store
You could also choose a host that helps you out. For example, Nexcess hosting includes Sales Performance Monitor, Plugin Performance Monitor, and built-in automated testing.
Mobile Friendliness
More and more customers are shopping on mobile devices. It’s quick, easy, and they’re likely already on their phones or tablets. It fits into their lifestyle more easily than being chained to a desk. You’re going to want to make sure your site functions just as well on mobile as it does on desktop.
When you’re in your dashboard, you can navigate to Site > Appearance > Customize. You’ll notice at the bottom of the menu, there are three icons: desktop, tablet, and mobile.

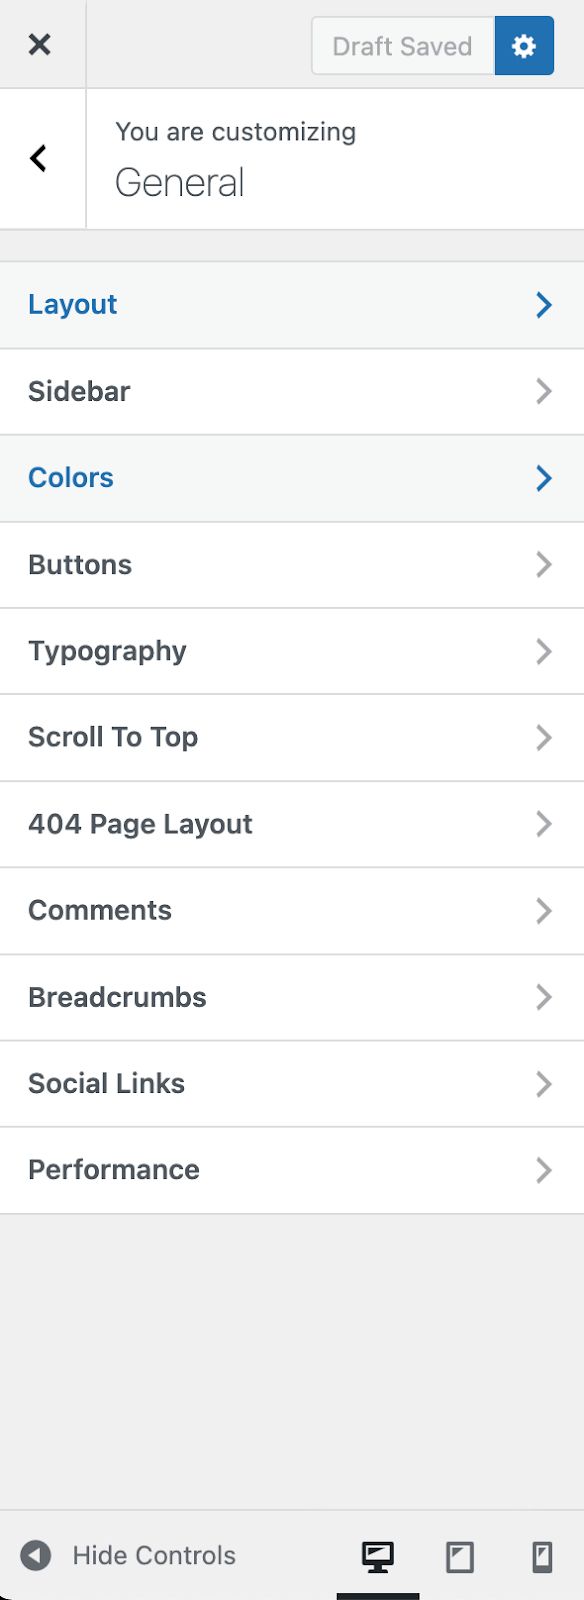
Make subtle changes to your layout to ensure everything looks great regardless of where your customers are accessing your store. This keeps their experience consistent. The easier it is to find what they need, the more likely they are to return. Here’s a great resource to help you ensure your store is flawless when you take your WooCommerce store mobile.
Choose Nexcess for the Fastest, Simplest Way to Set Up an Ecommerce Website
We all want our jobs to be easy and love finding solutions that help. When you are looking for a host that packs the most punch, consider choosing one that seeks to truly simplify the process of getting started.
StoreBuilder by Nexcess makes setting up your ecommerce website super simple. Not only does it have lightning fast speeds, a sweet CDN, and a bunch of premium, curated plugins and tools — it also gives you the features you need to keep your site at its best.
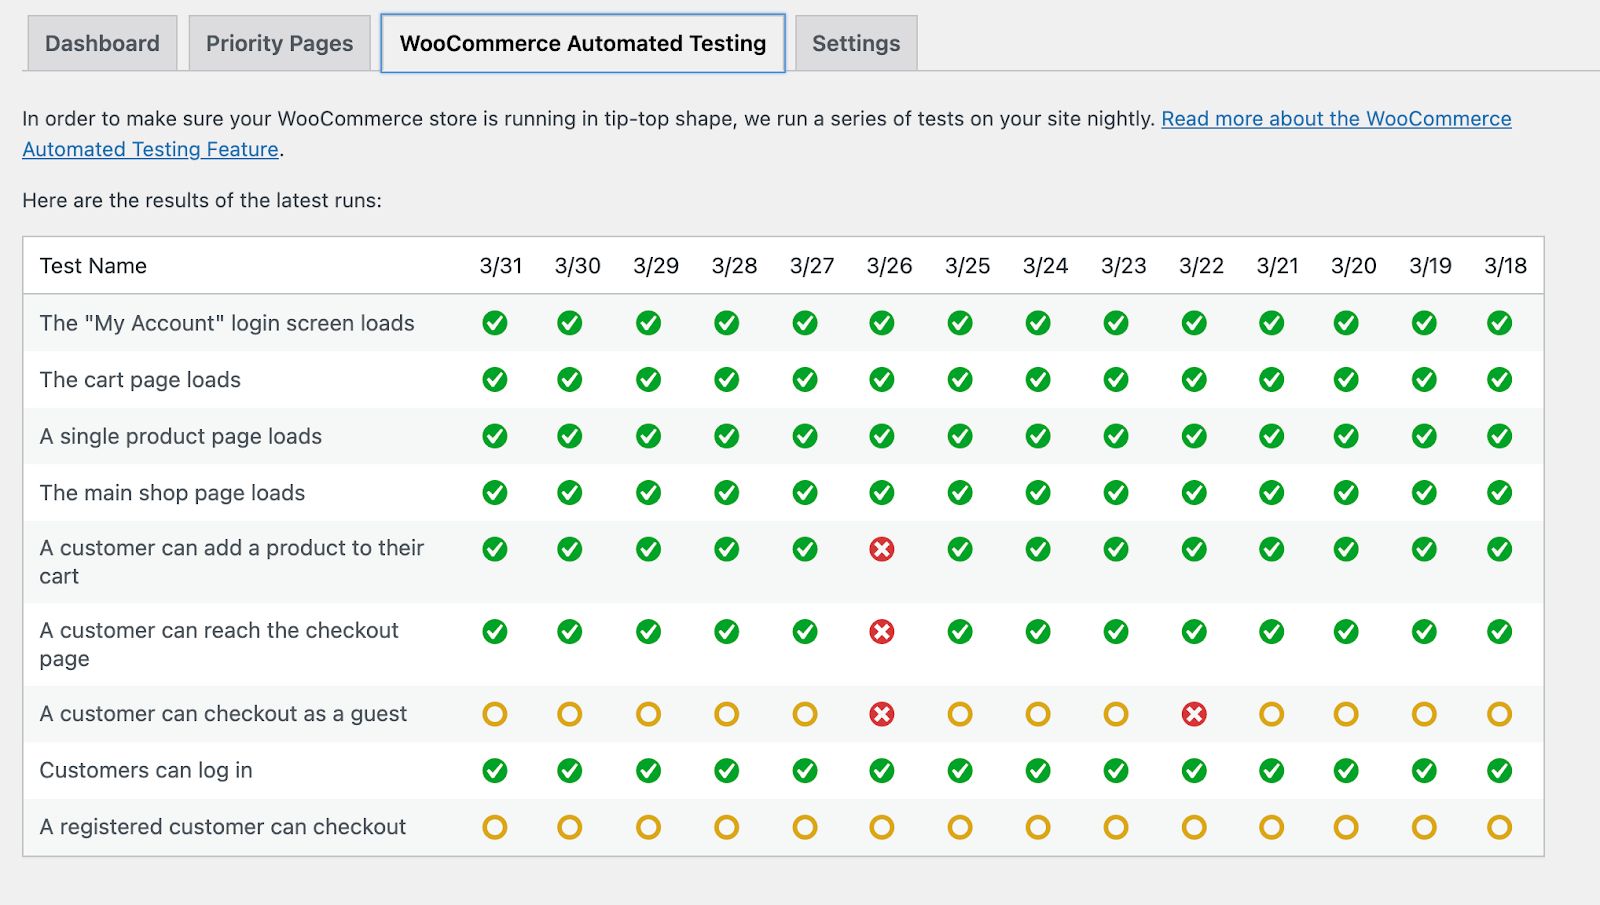
With our WooCommerce Automated Testing built right in, you’ll always know when something’s gone awry.

It also comes with Plugin Performance Monitor and Sales Performance Monitor, so you’ll know exactly which plugins are slowing your site down, and what your store trends look like.
Take it easy while boosting your sales. Try Nexcess StoreBuilder.

