So you’ve heard about this magical thing called WordPress and you want to know what all the buzz is about. WordPress is a website-building tool that enables almost anyone to jump right in and start making highly functional and beautiful web pages.
A great place to start your WordPress knowledge is with the WordPress editor so, bravo, you have come to the right place.
In this blog, we’ll cover how to use the WordPress block editor. Make sure you have an account with WordPress so you can jump into the block editor to follow along.
Without further ado, let’s jump in.
What is the WordPress Block Editor?
The WordPress block editor is a tool for editing and building out web pages. Think of the WordPress block editor as the building blocks of the webpage. It's highly effective with a helpful user experience.
The WordPress block editor can be broken down into three parts: top menu, settings menu, and the main content area. Each segment has elements that enable website editing and building in different ways. Each element of the site — such as paragraphs, headlines, videos, and buttons — can be considered a “block.” Framing your view of the editor down to individual building blocks makes building easier.
How Do WordPress Block Editors Work?
WordPress Block editors are usually third party additions using the Gutenburg blocks editor, enhancing it to further extend its capabilities.
There are plenty of different WordPress blocks. They come in many different types to help meet any need one would have to make a stunning site.
Types of WordPress Blocks
- Audio Block
- Blog Post Block
- Button Block
- Calendar Block
- Gallery Block
- File Block
- Group Block
- Heading Block
- Code Block
- Custom HTML Block
Let’s look at some examples of popular WordPress editor plugins.
WooCommerce

WooCommerce blocks help you add products to your website. It’s easy to use and offers a user-friendly interface. It is a great addition to any developer’s toolkit and saves time in the workflow. If you run an ecommerce site, Woocommerce Gutenberg Blocks is a must — and it's free!
Kadence

Kadence blocks are extremely helpful when working with complex websites with lots of content. Kadence prioritizes performance and functionality while building stunning websites.
How to Use WordPress Block Editor
Using the Wordpress block editors can be broken down into several steps depending on what you want to accomplish. Below, we’ll walk through the basic steps to find and add blocks to your site.
1. Click the Plus Icon & Select Your Block Type
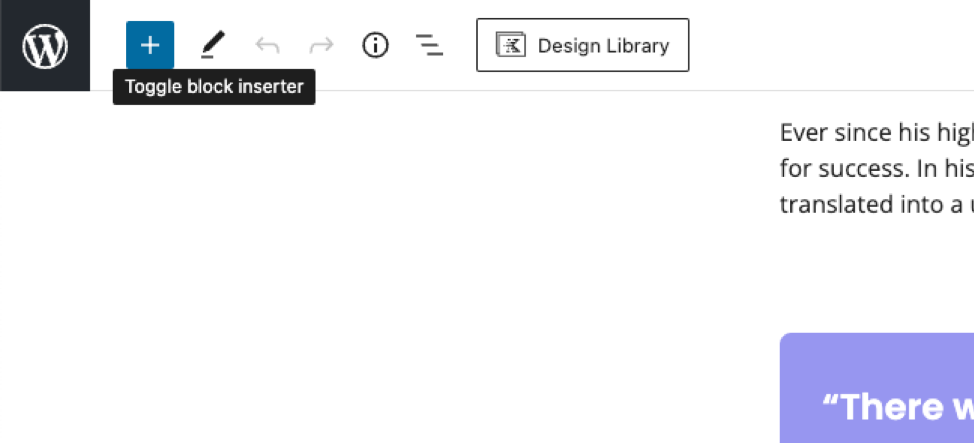
Once you’re in the WordPress block editor, usually your first step will be to find the plus icon on the top left, or if your cursor is clicked on a certain part of your site, a plus icon will appear on its right hand side.

Once the plus icon is clicked, a menu will open with different block options. As mentioned earlier, there’s plenty of different blocks to fit any need.
In this stage, you might have to search for a specific block. Once you’ve found the right block, go ahead and click it.
2. Place Your Block
Now it’s time to move your block to where you want it on the page. If you used the plus icon on the top left, then you might have to move your block to its proper location.
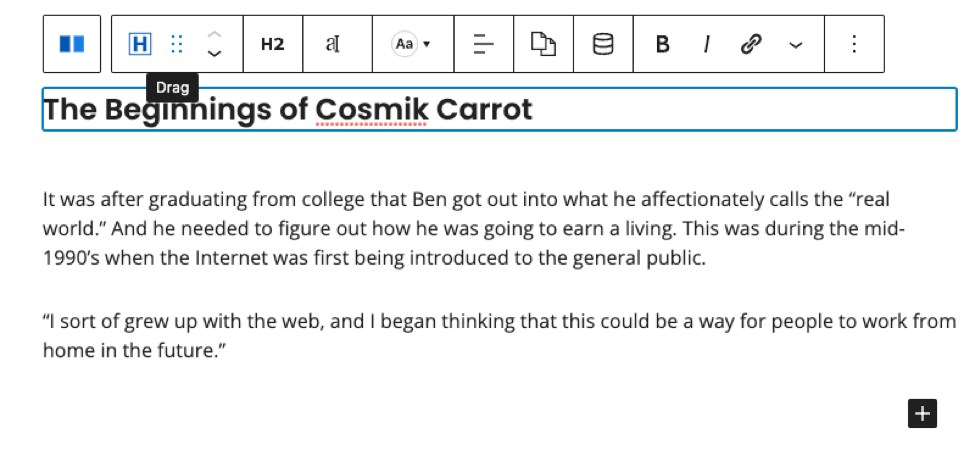
Moving your block can be done by using the up and down arrows on the editor's pop up menu (shown below). Another option to move any given block would be to click and drag on the editor using the “drag” icon which looks like a set of two lines of dots parallel to each other (shown below).

3. Customize Your Block
Now all that's left is customizing the block to fit your site's theme or branding. In this case, you can customize a paragraph block by changing the text color and font size.
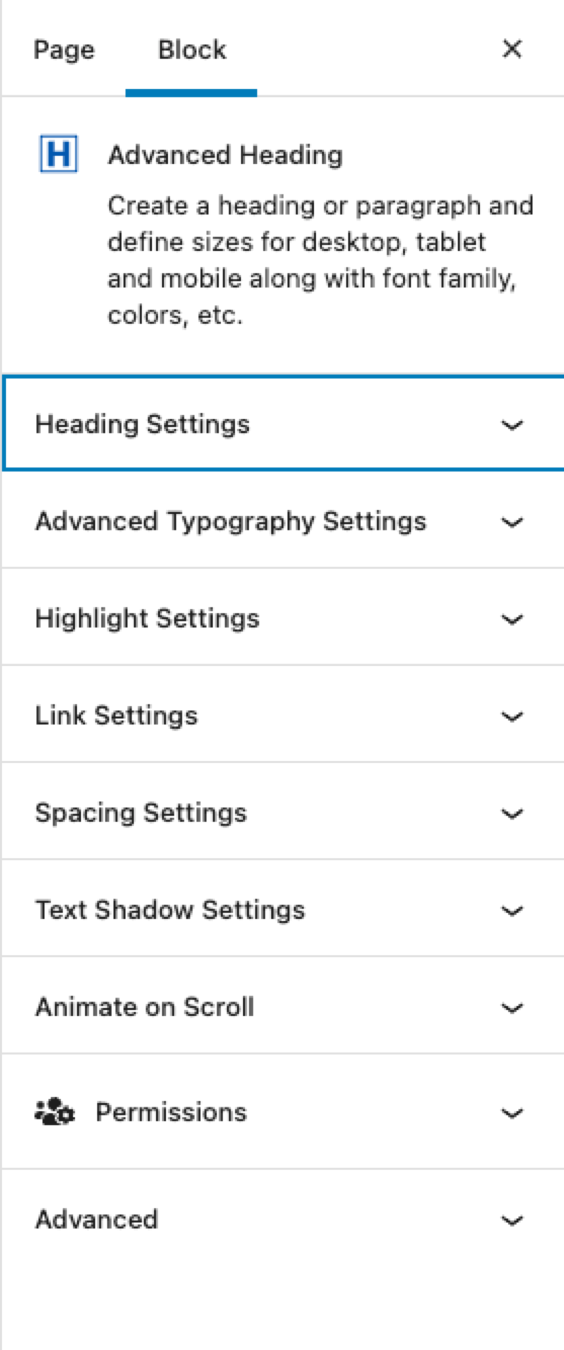
Not only can you edit blocks using the floating bar, but you can also edit blocks using the right menu, otherwise called the Settings tabs.
Let’s walk through some of those customization options in the settings tab.

Each settings dropdown tab helps facilitate more customization on subjects like typography, spacing, effects, and even animation. The setting tab is where the magic happens. You’ll spend a lot of time tweaking your design to perfection in this section of the WordPress block editor.
WordPress Block Editor Pro Tip
Keep an eye on the list view, which can be opened by clicking the list icon on the top right. This will help with structuring the site and making it responsive to different screen sizes. Responsive design refers to how a website is designed and structured to respond to the size of any given screen size.

How to Disable WordPress Blocks & Other Options
WordPress lets you disable blocks, which can be useful in many cases such as:
- Disabling blocks that you never use to cut down on clutter.
- Disable blocks to restrict a third party editor on your site from using specific blocks.
You can limit access to certain blocks using a plugin called Disable Gutenberg Blocks. Using Disable Gutenberg Blocks to disable blocks is super easy. We break it down into quick steps below.
- Download and install the plugin.
- Head over to settings and then the Disable Blocks option.
- Hover over any given block and click the option to disable.
When a block is disabled, it will be greyed out indicating its status. And that's it — it’s a very quick way to disable blocks.
The only issue is that these blocks disable globally. If you would like to disable blocks to only specific editors on your site, be sure to use a plugin called Advanced Gutenberg. Disabling blocks using Advanced Gutenberg only adds about two extra steps: making a profile and disabling blocks for each user accordingly.
If you have serious issues with Gutenberg Blocks, do not fret. There is also a way to disable it and revert to the classic WordPress editor.
To disable the Gutenburg blocks, we’ll need another plugin: Classic Editor Plugin. It was developed by core WordPress contributors and will make the process easy. It works automatically after downloading and installing the plugin.
The Classic Editor Plugin also gives you the option to work on both editor versions.
To do that, head over to the settings page, then to the Writing page while in the WordPress admin. You will see the option labeled “classic editor settings.” Don’t forget to click save.
Another option is to disable Gutenberg Blocks with the plugin mentioned above, the Disable Gutenburg Plugin.
Now You Know
Now you’re well versed in how to use WordPress blocks and the WordPress block editor. Hopefully you have a better idea of what the Wordpress block editor is and how to get started. Jump in and give it a try yourself.
And if you’re in the market for someone to host your WordPress website, consider Nexcess fully managed WordPress hosting.
Managed hosting is critical in running a site long term — and it makes it easier on you. Let Nexcess take care of keeping your site fast, secure, and high performing.
Check out Nexcess’ fully managed WordPress hosting plans to get started today.

