

A 2022 PwC report on consumer behavior shared that 51% of surveyed customers considered customer experience a top attribute when assessing a retailer to become loyal to.
A working shipping strategy is one way to guarantee an excellent customer experience.
And if you run an online store with WooCommerce that sells physical products, your shipping strategy depends on your shipping options.
Let’s explore how WooCommerce shipping options work, how to set them up, and how you can extend their functionalities.
Here’s what we’ll cover.
- Benefits of setting up WooCommerce shipping options
- WooCommerce multiple shipping options
- How to set up WooCommerce shipping options
- Using WooCommerce shipping plugins to add complex features
- Final thoughts: WooCommerce multiple shipping options in your WooCommerce store
Benefits of setting up WooCommerce shipping options
As a store owner, you can make or break your sales depending on how you set up your multiple shipping options from WooCommerce.
Here are some reasons to set up shipping options.
Ensures you can deliver products correctly
WooCommerce shipping offers great value to online store owners that sell physical products.
With shipping classes and zones set up, you can collect vital information from your customer to help automate the shipping process and improve accuracy.
Simplifies ecommerce shipping cost calculations
You can configure WooCommerce shipping options to automatically calculate appropriate shipping rates for different shipping zones. And if delivering products to customers’ doorsteps is an add-on service, you can configure that as well.
Monitors store metrics
One way to track your WooCommerce store performance is to monitor the number of products shipped. It can be a valuable indicator of the progress of your business.
For instance, if you sell fresh pastry products, frequent shipments can indicate a budding business. If the number or frequency of products shipped reduces, you may investigate to find out underlying issues.
Makes returns and refunds easier
Setting shipping policies as part of your WooCommerce shipping options can make it easier to manage shipping when things go wrong.
Your policies might include:
- Whether or not returns must be preauthorized.
- The shipping address for returns.
- Whether you offer refunds or replacements.
Keeps detailed records
You can keep records of products shipped during the lifetime of a customer. From these records, you can offer bulk discounts, loyalty points, or other in-store perks and rewards for loyal customers.
WooCommerce multiple shipping options
Right out of the box, WooCommerce offers three basic shipping options: local pickup, free shipping, and flat rates. If you run a simple online ecommerce store, these methods may be more than enough.
And you can always adjust them later or add a shipping method to meet your requirements as your online business grows.
Let’s explore them below.
Local pickup
Do you have physical stores near your customers? Local pickups would be ideal.
Instead of receiving products via shipping, your customers can pick them up from the nearby local store or warehouse branch. Local pickups are often time- and cost-efficient because your customers can walk in and pick their items up at any time without any extra charges.
Sell your products online, worry-free
Officially recommended by WooCommerce, our hosting is made for online businesses like yours
Free shipping
With this shipping method, your customers don’t pay a shipping fee. Instead, you absorb the shipping cost on their behalf and dispatch the items to your customers for free.
This option is ideal for customers who surpass a minimum order amount, a minimum number of items, or use shipping coupons or discount codes.
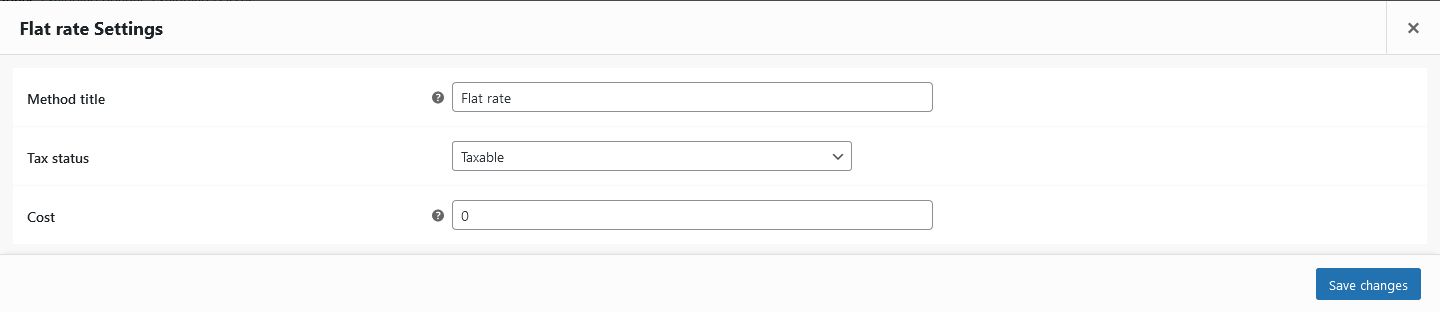
Flat rate shipping
Flat rate shipping applies a standard charge to your customers' orders for their physical purchases, regardless of what they order. This method is predictable, as your buyers know the shipping cost beforehand.
That also means each customer pays the same rate. Although straightforward, flat-rate shipping has its advantages and disadvantages.
For instance, it is ideal for your customers to know the shipping cost upfront. But if it's a fixed charge, It may cost some customers more, especially those physically closest to your business.
Flat rate shipping can also be modified to only apply to certain items.
How to set up WooCommerce shipping options
WooCommerce runs on WordPress, so we’ll set up WooCommerce shipping options directly from your WordPress dashboard.
1. Create new WooCommerce shipping zones
From your WordPress dashboard, go to WooCommerce settings and navigate to shipping.

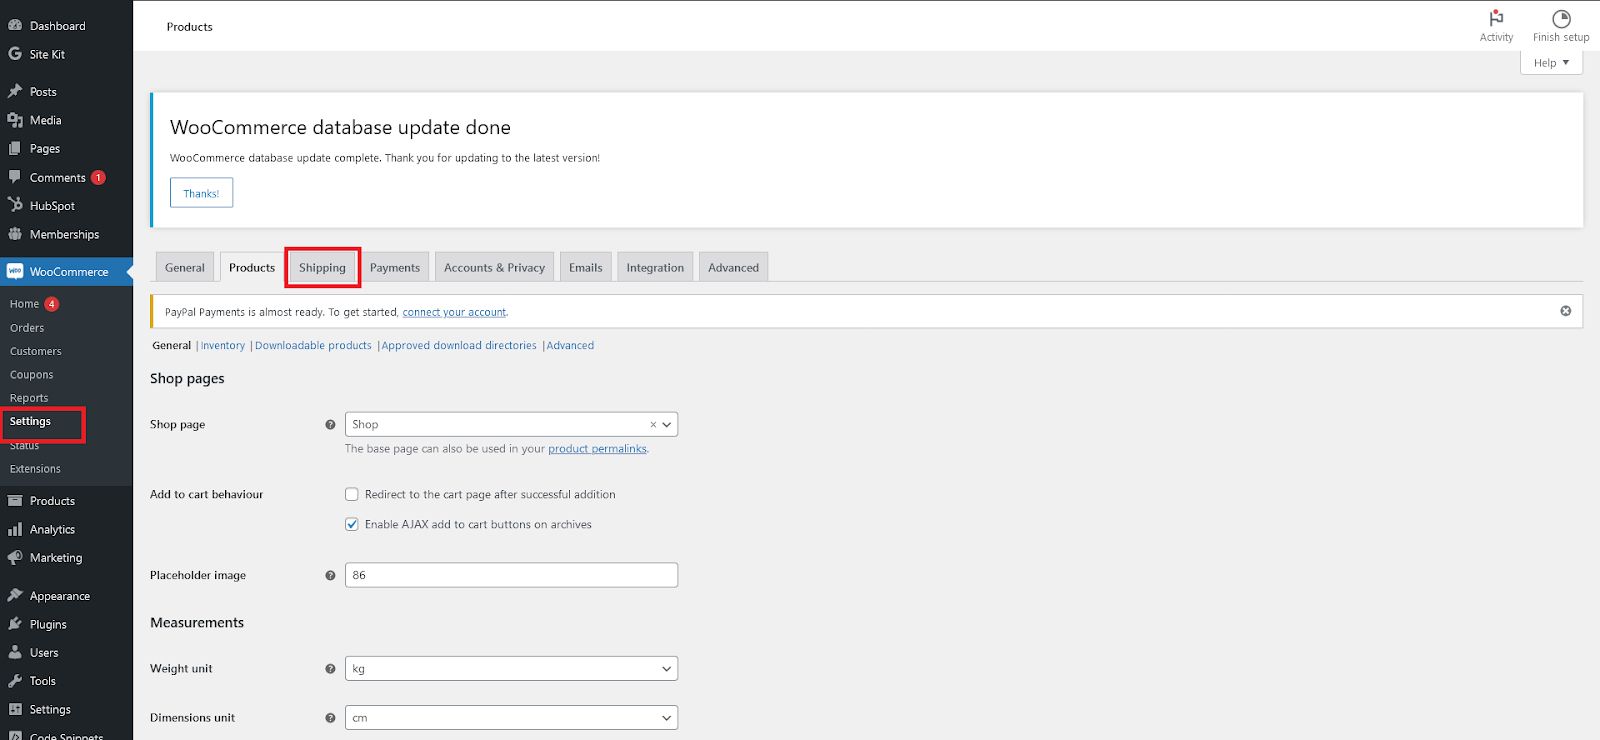
You'll see a list of default shipping zones, including the United States (US) and locations not covered by your other zones.

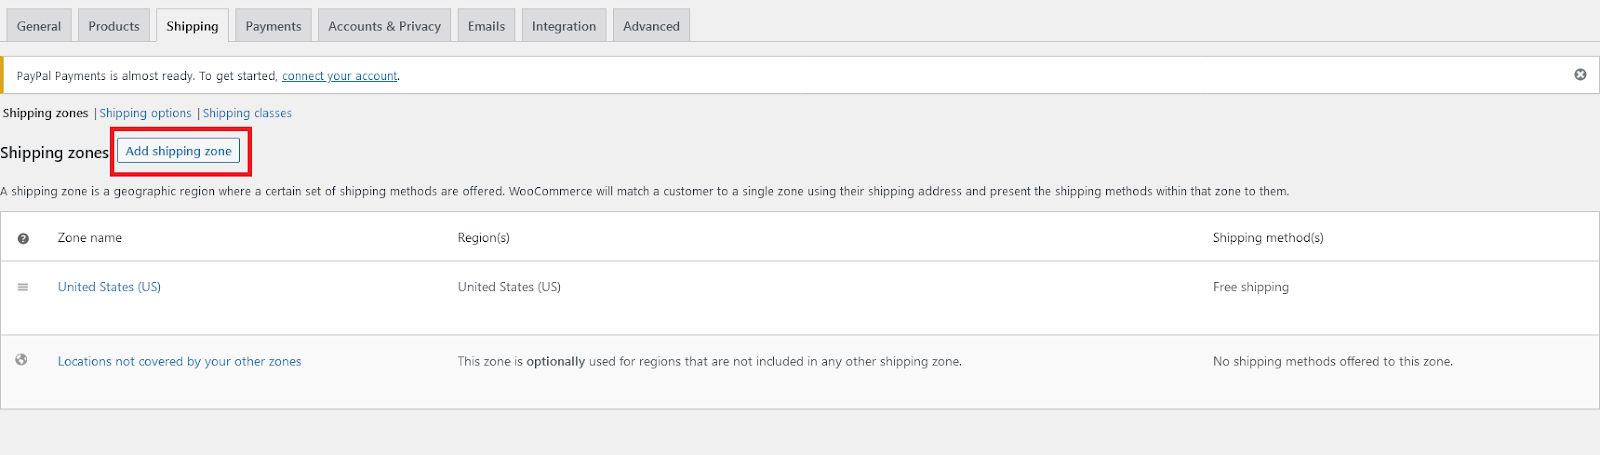
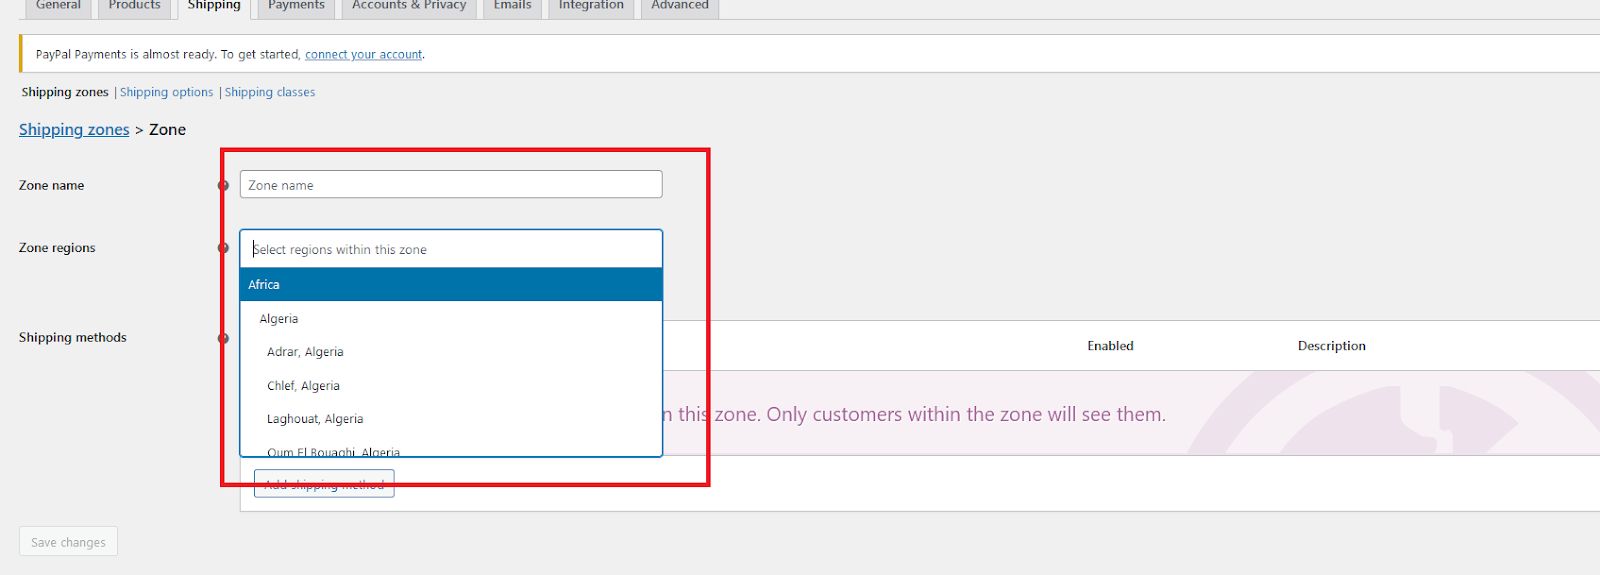
Add a new shipping zone by clicking Add shipping zone to begin setting up your WooCommerce shipping options. You can give it a custom name and select its region.

Next, add your shipping method. Select between a flat rate, free shipping, and local pickup from the resulting popup screen. Once done, make sure to save changes.

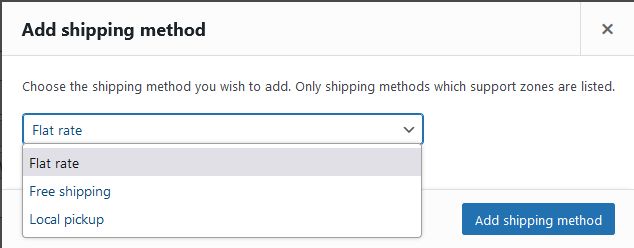
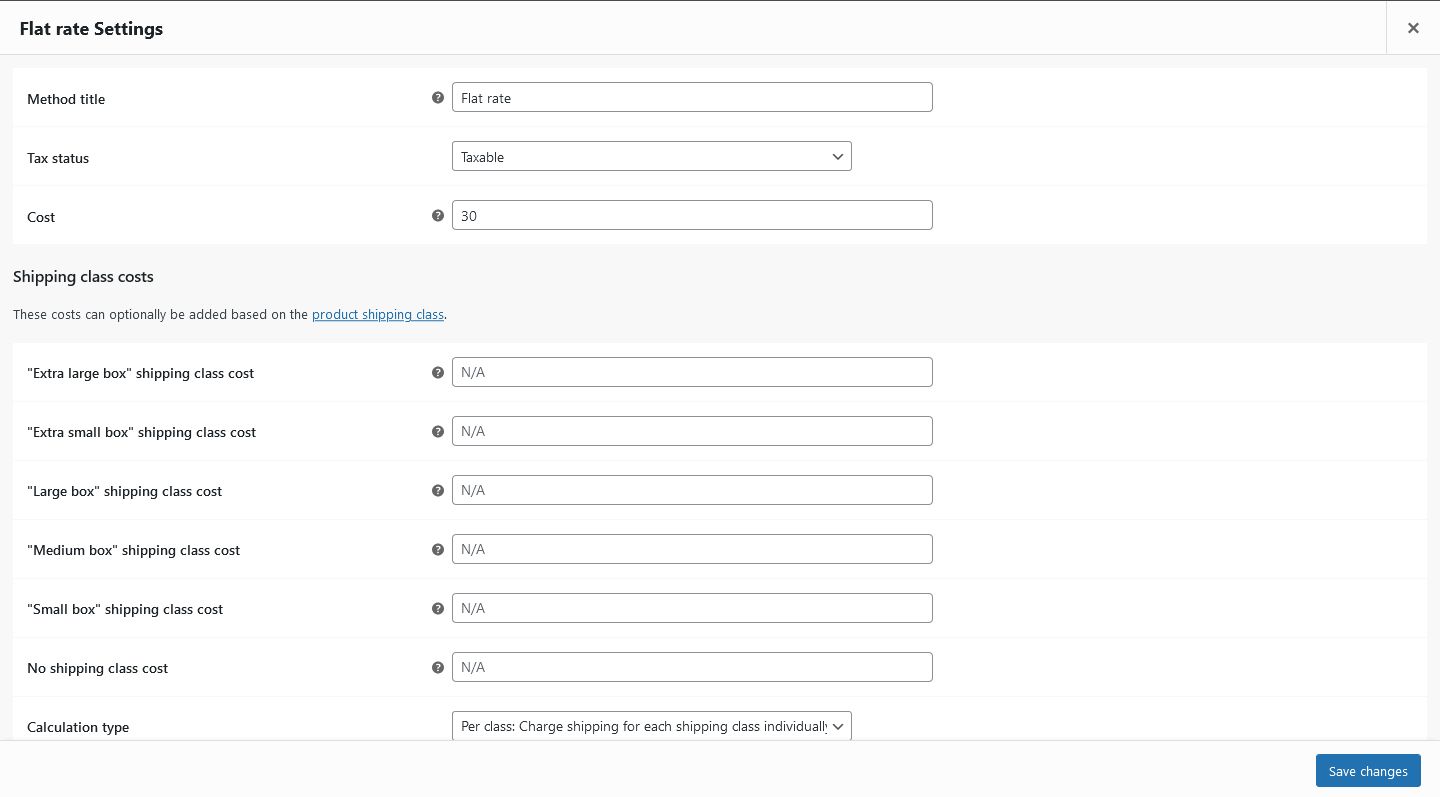
If you choose the flat rate option, you may add a tax status and the cost.

The new shipping zone should now appear with the rest.


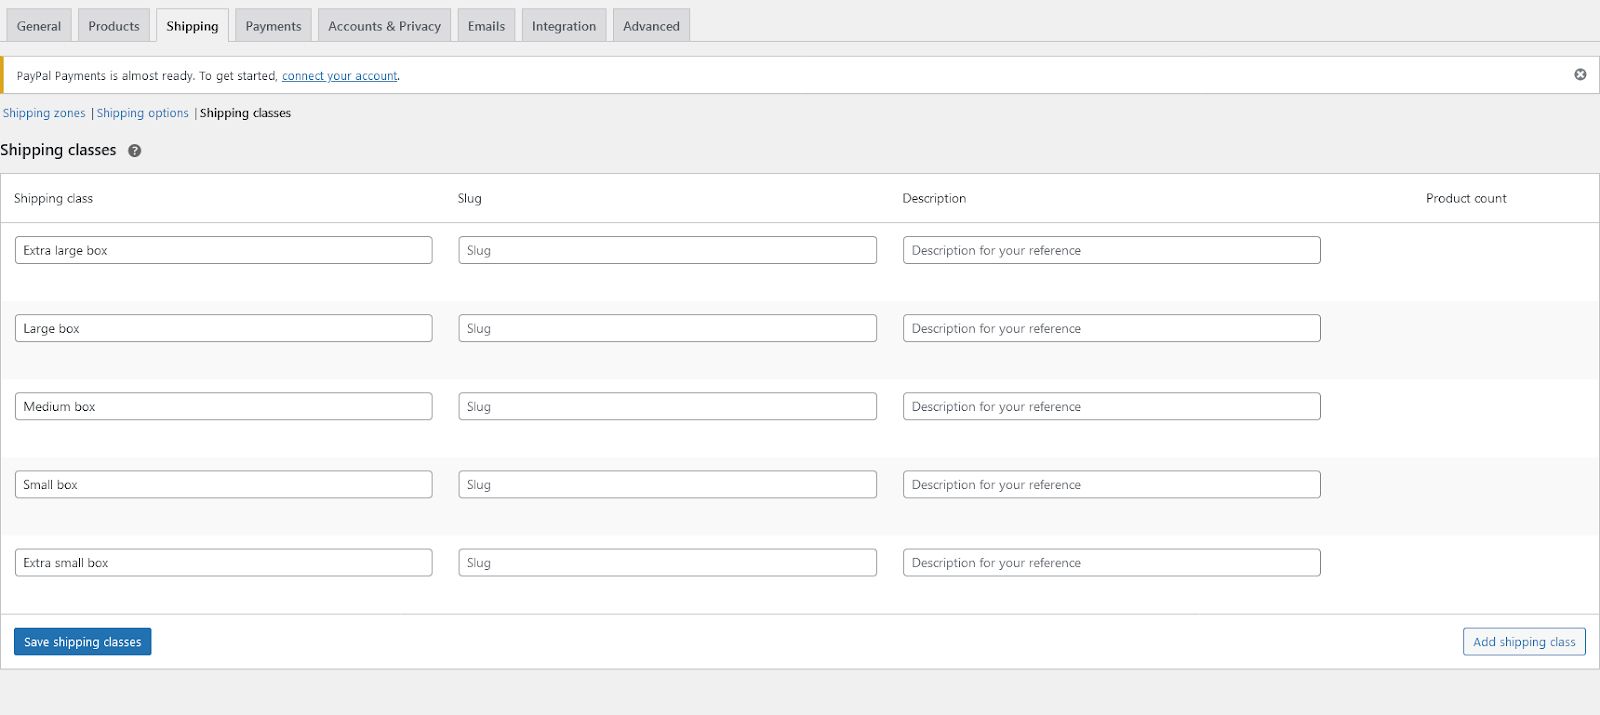
2. Set up shipping classes
Next up, set up the shipping classes.

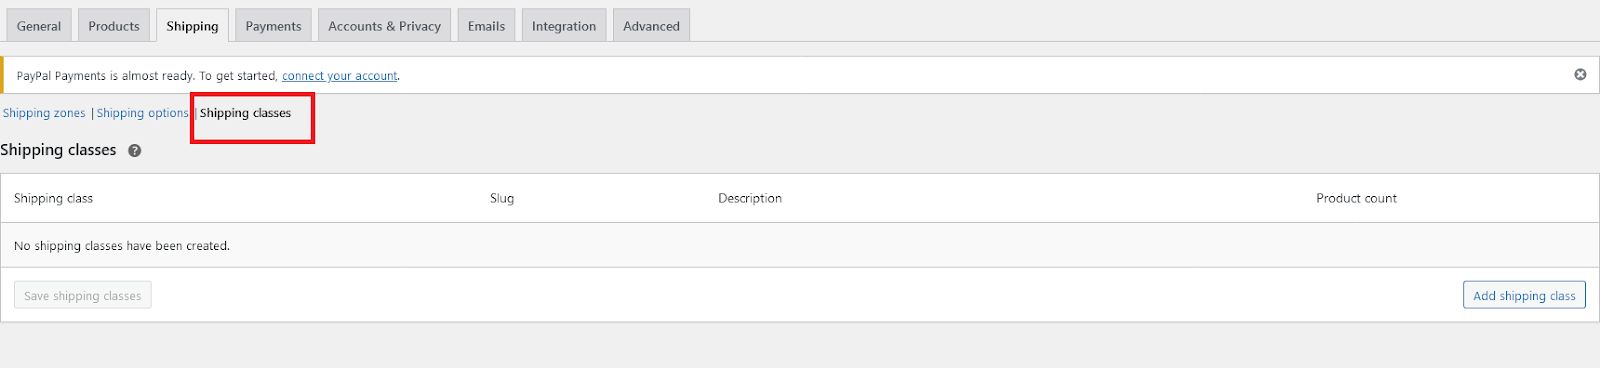
You have the option of creating new shipping classes with unique names, slugs, and descriptions.
But first, what do shipping classes do?
Shipping classes group together products of a similar type. While they don’t directly offer shipping rates to customers, they help you set up shipping zones and shipping class costs.
The slug is the text that will appear as part of the shipping class’s URL. It has to have one assigned, even if it isn’t indexed or publicly visible as a stand-alone page. If you leave the slug option blank, WooCommerce will automatically generate one for you.
Saving is a bit tricky here, click on the Add shipping class button to save your progress.

You can also attach specific flat-rate shipping costs and extra rules to each shipping class by editing zones on the shipping zones page.

3. Assign shipping classes to products

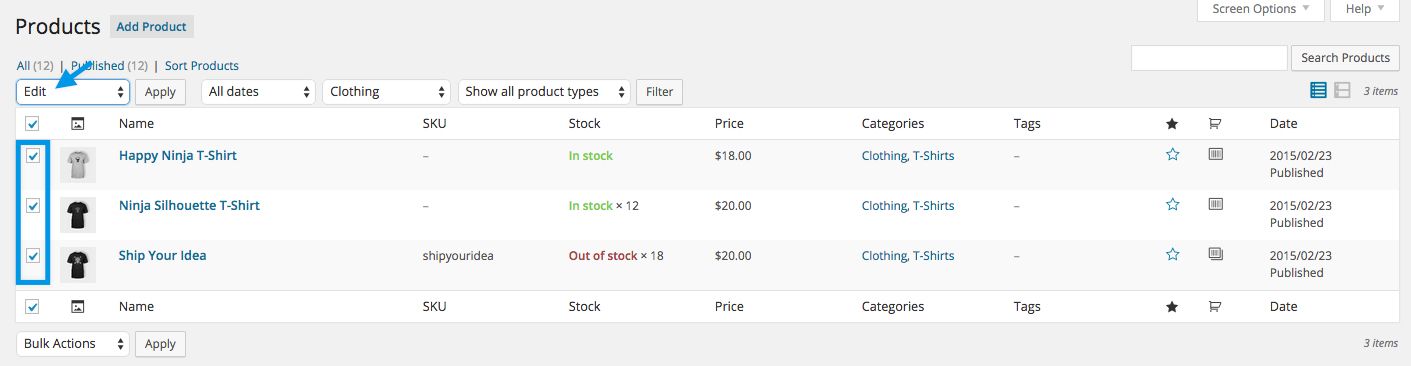
Once you’ve set up shipping zones and classes, you can add them to your products. If you already have products in your store, you can easily add shipping classes to them in bulk by selecting a group of products and editing their shipping classes together.
You can also add shipping classes to individual products as you add them to your store.
4. Test out your shipping process
Before rolling out a new shipping process, take your store for a test run. Ensure your shipping strategy works from the perspective of your customer.
You can do so by running your shipping setup from the front end to catch possible issues. It also ensures your shipping process is seamless, no matter your shipping location or the customer's location.
You can test your shipping process out in several ways:
- Use a virtual private network (VPN) to test if your shipping zones and classes work as expected. Test out at least one product from each shipping class and at least one location within each shipping zone. In each scenario, ensure shipping prices display as expected in the cart and checkout pages.
- Confirm that free shipping works as intended. Test all options, such as for discount and coupon codes, or when a customer exceeds a certain store value in purchases.
- Attempt to check out from your own store. Does the cart page work? Does your order total include the appropriate shipping cost? Ensure no links are broken and the process is seamless.
- If you’re using third-party plugins to enhance the shipping experience, ensure they work as expected without breaking your website or causing 404 errors.
Using WooCommerce shipping plugins to add complex features
Using proprietary and third-party WooCommerce shipping plugins, you can add extra features and functionality to your WooCommerce shipping options.
Some of the powerful options include:
Table rate shipping
Table rate shipping is an excellent shipping option for ecommerce if you want to control shipping rates based on specific product conditions. It could be size, weight, dimensions, or volume. Each specific condition met with a rate table gives the customer a different shipping fee.
A good example is the Table Rate Shipping plugin by WooCommerce. It enables you to add multiple rate tables across different shipping zones. You can also add rules to products based on weight, order, item, and class.
Third-party carrier rates in real time
If you use popular shipping providers like DHL, UPS, FedEx, or the U.S. Postal Service (USPS) to fulfill your orders, you can use their plugins to display real-time carrier rates for customers in different shipping zones. These plugins also act as shipping calculators, estimate the time to delivery, and provide tracking numbers for customers.
For instance, you can use UPS Shipping Method or FedEx Shipping Method to give live rates and shipping options.
Label printing
Instead of creating new labels for your products from scratch, you can use a label printing plugin in your WooCommerce store. It saves you the energy, time, and cost of getting specialized equipment to perform that task.
For example, you can use WooCommerce Stamps.com API to create ready-to-print shipping labels for USPS. That way, you never have to worry about getting the address wrong due to transcription errors.
Tracking information
Tracking plugins help your buyers track their items every step of the way, from your store to their doorstep. They relay live notifications from a shipping carrier on your website’s front end.
Many third-party shipping carrier plugins already come with that functionality. However, you can use the Shipment Tracking for WooCommerce plugin if it’s not the case.
Cart splitting
A great way to improve your shipping services is to offer cart splitting. This feature allows your customer to split a cart of items into different packages and configure unique shipping for each. That means a customer can order several items, package each separately, and send them all to different addresses.
Cart splitting can be an excellent way to purchase gifts from one store and send them to your family and friends in different locations.
The ideal plugin for flexible shipping with cart splitting would be the WooCommerce Advanced Shipping Packages plugin.
Automated shipping processes
Want to streamline shipping for your WooCommerce store? There are plugins to help you automate your shipping. Plugins like Shipwire and ShipStation help automate much of the shipping process by handling all the shipping processes.
Distance rate shipping
Rather than calculating shipping based on size, dimensions, weight, or volume, you can charge shipping rates based on distance. This feature isn’t a default in WooCommerce, but you can use the WooCommerce Distance Rate Shipping plugin to calculate rates based on the distance a product covers to reach the customer, or the amount of time taken.
Postcode validation
To prevent the loss or delay of packages because of wrong addresses, you can use the postcode validation plugin to help customers verify their addresses on checkout. It can also help people prevent typing errors and other mistakes when inputting address details at checkout.
Final thoughts: WooCommerce multiple shipping options in your WooCommerce store
While WooCommerce default shipping options provide a great starting point, the blanket shipping rates might not work for all customers. By configuring the WooCommerce shipping options, you can offer customized shipping rates and take a step toward creating a great buying experience.
To make sure the customers enjoy shopping with you, supplement these shipping options with a website that’s fast, secure, and reliable — all that’s possible with a responsible web hosting provider.
Check out the Nexcess managed WooCommerce hosting today and upgrade your online store.

