Tracking pixels. Retargeting pixels. Conversion pixels. Regardless of what you call it, a pixel can help you increase sales and better measure your own marketing efforts. But what is a tracking pixel and how does it work? How do you install it, and what are some real-world examples of how to use it?
- Keep reading to learn:
- What is a tracking pixel?
- How do tracking pixels work?
- How to add a tracking pixel to a website
- And more!
What Is a Tracking Pixel?
A tracking pixel is a 1x1 pixel graphic. It tracks web traffic, site conversions, user behavior, and more on a site’s server level. It also gathers information on how users interact and respond to ads, email campaigns, and the site as a whole. Even though a tracking pixel is very small (and hidden with CSS), its benefits are huge.
How Do Tracking Pixels Work?
Now you may be wondering, exactly how do tracking pixels work? A tracking pixel for a website is a code snippet. It’s usually added above the </body> tag so it’s invisible to users. The tracking pixel works by collecting user information, which can then be used for digital advertising.
Tracking Pixel vs. Cookie
When it comes to a tracking pixel vs. cookie, they differ in how information is delivered and kept. Cookies are saved to browsers. Tracking pixels send the information to servers. Both track information across websites and can be used in advertising.

Now let's cover the differences between a tracking pixel vs. cookie in more detail. Functionally, cookies and pixels are similar. Both track user behavior across websites. Both can be used to serve ads to people.
Cookies can also be used to make sure the website remembers certain user settings, like your Facebook username, so you don’t have to type it in every time.
The main difference between tracking pixels vs. cookies is where the information is served and kept. Pixels are made to send information to servers, whereas cookies are saved in your browser. So, a pixel can follow a user across devices, but a cookie cannot. That means that someone can visit your site with its pixel on their desktop, and you can serve them retargeting ads later on their mobile device.
Additionally, users can block cookies on their browser. Some users have big concerns about cookies and privacy, so they disable cookies. Pixels, as of now, cannot be disabled in this way.
Adding a Tracking Pixel to a Website
There are a few ways for adding a tracking pixel to a website. But first, you need to create a pixel.
To create a pixel, you need to go to the advertising platform you’re using and have them generate one for you. We’ll use Facebook as our example here, since it’s one of the most popular tracking pixels. Your Facebook pixel can be generated within Ads Manager, under their “Pixels” tab. Simply click “Create a Pixel,” and Facebook will generate your pixel.
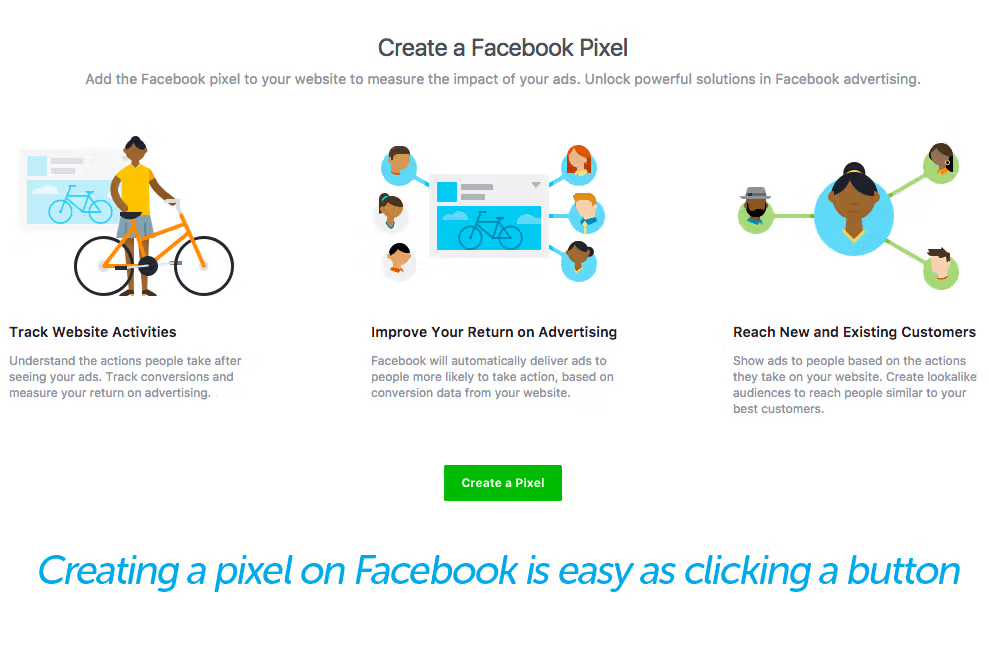
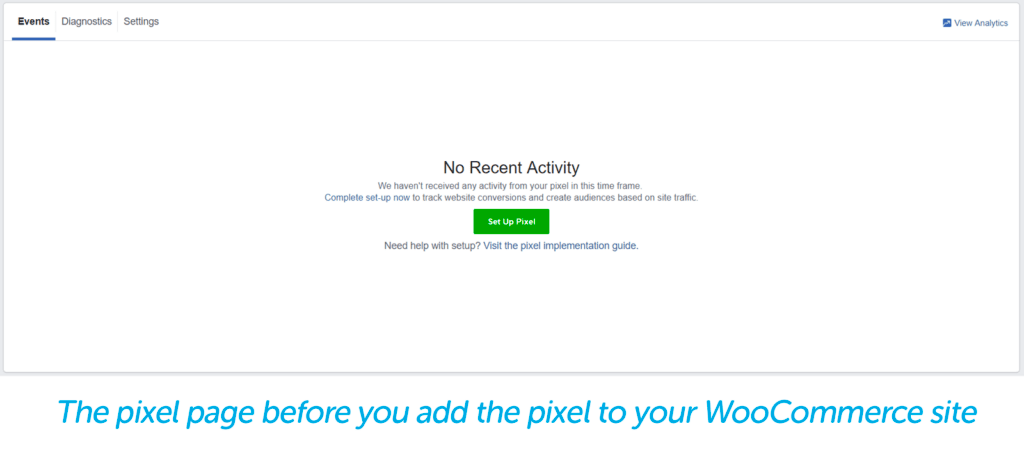
Keep in mind, this pixel is unique to you and your brand. As Facebook put it, it’s “one pixel to rule them all.” If you run more than one brand, you’ll need to create different pixels for different ad accounts. Next, you are ready for adding the pixel to your website.
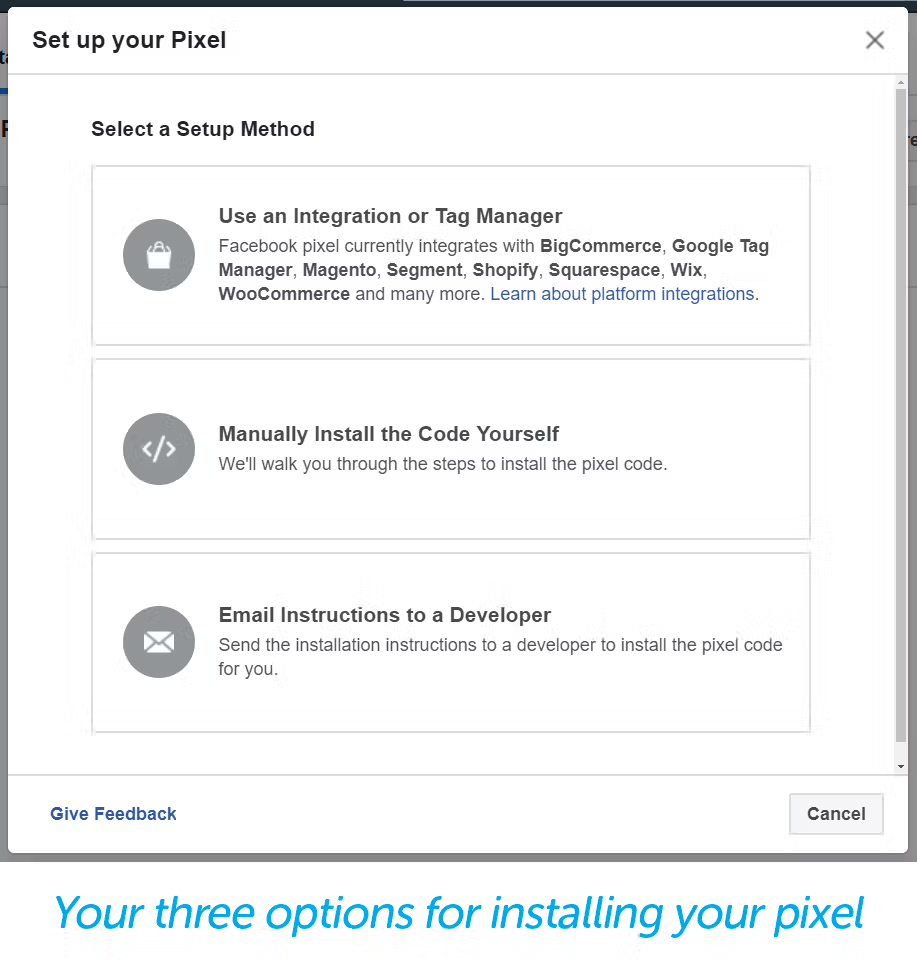
Email Code to Your Developer
If you have someone who typically makes all site updates for you, Facebook has an easy way to just email them detailed instructions. If you’re the one who makes site updates, they have a set of walk-through instructions that will explain to you exactly how to install the code.
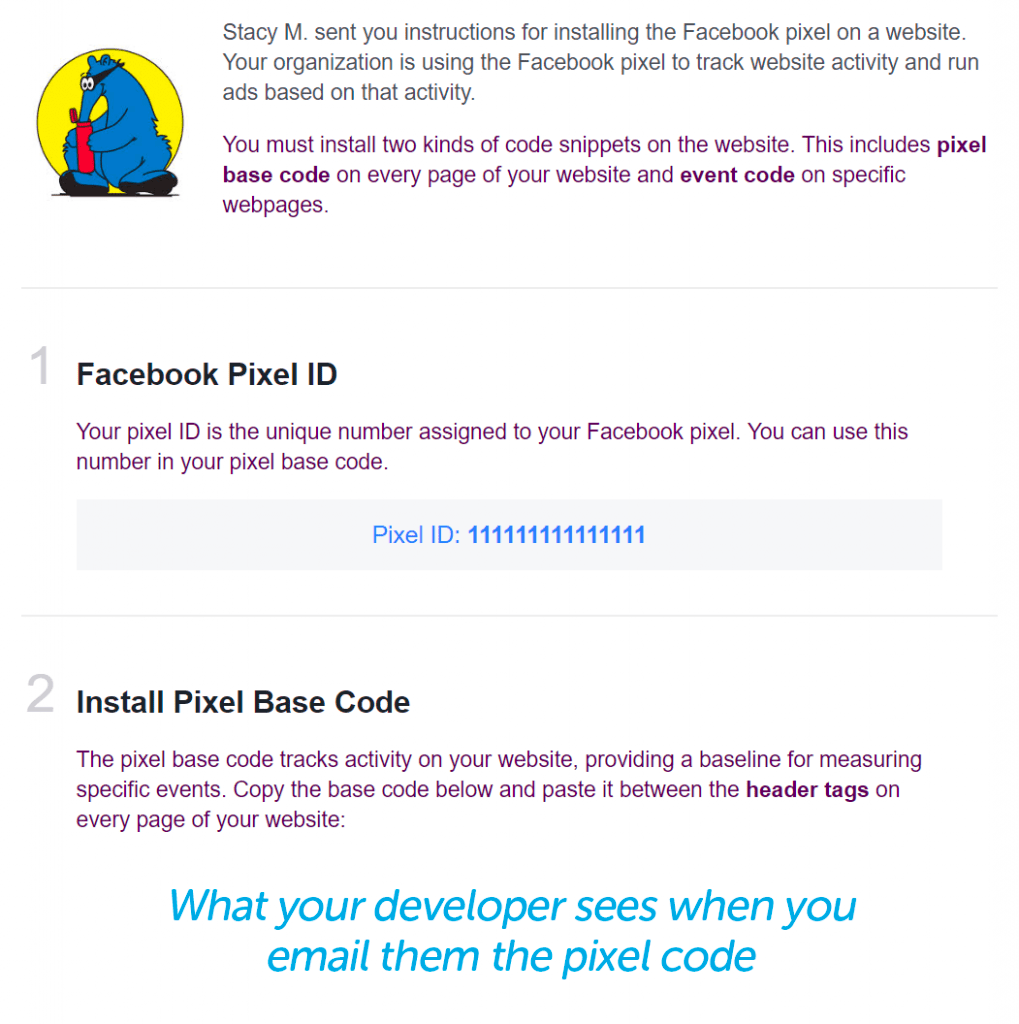
This email will contain four items for your developer:
- The Facebook pixel ID itself. This number is unique to your advertising account in Facebook.
- The base code that the developer will be installing. The email details exactly where your developer should place the code and the exact code itself. It’ll be copy and paste from there! There will also be a note for your developer about data matching, which we’ll explain more below.
- A link to details about how to use the pixel to track events, such as “add to cart,” “contact,” “find location,” “purchase,” and more. This is as simple as copying and pasting a small additional snippet of code into the base code included in the email.
- Instructions on how to check to see if the pixel is working. If your developer doesn’t have access to your Facebook advertising account, you may have to do this. It could take up to 20 minutes, but you check pixel status on the same page where you sent your developer the code in the first place.
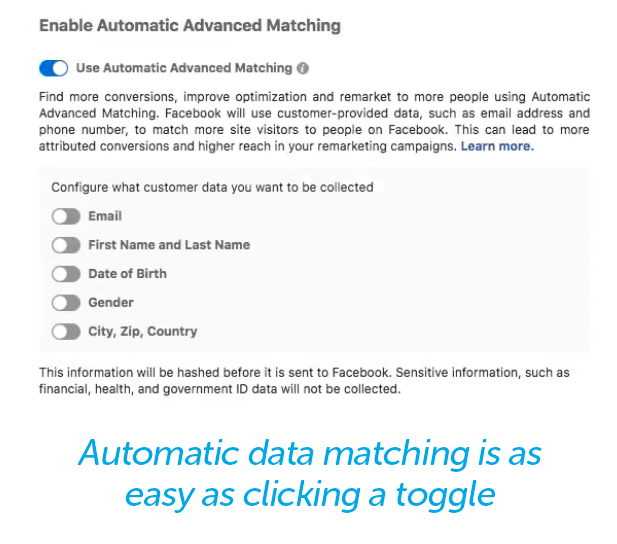
Now, about data matching (mentioned in point two above). Data matching is how Facebook matches actions taken on your website with Facebook users. According to Facebook, this helps to increase the effectiveness of conversion reporting, ad optimization, and targeting.
Developers used to have to manually insert code provided by Facebook to use this feature. This can still be done, but Facebook updated their code to allow advertisers to automatically use data matching with the click of a toggle. This can be turned on for new pixel users under pixel settings.
Add the Code Yourself
It might sound difficult, but this is usually very easy to do if you have any experience with HTML. If you don’t have HTML experience and don’t have someone who can help you, skip ahead to the next section for an even easier installation method.
You just have to paste the entire section of code they give you into your site header, between the tags.
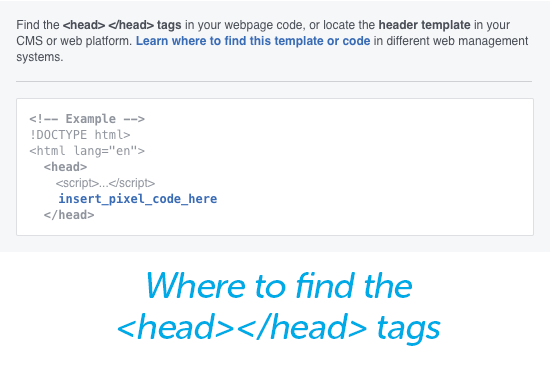
You’ll want to install the code in the header vs. any other place on your site both because your header should be on every page of your site, and because it loads before anything else. If your pixel was in your footer, which loads last, users might take several actions that your code is unable to track.
The location of your head tags varies by website platform, but in WordPress and WooCommerce, it’s found in your Appearance settings.
As an example, we will use a WooCommerce-enabled site from our friends over at Secret Aardvark Trading Co., a hot sauce company based out of Portland, OR. who were kind enough to share their site.
First, we open up their WordPress Dashboard. On the left-hand side of the page, hover over the menu item that says “Appearance” and select “Editor.” At this point, you may get a warning message that lets you know that this area is for advanced users.
Dismiss it if you feel confident. If not, hit the back button and move on to the next section for further directions.
Under “Theme Files,” select “header.php.”

In Secret Aardvark’s theme, the tag starts on line 19 and ends on line 32. You can insert the code anywhere in that area.
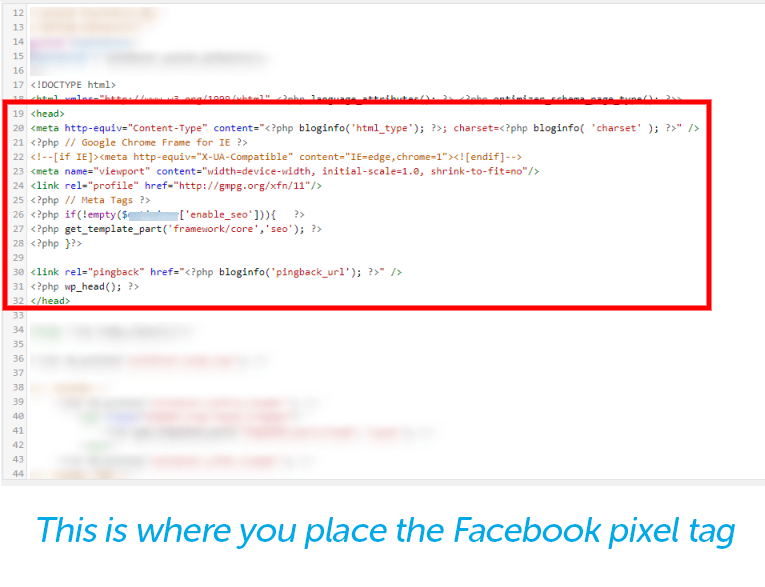
Voila, you’ve added your pixel!
Quick note: When you edit a tag, you’re editing the theme that’s installed on your site. If you change themes, you’ll need to add the pixel again. When you click on the “Editor,” the default view is for your site’s active theme, but you can edit any theme you choose. This is helpful if you’re in the process of moving to a new theme and want to make sure everything is set up correctly before you launch.
Add the Code With an Integration Manager
Since pixels have become so popular over the past few years, numerous popular website platforms (including WooCommerce) have made it even easier to install tracking pixels.
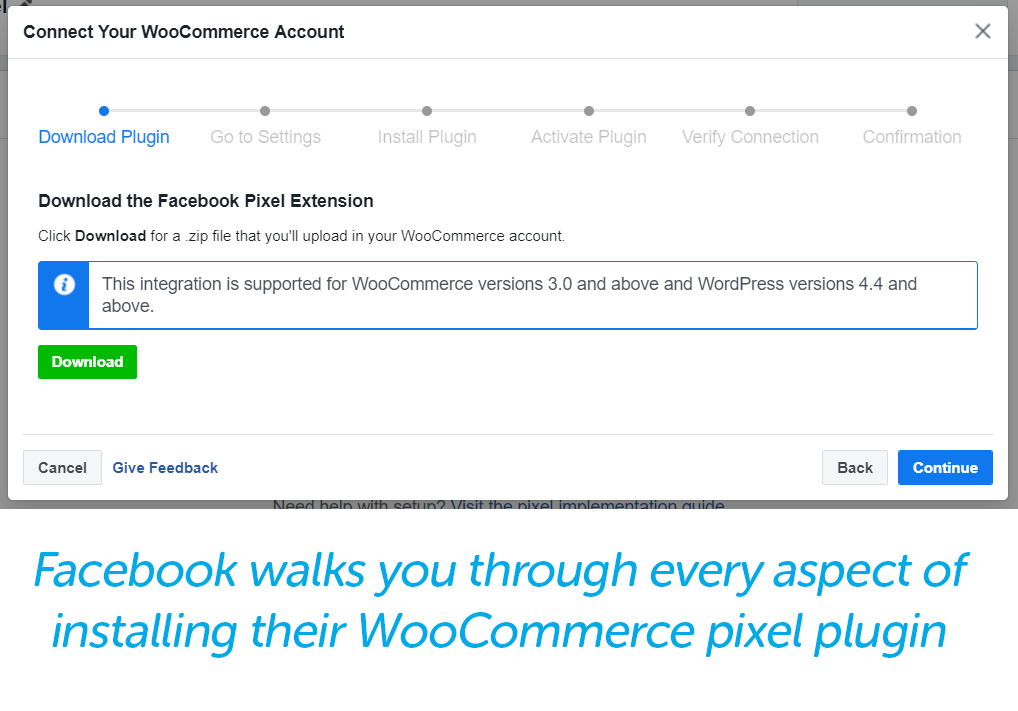
Instead of having to find header tags within your theme, with WooCommerce and other popular platforms, all you have to do is add a plugin, which you can download straight from Facebook and then upload to your WooCommerce store.
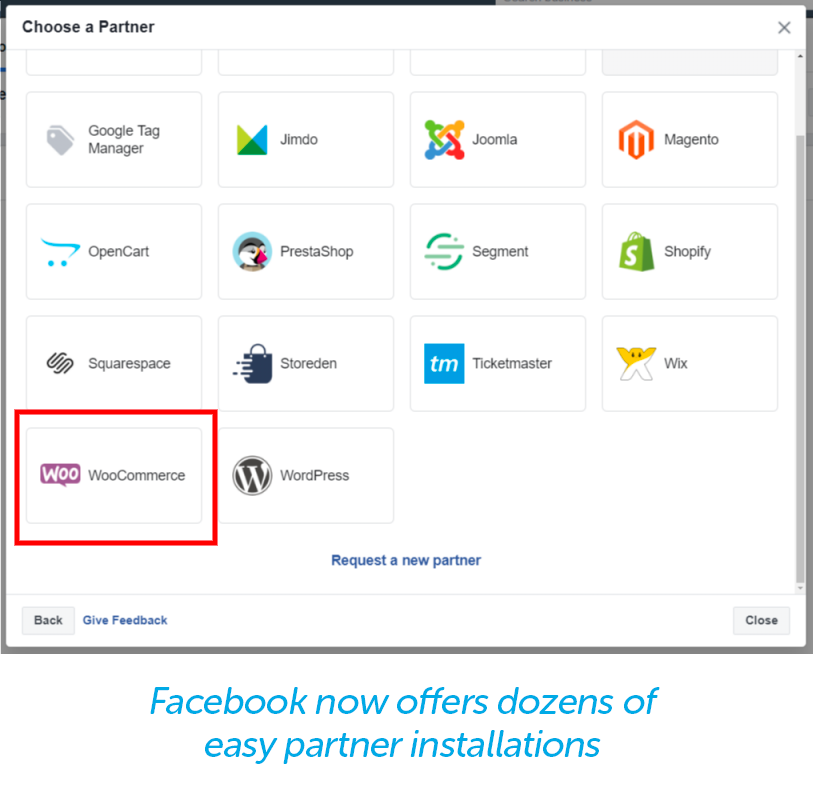
After you select your partner (WooCommerce, in Secret Aardvark’s case), you download the Facebook Pixel Extension.
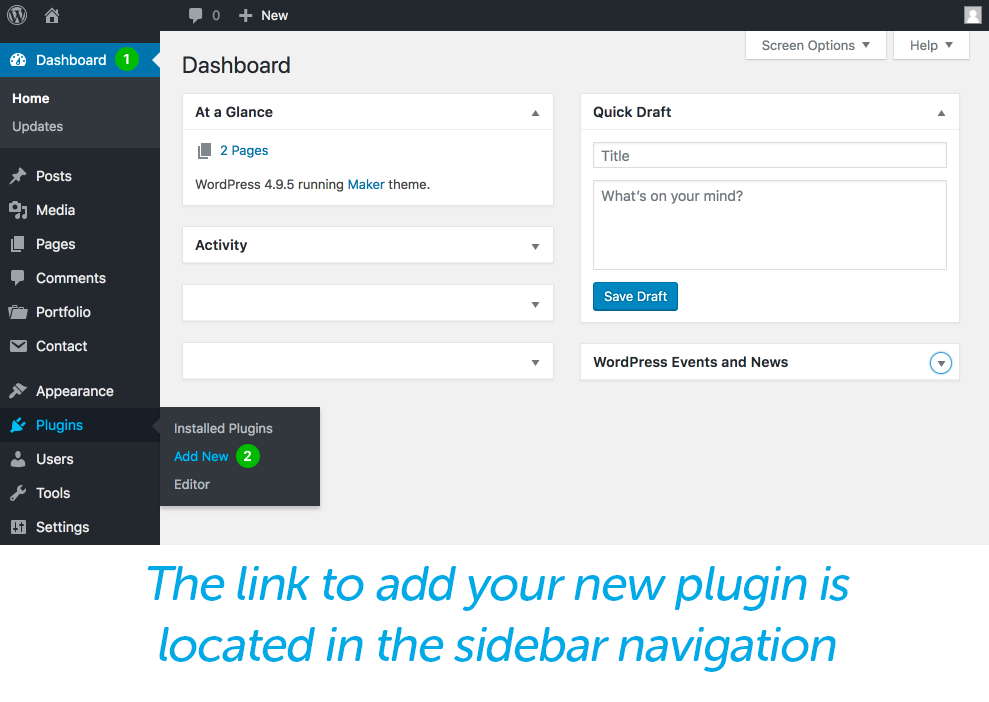
After the file downloads, go back to your WordPress dashboard, hover over “Plugins” on the left sidebar navigation, and select “Add New.”
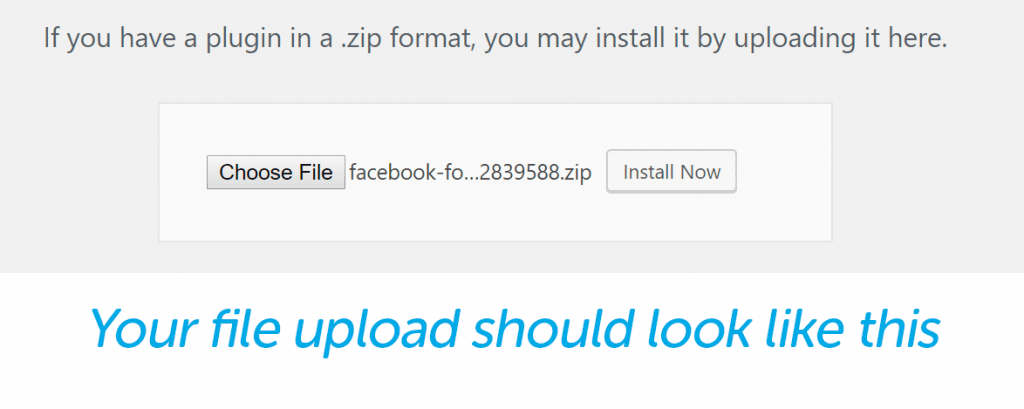
At the top of the Add Plugins page, right next to the header, you’ll see a button that says “Upload Plugin.” Click it! An area will pop up on the page that says, “If you have a plugin in a .zip format, you may install it by uploading it here.” Upload and click “Install Now.”
When that finishes uploading, go ahead and select the blue “Activate Plugin” button.
Next, go to view all your plugins and select “Settings” on the Facebook plugin. From there, you’ll select what page you want to set up the pixel for.
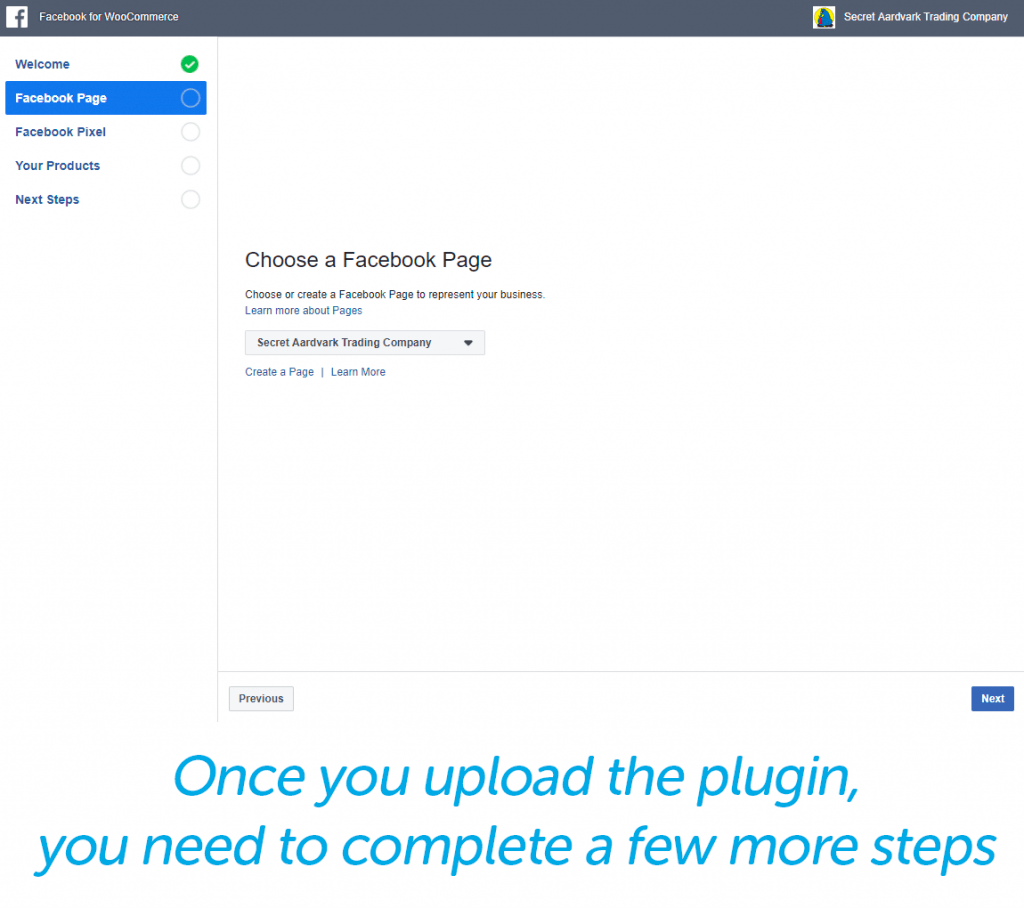
The next page will be dedicated to the Facebook pixel. As you can see from the Secret Aardvark example, their pixel of choice is already installed, and advanced matching is selected. This is how the plugin installs by default.
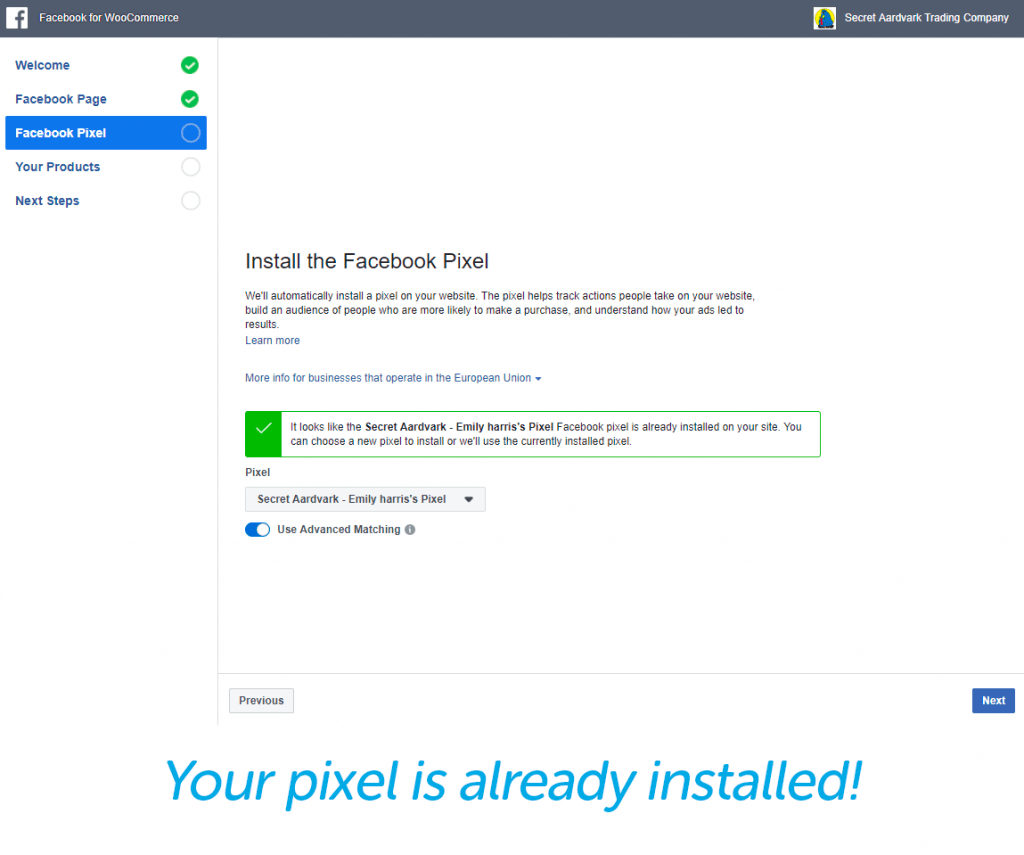
Next, you can automatically import your catalog of products to Facebook, which makes selling on Facebook even easier.
Related reading: How To Use Social Media as a Social Commerce Platform >>
After you finish running through those settings, you’ll need to keep your browser open so that Facebook can sync with your WooCommerce account.
Go back to Facebook and click the green “Verify” button in the plugin installation tutorial.
If all goes well, you should have an active pixel!
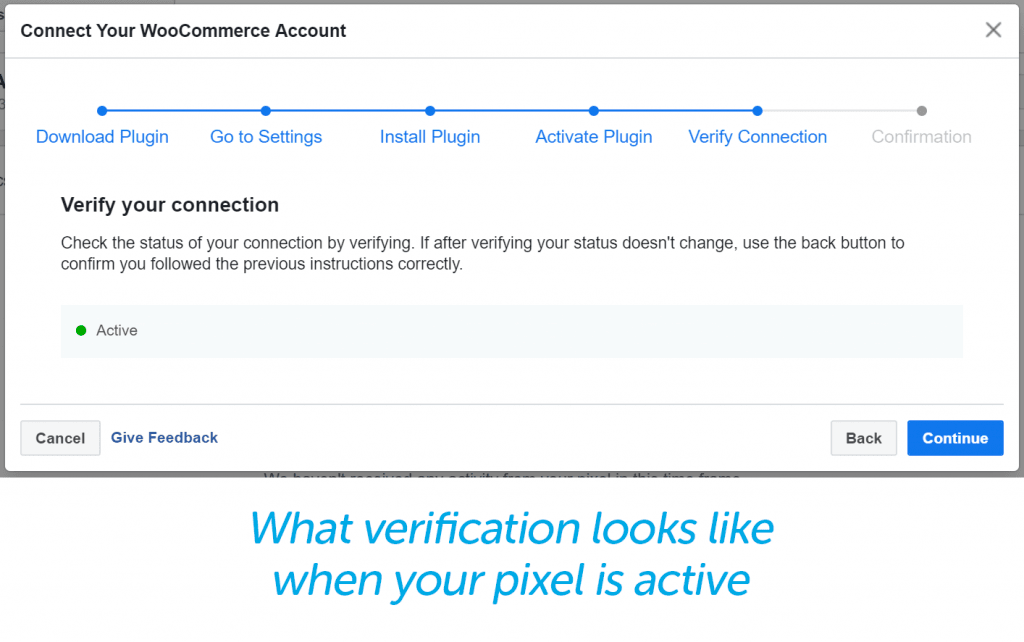
If it doesn’t look like your pixel is verifying, wait 20 minutes and then try again. Sometimes it can take awhile for the pixel to update.
Using a Tracking Pixel
A number of advertising platforms have tracking pixels, including Twitter, LinkedIn, and Facebook. All tracking pixels are installed similarly, and serve similar functions. The Facebook tracking pixel is most popular pixel associated with advertising, so we’ll focus on that one.
The Facebook tracking pixel has four main purposes. It can:
- Measure cross-device conversions
- Allow you to show ads to those most likely to convert
- Create retarget visitors to your website across devices
- Teach you about how people use your site once they click on an ad
Facebook’s tracking pixel is most commonly used to:
- Boost a post (either an organic page post or an ad)
- Send people to your website
- Improve conversion rate on your website
Tracking Pixel Perk: Increasing Conversions
Increasing website conversions is easily the most popular use of tracking pixels. This most often means a purchase, but when you set up a conversion-oriented campaign in Facebook ads, it will track all available conversions, like adding a product to a cart, initiating checkout, filling out a lead fo09rm, or viewing a specific page.
That means you’ll be able to see how many full purchase conversions you have, but you’ll also see how many people viewed your page, how many people have added items to their cart, and more.
To build an ad that utilizes pixel conversion tracking, go to your Facebook Ads Manager homepage and select the “Create Ad” button.
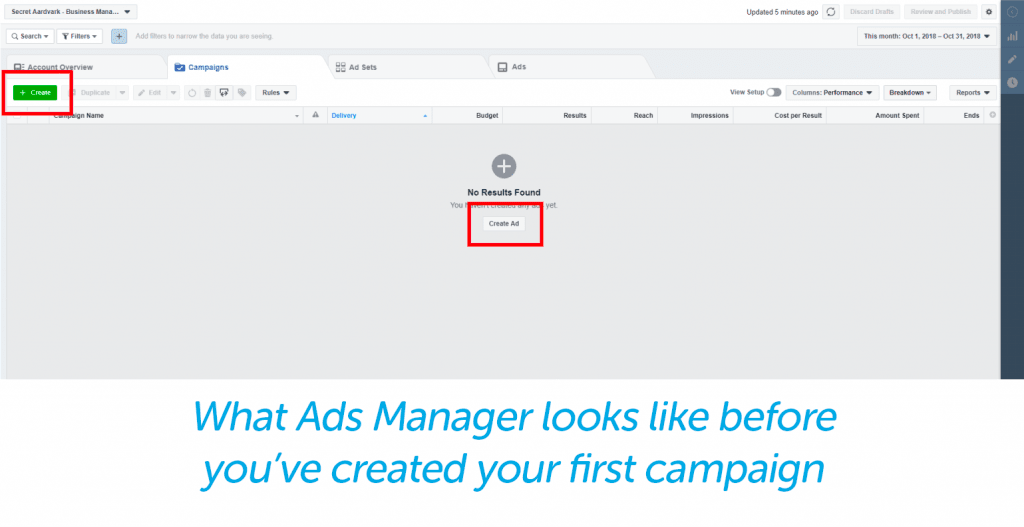
The first thing you need to do is create a new campaign with a conversions campaign objective. For this example, Secret Aardvark is going to create a campaign encouraging Ohioans near a Meijer grocery store to purchase Secret Aardvark in Meijer.
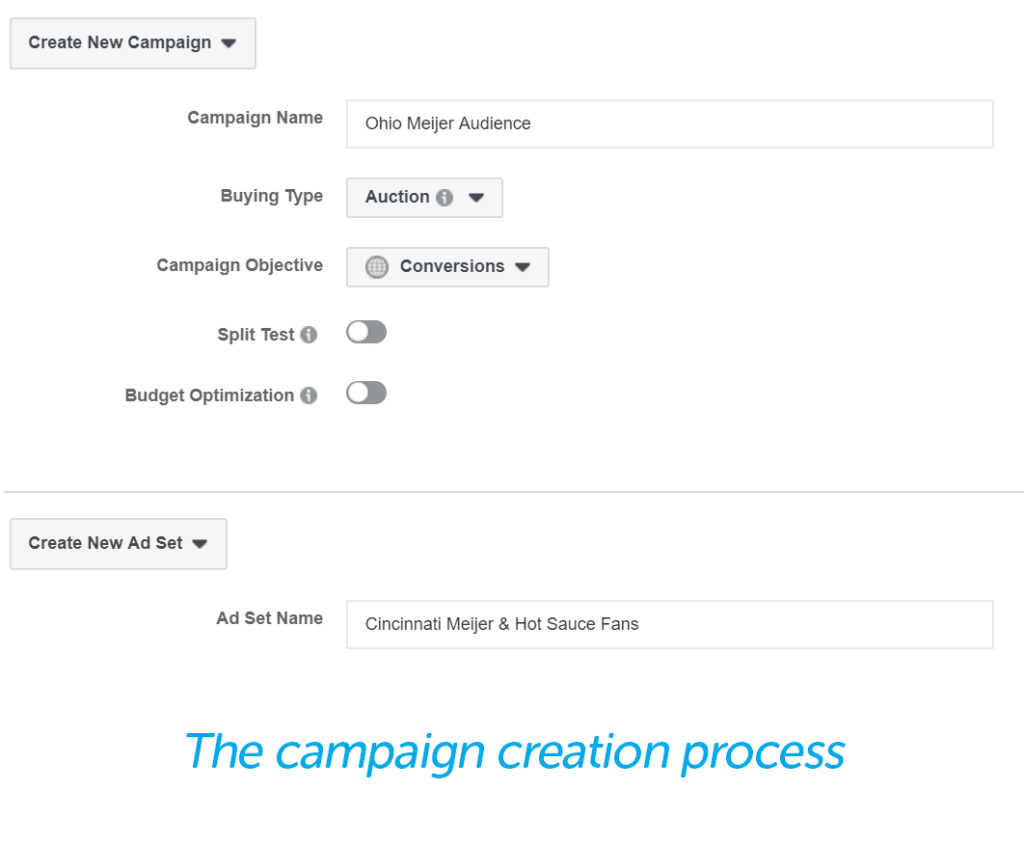
Since this relationship with Meijer is new, Secret Aardvark wants to promote in-store purchase over online purchases. Then, they’ll create an ad set. In this case, they’re going to create an ad set geared toward those in the Cincinnati area of southwestern Ohio.
The conversion they’re looking for here is people who view their “Sauce Locator” page from Facebook ads.
To do that, they’re going to open up the ad set (highlighted blue). Ignore the red warnings for now. Facebook creates those warning whenever something necessary is missing from an ad campaign, set, or unit, regardless of whether you’ve tried to upload it.
Next, they’re going to select “Track Custom Events.” Standard events are things like adding to the cart, adding payment information, and purchasing. The custom event they’ll be tracking are visits to their Sauce Locator page.
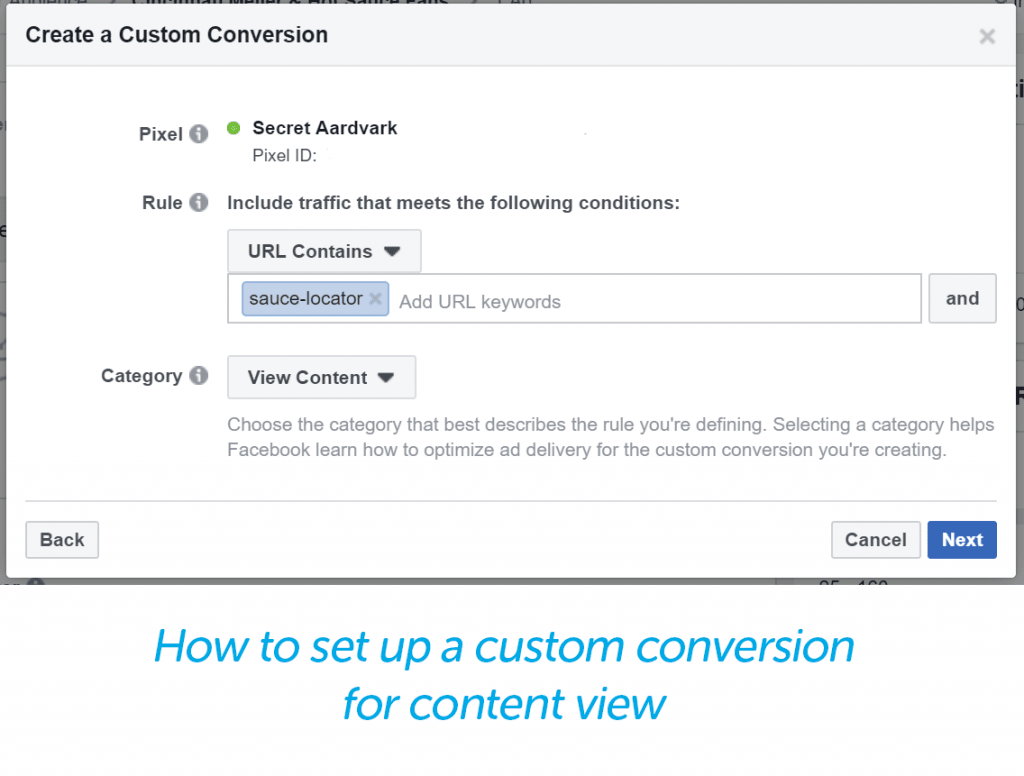
With that in mind, we set the custom conversion to track only urls that contain the phrase “sauce-locator.” From there, you’ll be directed to name your custom conversion, and you’ll be given an opportunity to assign a dollar value to it.
You can even choose the length of time you want to track the pixel after it’s first fired (i.e., the pixel loaded and sent information back to Facebook), up to seven days. That means that Facebook can count a conversion toward an ad up to seven days after it’s viewed.
If Secret Aardvark decides to send users who click on their ads directly to their Sauce Locator page, there isn’t much of a need to track conversions over a period of seven days.
However, if Secret Aardvark sends users to one of their recipe page, it might behoove them to set a longer conversion window. That way, they can see how many users looked at a recipe and then went to see where they could buy Secret Aardvark near them.
You’ll be able to see how many conversions your ad campaign had right in your ads manager dashboard reporting. Whatever conversion you chose, in the case below, purchases will show in the “Results” column. You’ll also be able to see your cost per result, which will help you understand which campaigns, ad sets, and ad units were most successful.
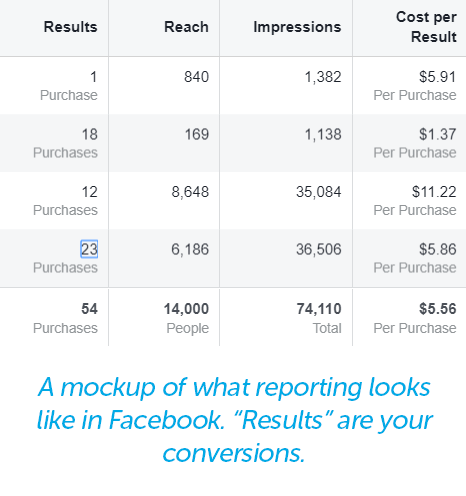
Above you’ll see results from an example from a different Facebook ad campaign that was geared toward purchases. The first three rows relate to ad sets, and the final row is the summary row. The cost per purchase varied quite a bit between these ad sets—there’s almost a $10 difference between some of them!
Retargeting Users
Tracking direct conversions isn’t the only beneficial thing about the Facebook tracking pixel. We love the pixel for its ability to implement retargeting to users across devices.
Related reading: Ecommerce Search Marketing Basics: The Beginner’s Guide >>
You can use the pixel to retarget users who went to specific pages or completed specific actions on your page. You can take those who viewed your awareness content (in Secret Aardvark’s case, their recipes) but haven’t purchased yet and show them consideration content (like their sauce locator or product page). It’s a natural way to lead users through your funnel from awareness to conversion.
To build a retargeting group, go to the Audience tab in Facebook. Click on the button that says “Create a Custom Audience.”
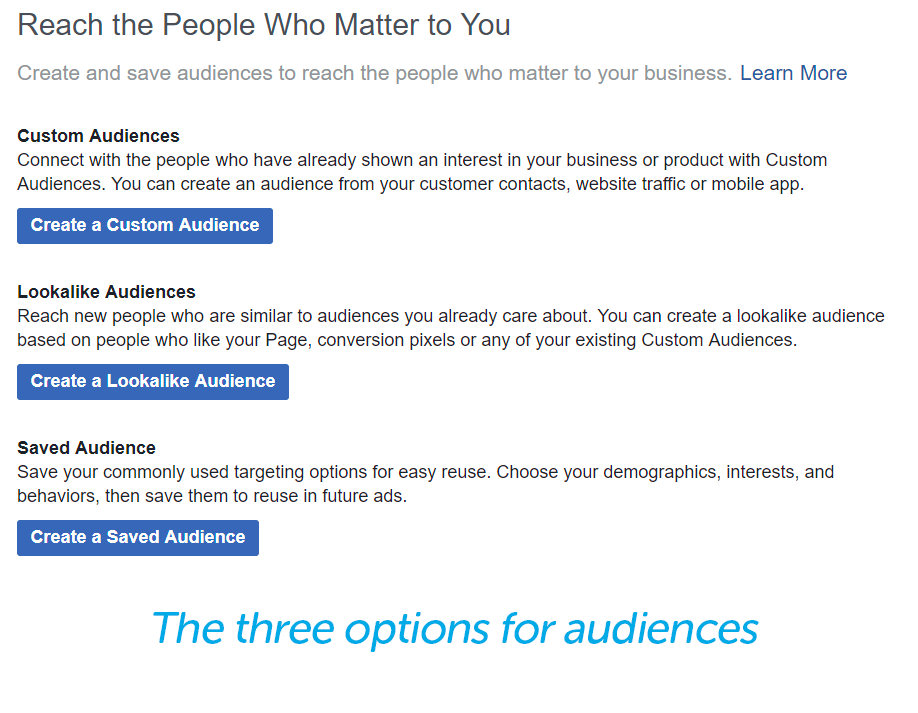
There are several types of custom audiences you can build. In the case of Secret Aardvark, they’re looking to build a custom audience based on Website Traffic.
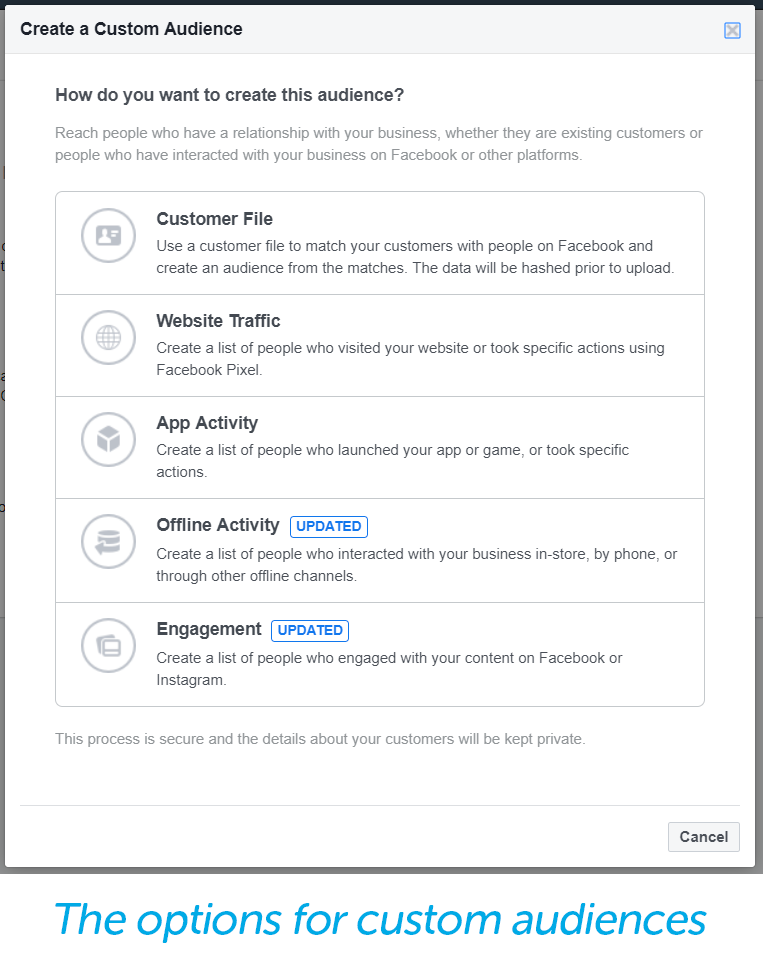
From there, you can select customers who completed certain events (e.g., viewed a recipe page). You can also exclude those who did or did not complete other actions (e.g., viewed the sauce locator or store).
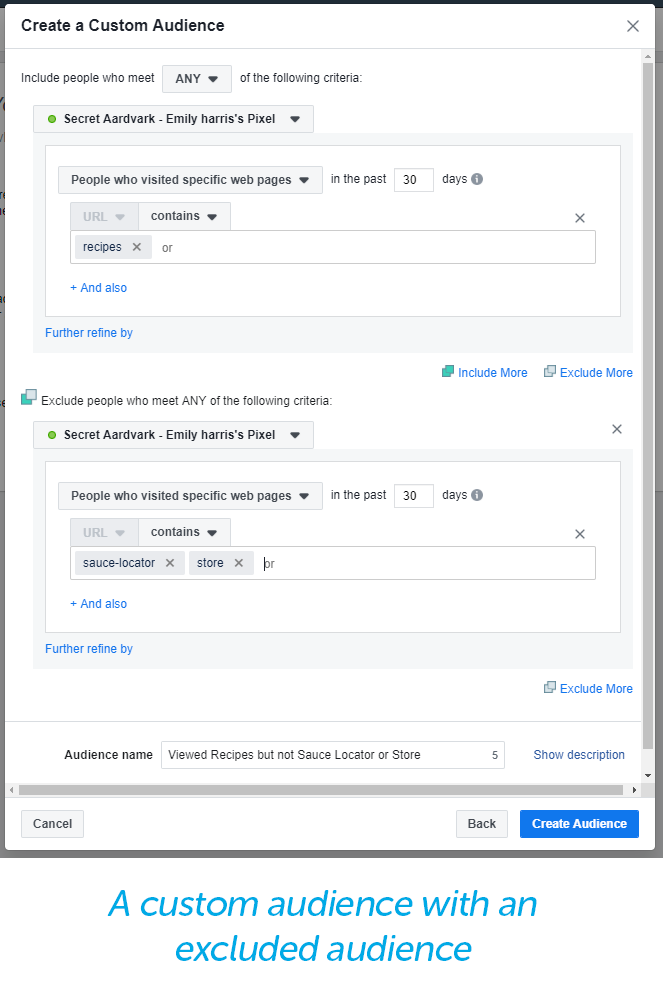
What you’re left with in this example is people who did engage with Secret Aardvark’s awareness content, but did not engage with their consideration or conversion content. With that information, Secret Aardvark can build new ads to folks who are already familiar with their brand and encourage them to try out their product.
Retargeting is also used for closing sales that almost got away. You can go through the same process as above to make a custom audience of people who added a product to their cart but didn’t complete the purchase. You can then show those users an ad for the product they almost purchased along with an extra incentive to buy, like free shipping or a discount. This helps reduce shopping cart abandonment.
The Benefits of Pixels
Over the past few years, tracking pixels have become one of the top tools for anyone who runs a website, especially anyone who runs an ecommerce website.
One little pixel can make your reporting more accurate, your advertising smarter, and can help you close the sales that almost got away. You’ll no longer have to guess if your ads converted any sales. You’ll be able to see that right in your Facebook reporting!
And you can customize pixels to work for you. Not all brands have the same goals, and the builders of pixel tracking understand that. That’s why they give brands such a wide range of uses for their pixels, from retargeting those who didn’t complete a purchase, to creating audiences that look like those who make a purchase or join your email list, to optimizing your ads for exactly what you want them to accomplish.
Website Tracking Pixel FAQs
What Does a Tracking Pixel Do?
A tracking pixel gathers information, such as user behavior, web traffic, conversions, and how users interact with ads online. Tracking pixels are 1x1 graphics that are embedded into websites, emails, ads, and more. They are used for marketing and are usually hidden from view.
Are Tracking Pixels Legal?
Tracking pixels are legal under United States federal law. There’s no prohibition on using web pixels to track user behavior.
How Do I Create a Tracking Pixel?
If you want to create a tracking pixel, follow these steps:
1. Go to your advertising platform, such as Facebook.
2. Go to the Ads Manager section.
3. Click on the Pixels tab.
4. Click “Create a Pixel."
5. Facebook then generates your pixel.
6. Add your pixel to your WooCommerce site.
7. Save your changes.
8. Analyze your tracking pixel insights.
What is the Difference Between a Tracking Pixel and a Cookie?
The difference between a tracking pixel and a cookie comes down to how they each deliver information, and where they keep it. Tracking pixels send information to servers, while cookies save information to browsers. Both track information across websites that can be used for advertising.
Sell More With Managed Hosting
If you're serious about selling on your ecommerce store, a good host can make all the difference.
Consider fully managed WooCommerce hosting by Nexcess to power your store. Nexcess offers hosting specially designed for fast, high-performing stores. Nexcess also:
- Offers high performance and site speed.
- Dynamically scales and optimizes.
- Secures your store with always-on monitoring.
Check out our hosting plans to get started today.
Why was this article created?
This blog was written by AJ Morris, a WordPress developer with 20+ years of experience designing, building, and managing WordPress and WooCommerce sites. AJ works with clients seeking to build out ecommerce stores with all of the bells and whistles. This article was written to demonstrate the process in which a store owner can add a tracking pixel to their WooCommerce store, so they can get more data and make better business decisions. Our in-house WordPress team has approved this article for accuracy.

