
Your ecommerce website should allow you to design and move content quickly without writing code, all while remaining on-brand.
That flexibility lets you delegate website design and content tasks to almost any team member, helping you sidestep developer delays or burnouts — so you’ll deliver projects faster.
That's the solution drag-and-drop ecommerce website builders provide.
Just one thing, though. You have unique enterprise needs.
So, your drag-and-drop builder should accommodate them. For example, your no-code solution should be elastic, allowing various customizations, including code embeds, when necessary.
That's where Magento 2 Page Builder comes in handy.
This guide helps you understand the use cases and benefits of Magento 2 Page Builder and shows you how to create a landing page, storefront, product list, and content page.
Let’s dive in.
- Benefits of using Magento 2 Page Builder
- Starting with Magento 2 Page Builder
- Magento 2 Page Builder features
- Magento 2 Page Builder user guides
- Final thoughts: Launch your Magento 2 Page Builder
Benefits of using Magento 2 Page Builder
Enterprise users love Magento 2 Page Builder for at least five reasons.
- No coding skills required: Magento 2 Page Builder enables anyone to create top-class content pages without programming knowledge.
- User-friendly interface: The Magento 2 Page Builder has a near-zero learning curve and intuitive interface design.
- Drag-and-drop and live preview: Drag and drop content components, layouts, and elements and preview them in real-time.
- Flexible content management: The Page Builder extension supports all ecommerce page design and content creation needs.
- Supports developer customizations: Enterprise or advanced users can create custom features using developer help.
The best part? Getting started with Magento 2 Page Builder is easy. Here’s how.
Starting with Magento 2 Page Builder
Page Builder is a Magento extension that empowers Adobe Commerce and Magento Open Source users to create design-rich content pages using pre-built controls.
These controls include intuitive drag-and-drop Page Builders, live previews, rich media, form editors, and product catalogs.
However, only Magento Commerce users can access its enhanced features.
Let's explore how to get started with this CMS page builder.
Configure Magento 2 Page Builder in 4 steps
Follow these steps to set up your Magento Page Builder staging area in Adobe Commerce.
Step #1: Go to Stores > Settings > Configuration from your Admin sidebar.

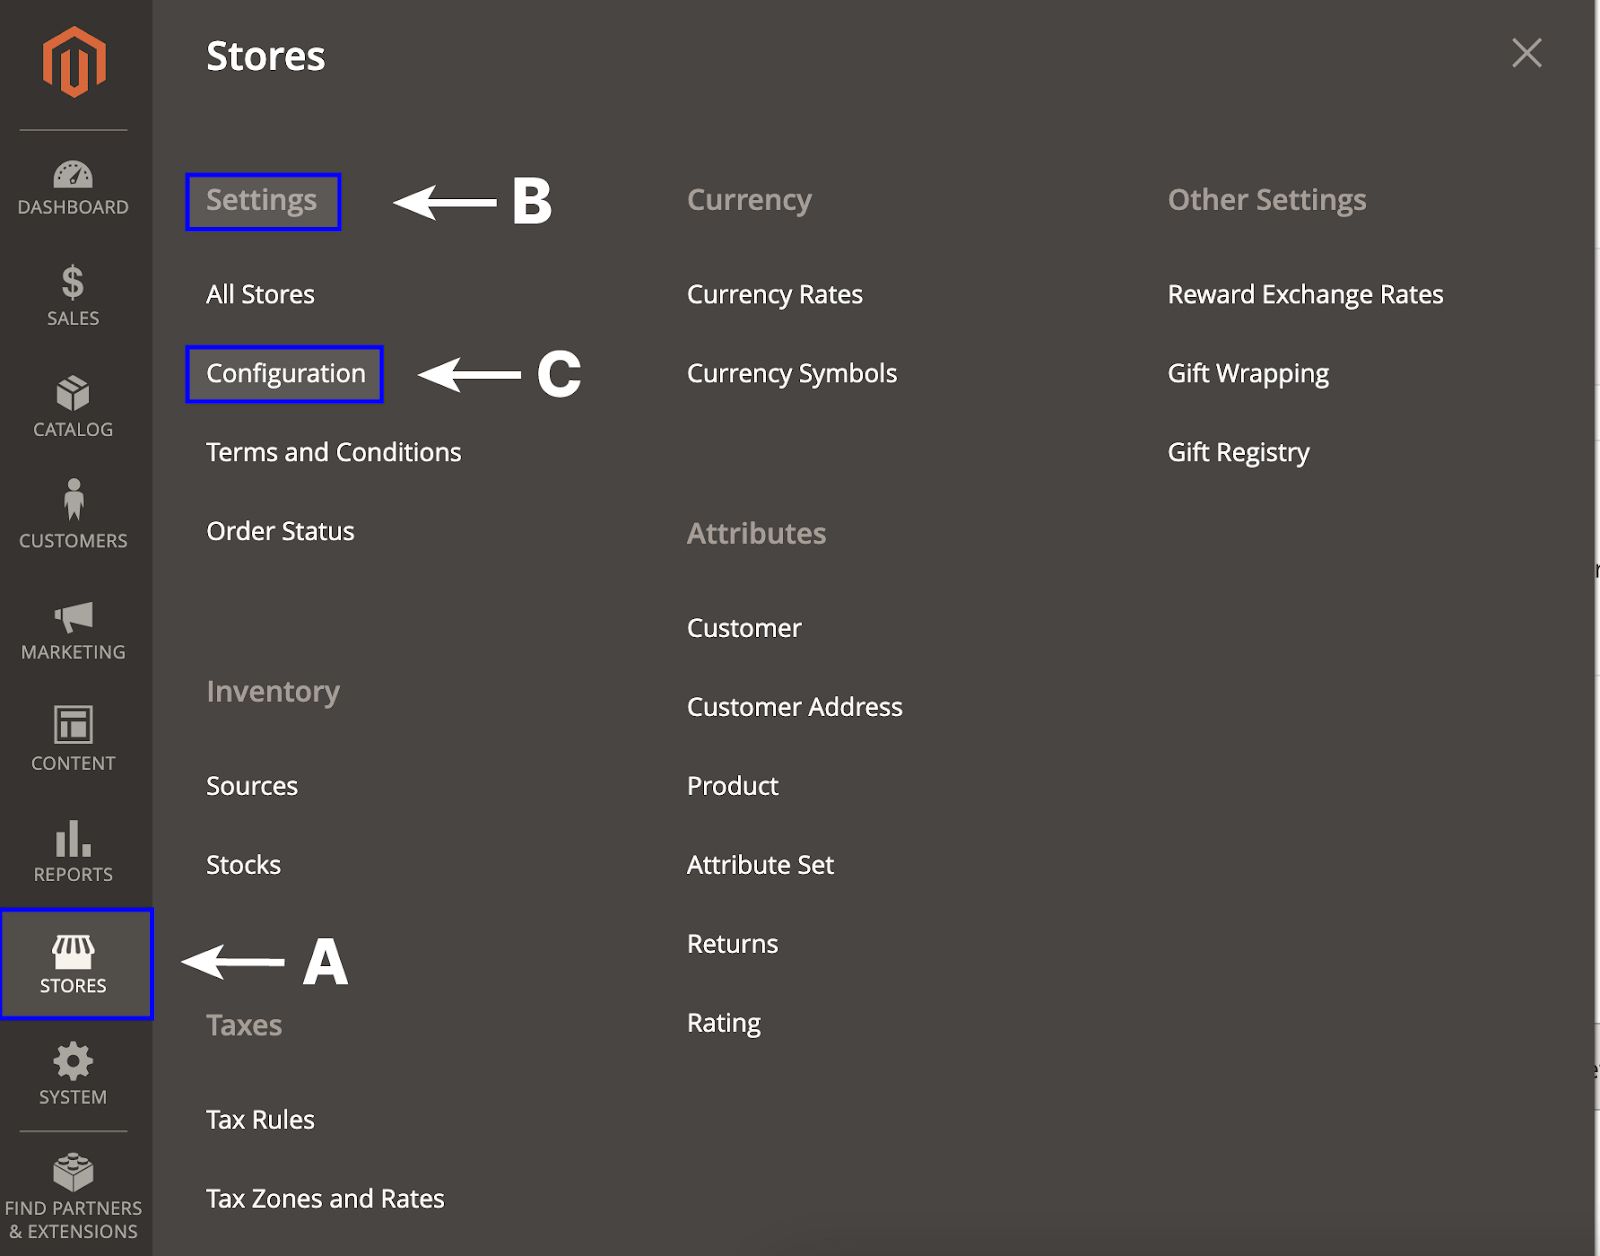
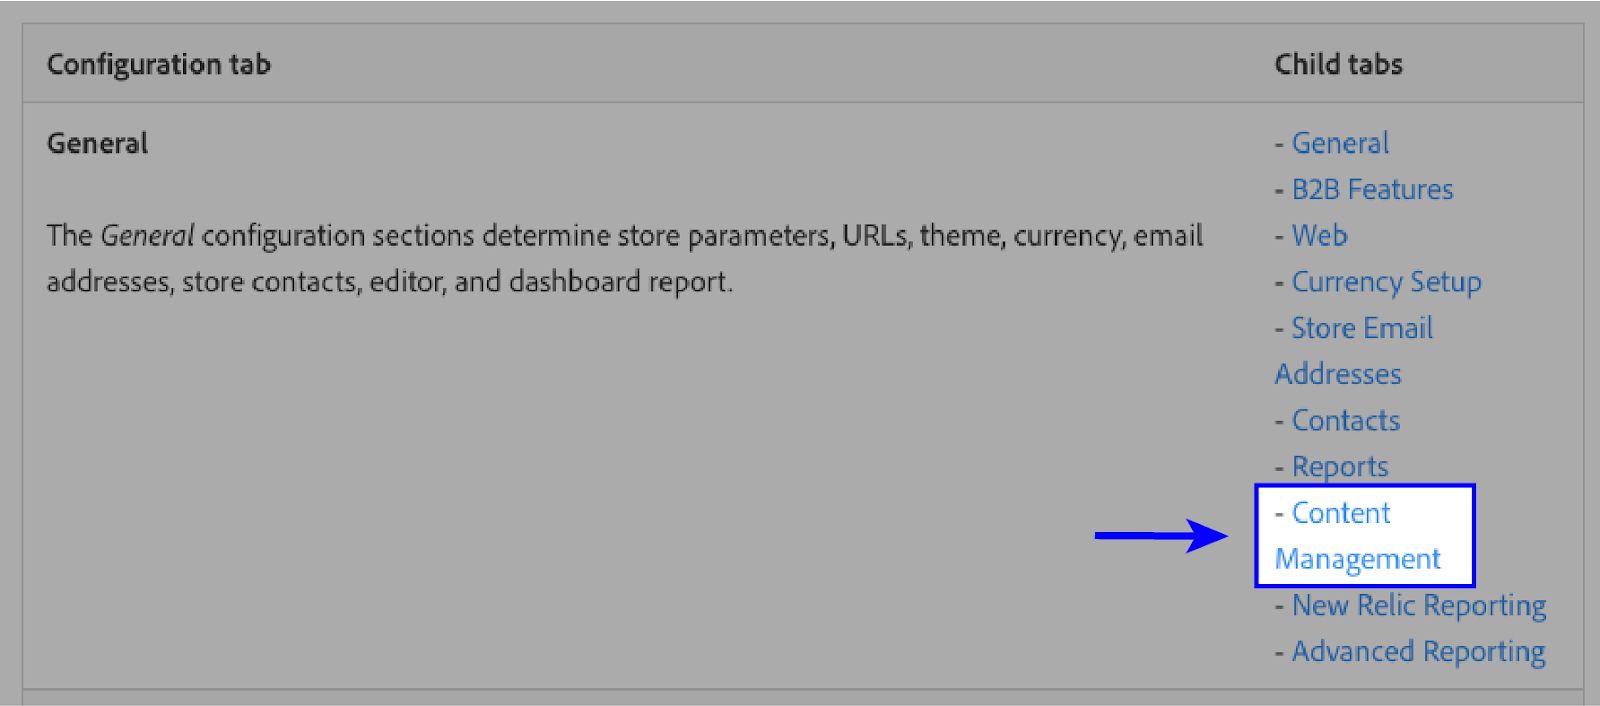
Step #2: Select Content Management under general.

Step #3: Set the Enable Page Builder field to Yes in advanced content tools.

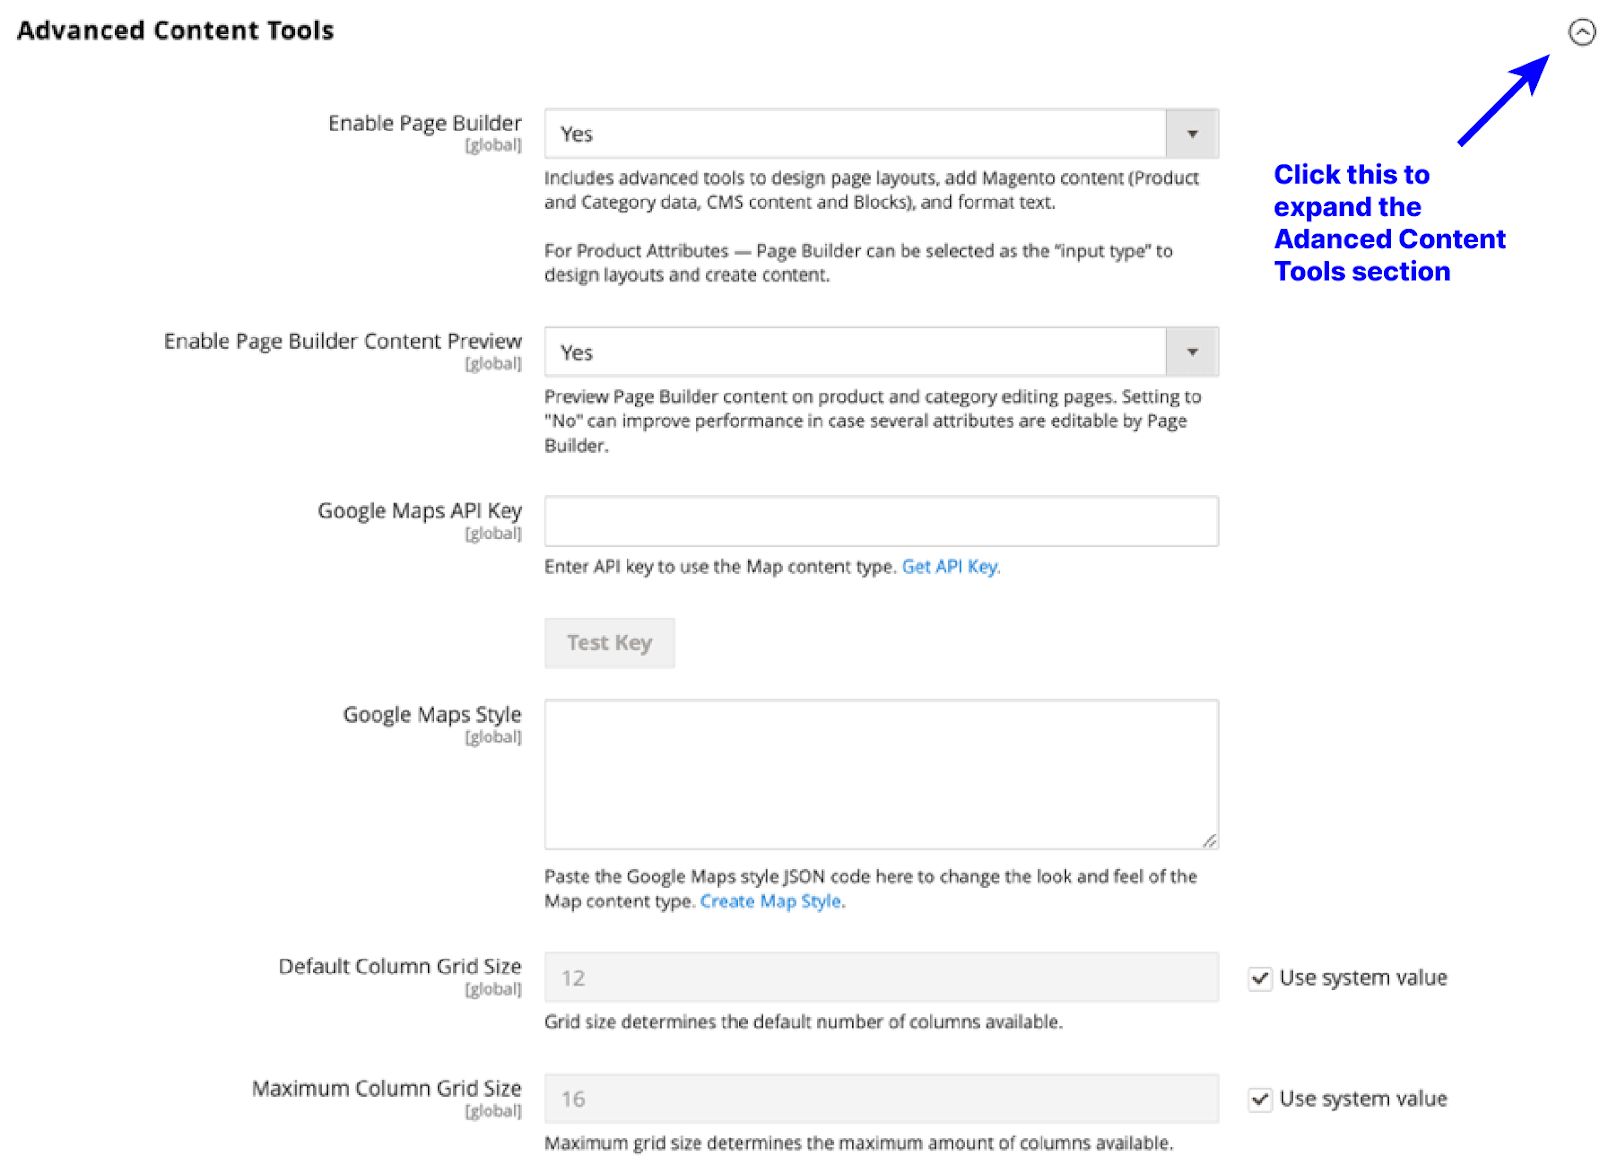
Step #4: Save the configuration.
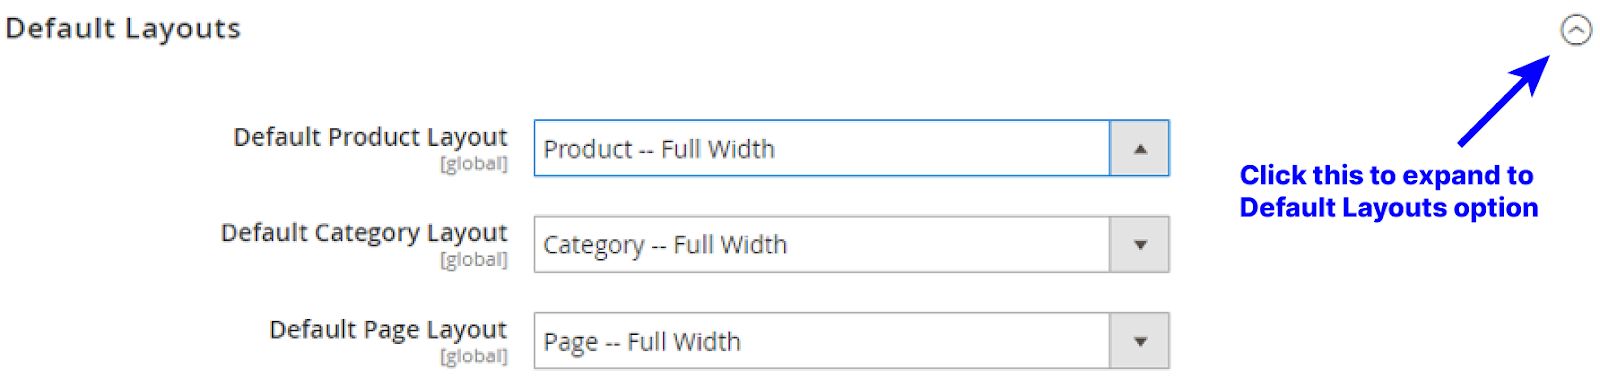
Setup your default layouts
Now, head to the Configuration area.
Under General, select Web. Next, expand the Default Layouts and choose your product, category, and page layouts.
Next, save the configuration.

Now you’re ready to get started and explore the many features Magento 2 Page Builder has to offer.
Magento 2 Page Builder features
Page Builder has five features with a total of over 20 sub-features.
Let's explore what each component offers you.
Toolbox options
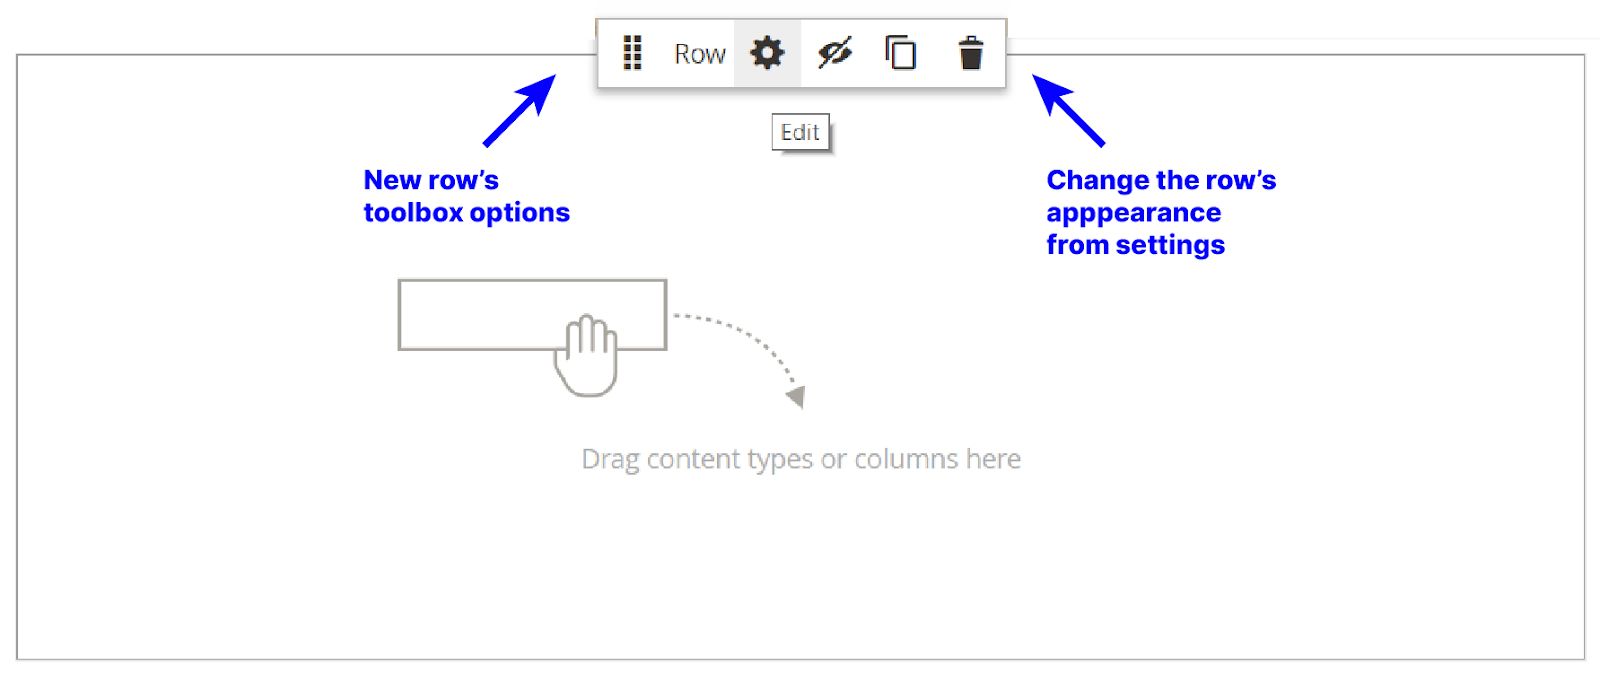
You can control page layouts, elements, and content using toolbox options. For example, these features let you move, add, hide, and remove components from your page.

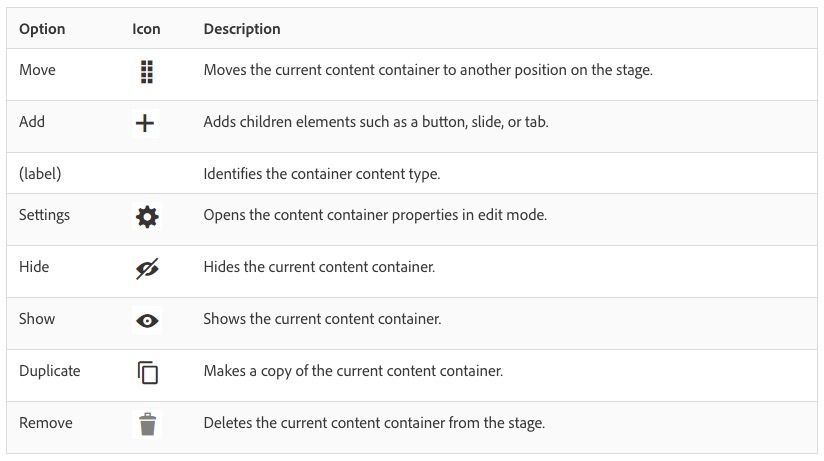
Hover in the Page Builder's content containers to find these toolbox options.
Keep in mind that these features are container specific. So the options vary from container to container. The image below shows the toolbox options for the Row layout.


Layouts
Magento 2 Page Builder offers you three layouts types:
- Tabs
- Columns
- Rows
Drag any of these content types from the Page Builder layout to the stage in your panel. Then, click the cog icon from the toolbox to access settings and customize the layout.


Elements
Page builder elements let you add written content, images, calls to action, and other content functionalities to your pages.
Like anything else, you can drag-and-drop content elements and customize them to your heart's content.

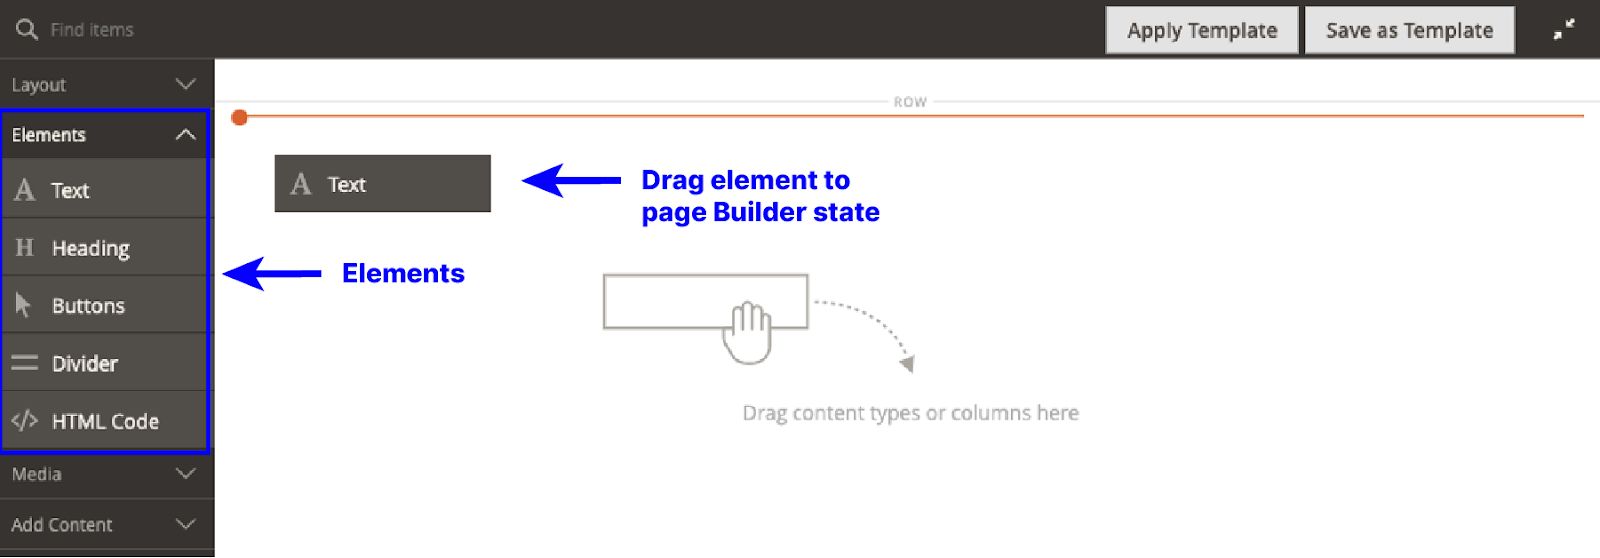
Magento 2 Page Builder has five elements. Let's shed some light on them.
- Text: This feature lets you add text, images, links, content templates, and widgets to your content.


- Headings: This feature lets you add heading tags to establish topical flow within your content for better SEO (search engine optimization).


- Buttons: This feature lets you add and customize your page's call-to-action or navigation buttons.


- Dividers: Dividers add visual breaks between content sections.


- HTML Code: This feature allows you to embed JavaScript, HTML, and CSS code snippets to your page.


Media
This drag-and-drop interface enables you to add rich media to your content.

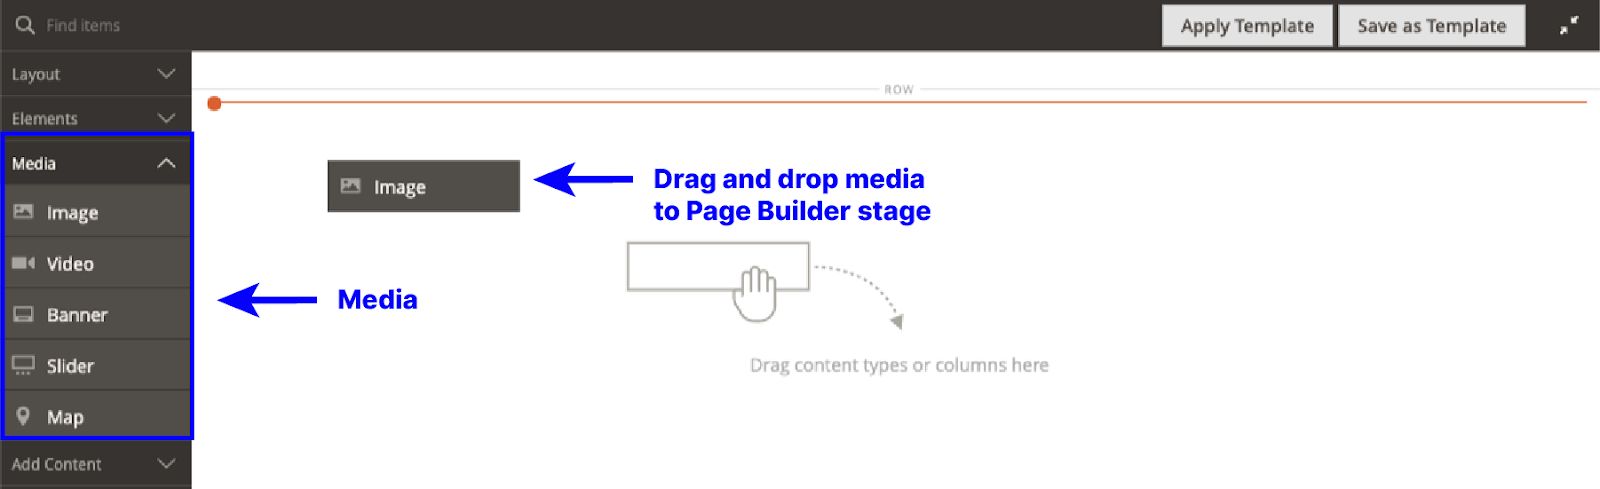
You can add these media types:
- Images
- Video
- Banners
- Sliders
- Google Maps
Magento Page Builder supports PNG, JPG, and GIF image types, and you can link your image to any content, product, or category pages.

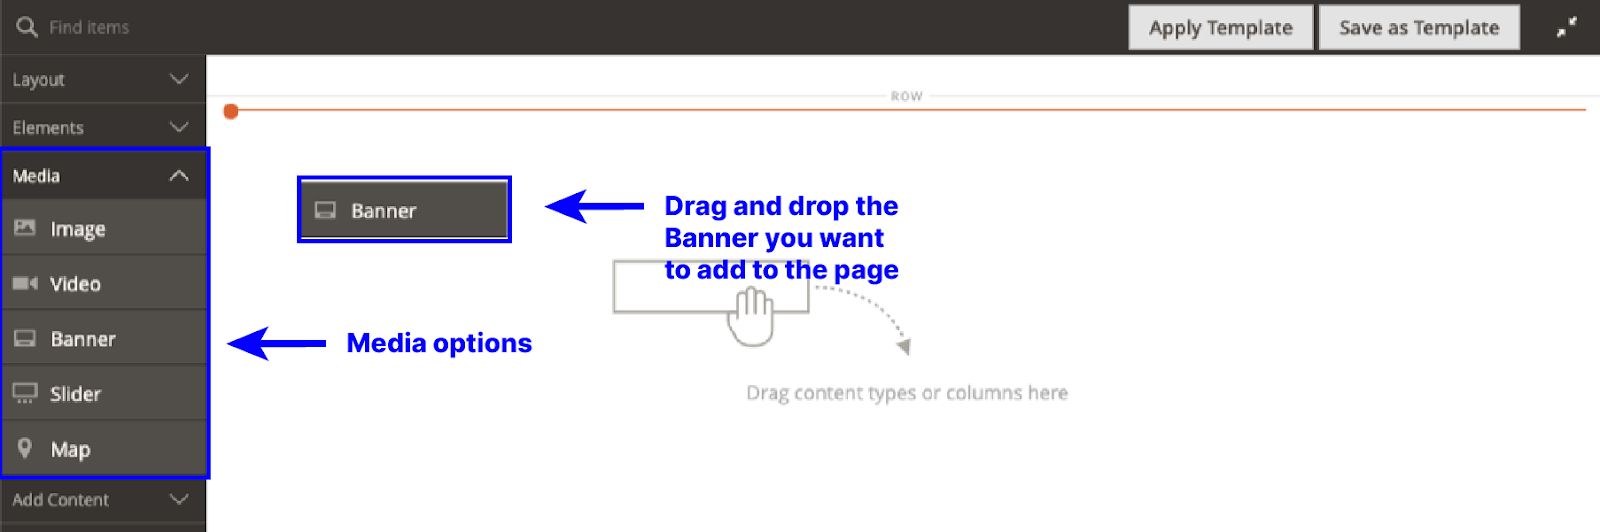
This same idea applies to other media types — drag them to the stage and then use their toolbox options to add the media you want your audience to see.
Content components
Content components are handy for adding forms, creating unique ecommerce experiences, and distributing content across your website.

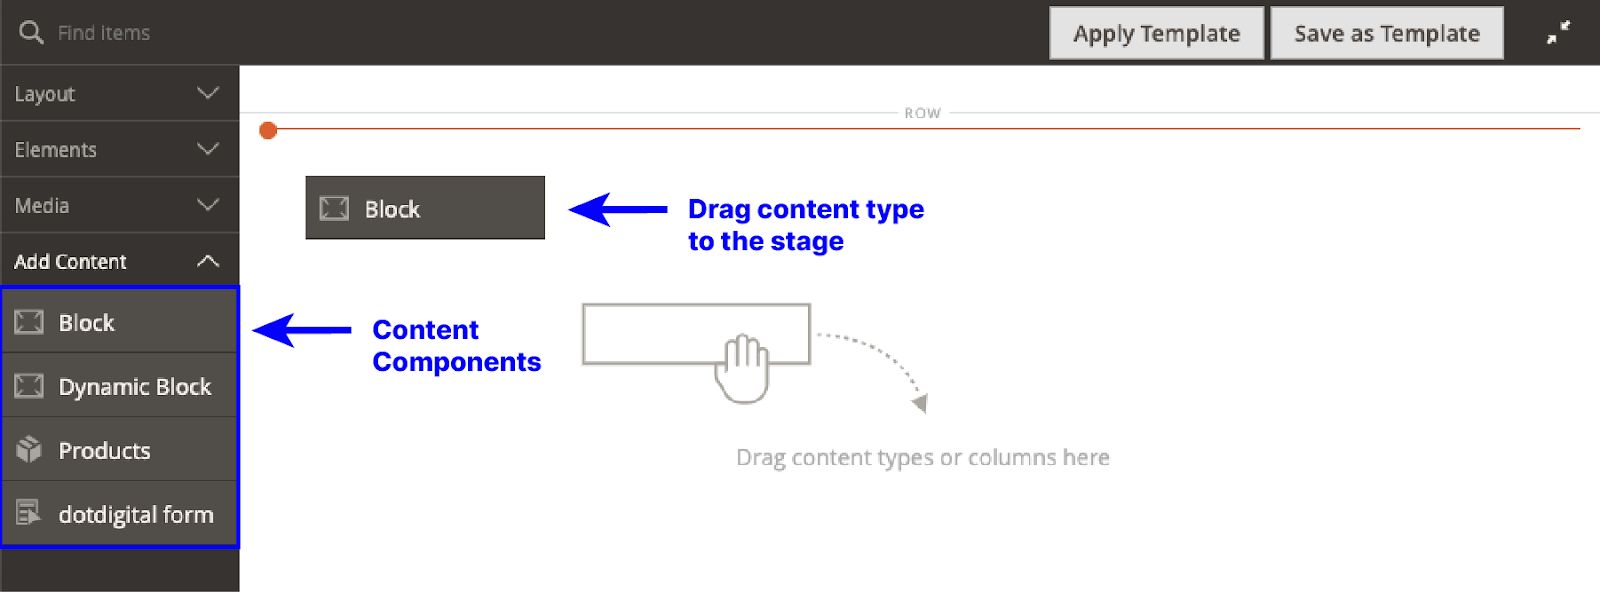
Magento 2 Page Builder has four content types:
- CMS blocks
- Dynamic blocks
- Products
- Product recommendations
Blocks are the basic page-building units of Magento 2 Page Builder. You can embed blocks in blocks.
CMS blocks display static information like images and texts, whereas dynamic blocks display information from your database using widgets.
Product recommendation content helps you serve recommended products to buyers on your page. But this feature is for Magento Commerce users only.
Now, let's do some quick tutorials using these features.
Magento 2 Page Builder user guides
Before building pages or creating content in Page Builder, increase your admin session lifetime to avoid session time-outs while you work.
How to create a page
Initiate page creation from your Admin panel using this path: Content > Elements > Pages.


Add a new page from the upper right corner of your screen.
Set the Enable Page slider to No to avoid making live changes to your store. And then, give your page a title.


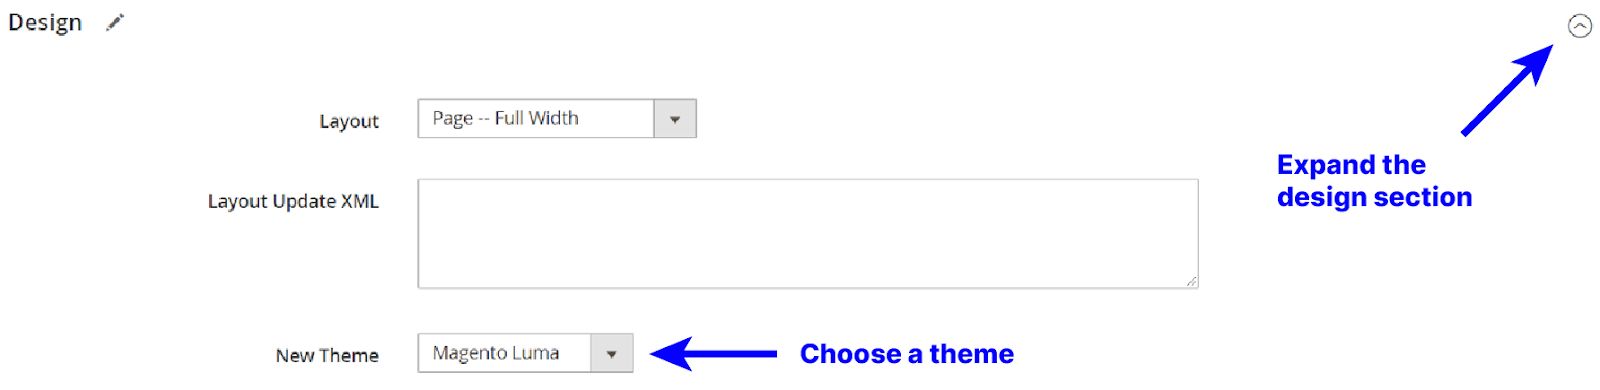
Expand the design section, choose a theme, or use the default Magento theme.

Save.
Next, let's add rows and columns to your page.
How to add rows and columns to pages
Let's start with adding rows.
Create a Row
Open the page you wish to edit in the Page Builder stage.
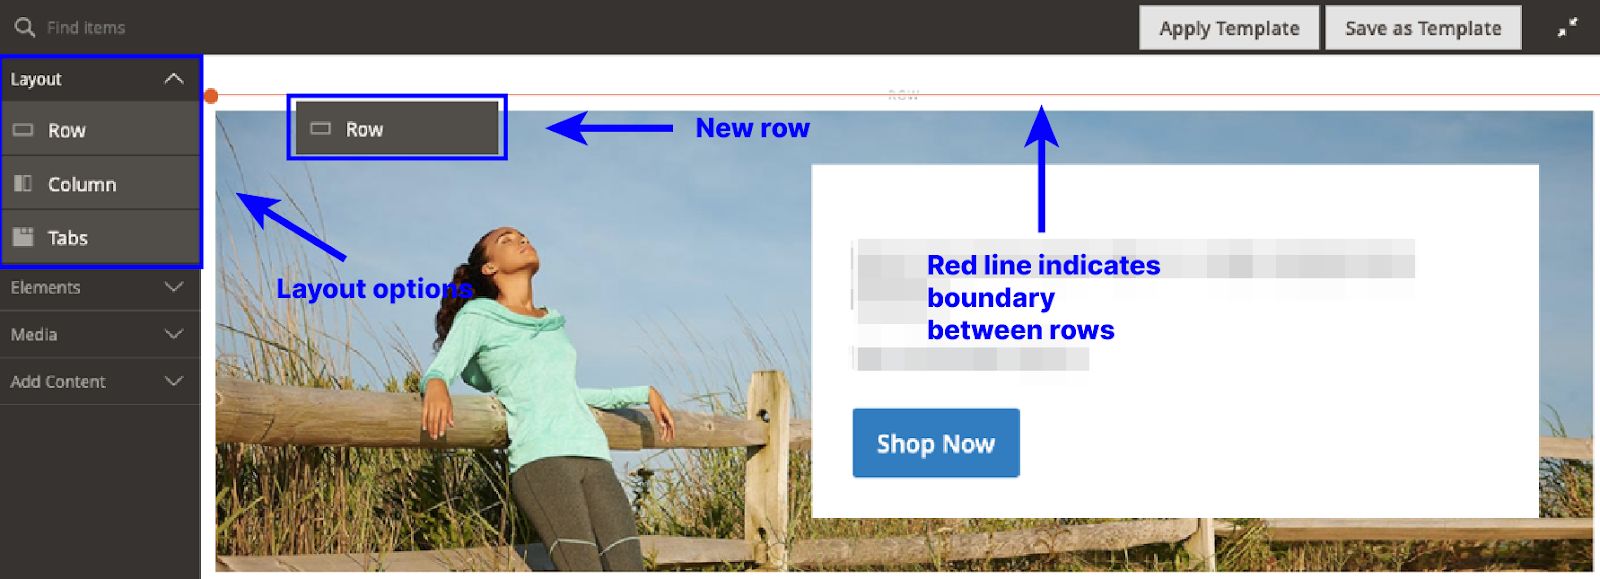
Drag the Row layout from the Layout section to the page. You'll see a red line between rows indicating the boundary. Add your new row there.

Customize this row using its toolbox options. Then, set the appearance of the row.

Choose a width appearance for your row.

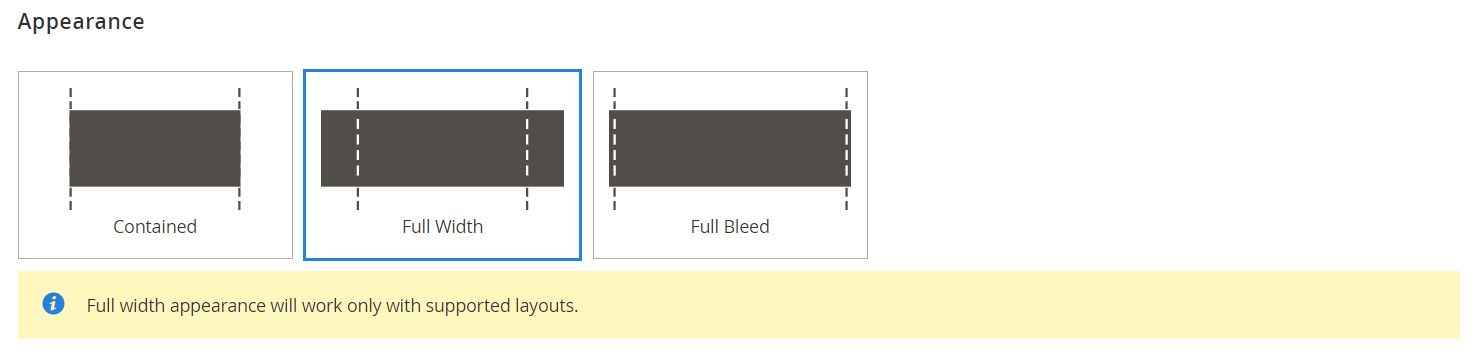
And then save.
Create a Column
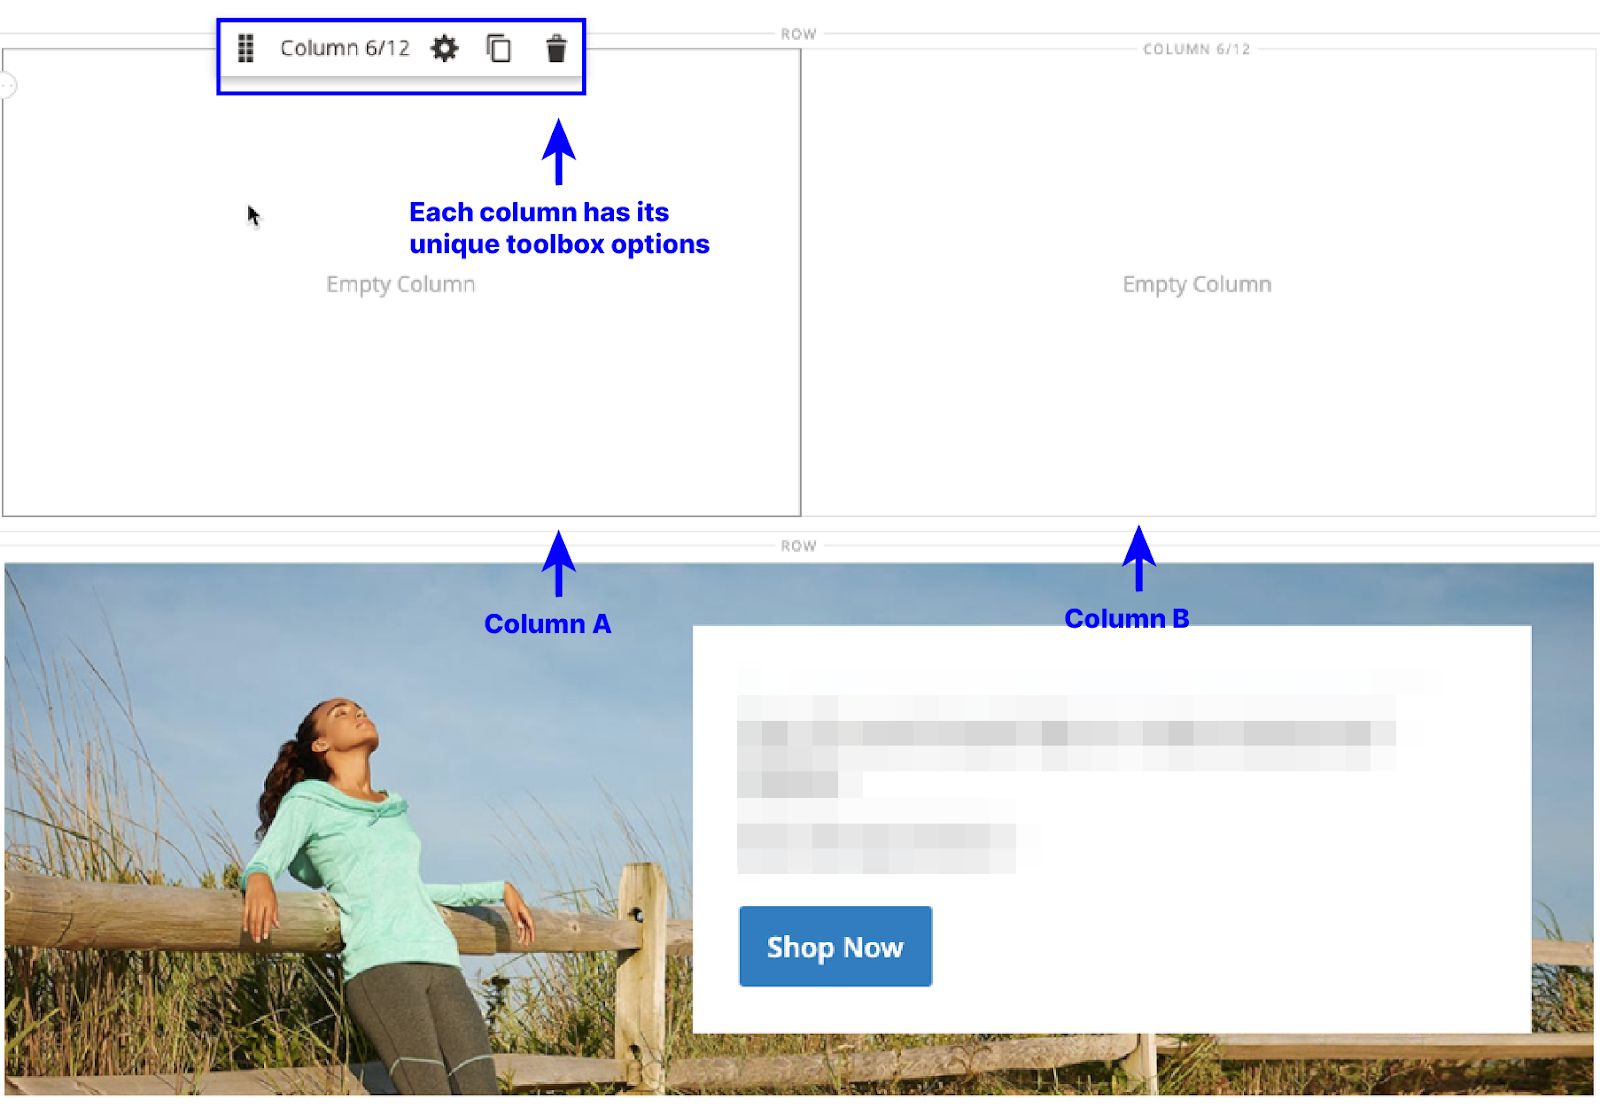
Divide that row into two equal parts by dragging and dropping the column from the layout options into the Magento Page Builder staging area.


Each column is a unique container with its toolbox options. So, you have complete customization control of it.

How to add banners to a page
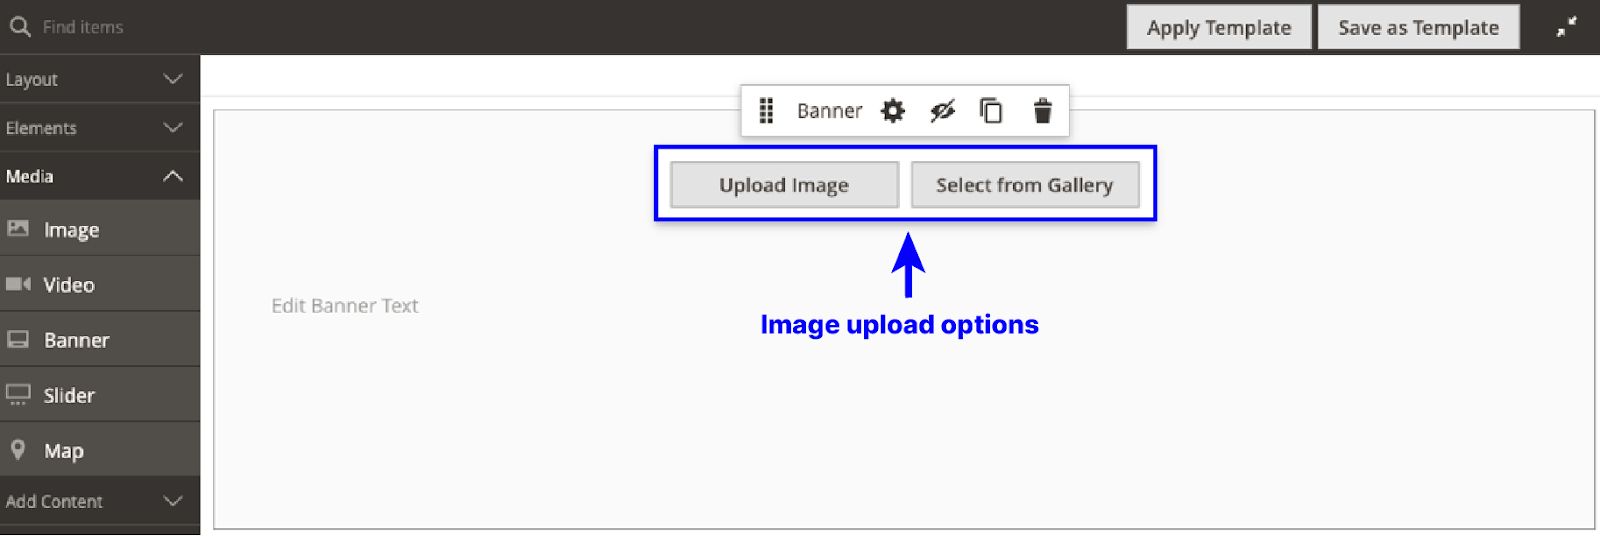
Open the page where you want to add a banner, then drag and drop a banner container in the Page Builder backend.

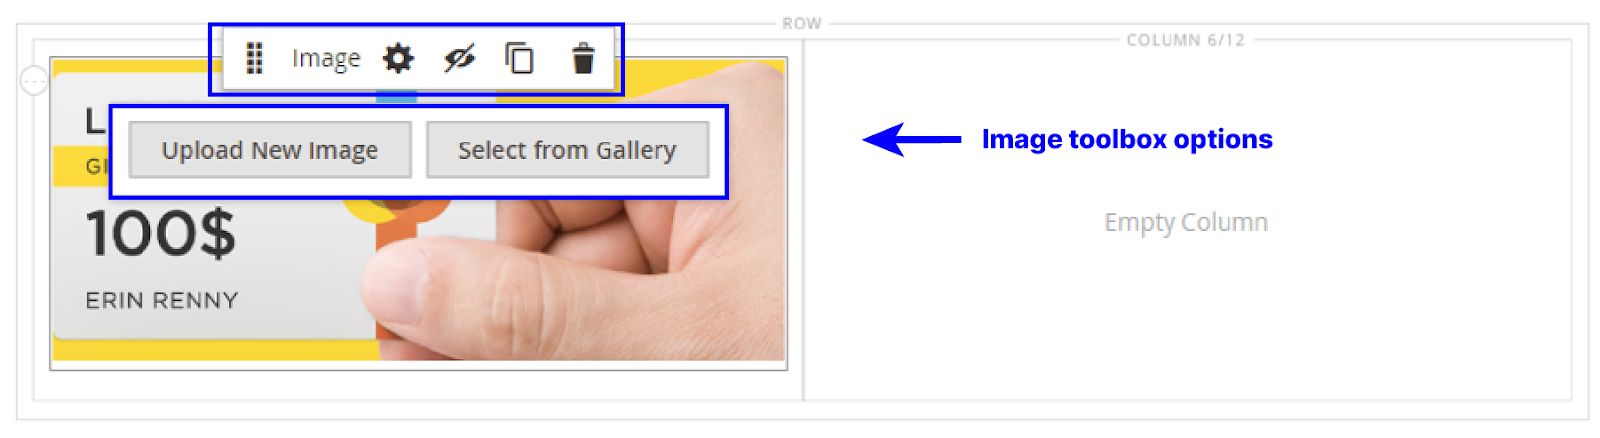
Choose a banner image from the toolbox — upload or gallery.

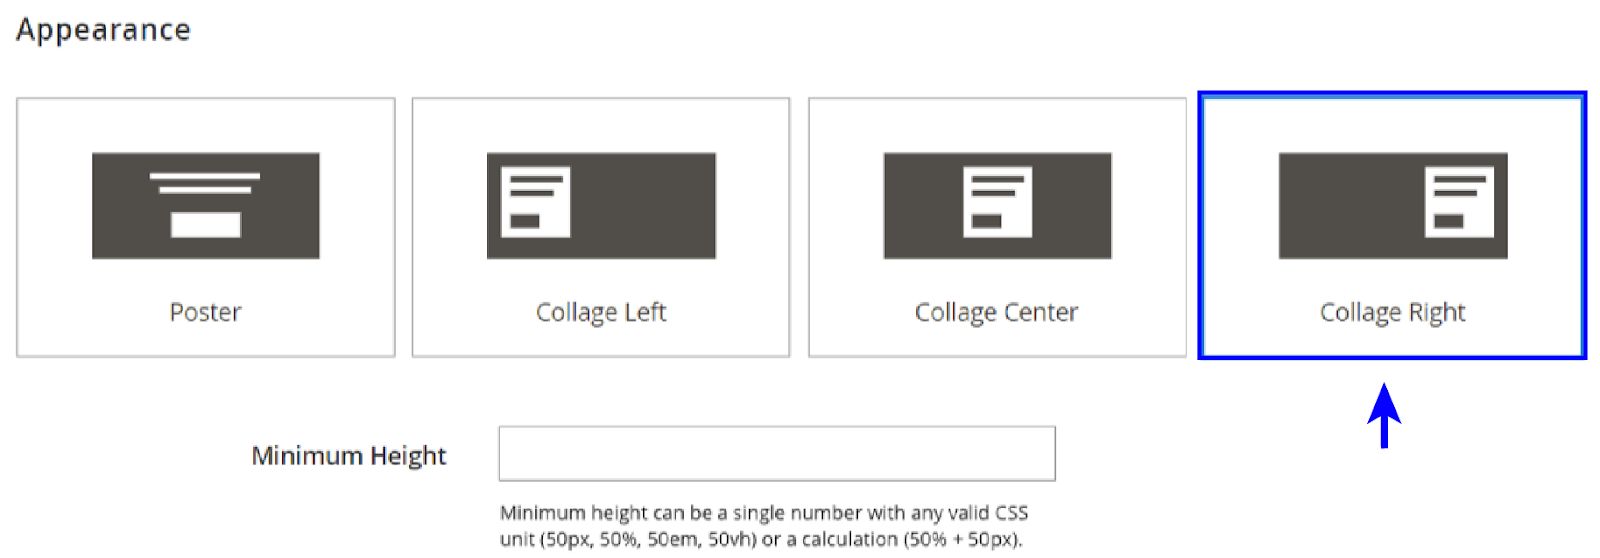
Choose a banner appearance from the Toolbox Settings.
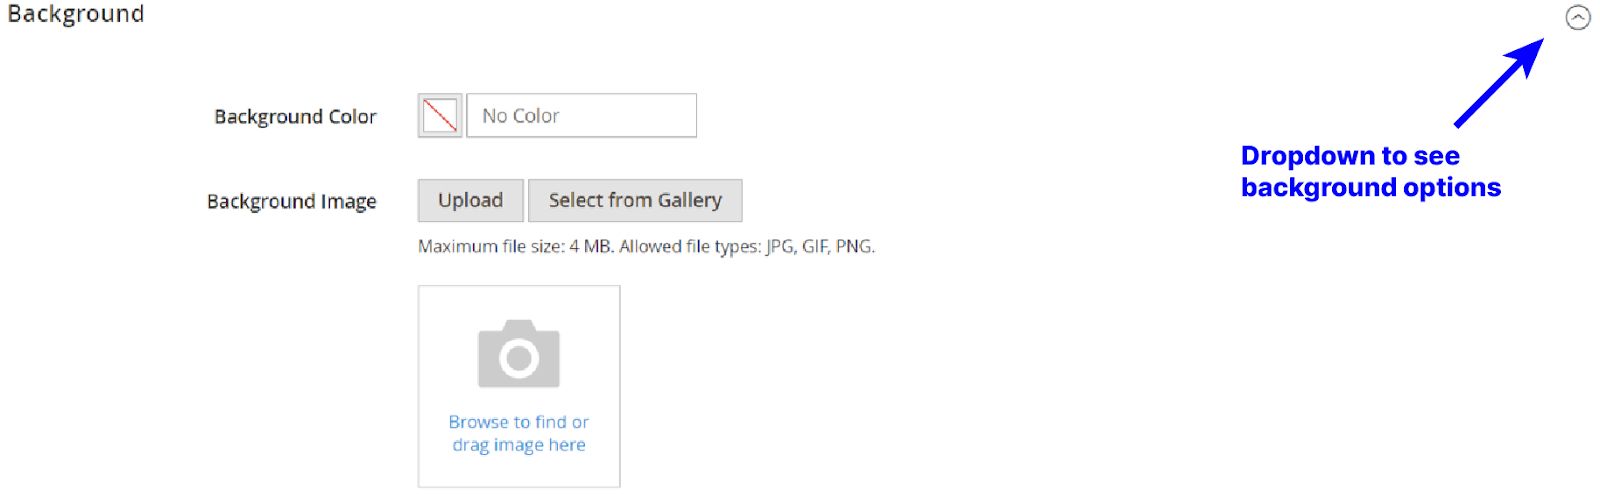
Scroll down to the Background section to set the banner background image.

Change and format the placeholder text in the WYSIWYG editor.

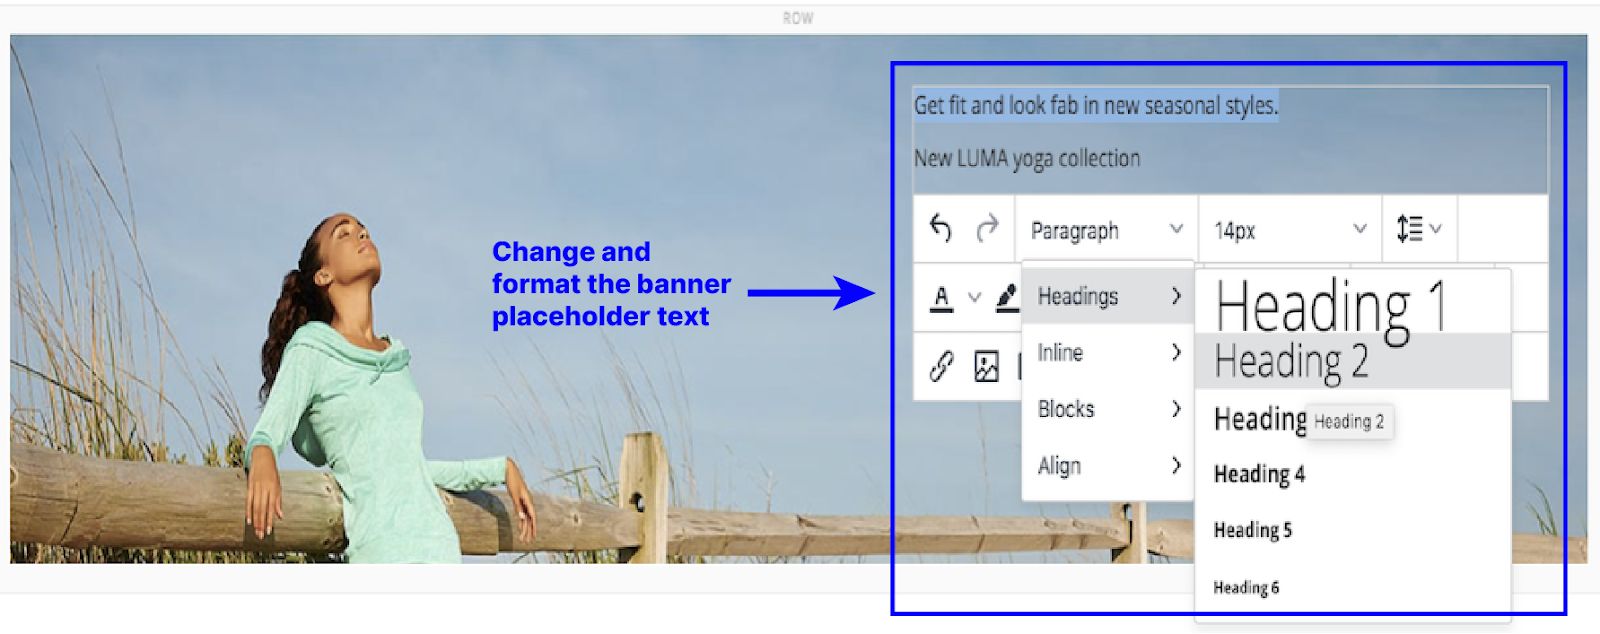
Return to settings to add a button color, choose fonts, and then go to the content section to add a banner link.
So your banner frontend should end up looking like this:

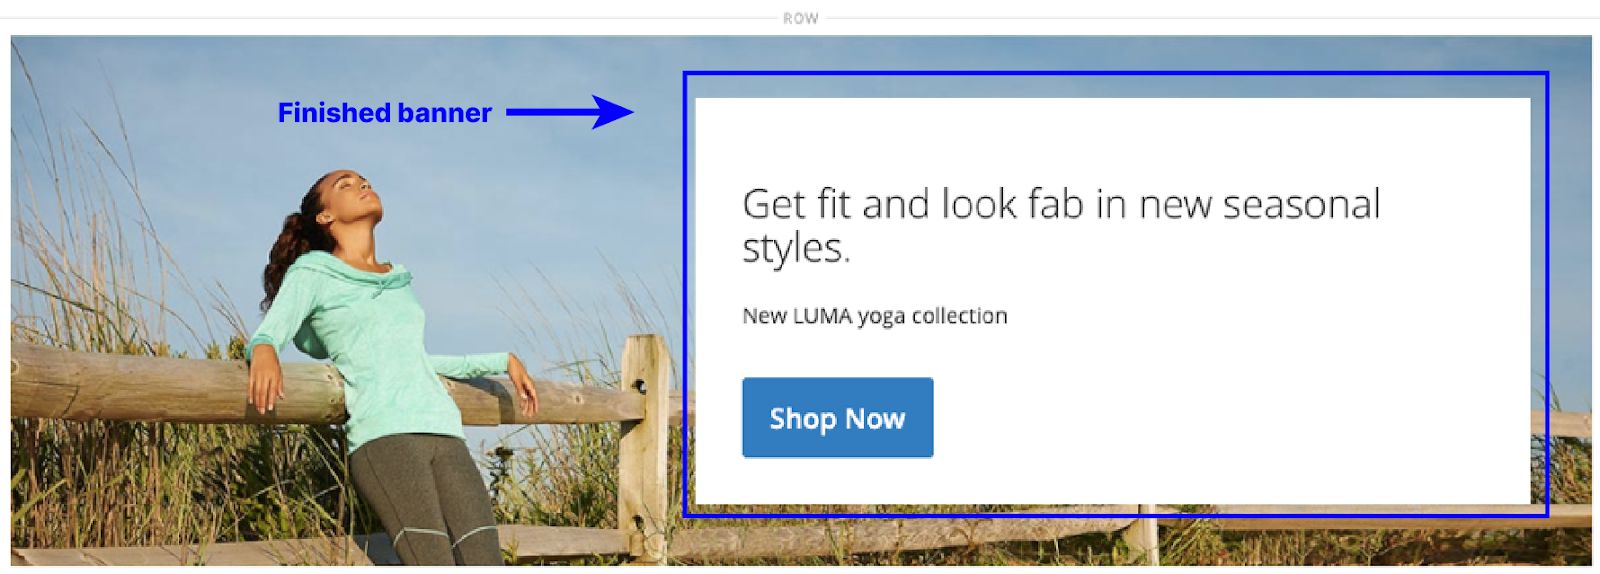
Wrap up your setup, save, and close it.
How to add review content to a page
Adding review content is as simple as creating rows and columns and adding new content using elements and media.
Let's look at an example.
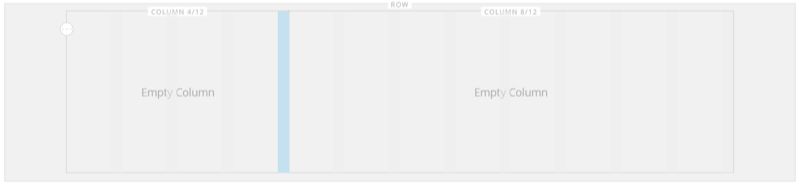
Create a row and two columns. But drag the first column's right border to the 4/12 position in the grid. This setting adjusts the second column to 8/12 automatically.

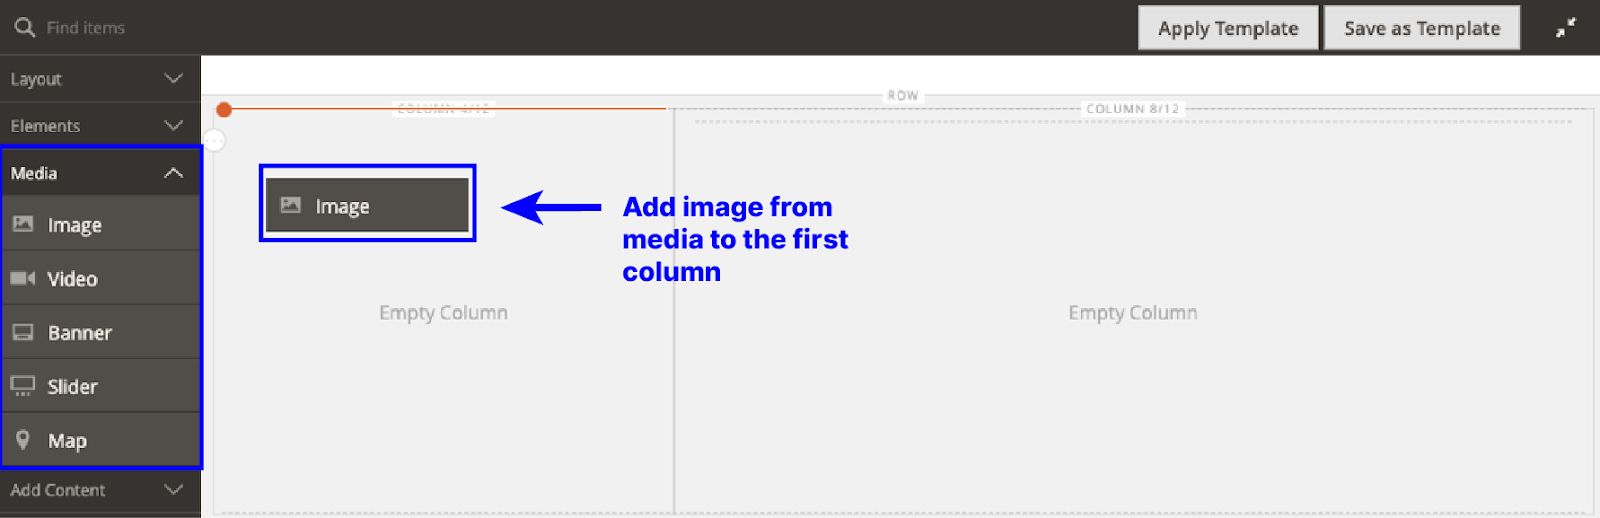
Add your review product image to the first column using the image component from the media section — see the image below.

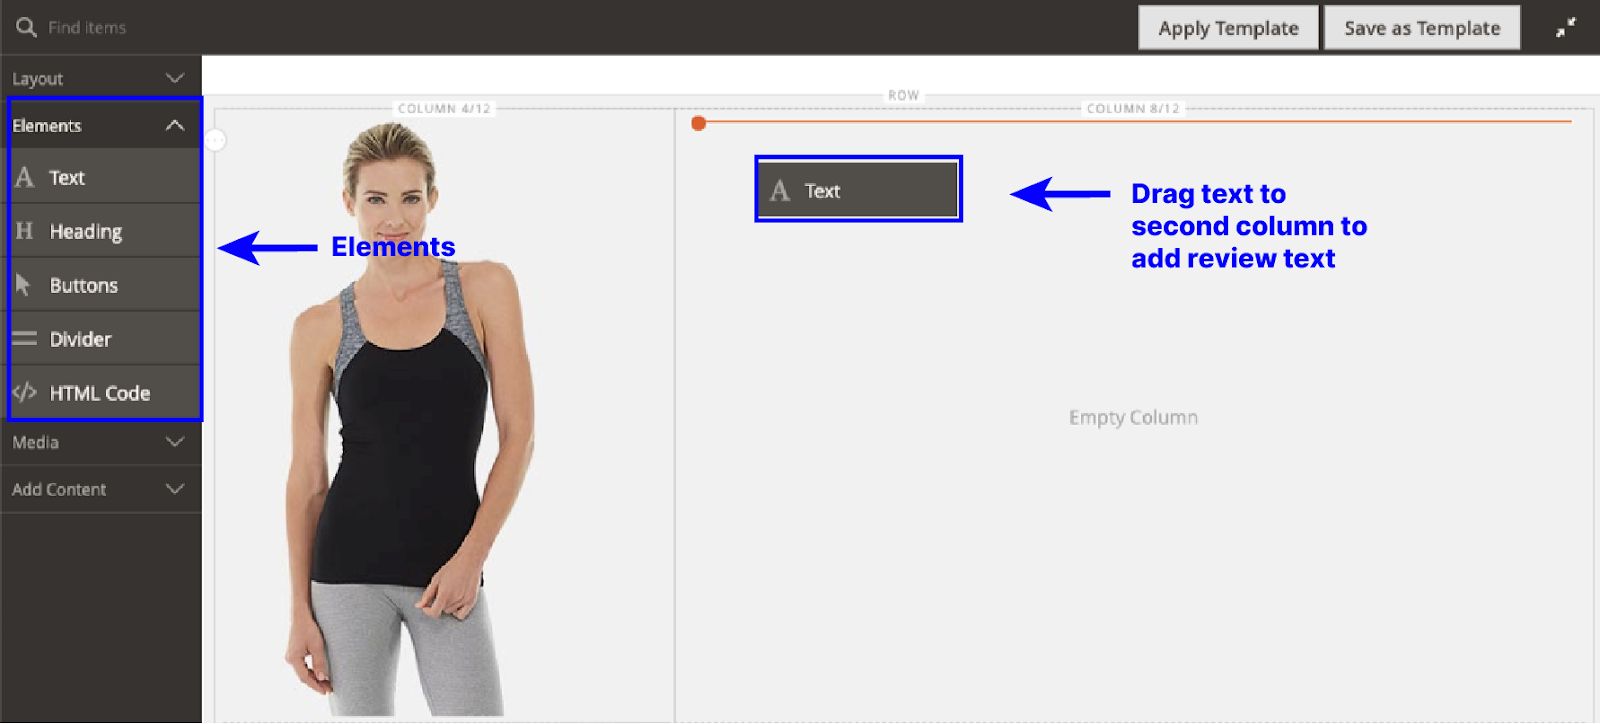
Then add your review text to the other column using Text from Elements.

Add a five-star image to the text box using the native insert-image feature in the WYSIWYG editor.

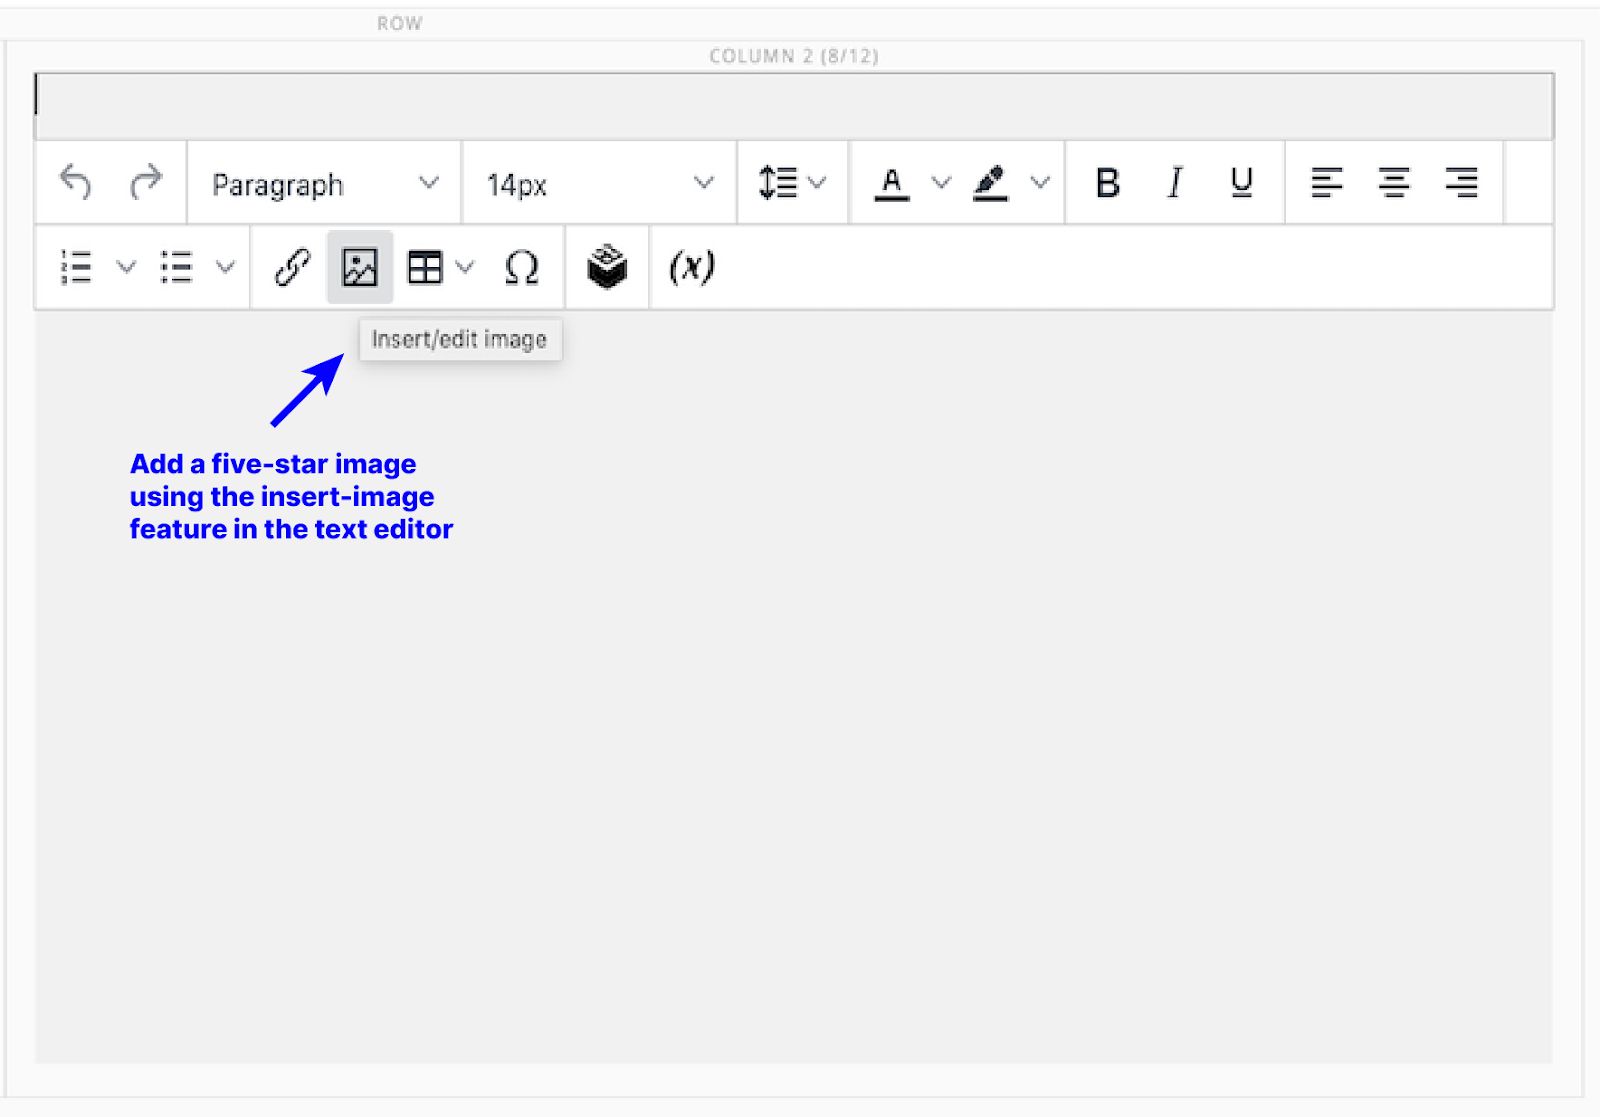
And then add your review text to the editor. You can also add links to your review text.

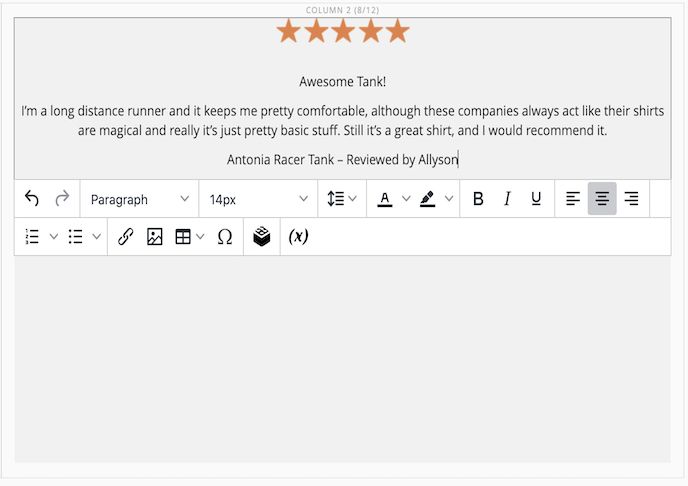
The final output should look like this.


How to add a product catalog to a page
Open the page where you want to add this catalog or create a dedicated catalog page in the Page Builder editor.
Drag and drop the product component to the stage.

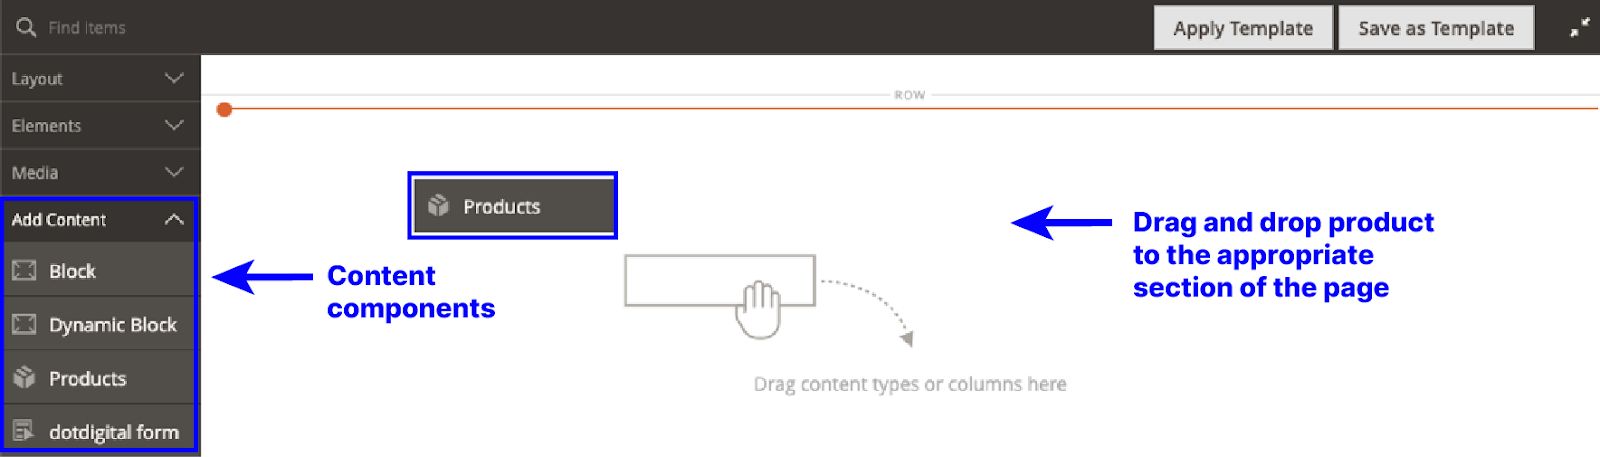
Set the conditions and category in the product settings area.
Choose the number of products to display and add a buy button.
Configure the checkout area, write your product description, and add other page elements to complete the catalog setup.
And then save.
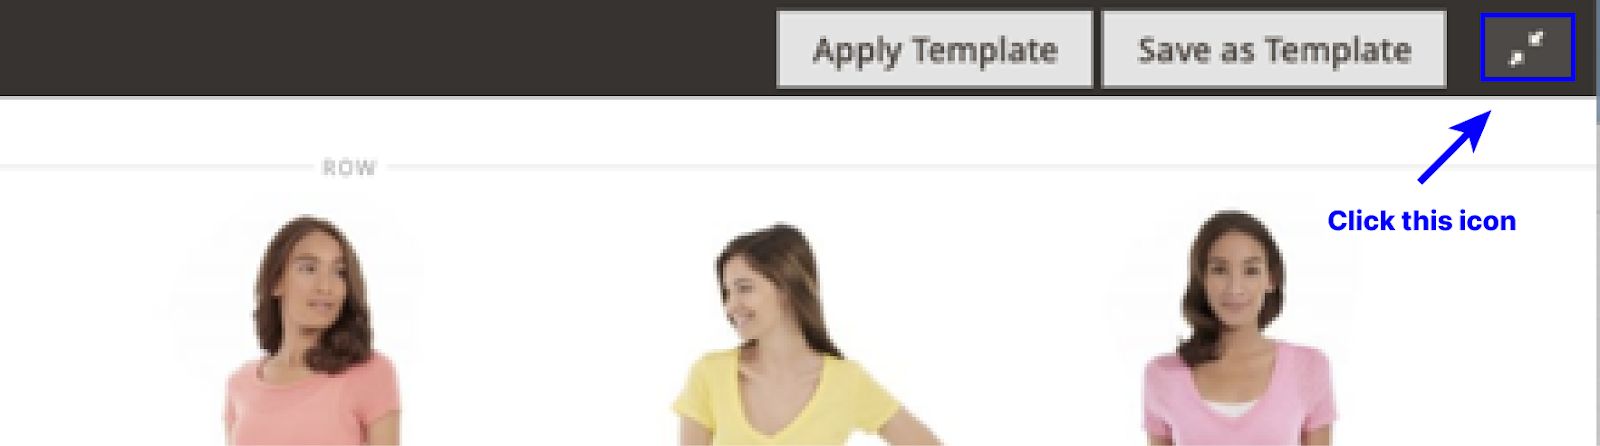
Exit the CMS page by clicking the white icon on the upper-right corner with two arrows pointing to each other.

And then, save and close using the dropdown menu on the admin page.


Final thoughts: Launch your Magento 2 Page Builder
Magento 2 Page Builder is a flexible content management solution that can help you boost productivity. So, no more content management headaches.
But a flexible CMS can only take you so far. It'd help if you had an ecommerce hosting solution that's up to snuff.
Enter Nexcess enterprise hosting. Nexcess handles your enterprise ecommerce hosting needs, including Magento hosting. Try it out today.

