
Whether it’s skincare products or fresh produce, consumers love the convenience of getting products delivered to their doorsteps at regular intervals.
Daedal Research predicts the global subscription ecommerce market will grow from $51.22 billion in 2020 to $442.62 billion by 2025.
There’s tremendous potential in the growing market of direct-to-consumer product subscriptions. And Magento virtual products are the best way to tap into it and generate recurring revenue for your online business.
Want to learn how?
Here’s a detailed guide that covers:
- An Introduction to Magento 2 Virtual Products
- How To Create a Virtual Product in Magento 2
- Final Thoughts: How To Add a Virtual Product in Magento 2
An Introduction to Magento 2 Virtual Products

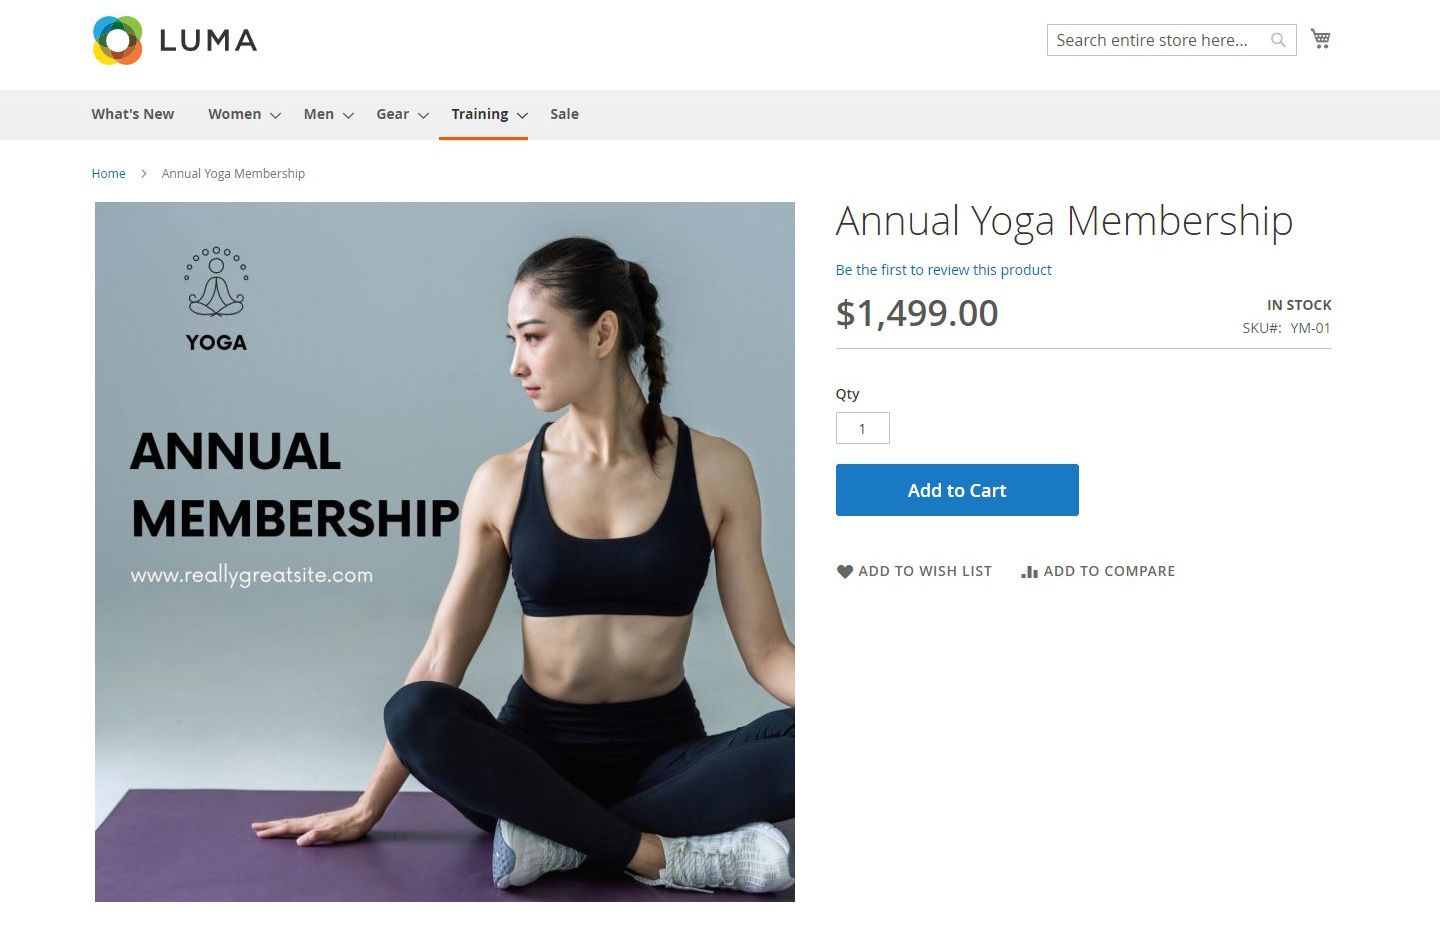
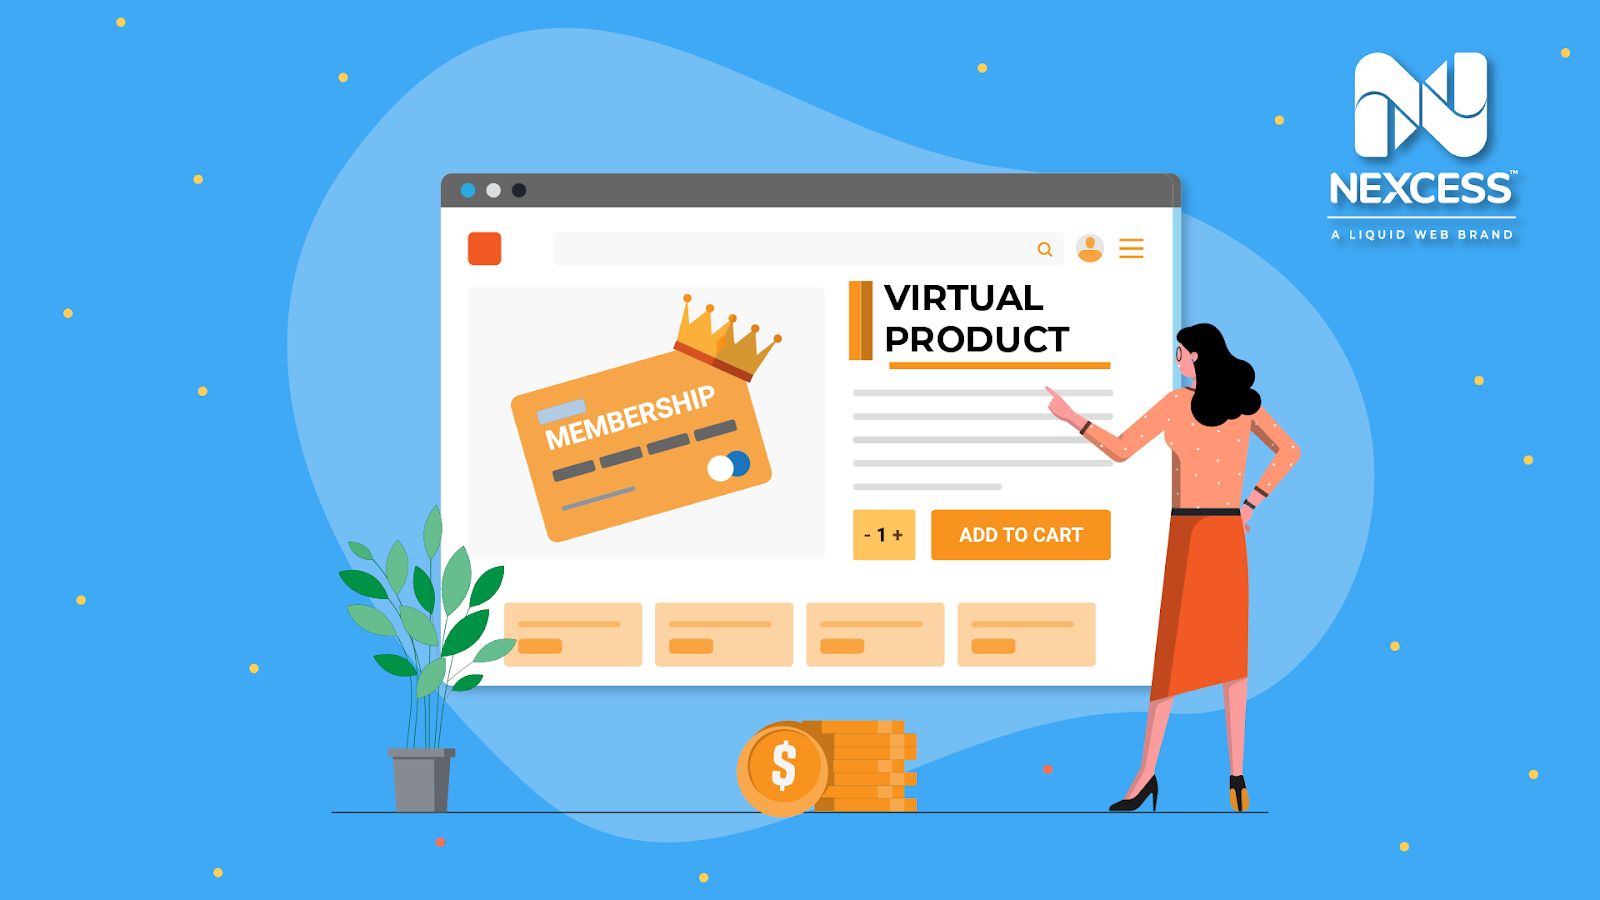
A virtual product in Magento is a product type used to sell non-tangible products such as memberships, services, gift cards, and subscriptions. It looks exactly like a simple product on the front end, i.e., it doesn’t have any configurable or customizable product options.
The only difference between a simple and virtual product is that the Magento virtual product type doesn’t have any weight.
Customers can add them to their cart and purchase them without entering a shipping address as virtual products aren’t shipped or delivered.
You can sell a Magento 2 virtual product individually or as a grouped, bundle, or configurable product. For example, you can sell a yoga class membership as a virtual product or combine it with a yoga mat and sell it as a grouped or bundle product.
A Magento 2 virtual product cannot be shipped or downloaded when sold independently. Customers only receive an order confirmation email after placing their online orders.
So if you’re using virtual products to sell event tickets, you’ll need to manage ticket sales manually or build an integration between your Magento store and event software.
How To Create a Virtual Product in Magento 2
Although you can create a virtual product programmatically in Magento 2, it’s easier to do it from the Magento admin panel.
Here’s how to set up a virtual product in Magento:
Step 1: Choose the Product Type

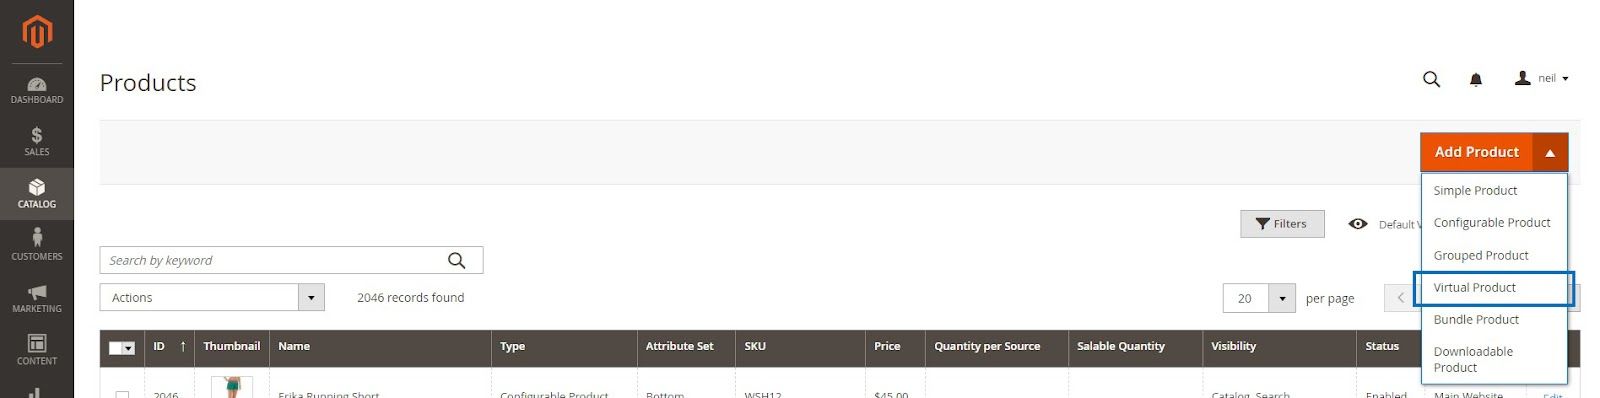
In the Magento admin, go to Catalog > Products.
Expand the Add Product menu and select the Virtual Product template.
Step 2: Assign an Attribute Set to the Product

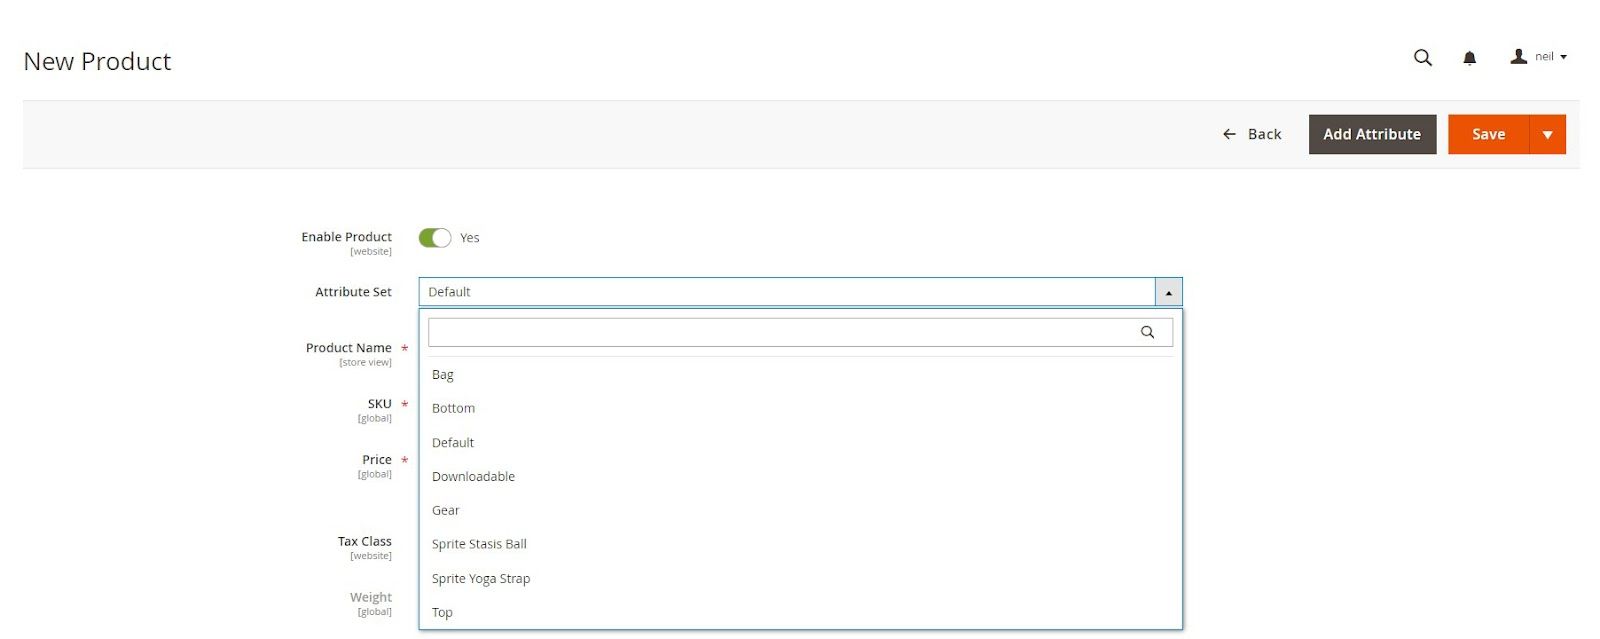
Choose an attribute set for the virtual product by expanding the dropdown and selecting from the available options.
If you haven’t created attribute sets, you can use the default Magento 2 attribute set or create a new one using the Add Attribute button.
Step 3: Configure the Required Settings

Complete the required settings as described below:
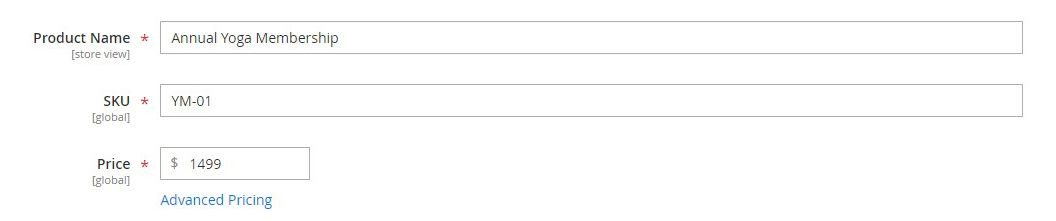
- Product Name: Enter the product name.
- SKU: Use the default SKU generated from the product name or replace it with a custom SKU.
- Price: Add the product price.
After updating the required fields, switch the Enable Product toggle from the default Yes to No and save it. We’ll update this setting after completing the Magento 2 Virtual product creation process.

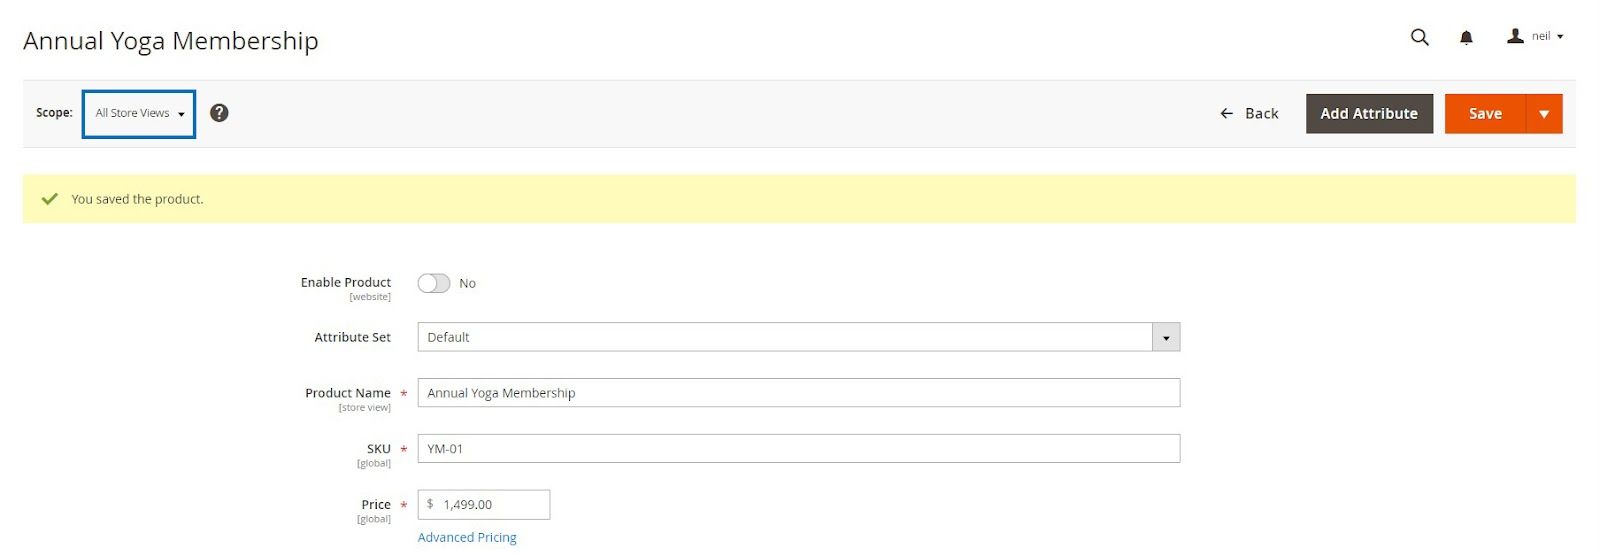
After the product saves, the Store View option will appear on the top-left corner under the product name.
Assign the product to a store or set it to All Store Views to assign the product to all stores.
Step 4: Update the Basic Settings

Configure the value for the following basic product settings:
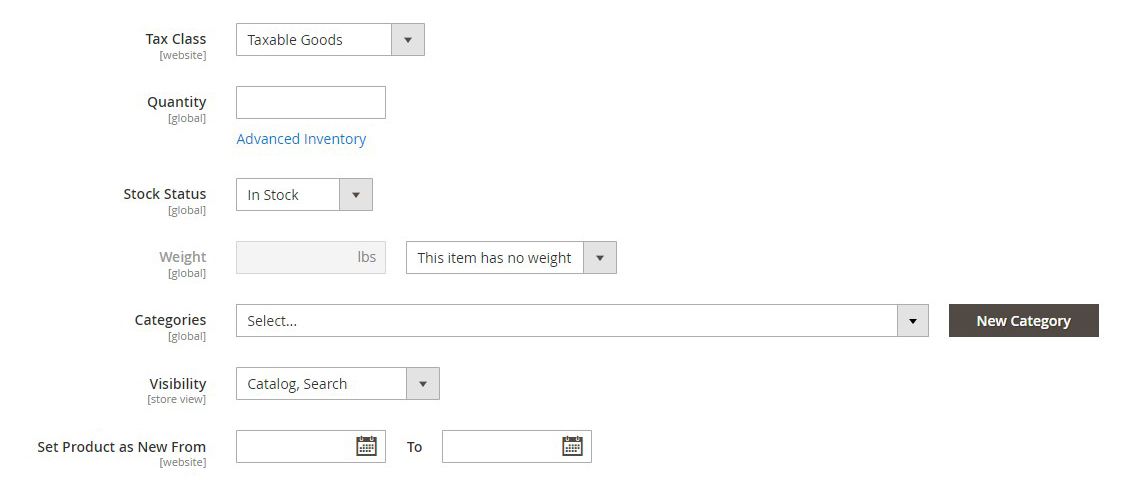
- Tax Class: Assign a tax class by setting it to Taxable Goods or exclude it from taxation by setting it to None.
- Quantity: Add the number of products in stock.
- Stock Status: Set the status to In Stock.
- Weight: This is disabled by default. If you override this setting and add weight, the product will convert into a simple product.
- Visibility: Set it to Catalog, Search.
- Categories: Assign the product to relevant categories.
- Set Product as New From: Set a timeframe to display the product in the New Products widget.
The above list of product attributes may vary based on your attribute set.
If you’re using Multi Source Inventory Management, you may not see the Quantity and Stock Status options. Instead, you’ll see a Source section below. We’ll demonstrate how to configure quantities for Multi Source in the next step.
Step 5: Assign Sources and Quantities (for Multi Source Merchants)
If you aren’t using Multi Source Inventory Management, skip this step.

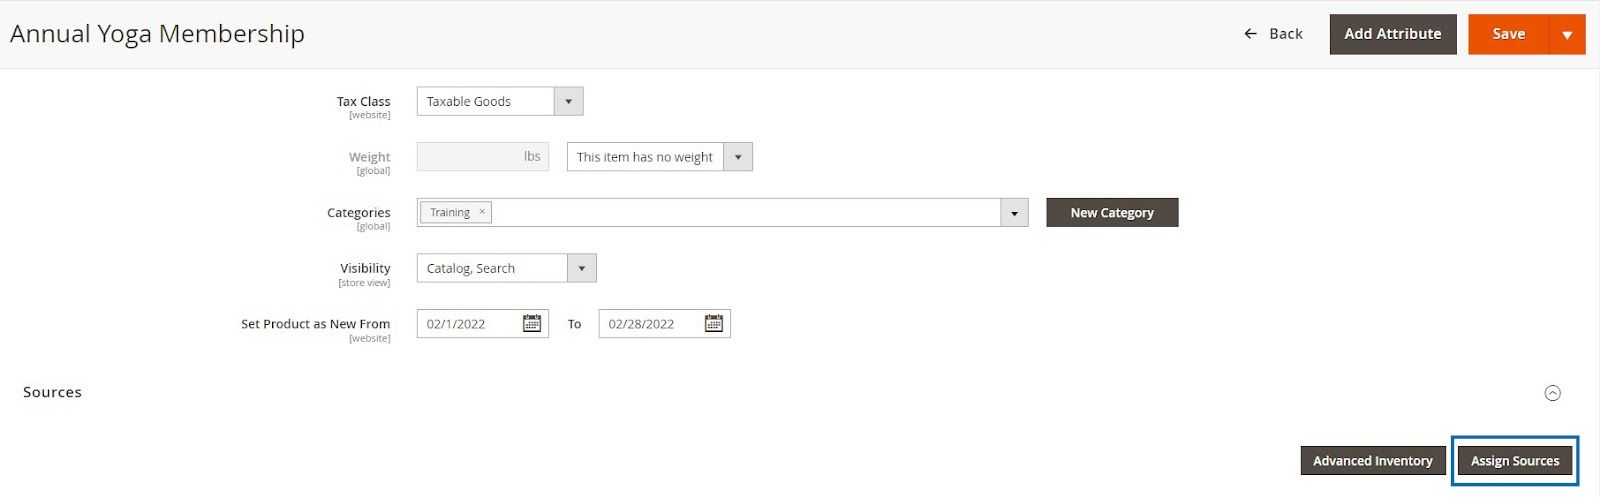
Multi Source merchants can assign sources and quantities to Magento virtual products using the Assign Sources button in the Sources section.

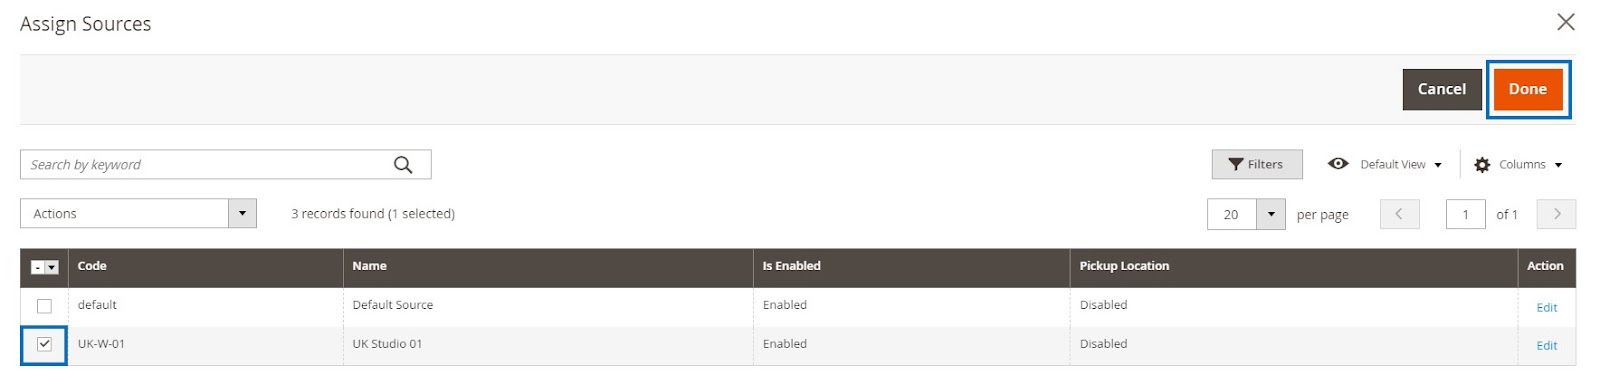
Find the sources you want to associate with the product and select the checkbox beside them. Click Done to add the sources.

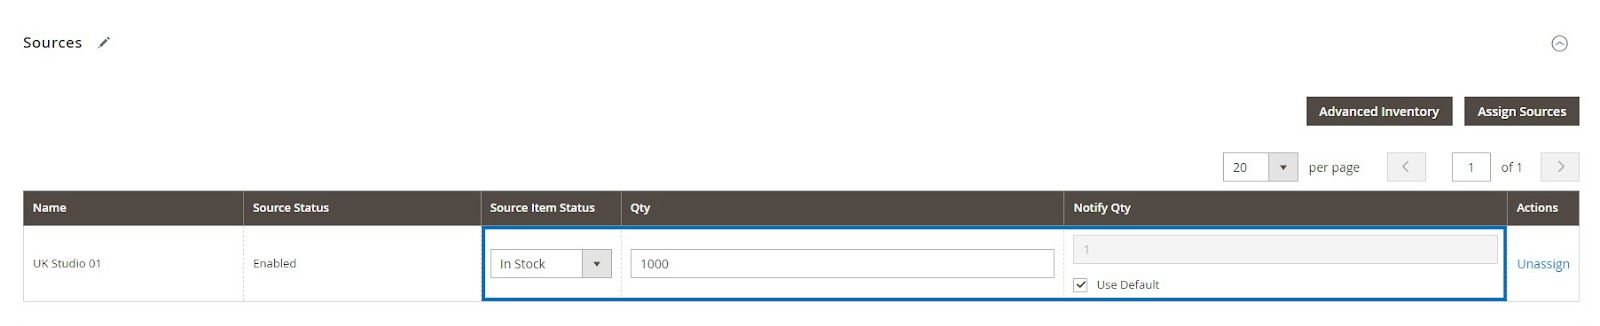
To manage the sources, you can:
- Set the Source Item Status to either In Stock or Out of Stock.
- Add the stock on hand in the Qty column.
- Enable notifications when the stock drops below a preset quantity by setting a value in the Notify Qty column. Alternatively, you can select the Use Default checkbox to use the global value.
Step 6: Configure the Optional Product Information Sections

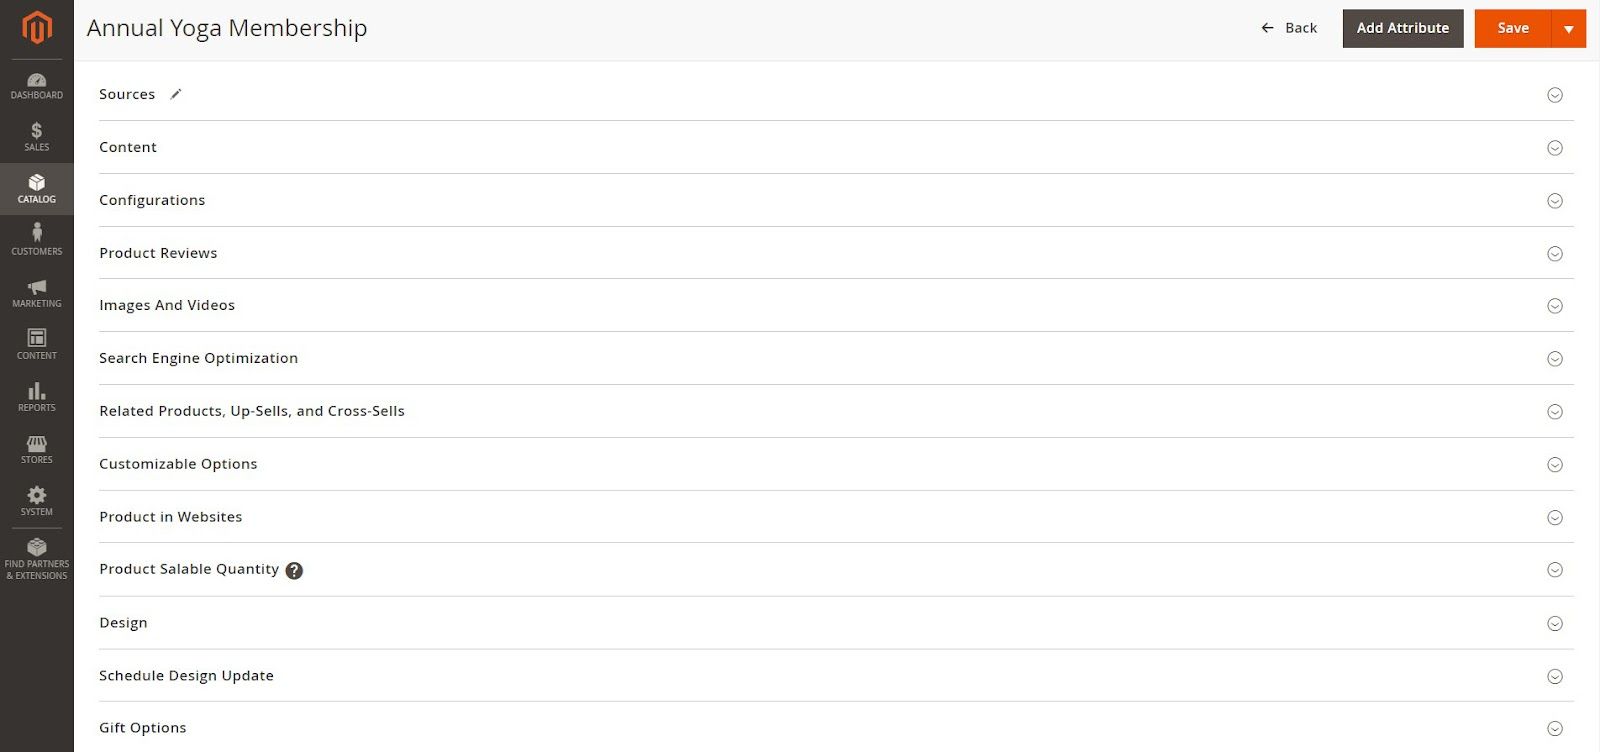
Complete the product information in each of the following sections:
- Content: Add the product description.
- Images and Videos: Upload images, rearrange them, and configure display settings.
- Search Engine Optimization: Add an SEO-friendly meta title and product meta description.
- Related Products, Up-Sells, and Cross-Sells: Set up promotional product blocks.
- Customizable Options: Allow adding customizations such as text, date, or other selection options.
- Products in Websites: Assign the product to different websites when using a multisite deployment.
- Design: Customize the product page layout.
- Gift Options: Allow buyers to add a gift message during checkout and set a price for it.
Step 7: Publish the Product on Your Store

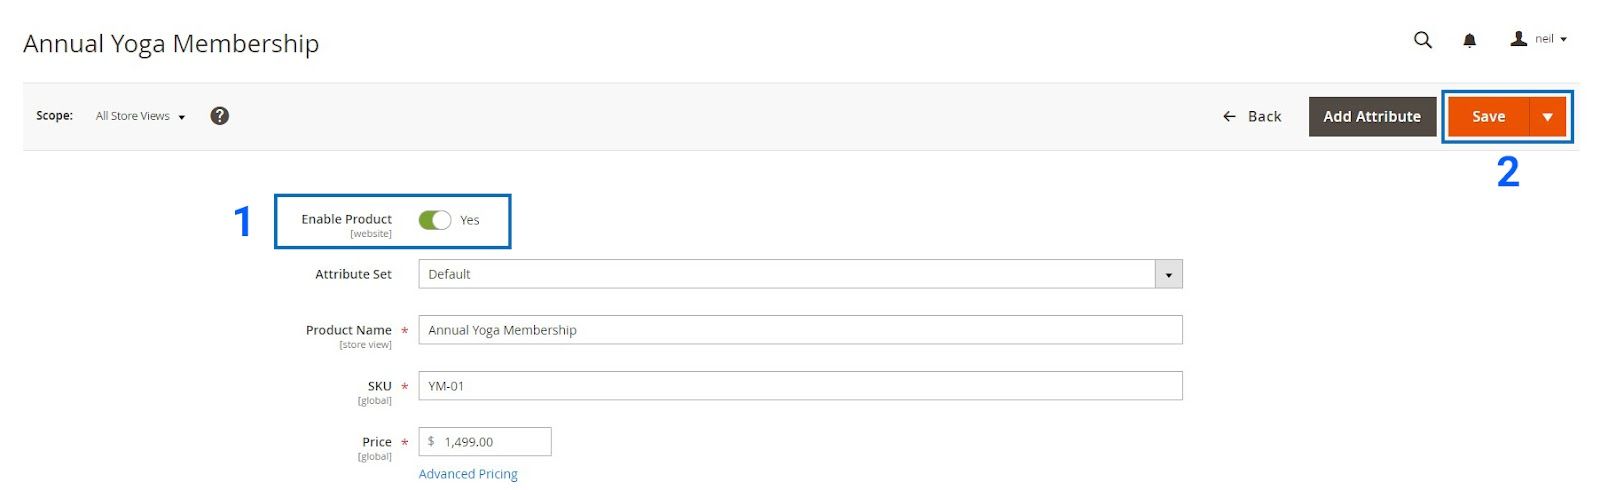
Switch the Enable Product toggle to Yes.
Click Save to publish the product.
Final Thoughts: How To Add a Virtual Product in Magento 2
Learning how to create a virtual product in Magento 2 opens a new realm of possibilities for your online store. It allows you to sell product subscriptions, extended warranties, and exclusive memberships that can help you improve sales and reduce churn.
No matter how you use it, make sure your store has the resources it needs to deliver a seamless shopping experience. Don’t know where to start?
Check out Managed Magento hosting by Nexcess. It gives you access to hosting that’s purpose-built for Magento. You also get 30-day backups, unlimited email accounts, and instant auto-scaling.
Sign up for a plan today!

