
The A Magento 2 cache stores data for quicker data calls in the future and improves site speed. Keep reading to learn how to flush a Magento 2 cache command line with this guide.
What is the Magento 2 cache?
A cache basically stores information in a way that makes it easily accessible for future use. This way, during high-traffic periods, your website visitors can still load pages quickly.
How does the Magento 2 cache work its magic? If you’ve heard of WordPress caching, you may already understand the basics.
Magento uses multiple caching types — Minification, Varnish, and Redis.
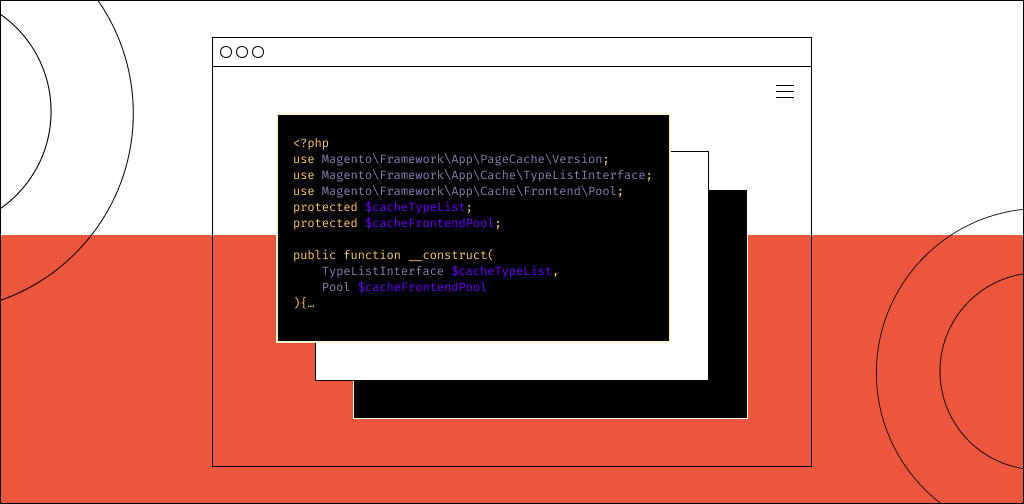
Magento 2 gathers configuration files from all modules. It then merges these files and saves them to the cache.
Get fully managed Magento hosting
Accelerate your store's potential, without the tedious maintenance
Why should you flush the Magento 2 cache?
After making changes to your website, you need to clear (“flush”) the cache in order for these changes to become visible.
Also, to ensure your Magento website maintains high performance, make sure to flush, enable, or disable your caches as required.
How do you flush the Magento 2 cache?
Simple. You can do so using either the command line or the Admin panel.
How to flush the Magento 2 cache using the command line
To flush your cache with the command line, run either of these commands from your Magento root directory.
php bin/magento cache:flush
php bin/magento c:f
Here’s the output:
[ad067e60@cloudhost-3703047 html]$ php bin/magento cache:flush
Flushed cache types:
config
layout
block_html
collections
reflection
db_ddl
compiled_config
eav
customer_notification
config_integration
config_integration_api
full_page
config_webservice
translate
vertex
How to flush the Magento 2 cache using the Admin panel
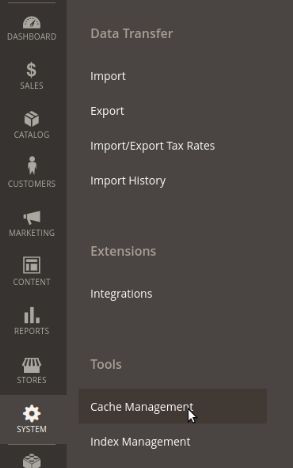
To flush the Magento 2 Cache via the Admin panel, follow these steps:
Step 1:
Go to Admin > System > Cache Management.

Step 2:
Select the cache types you want to refresh (e.g., Configuration).
If you want to refresh all cache types, you can select them all.

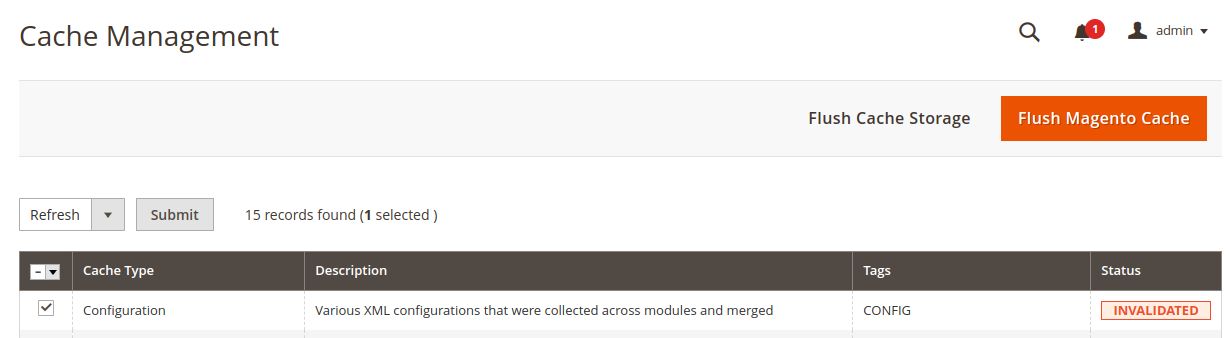
Step 3:
Select Refresh from the drop-down menu and click Submit.
Here’s the output:

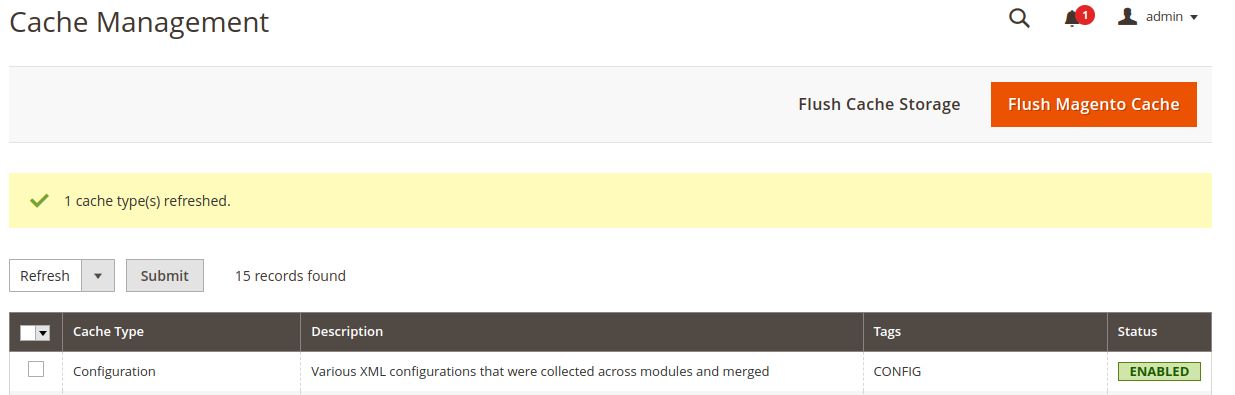
You’ll see buttons marked Flush Cache Storage and Flush Magento Cache. You can also click either of these to flush your Magento 2 cache.


Difference between a cache flush and a cache clean
A Magento 2 cache flush removes all stored data from the cache, so it may affect the performance of other processes using the same storage (e.g., Redis).
A Magento 2 cache clean deletes all enabled caches. It doesn’t affect other server processes that aren’t part of Magento.
How to check the cache status
You can check the cache status using the following command line:
php bin/magento cache:status
Here’s what you’ll see:
[ad067e60@cloudhost-3703047 html]$ php bin/magento cache:status
Current status:
                        config: 1
                        layout: 1
                    block_html: 1
                   collections: 1
                    reflection: 1
                        db_ddl: 1
               compiled_config: 1
                           eav: 1
         customer_notification: 1
            config_integration: 1
        config_integration_api: 1
                     full_page: 1
             config_webservice: 1
                     translate: 1
                        vertex: 1
How to enable a cache using the command line
To enable all cache types, use the following command:
php bin/magento cache:enable
Here’s your output:
[ad067e60@cloudhost-3703047 html]$ php bin/magento cache:enable
Changed cache status:
                        config: 0 -> 1
                        layout: 0 -> 1
                    block_html: 0 -> 1
                   collections: 0 -> 1
                    reflection: 0 -> 1
                        db_ddl: 0 -> 1
               compiled_config: 0 -> 1
                           eav: 0 -> 1
         customer_notification: 0 -> 1
            config_integration: 0 -> 1
        config_integration_api: 0 -> 1
                     full_page: 0 -> 1
             config_webservice: 0 -> 1
                     translate: 0 -> 1
                        vertex: 0 -> 1
Cleaned cache types:
config
layout
block_html
collections
reflection
db_ddl
compiled_config
eav
customer_notification
config_integration
config_integration_api
full_page
config_webservice
translate
vertex
To enable a specific cache type, use this command:
php bin/magento cache:enable CACHE_TYPE
For example, if you want to enable the collections cache type, use:
php bin/magento cache:enable collections
Here’s your output:
[ad067e60@cloudhost-3703047 html]$ php bin/magento cache:enable collections
Changed cache status:
                   collections: 0 -> 1
Cleaned cache types:
collections
To disable all cache types, use:
php bin/magento cache:disable
[ad067e60@cloudhost-3703047 html]$ php bin/magento cache:disable
Changed cache status:
                        config: 1 -> 0
                        layout: 1 -> 0
                    block_html: 1 -> 0
                   collections: 1 -> 0
                    reflection: 1 -> 0
                        db_ddl: 1 -> 0
               compiled_config: 1 -> 0
                           eav: 1 -> 0
         customer_notification: 1 -> 0
            config_integration: 1 -> 0
        config_integration_api: 1 -> 0
                     full_page: 1 -> 0
             config_webservice: 1 -> 0
                     translate: 1 -> 0
                        vertex: 1 -> 0
To disable specific cache types, go for:
php bin/magento cache:disable CACHE_TYPE
For example, if you want to disable the “collections” cache type, use this command:
php bin/magento cache:disable collections
Here’s the output:
[ad067e60@cloudhost-3703047 html]$ php bin/magento cache:disable collections
Changed cache status:
                   collections: 1 -> 0
How to enable a cache using the Admin panel
Here’s how to enable caches from the Magento Admin panel:
Step 1:
From the Magento Admin panel, go to System and click Cache Management.
Step 2:
Select the required cache type (e.g., Layouts).

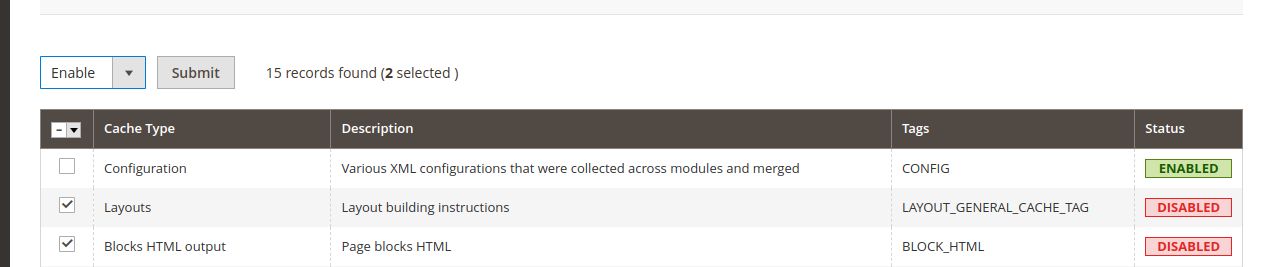
Step 3:
Make sure the top-left menu is set to Enable.
Step 4:
Click Submit.
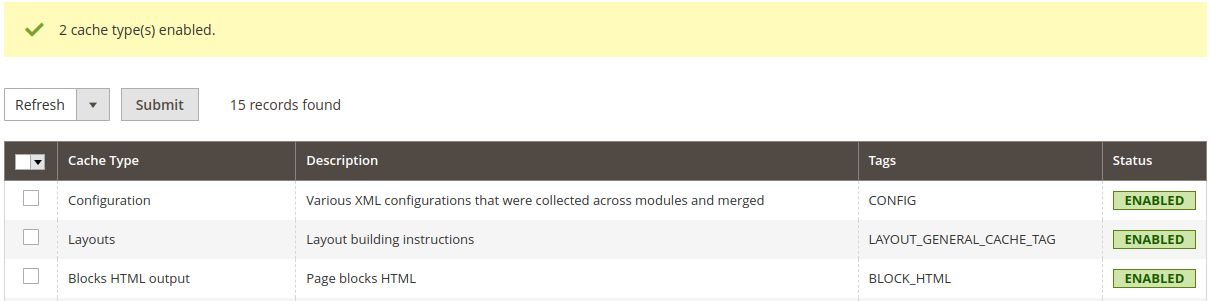
Here’s the output:

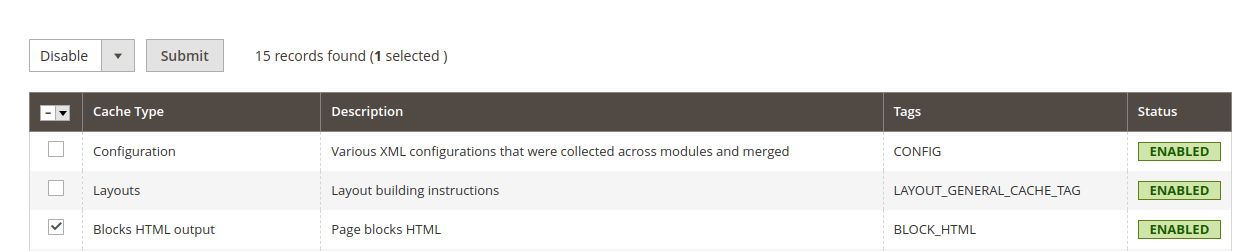
If you want to disable caches using the Admin panel, just follow the above steps, but instead of clicking Enable in step 3, click Disable.

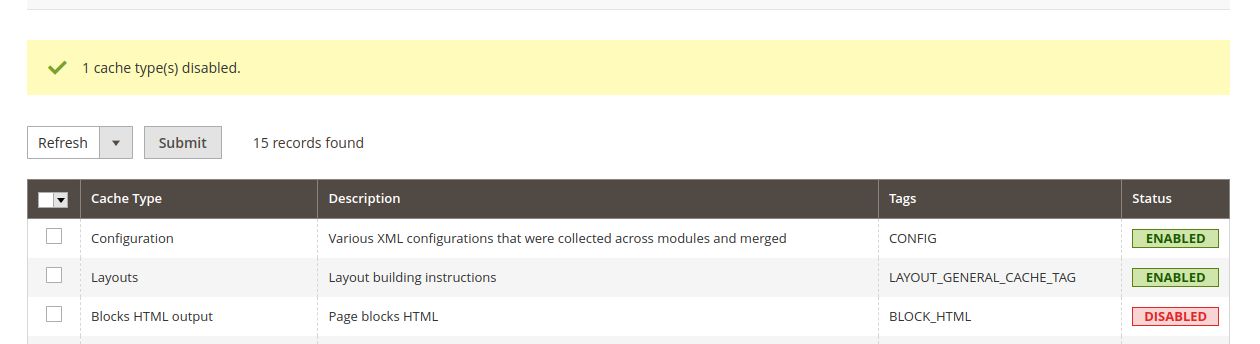
Here’s the output:

Final thoughts
Once you’ve flushed your cache, you can move on to growing your website’s traffic. For example, you could start by optimizing Magento for SEO.
Planning to purchase a hosting plan for your Magento website?
We recommend one of our fully managed Magento hosting plans. These ecommerce web hosting plans are optimized for speed, security, and scale.
Included in these plans are features such as:
- Advanced caching.
- Staging sites.
- Dedicated IP addresses.
- Instant autoscaling.
- Performance testing.
Having problems with anything discussed in this guide?
Nexcess is ready to provide the help you need.
For 24/7 support, Nexcess customers can email support staff or use the Client Portal.
Not a Nexcess customer? No problem. You can still chat with an expert or consult expert-curated support resources.
Or, check out our fully managed Magento plans to get started today.

