WP All Export is a powerful tool that allows you to export WordPress data to a custom CSV or XML. You can edit WooCommerce products in Excel and reimport them, migrate them to a new site, or upload them to Google Merchant Center.
Keep reading for an in-depth guide to exporting WooCommerce products, including price, stock, categories, and product image galleries. Follow along by going here to WP All Import and selecting “WooCommerce Store.”
How to Export WooCommerce Products
At a high level, here’s how to export your WooCommerce products.
1. Go to All Export › New Export and select “WooCommerce Products” to create a new WooCommerce product export.
2. Decide if you’d like to export to CSV, XML, or Google Merchant Center.
3. Drag and drop to customize your export file.
4. Run the export to generate your WooCommerce product export.
Below we will go into more detail for each step.
9 Steps to Export WooCommerce Products
1. Create a New WooCommerce Product Export
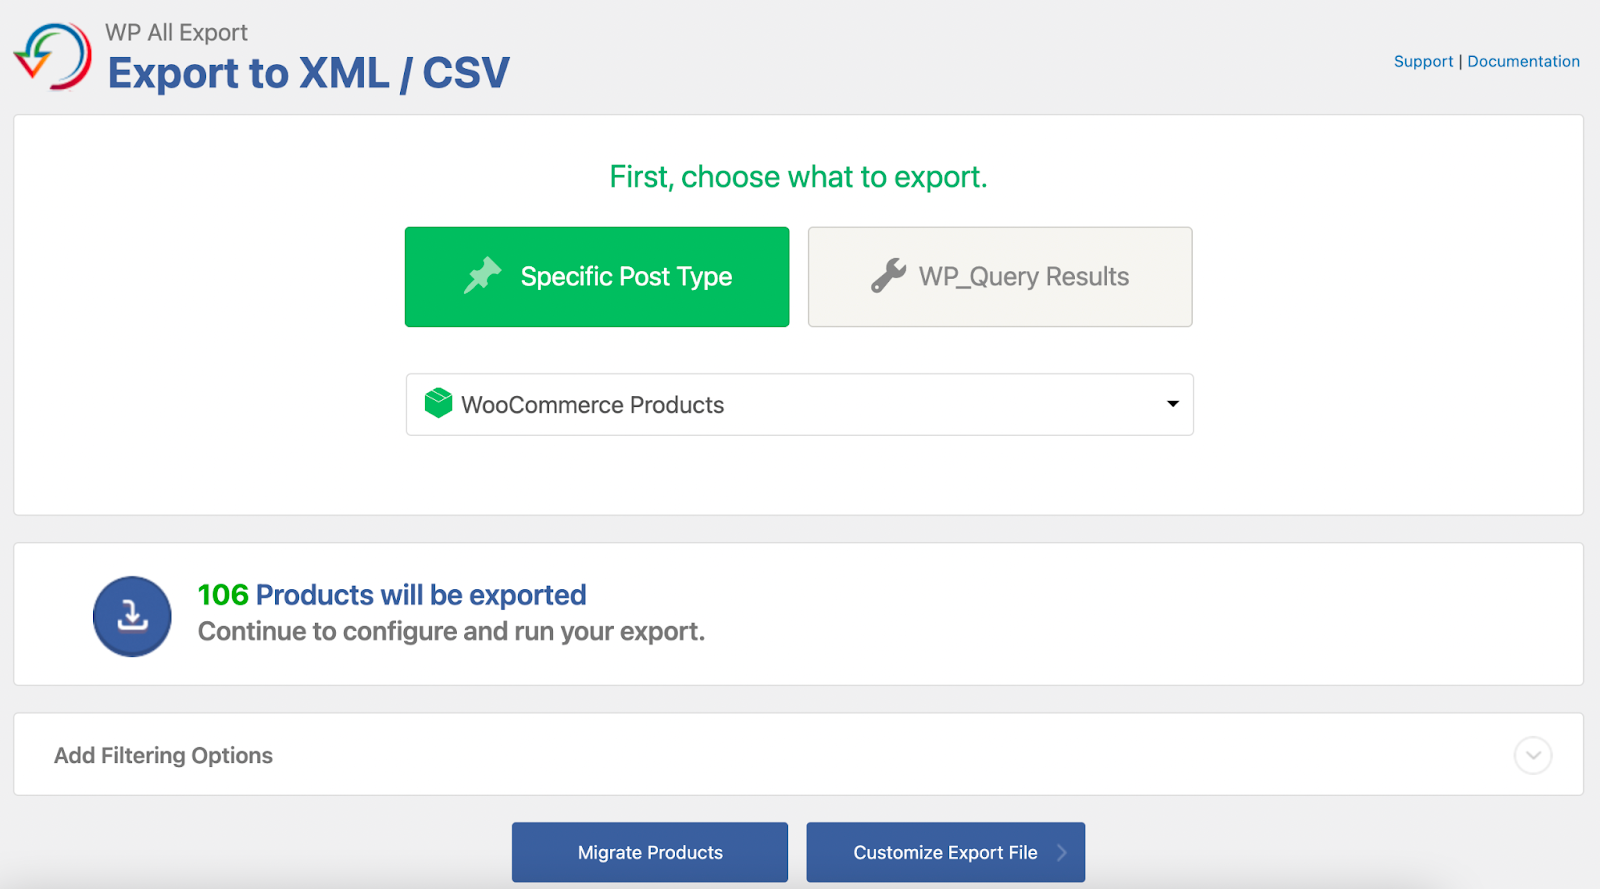
To create a new WooCommerce product export, go to All Export › New Export and select “WooCommerce Products” from the drop-down. Create filters to set which products are included in your export, and decide if you’d like to customize the export or automatically generate your CSV/XML for easy migration to another site.

2. Set the WooCommerce Product Export Filters
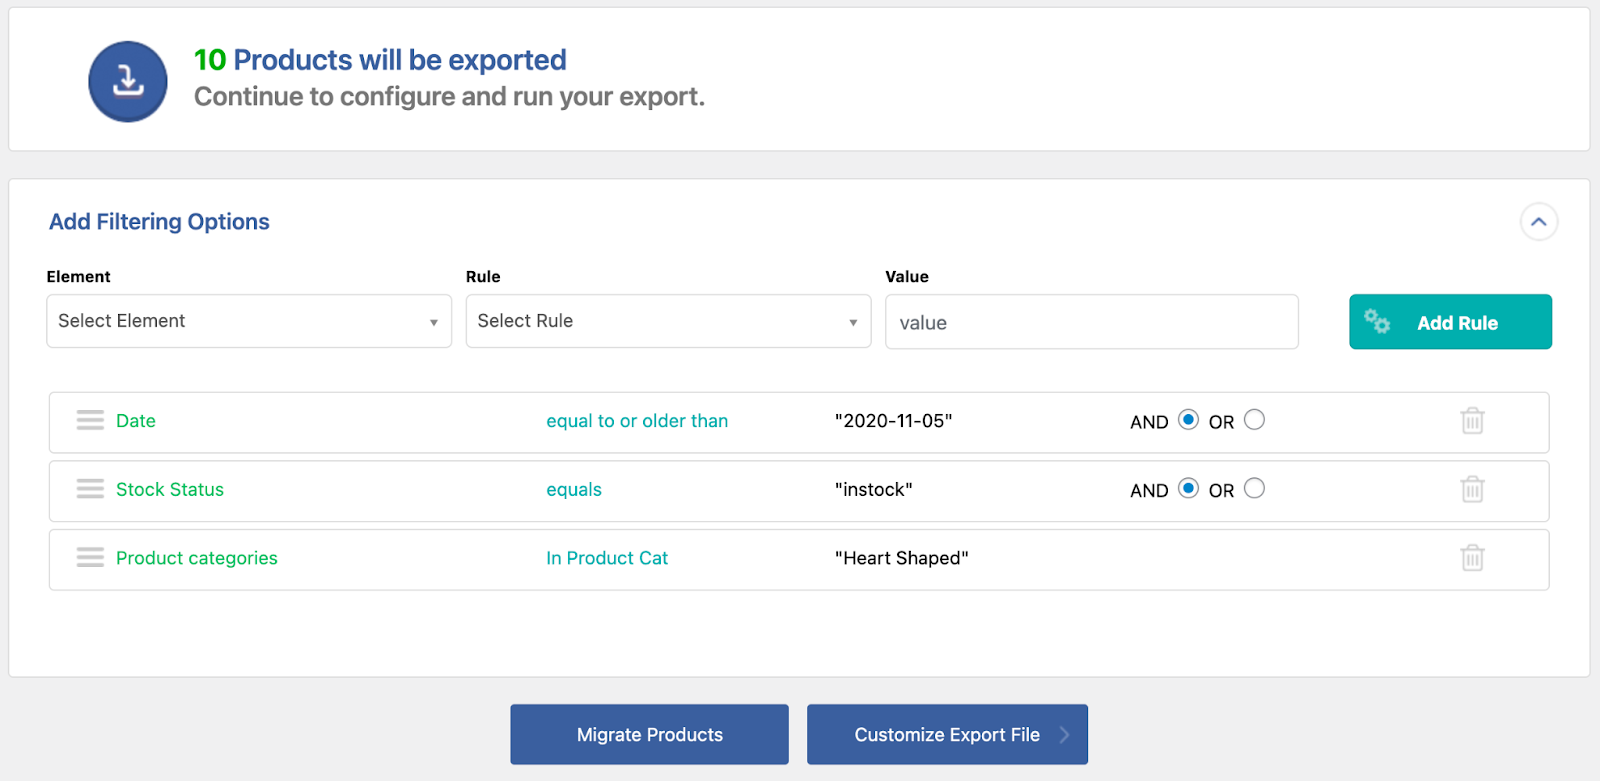
Export filters allow you to decide which products to include in your export. You can build any combination of filter rules to build the exact file that you need. To create a filtering rule, select the element you want to filter by, the rule for the filter, and then the value to filter by. Add multiple rules with “AND” or ‘“OR” conditionals.
As an example, the below set of filters will only export products that are in stock in the category “Heart Shaped” and were created before November 5 2020.

For now, let’s remove them so that all of our products are included in this export.
3. Customize Your Woocommerce Product Export File
Click “Customize Export File” to continue to the edit export page.
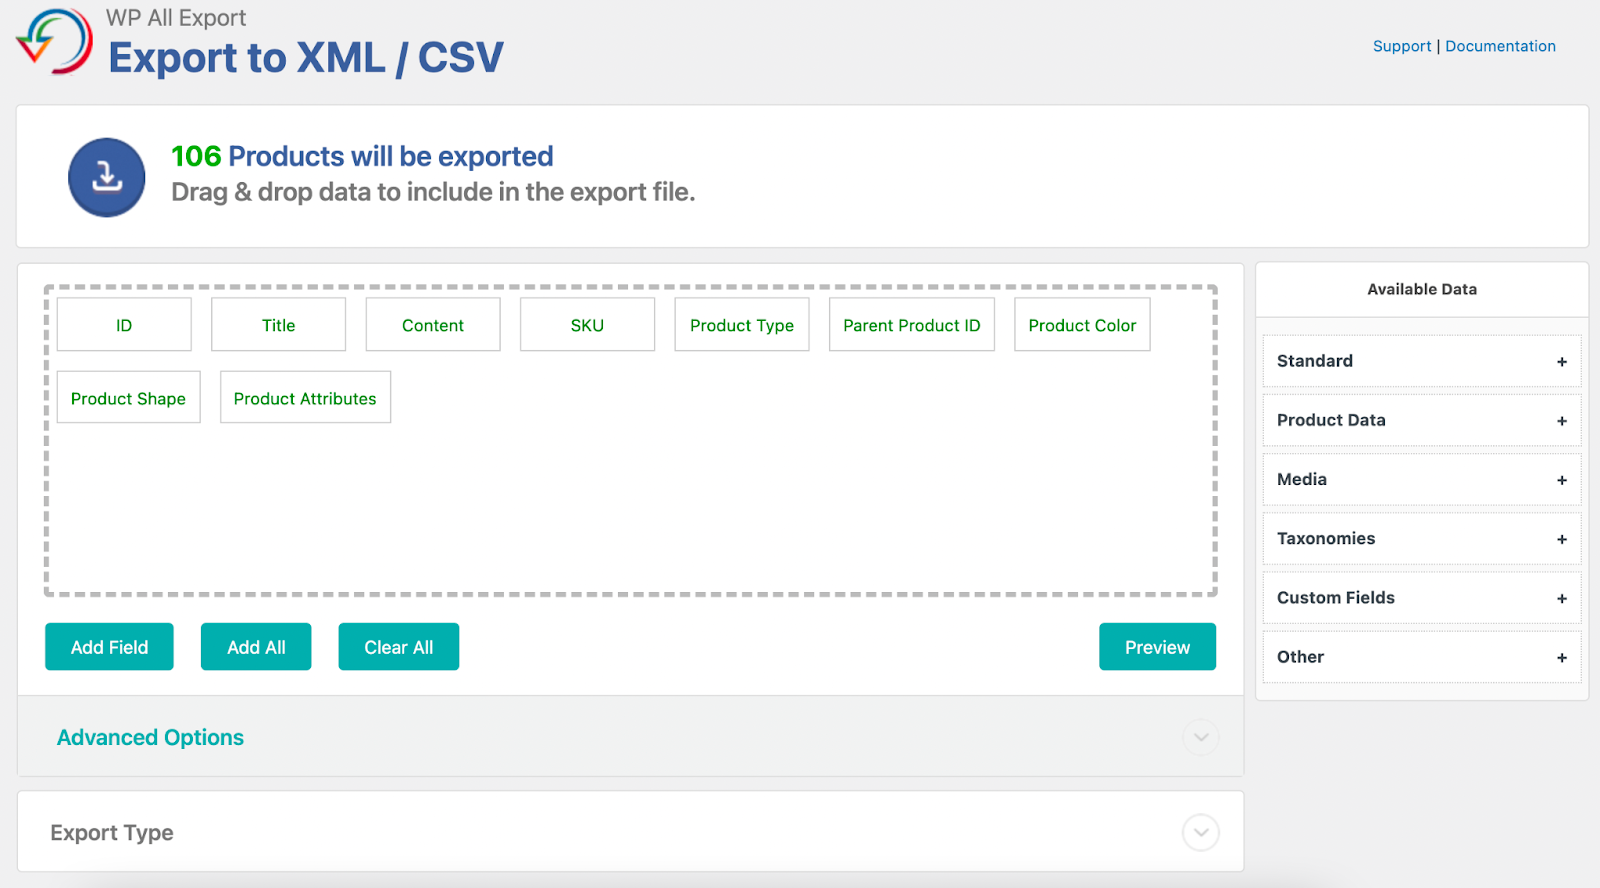
WP All Export automatically adds some relevant fields to the export template to get you started. Drag them around to re-arrange them, drag them out of the template to remove them, and click them to edit their names and adjust other settings.

All of the WooCommerce product data is included in the Available Data section on the right.
The “Product Data” section contains the most commonly used fields, like SKU, price, stock, and product attributes like size and color. Product variations are automatically detected.
The “Media” section contains all of the export fields needed to export WooCommerce product galleries and attached files. The URL, filename, and all image SEO data are all available for export.
The “Taxonomies” section is automatically populated with all of the categories and tags applied to the WooCommerce products in your export.
4. WooCommerce Product Export File Types
Click “Export Type” to decide which type of export file to generate. You can choose from the following options:
- CSV File
- Excel File (XLS or XLSX)
- XML (Simple or Custom)
- Google Merchant Center
CSV and Excel are the best to bulk edit your WooCommerce Products, or process them in Excel or Google Sheets. They also work well for migrating WooCommerce products to another WordPress install.

Other services and systems will sometimes require an XML feed, prepared with a specific schema or format. If you’re lucky, you will be able to use the ‘Simple XML’ option. This creates a simple, single-level XML feed of your product data that will work for the majority of uses.
If you need more customization options than the “Custom XML Feed,” you can fully customize the structure of the XML file (including nested elements), control the names and order of the XML elements, and easily add static data to the feed using this option.
Finally, the “Google Merchant Center Product Feed” option creates a feed tailored to easily upload WooCommerce Products to Google Merchant Center. WP All Export pulls all of the necessary information from your products in WooCommerce, with options to map categories and configure other options specific to Google.
5. Run the Export
Let’s set the export type to “CSV.” Click “Add All” to add all fields to the template and continue to the final step of the export.
The export should be complete in less than a few minutes. After the export is complete you have a variety of options on how to proceed.
6. Migrate WooCommerce Products
In the “Download” section, click “Bundle” to get a zip file containing the export file and the import template. On a different site, upload the bundle to WP All Import and your import file and all import settings will be preconfigured.
7. Edit WooCommerce Products in Excel
Go to the “Export, Edit, Import” section to download your products. After editing them in Excel, click “Import with WP All Import” and the changes you made in Excel will be reflected in your WooCommerce products on the site.
For example, you can export the stock and prices for your products, edit them in Excel, then bulk update them via the “Import with WP All Import” button. All of the settings are filled in for you.
8. Export WooCommerce Products on a Schedule
In the “Scheduling Options” section you can set your WooCommerce product export to run on a schedule. Run it every day, every hour, once a week, or whenever you want. WP All Export will run at the scheduled times and update your WooCommerce store with the latest version of your export file.
9. External Apps
WP All Export integrates with Zapier, which means that you can easily connect your export to hundreds of apps. You can automatically send your export file to Google Drive or Dropbox, email it to yourself, and more.
Finishing Up
As you can see, WP All Export makes it very easy to export your WooCommerce product data. Give it a try with these steps outlined above.
With Nexcess WooCommerce Hosting, Better Is Built In
Nexcess offers fully managed hosting for WooCommerce designed for fast, high-performing stores. Nexcess also:
- Offers high performance and site speed.
- Dynamically scales and optimizes.
- Secures your store with always-on monitoring.
Start your free two-week trial of fully managed WooCommerce from Nexcess today.

