WordPress is one of the most popular platforms for website creation due to its ease of use and wide variety of functionality it offers. Throughout its history WordPress has focused on improving the way site content is edited.
In 2018, WordPress Block Editor became the default editor. It provided a new editing experience to users. This project is known as “Gutenberg” and is available on wordpress.com as well as wordpress.org.
Do you find yourself adding the same content to different pages or posts of your site? Have you wondered if there was a faster, easier way? Sound familiar? Thankfully, WordPress has a useful feature you’ll find quite “reusable.”
Keep reading to learn about WordPress reusable blocks and how to use them.
What are WordPress Reusable Blocks?
A reusable block is a collection or combination of some content that can be saved, providing the ability to re-add it to any page or post easily. With the ability to save a snippet of content, WordPress reusable blocks save site editors a lot of time. Instead of writing the same content for multiple posts, one can add the same block to each post.
Want to encourage readers to follow you on social media sites? Create a block with some text and links to your social media handles and save it. On each new post you add to your site, this saved block can be added with a few clicks as opposed to writing and adding the same content every single time you create a new post.
Benefits of Reusable Blocks
Reusability of blocks serves as a tool to save you from repetitive, inefficient work. What’s more, you leave yourself open to making errors. Using reusable blocks prevents time consuming, tiring work. Never again have to go back and forth copying content from one post to another.
A great benefit of reusable blocks is that they are globally synchronized. Let’s say you have a survey form saved and used on multiple posts as a reusable block. At some point you decide to add another field to the form to collect additional information. You can simply edit the block saved and make changes there. All the posts using that block will automatically display its updated state, saving you from editing the survey form in each post manually.
WordPress reusable blocks can also be helpful when it comes to sponsored content. You can create a block for sponsored content, such as the sponsor's logo along with other content. When needed, you can modify the saved block to replace the logo with a different one across your site with ease.
A few other cases where reusable blocks may come in handy include:
- Saving and reusing call-to-action sections.
- A block of featured posts.
- In list or tabular form.
How to Create Reusable Blocks
All blocks within the Gutenberg editor are individual content elements that can be saved individually as a reusable block. Let’s talk about how to create them.
1. While in the Editor, Click on "Add New Block" Button
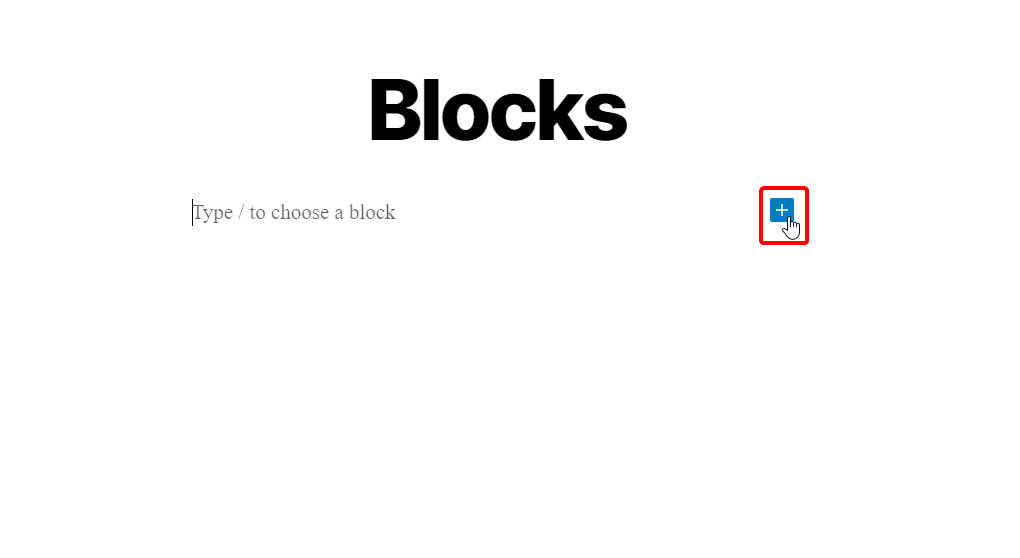
In this example we will create a button linking to a URL, using Buttons block. This is, however, just for demonstration purposes. Same steps can be used for any other individual block you may need or use, such as paragraph, image, or list.
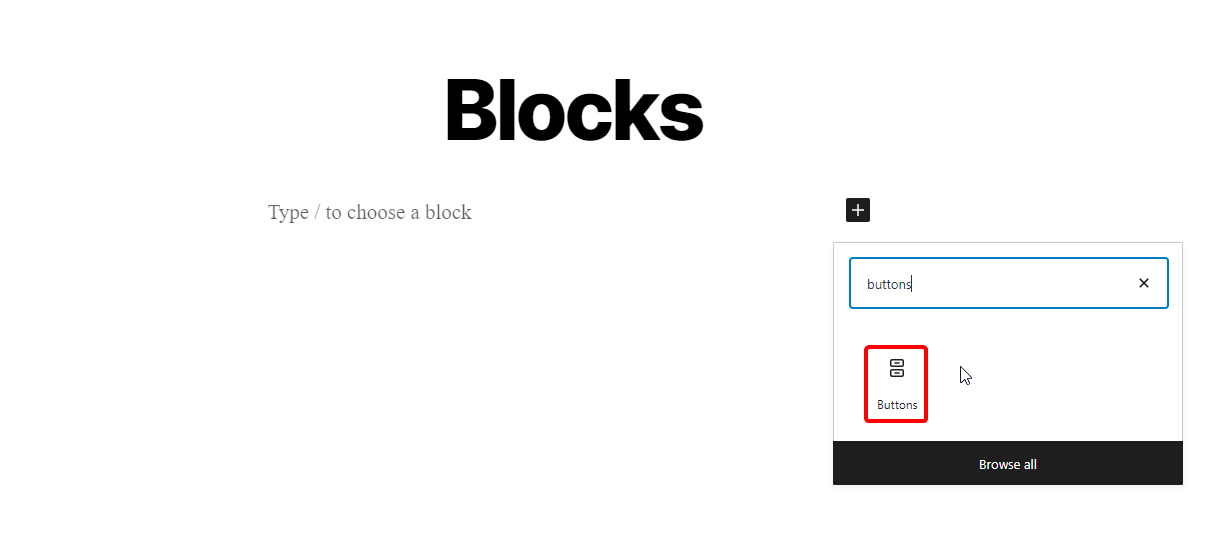
2. After Adding the Button Block, Assign It Some Text and a URL
You can also stylize the button as needed using options available in the block toolbar.
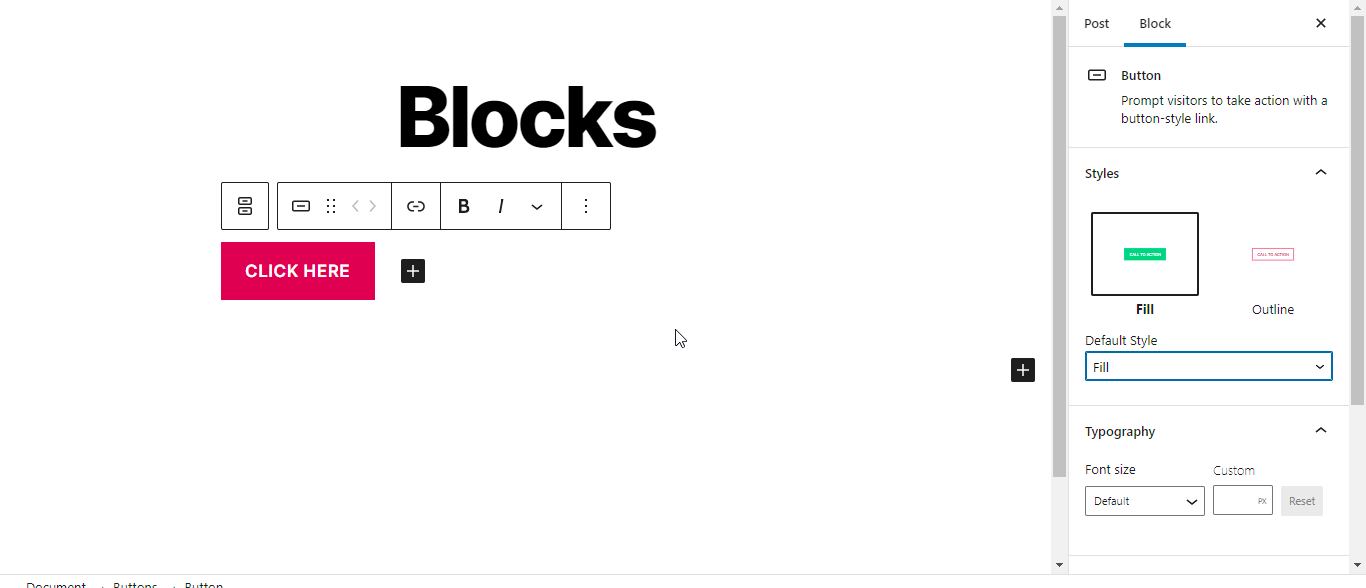
3. Once You Are Done Editing, Click on the Button With Three Vertical Dots
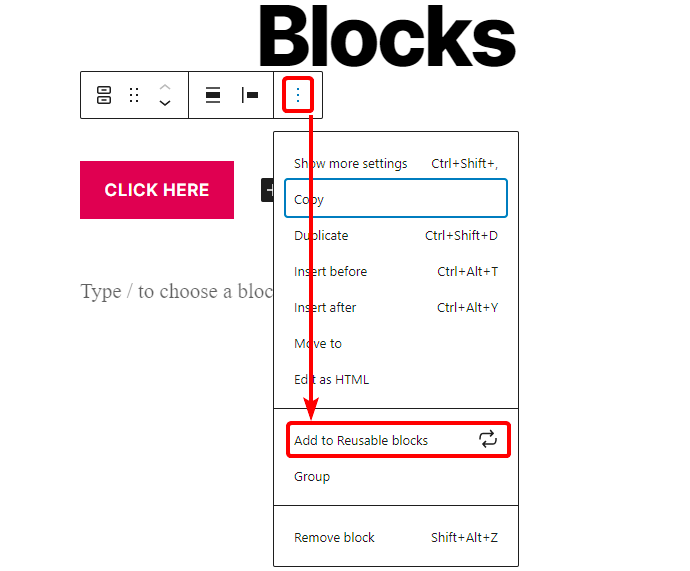
Then select “Add to Reusable blocks” from the dropdown. You will be asked to assign the block you are about to create a name which can then be used for quick identification while going through the library of available blocks.
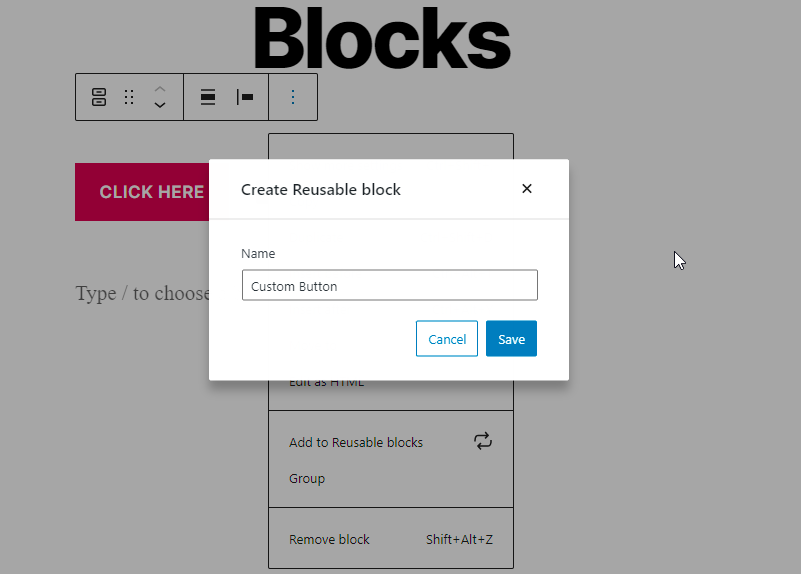
4. Click On the Save Button and a Reusable Block Will Be Created
This little popup in the left hand corner confirms that a block has been saved to the reusable blocks library.
Adding Reusable Block in Other Posts
Now that we have created a reusable block, we can add this block to a different post or page. Start by creating a new post or page or editing an existing one. There are a few ways a reusable block can be called to a post or page.
1. Search for the Name Assigned to the Reusable Block While Adding a New Block
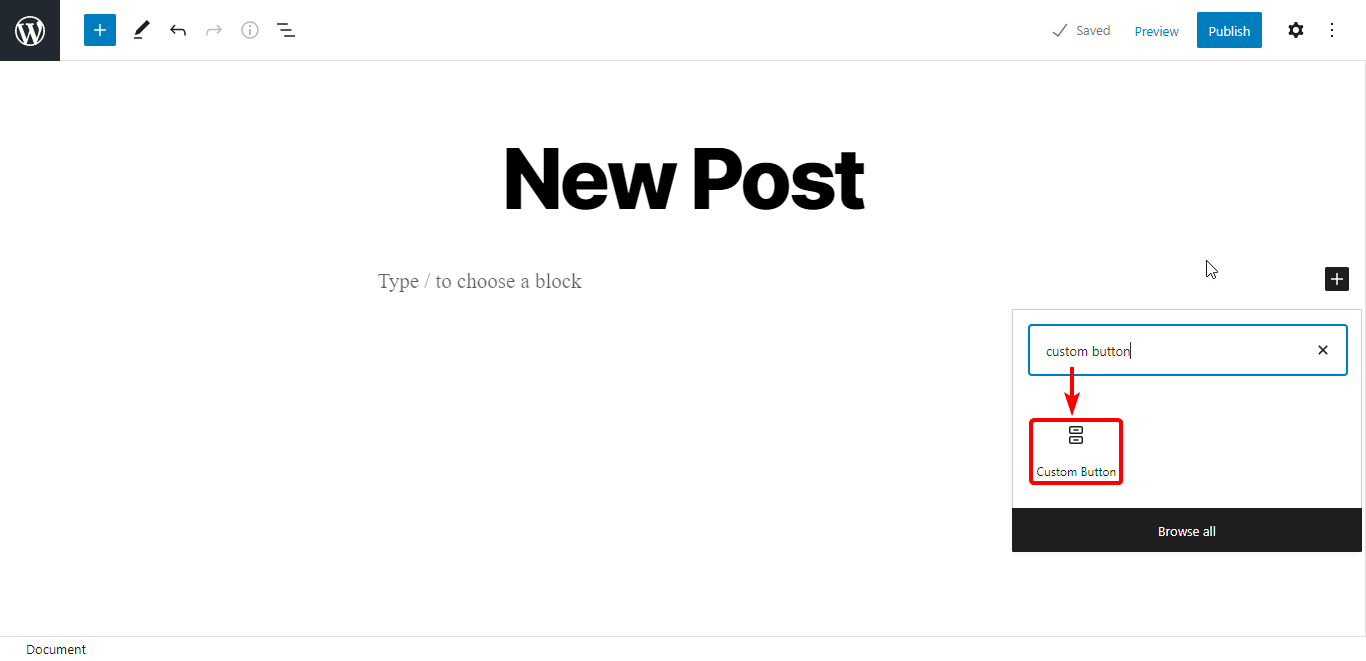
Alternatively, you can click on the add toggle block inserter button in the top left corner.
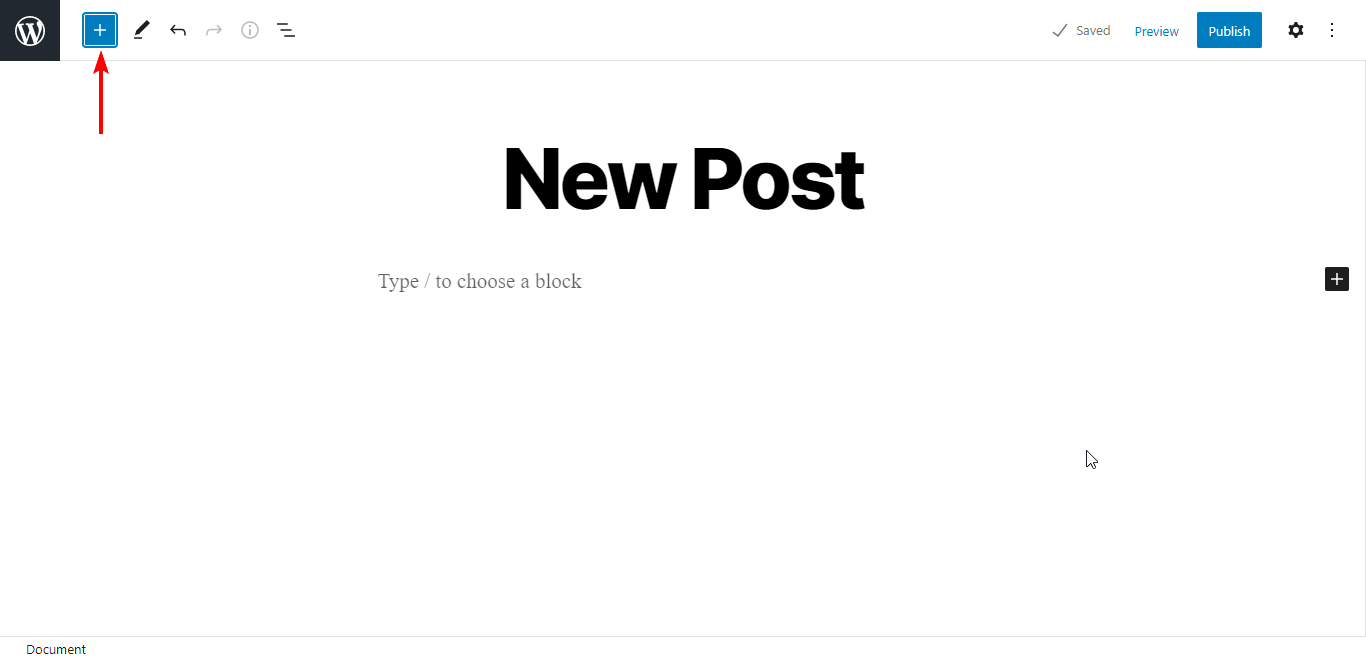
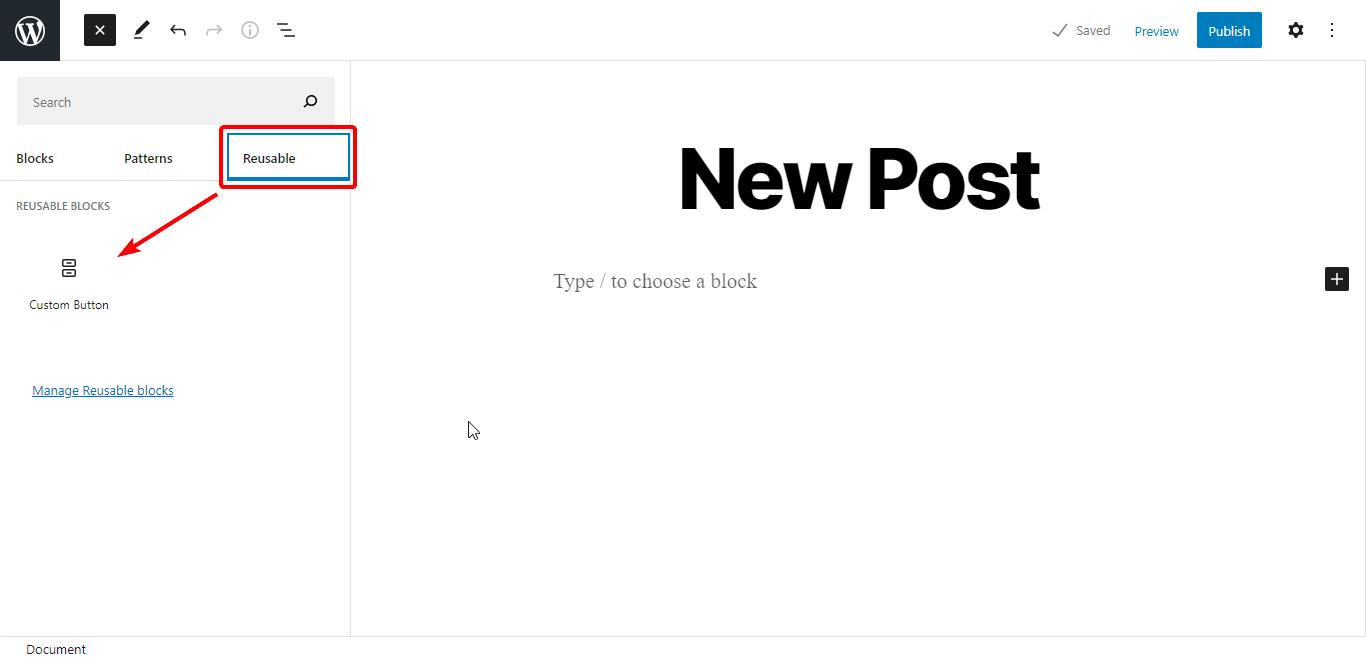
2. Go to the Reusable Blocks Tab and Insert the Required Block
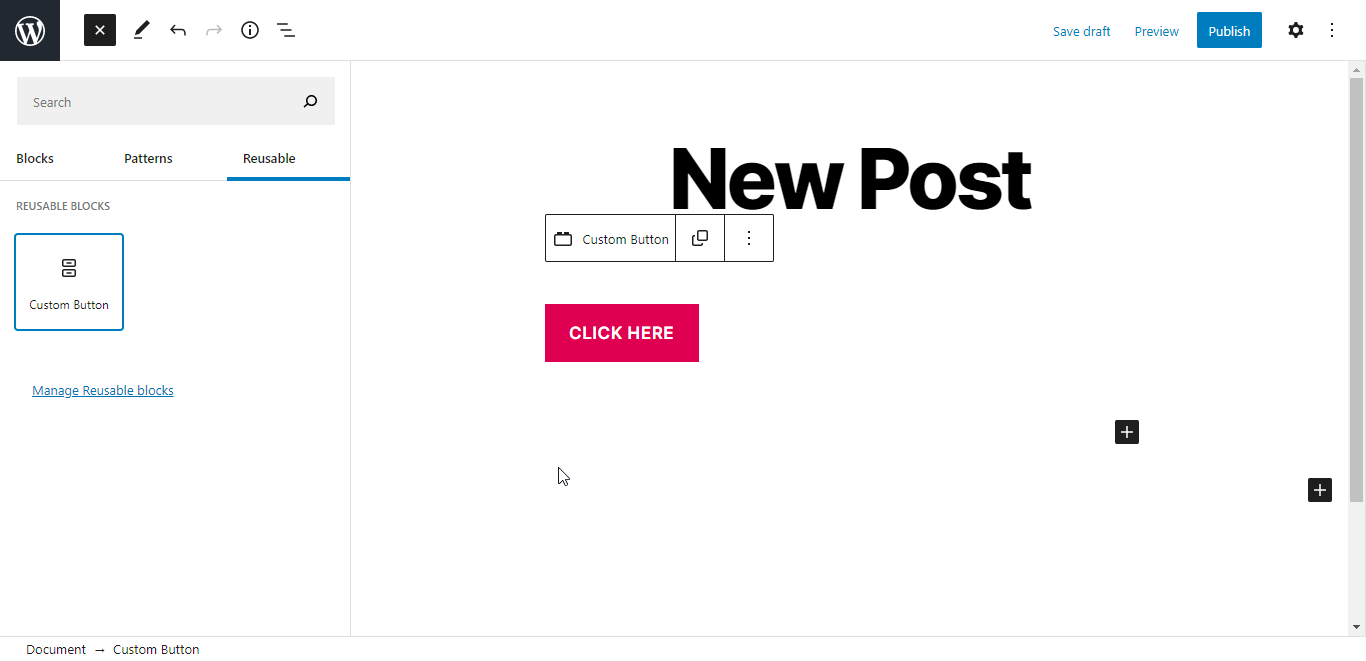
3. Click On the Desired Block and It Will Be Added to the Post or Page You Are Editing
How to Edit Reusable Blocks
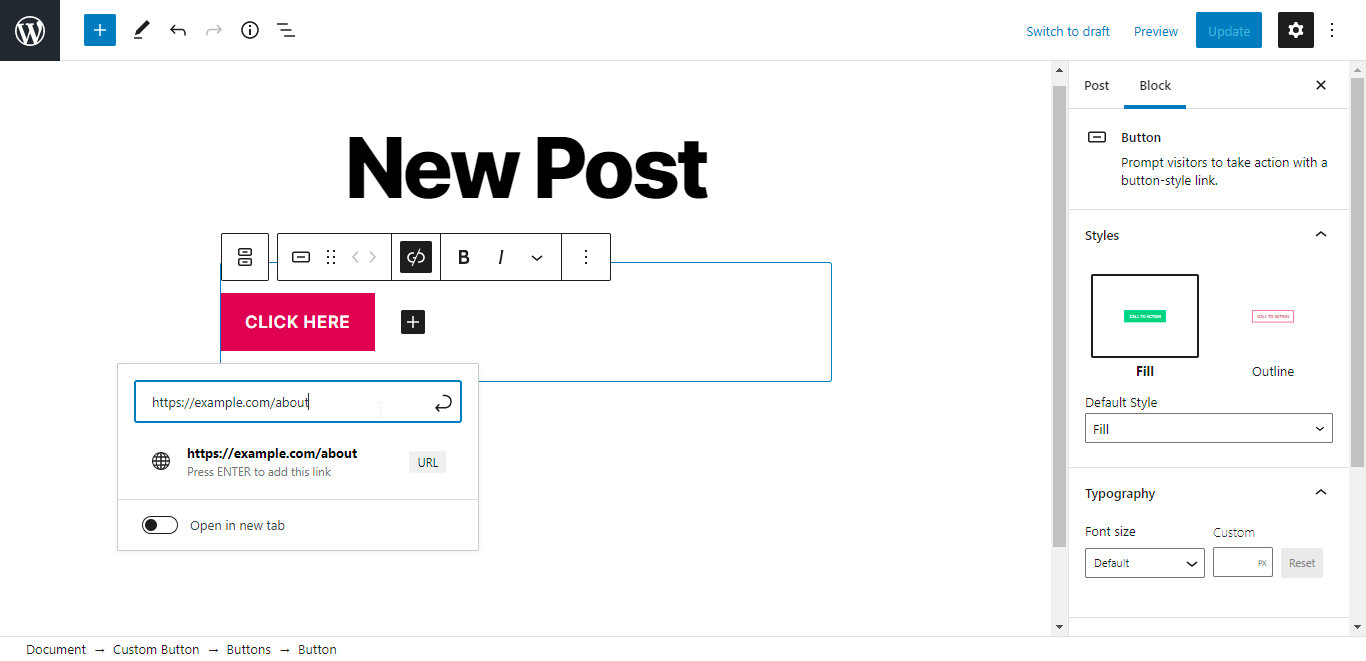
One way to edit reusable blocks is by adding the block to a post and editing the block there. In the previous step, we added our custom button block to a new post. Let’s say we want to edit the URL assigned to the block.
1. Select the Block and Make Required Changes
2. Try Updating Page Changes
You should be notified that changes are being made to the reusable block and any other areas of site using that same block will reflect these changes.
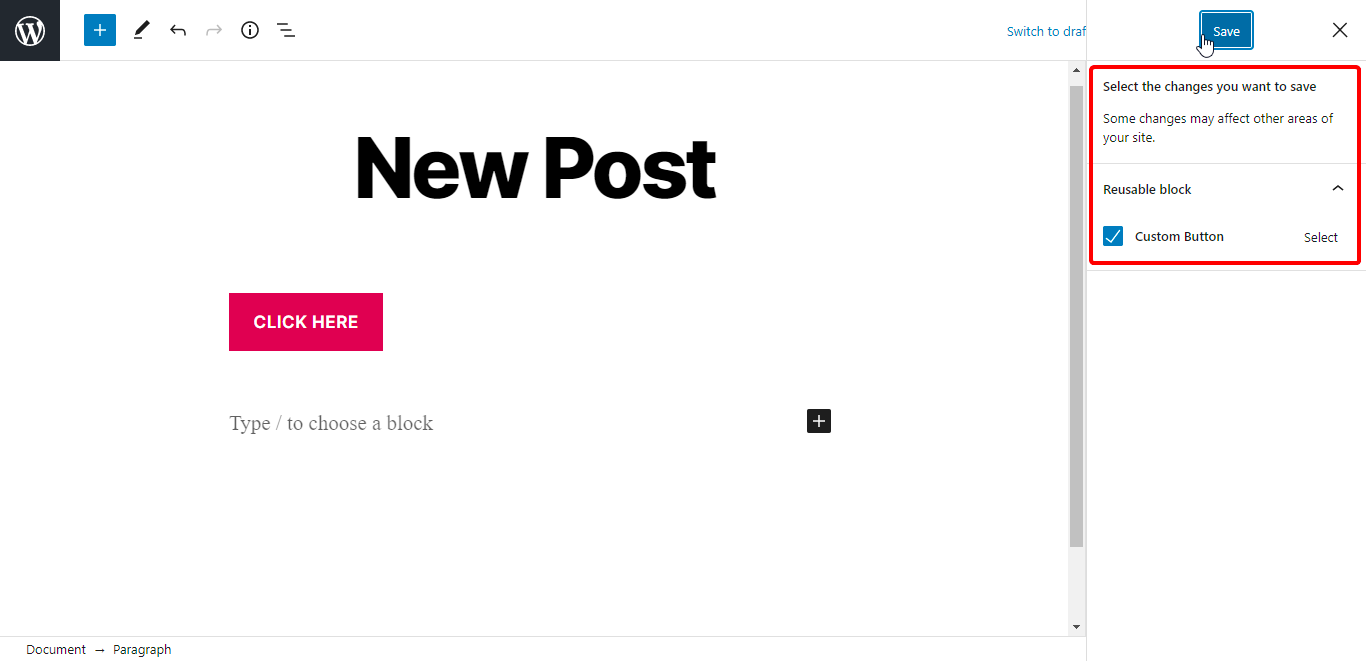
3. Click Save and the Changes Made Will Be Applied to the Reusable Block
Now your edits have been saved.
Converting Reusable Blocks
Changes made to reusable blocks are reflected across your site and anywhere the block is used. This may not be an option you want to take all the time. Sometimes you may want to just edit one block. This is where you would want to convert a reusable block to a normal block.
Once you have added a reusable block to a post or page, you can select the block. You will have the option to convert a block.
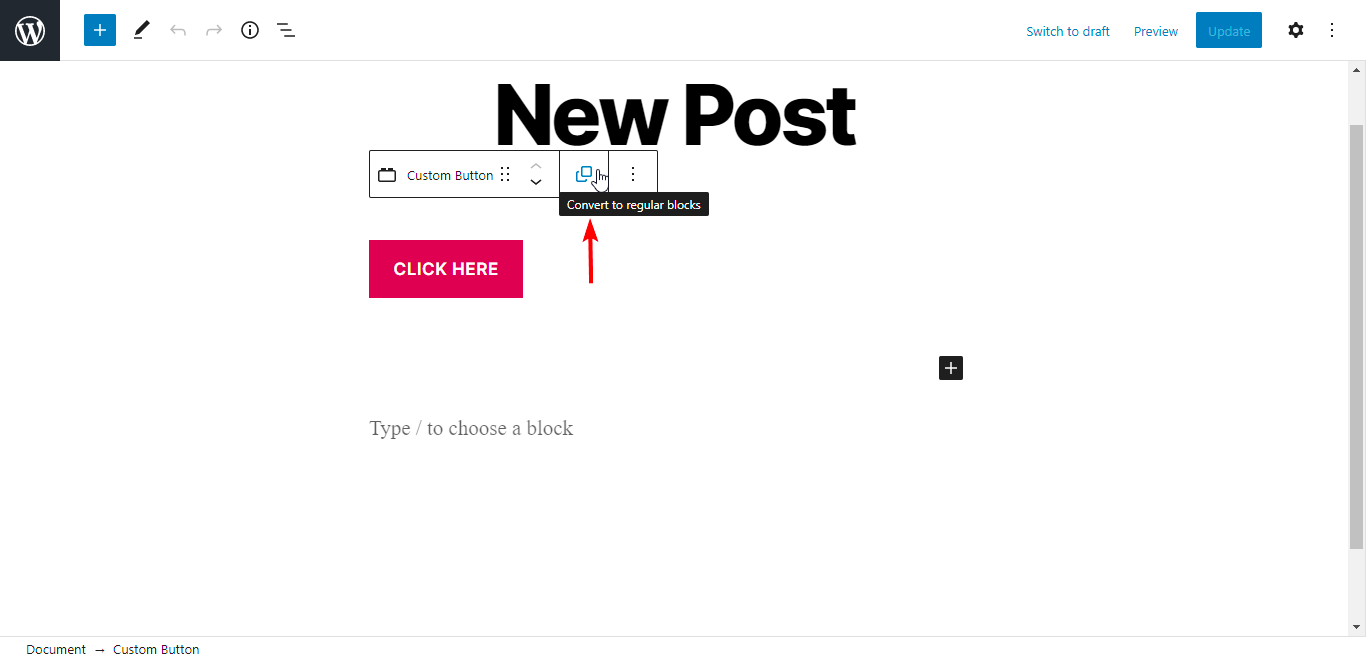
Once converted, the block will no longer be a reusable block — so any changes made to it will not be applied to the rest of the reusable blocks you had set up.
Managing WordPress Reusable Blocks
WordPress enables you to access the complete library of reusable blocks. This is another way you can make changes to a saved block.
Click on toggle block inserter button and under reusable blocks, click on the Manage Reusable Blocks link.
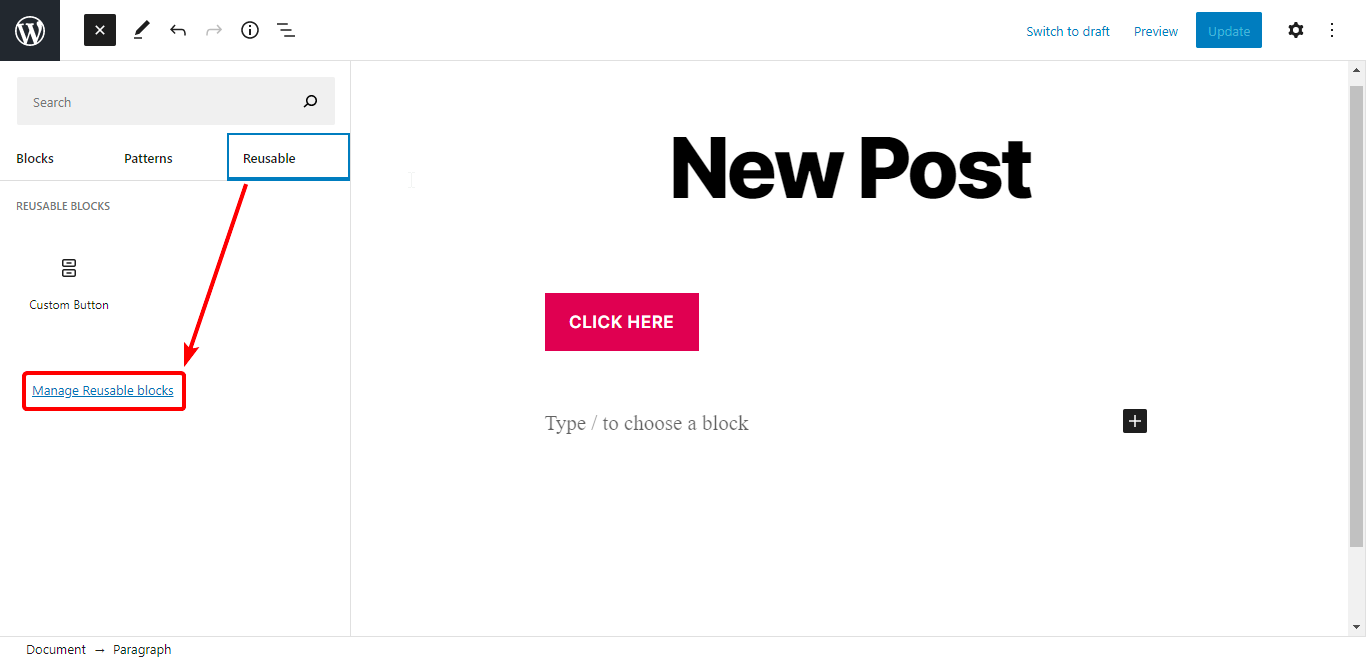
You will be redirected to the reusable blocks library. Here you can add new blocks, edit, or delete existing ones as well as import or export blocks from one site to another.
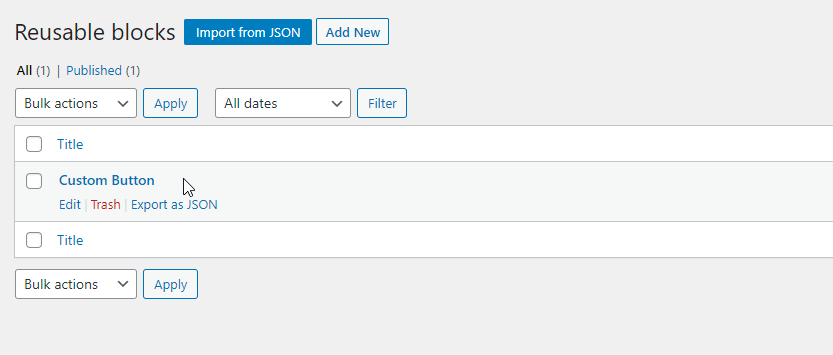
Being able to access all available reusable blocks in one place makes it easier to manage them without having to add a block to post or page before editing. Import and export functionalities let you use blocks created on one site on a different site and vice versa.
WordPress Reusable Blocks FAQs
What is a Reusable Block in WordPress?
A reusable block in WordPress is a type of content block that can be saved and used again. It’s a helpful tool to save time and eliminate repetitive tasks in WordPress. Reusable blocks can be customized with whatever content you want to feature.
How Do I Create a Reusable Block in WordPress?
If you want to create a reusable block in WordPress, follow these steps.
1. In the editor, click “add new block.”
2. Assign the block text.
3. After editing, click on the button with three dots.
4. Click save and your WordPress reusable block is created.
5. Search for the name assigned to the reusable block.
6. Go to the reusable blocks tab and insert the block.
Where Are Reusable Blocks Stored in WordPress?
Reusable blocks are stored in WordPress under the “Reusable” tab. Click the add new block button and you’ll find the Reusable tab. You can also search for it by name in the search box if you’ve named reusable blocks previously.
Can You Edit a Reusable Block Without Changing the Other Instances Of the Same Block?
If you edit a reusable block in WordPress, it will change other instances of the same block. To avoid this, convert your reusable block into a regular block prior to making any changes. This will not affect other instances of the reusable block, just the one you’ve converted and edited.
Feel Ready To Reuse Some Blocks?
WordPress reusable blocks are a great time saver especially when dealing with a large number of posts and pages of lengthy content. However, time savers like this aren’t of much use if your site runs slowly at the frontend or is a victim of a not-so-suitable host.
You can avoid site speed problems when you’re with Nexcess Fully Managed WordPress.
Check out our fully managed WordPress hosting plans to get started today.
