Building a WordPress online store is a great way to monetize your blog or grow your retail business.
As the most popular content management system in the world, WordPress provides a perfect platform for setting up an ecommerce site. The WordPress ecommerce ecosystem offers the best selection of plugins, developers, and themes.
Learning how to build an online store with WordPress is simple. In this post, we cover why WordPress is a great choice for online stores and how to set up a store on WordPress.
WordPress Ecommerce Advantages
Most WordPress online stores run on WooCommerce, an ecommerce system developed by WordPress. WordPress and WooCommerce differ from other ecommerce platforms because they’re open source.
When it comes to open source vs. proprietary solutions, open source has the advantage. In proprietary systems like BigCommerce or Shopify, you build a store that only works as long as you keep paying for a BigCommerce or Shopify subscription.
As an open source system, you only have to pay for web hosting with WordPress and WooCommerce. Nexcess can provide managed hosting for WordPress and WooCommerce to make things easier. In addition to lower operating costs, WooCommerce and WordPress also offer great flexibility and customization. WooCommerce offers the largest collection of plugins for nearly limitless customization options.
How to Build an Online Store with WordPress
Adding an online store to your website requires installing an ecommerce platform. For this guide, we’ll review the steps for setting up WooCommerce, the most popular and powerful online store plugin for WordPress.
Install WooCommerce on Your WordPress Website
We’ll start our process assuming you already installed and set up a WordPress website. If you don’t have a WordPress site already, consider purchasing a managed WordPress hosting account to simplify the WordPress installation.
Add the WooCommerce plugin to your website by:
- Signing in to your WordPress dashboard.
- Go to plugins in the navigation menu. Select “Add New.”
- Type WooCommerce in the search bar.
- On the WooCommerce box, select “Install Now.”
- Then choose “Activate.”
Configure WooCommerce
WooCommerce offers a simple setup process. After activating the plugin, you can launch a self-guided setup wizard. After answering some questions about your online store, you’ll be ready to add products and design your store.
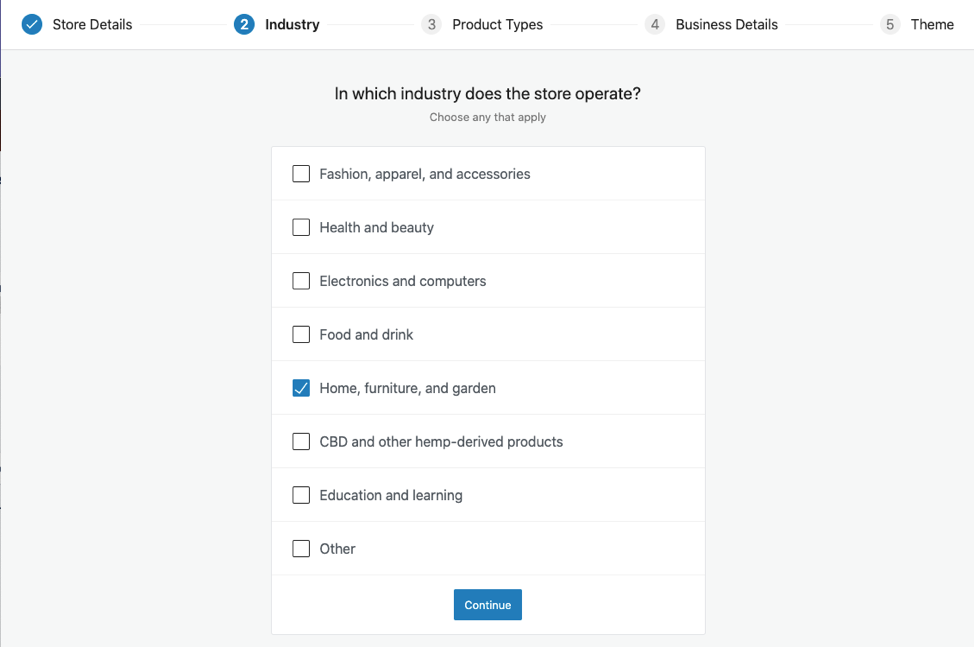
Adding Products to Your Online Store
After completing the setup wizard, you’ll see a checklist for setting up your WooCommerce store. The next step is to add products.
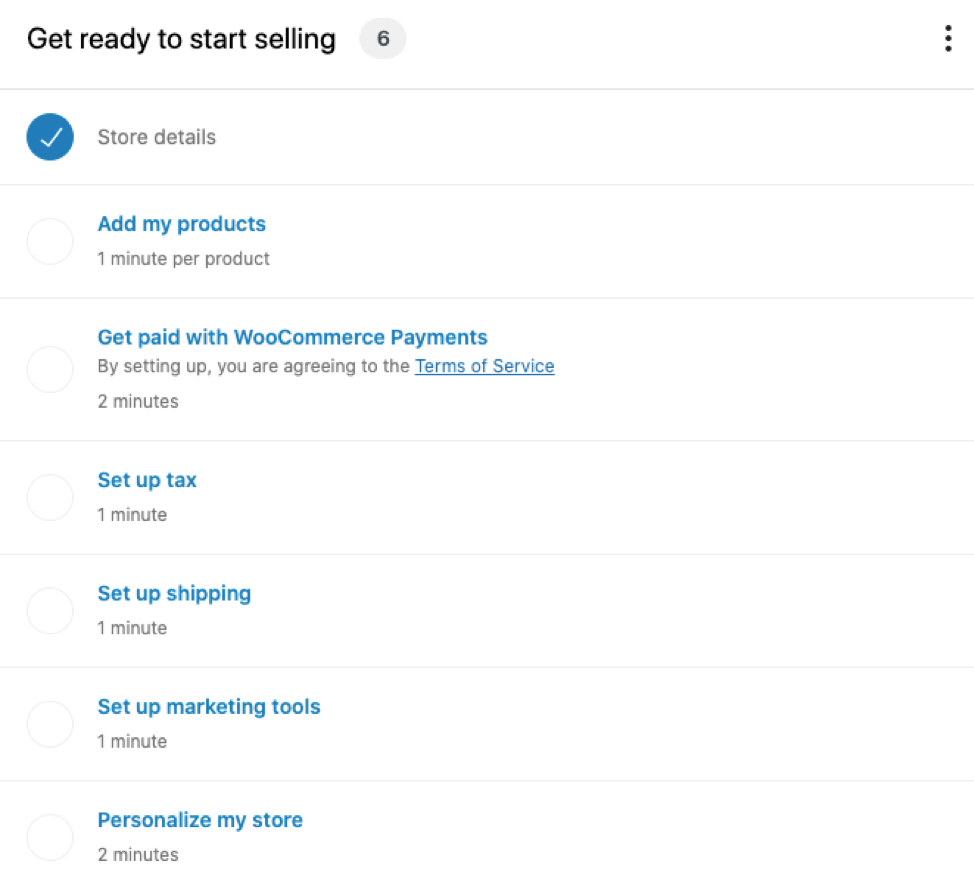
Clicking the “add my products” links gives four options:
- Start with a template
- Add manually
- Import via CSV
- Import from another service

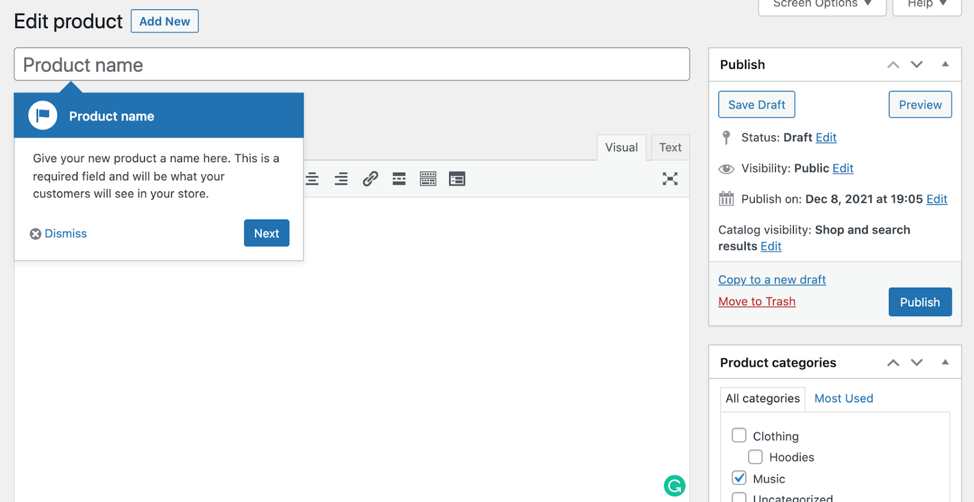
When you’re new to WooCommerce, the template options work best. This option takes you to the add product screen, where pop-up balloons walk you through each step.
Build a WordPress store quickly and easily
With hosting officially recommended by WooCommerce
Configure Your Payment, Tax, and Shipping Options
For your online store to work, you need a way for people to pay you.
From the setup checklist, the “Get Paid with WooCommerce Payments��” link will walk you through how to integrate with WooCommerce’s native payment gateway. But WooCommerce supports different payment methods. If you want to use a different payment gateway, follow the provider’s instructions for integrating with WooCommerce.
After payment gateways, the checklist covers taxes and shipping. WooCommerce and Jetpack offer an automatic option for calculating sales tax. You also have the option of manually configuring your sales tax settings.
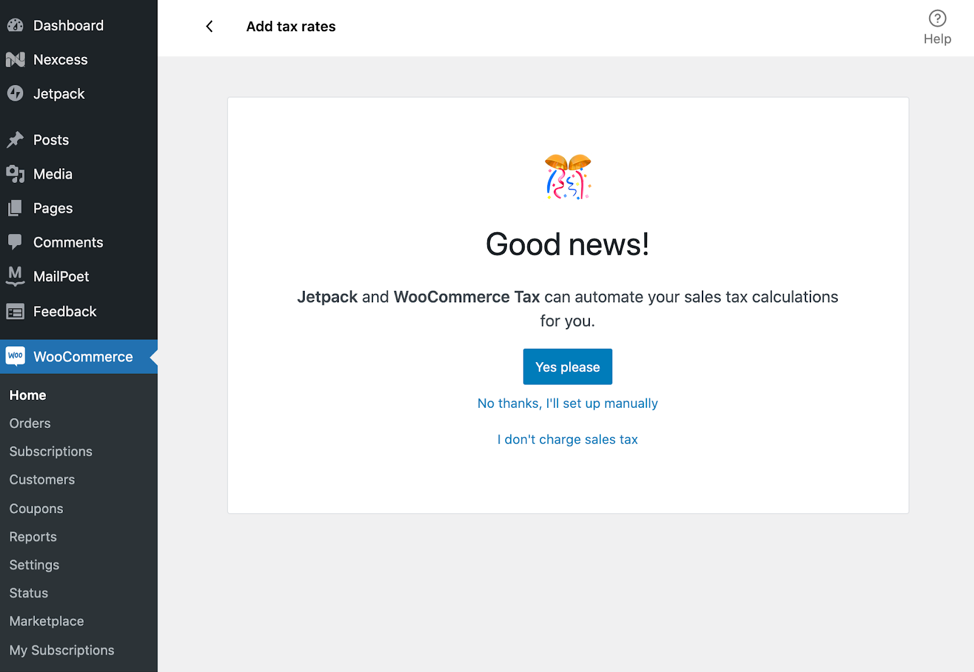
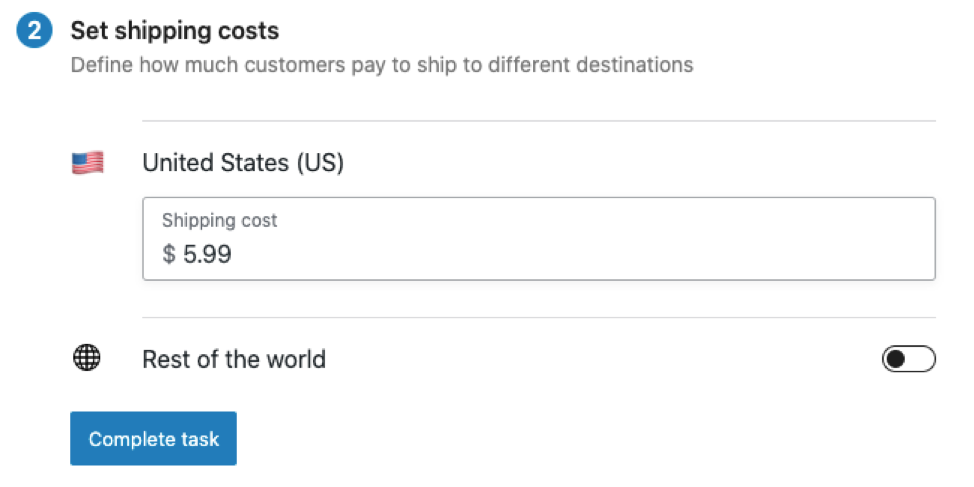
The default shipping method is flat-rate shipping. If you want to calculate shipping costs at checkout, you need to install a shipping plugin.
Set Up Optional Marketing Tools
WooCommerce recommends installing and setting up marketing tools next when setting up your online store. In practice, you may find it easier to skip this step until after you finish the store setup.
Design Your Online Store
The final step in the WooCommerce getting started checklist is to “personalize my store.”
Click that link to get options to create a custom homepage, upload a logo, and set a notice.
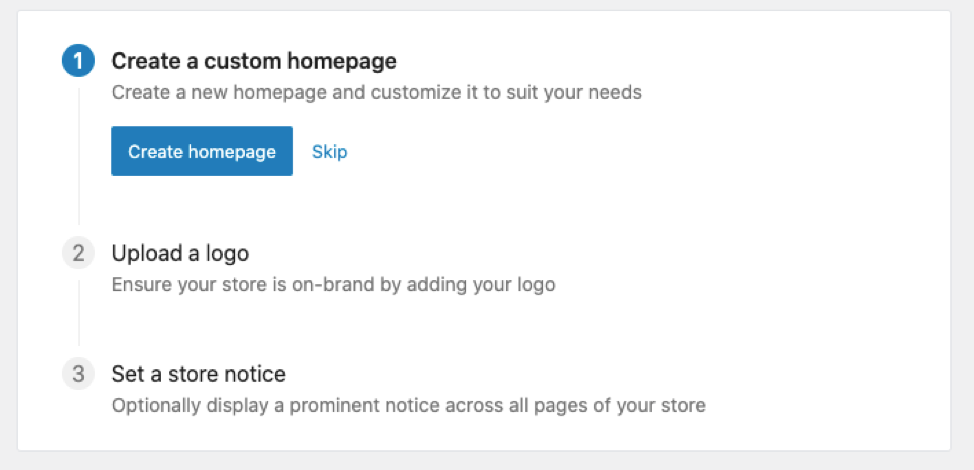
Click the “Create Homepage” button and complete uploading a logo. You can wait to set a store notice until later.
You’ll then see an option to “Design your store with Storefront.” Click “Let’s Go” to get started. Create a homepage and upload a logo. You can skip the store notice if you don’t need one.
You’ll then see an option to use Storefront to design your store. Click “Let’s Go!”

Then hit “Let’s Go” again.

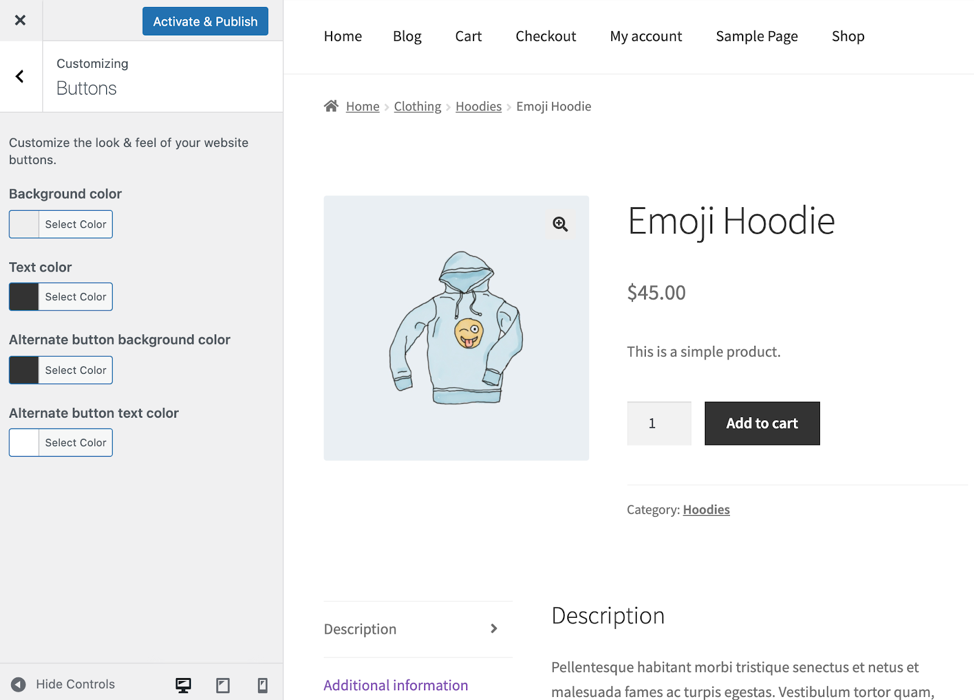
Use the customizer to change the look and feel of your store by updating fonts, colors, or layout. The WooCommerce pop-up balloons walk you through each step.
If You Want to Skip the Setup...
Designing from scratch isn't for everyone. Fortunately, there are plenty of resources and options for a stunning, high-performing online store.
WooCommerce freelancers can help you whip up a store, but charge at an hourly rate. An ecommerce website design service can create, set up, and optimize your store for you for a one-time price.
Expect More From Your WordPress Online Store
Building an online store with WordPress is simple, but pairing it with Managed Hosting from Nexcess helps running a store stay easy.
The Nexcess team vetted every plugin, eliminating the need for you to research, download, and install plugins to customize your online store.
WooCommerce is THE plugin for ecommerce on WordPress. With premium themes, curated tools, elite performance, and expert support – you can set up a store on WordPress in no time.
