

Adobe deprecated the Web Setup Wizard in Magento versions 2.3.6 and above. So if you want to perform tasks like installing a Magento 2 theme or extension, you’ll need to use the Magento 2 command line interface (CLI).
In this guide, we’ll explain the basics of the Magento CLI and show you how to use it for daily tasks like managing your store cache and indexing.
Here’s what we’ll cover:
- An Introduction to the Magento CLI
- The Magento CLI Command Naming Convention Explained
- 10 Basic Tasks You Can Perform Using the Magento CLI
- How To Add a Custom Magento 2 CLI Command
- Final Thoughts: A Beginner’s Guide to the Magento CLI
An Introduction to the Magento CLI
The Magento CLI is an open source tool that helps you manage the Magento application and its modules from the command line. You can do everything from installing Magento 2 to configuring and upgrading the application using the Magento CLI.
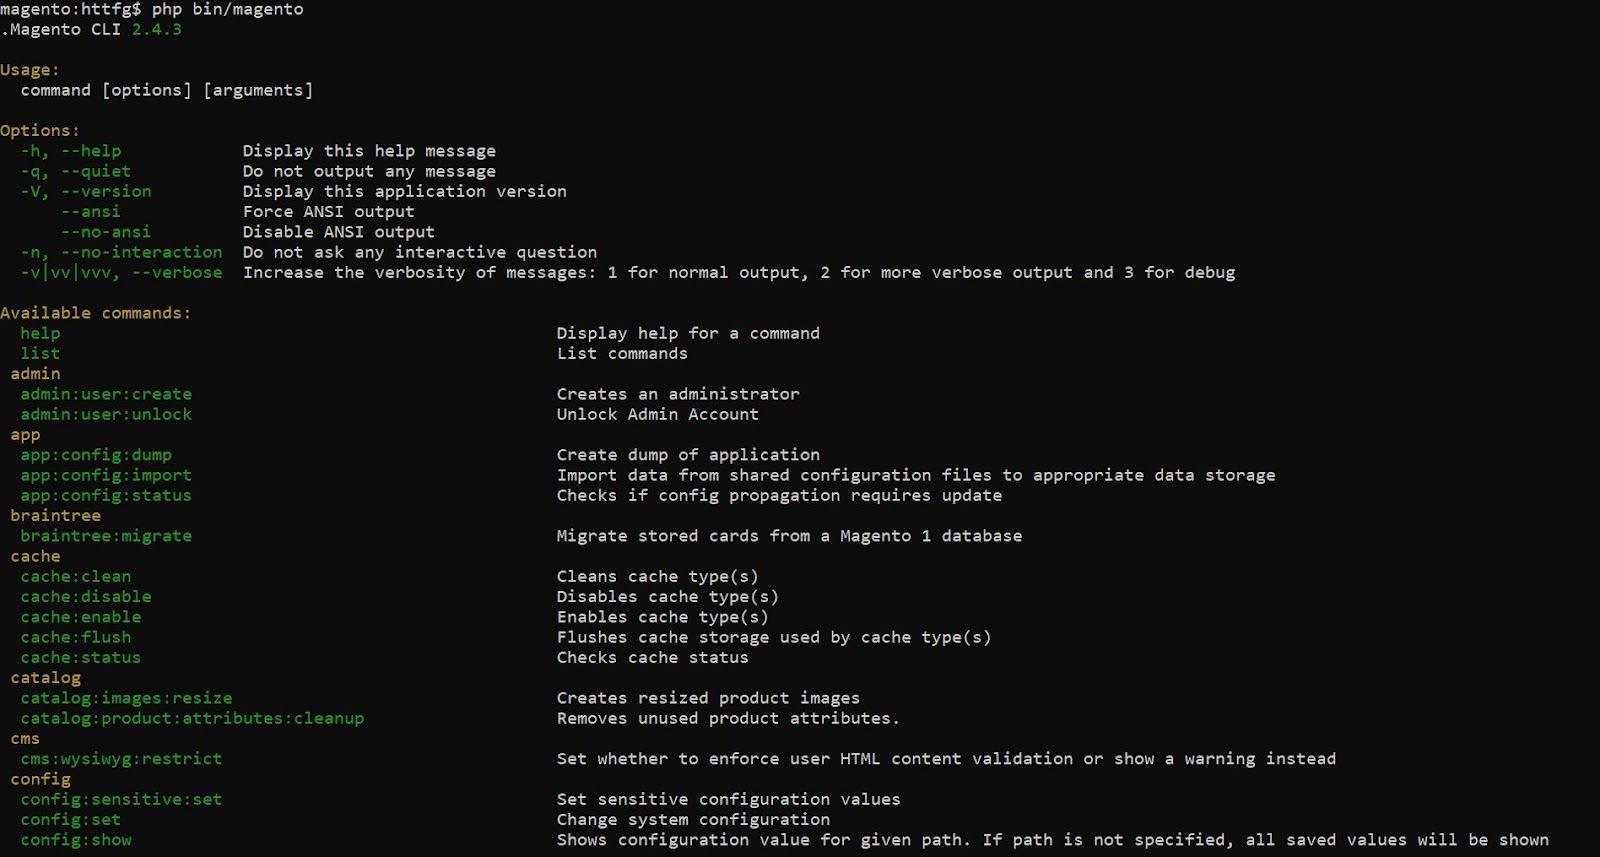
The Magento CLI is located in the <project-root>/bin/ directory of every Magento installation. You can access it from the Magento root directory using the following command:
$ php bin/magentoNote: Using “php” before bin/magento is optional. Your operating system will automatically find the global PHP variable to execute the command even if you leave it out.
The above command will output the Magento CLI help page to your terminal screen. You’ll see a list of all available commands and a brief description of each one as follows:

The Magento CLI Command Naming Convention Explained
Magento CLI commands use the following syntax:
$ command [options] [arguments]For example, here’s a command you’ll use to deploy static content in Magento 2:
$ php bin/magento setup:static-content:deploy
In the above example, “setup:static-content:deploy” is the command name in the “group:[subject:]action” format.
The “group” is a set of related commands categorized based on a domain or workflow. One command group can have multiple subjects unique to its domain, and each subject can have multiple actions.
For instance, here are two different actions you can perform using the setup:config group and subject:
$ bin/magento setup:config:set

$ bin/magento setup:config:delete
Specifying an action in the command name is optional. You can execute some commands without an action, such as:
$ bin/magento setup:installMagento CLI commands perform precise actions related to the configuration and management of a Magento store. But you can modify their behavior using options and arguments.
For example, here’s a Magento 2 CLI command with an option and argument:
$ bin/magento module:disable --force Magento_Catalog
Here, “module:disable” is the command name, “--force” is the option, and “Magento_Catalog” is the argument defining the module you want to disable.
10 Basic Tasks You Can Perform Using the Magento CLI
Here’s a quick rundown of 10 tasks you can execute with the Magento CLI.
Note: All commands demonstrated below must be run by the Magento file system owner.
1. Install Magento 2
You can install the core Magento application using the setup:install command. For example:
$ bin/magento setup:install \

--base-url=https://example.com \

--db-host=localhost \

--db-name=magento \

--db-user=magento_user \

--db-password="****************" \

--admin-firstname=bob \

--admin-lastname=smith \

--admin-email=email@example.com \

--admin-user=bob \

--admin-password=********* \

--language=en_US \

--currency=USD \

--timezone=America/Chicago \

--use-rewrites=1
2. Configure Magento 2 Cron
Magento 2 cron is essential for automated tasks like updating indexes on a schedule and sending out order emails. You can generate and install cron for Magento 2 using the following command:
$ bin/magento cron:install
And if you’d like to run cron jobs manually, you can do that by executing:
$ bin/magento cron:run3. Manage Magento 2 Indexers
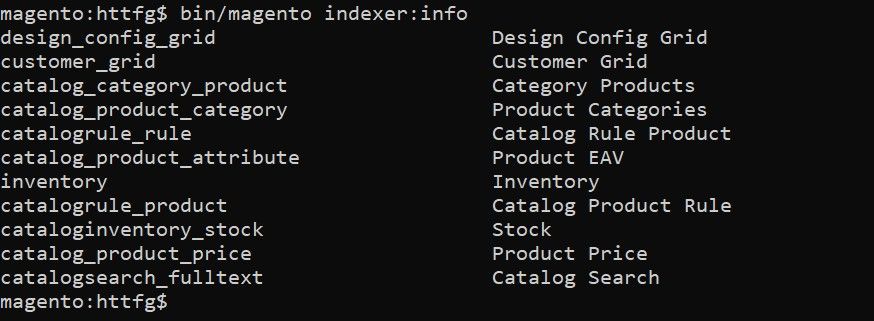
Magento uses indexing to update storefront data such as stock information, product pricing, and customer details to match the data stored in the database.
You can view all indexers on your store using the following command:
$ bin/magento indexer:info
Likewise, you can set the indexer mode type to “realtime” or “schedule” using:
$ bin/magento indexer:set-mode schedule [index-name]
You can also manually reindex the indexers using:
$ bin/magento indexer:reindex4. Configure Magento 2 Security Features
Magento 2 includes several default security features, such as reCAPTCHA and Two-factor authentication. You can manage those features using the Magento CLI security group of commands.
For example, you can disable reCAPTCHA for admin users using the following command:
$ bin/magento security:recaptcha:disable-for-user-login
And you can reset Two-factor authentication for an admin user using:
$ bin/magento security:tfa:reset <username> <provider-code>5. Deploy Static View Files
Magento generates static view files such as CSS and block HTML files and serves them from the cache in a production environment to improve store performance.
Here’s how you can deploy static view files in Magento 2 from the CLI:
$ bin/magento setup:static-content:deployOptionally, you can modify the command to exclude certain themes and deploy static content for a specific store view as follows:
$ bin/magento setup:static-content:deploy en_US --exclude-theme Magento/luma6. Manage the Magento Operation Mode
You can operate the Magento application in four different modes. For instance, if you’re testing code, you can run it in developer mode. And if you’re operating a live store, you can run it in production mode for better performance and security.
Here’s how you can set the Magento operation mode to production from the CLI:
$ bin/magento deploy:mode:set production7. Configure Maintenance Mode
The Magento 2 maintenance mode disables access to the frontend during routine maintenance tasks like design and layout updates. Here’s how you can enable maintenance mode in Magento 2 from the CLI:
$ bin/magento maintenance:enable
Optionally, you can exempt some IP addresses from the maintenance mode using:
$ bin/magento maintenance:allow-ips <xxx.xxx.xxx.xxx>8. Manage Magento 2 Modules and Extensions
Magento’s modular architecture allows merchants to customize their store design and functionality using third-party modules. It’s no surprise that data from BuiltWith shows that 8% of the top 10,000 websites use Magento to power their online store.
Adobe provides various module management commands grouped into the module: category. For instance, here’s how you can check the status of all enabled modules on your store:
$ bin/magento module:status --enabled9. Manage the Magento 2 Cache
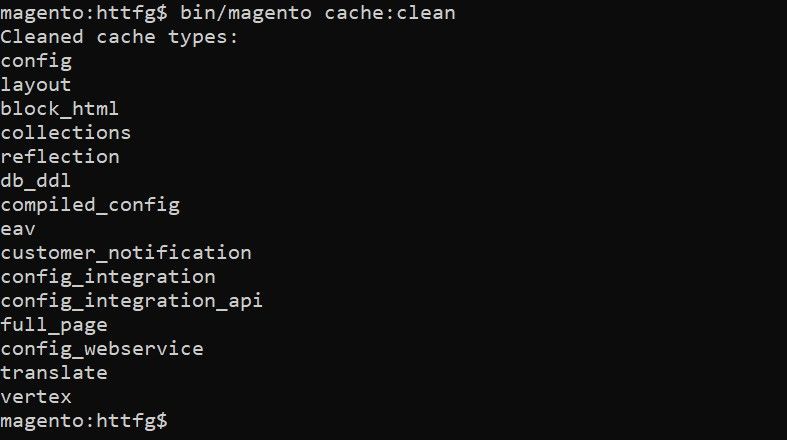
Magento’s cache management system provides an easy way to improve Magento store performance. Magento uses different cache types such as layout, full page, and block HTML output.
You can view their status using the following command:
$ bin/magento cache:statusAnd to clear the Magento cache, you can use the following command:
$ bin/magento cache:clean
10. Create New Admin Users
The Magento CLI lets you create new admin users without logging in to the admin panel. Here’s how you can add a new admin user from the CLI:
$ bin/magento admin:user:create \

--admin-user ADMIN-USER \

--admin-password ADMIN-PASSWORD \

--admin-email ADMIN-EMAIL \

--admin-firstname ADMIN-FIRSTNAME \

--admin-lastname ADMIN-LASTNAME
How To Add a Custom Magento 2 CLI Command
Like all things Magento, the Magento CLI is extensible as well. Here’s how you can add a custom command to the Magento CLI in five simple steps.
Note: All actions demonstrated below must be performed by the Magento filesystem owner.
Step 1: Create a Basic Magento Module
Log in to your server over SSH and create a custom Magento 2 module with a module.xml and a registration.php file.
Step 2: Create a di.xml File
Create a di.xml file in the etc/ folder of your module and paste the following code inside it:
<?xml version="1.0"?>

<config xmlns:xsi="http://www.w3.org/2001/XMLSchema-instance" xsi:noNamespaceSchemaLocation="urn:magento:framework:ObjectManager/etc/config.xsd">

<type name="Magento\Framework\Console\CommandList">

<arguments>

<argument name="commands" xsi:type="array">

<item name="CustomCommand" xsi:type="object">Nexcess\CustomModule\Console\Command\CustomCommand</item>

</argument>

</arguments>

</type>

</config>
Step 3: Create a Command Class
Create a command class file called CustomCommand.php inside the app/code/<vendor>/<module>/Console/Command directory of your custom module containing the following code:
<?php

namespace Nexcess\CustomModule\Console\Command;


use Symfony\Component\Console\Command\Command;

use Symfony\Component\Console\Input\InputInterface;

use Symfony\Component\Console\Output\OutputInterface;


class CustomCommand extends Command

{

protected function configure()

{

$this->setName('nexcess:helloworld');

$this->setDescription('Custom command example.');


parent::configure();

}

protected function execute(InputInterface $input, OutputInterface $output)

{

$output->writeln("Hello World");

}

}
Step 4: Clear Magento Cache, Register the Module, and Recompile Code
Clear the cache, register your module, and regenerate Magento code using the following commands:
$ bin/magento cache:clean

$ bin/magento setup:upgrade

$ bin/magento setup:di:compile
Step 5: Test Your Custom Magento CLI Command
Your custom command is now ready to use. Verify it’s available by outputting the complete list of commands to your terminal using:
$ bin/magento list
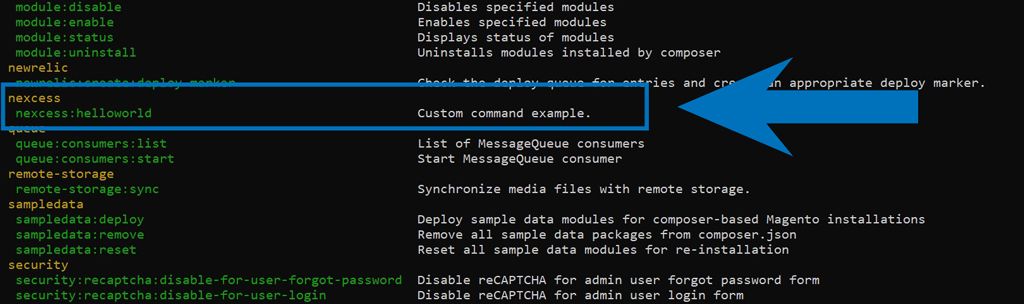
Finally, test the command using:
$ bin/magento nexcess:helloworld
You should see the following output:


Final Thoughts: A Beginner’s Guide to the Magento CLI
The Magento CLI might seem intimidating at first. But once you understand how it works, you’ll realize that you don’t need to become a developer to manage a Magento store, especially if you’re hosting your Magento store with managed Magento hosting by Nexcess.
Our hosting plans give you access to Magento-optimized servers without dealing with the technicalities of hosting Magento.
Browse our plans to get started today.

