

WP All Import is a powerful tool that lets you import WordPress users in a fraction of the time it takes to manually create them. Thanks to WP All Import’s drag and drop interface, you can bulk import WordPress users from any CSV, XML, or JSON file with virtually any data layout by following these basic steps:
- Upload a user import file.
- Optionally add a filter if you only want to import certain users.
- Map the fields from your import file to WordPress user fields using the drag and drop functionality.
- Run the import to create and/or update the users.
This guide covers everything you need to get started, and you can follow along with a free demo here at WP All Import.
Create a New WordPress Users Import
WP All Import offers several different methods for uploading your import data. You can manually upload a file from your computer, download it from an external URL or FTP location, or use a file that’s already been uploaded to your server.
For this example, we’ll use this Google Docs spreadsheet as our source file. However, the structure (column names, types, etc.) of the source file doesn’t matter. WP All Import can handle any file structure that you throw at it.
Here are the key steps:
- Go to All Import > New Import and select Download a file.
- Select From URL.
- Enter the link for the Google Docs spreadsheet shown above.
- Click the Download button.
- Click New Items.
- Select Users in the Create new selection box.
- Click the blue Continue to Step 2 button at the bottom.

Review the Import File
The Review Import File page lets you verify that WP All Import has parsed the import file correctly:
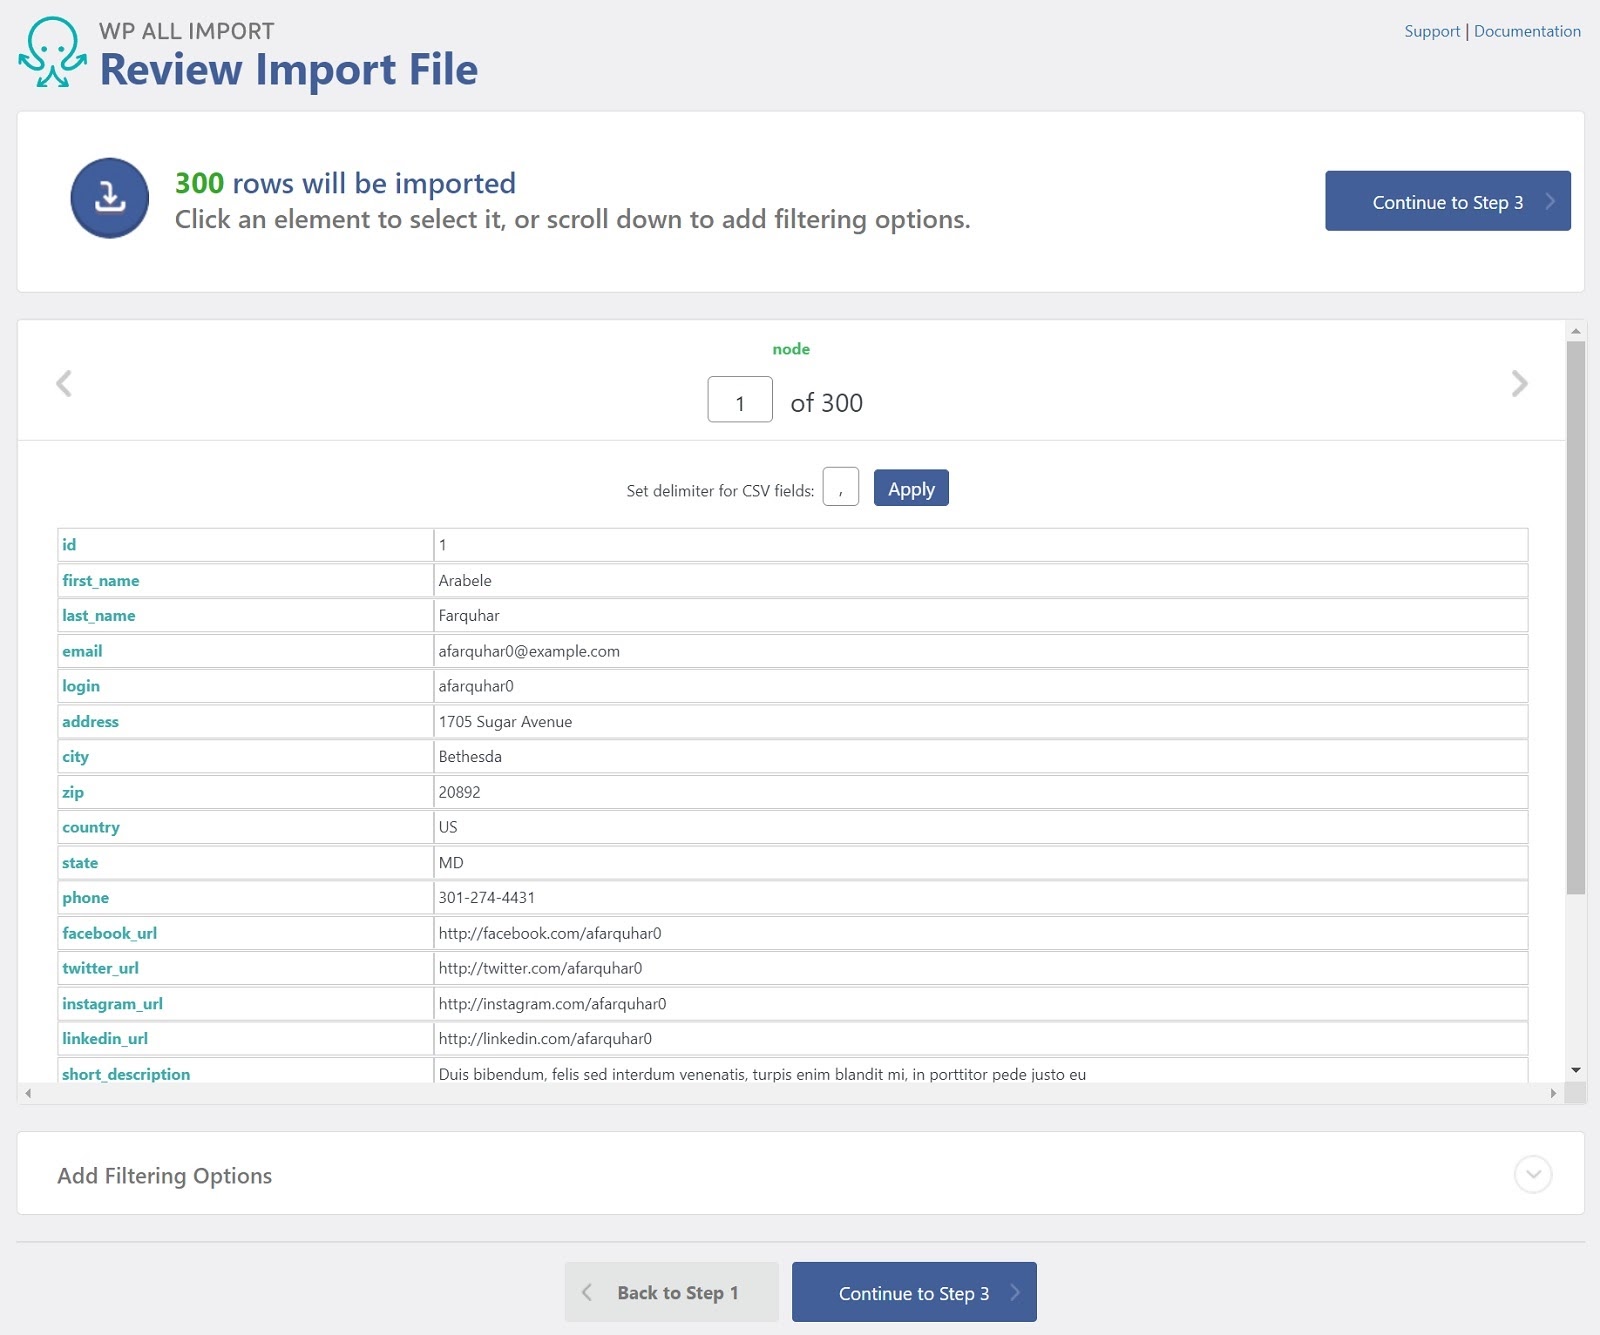
In this case, it has, so simply click the blue Continue to Step 3 button.
Drag & Drop Import Data Into WordPress User Fields
In this step, we’ll map the data from our file directly into the WordPress user fields in the import template. Thanks to the drag and drop system, you don’t have to worry about the headache of manually editing your file so that every column has the correct name and order. Instead, just drag the columns from the right into the appropriate fields on the left.
Here’s a look at the mapping process for just the User Account Info section:
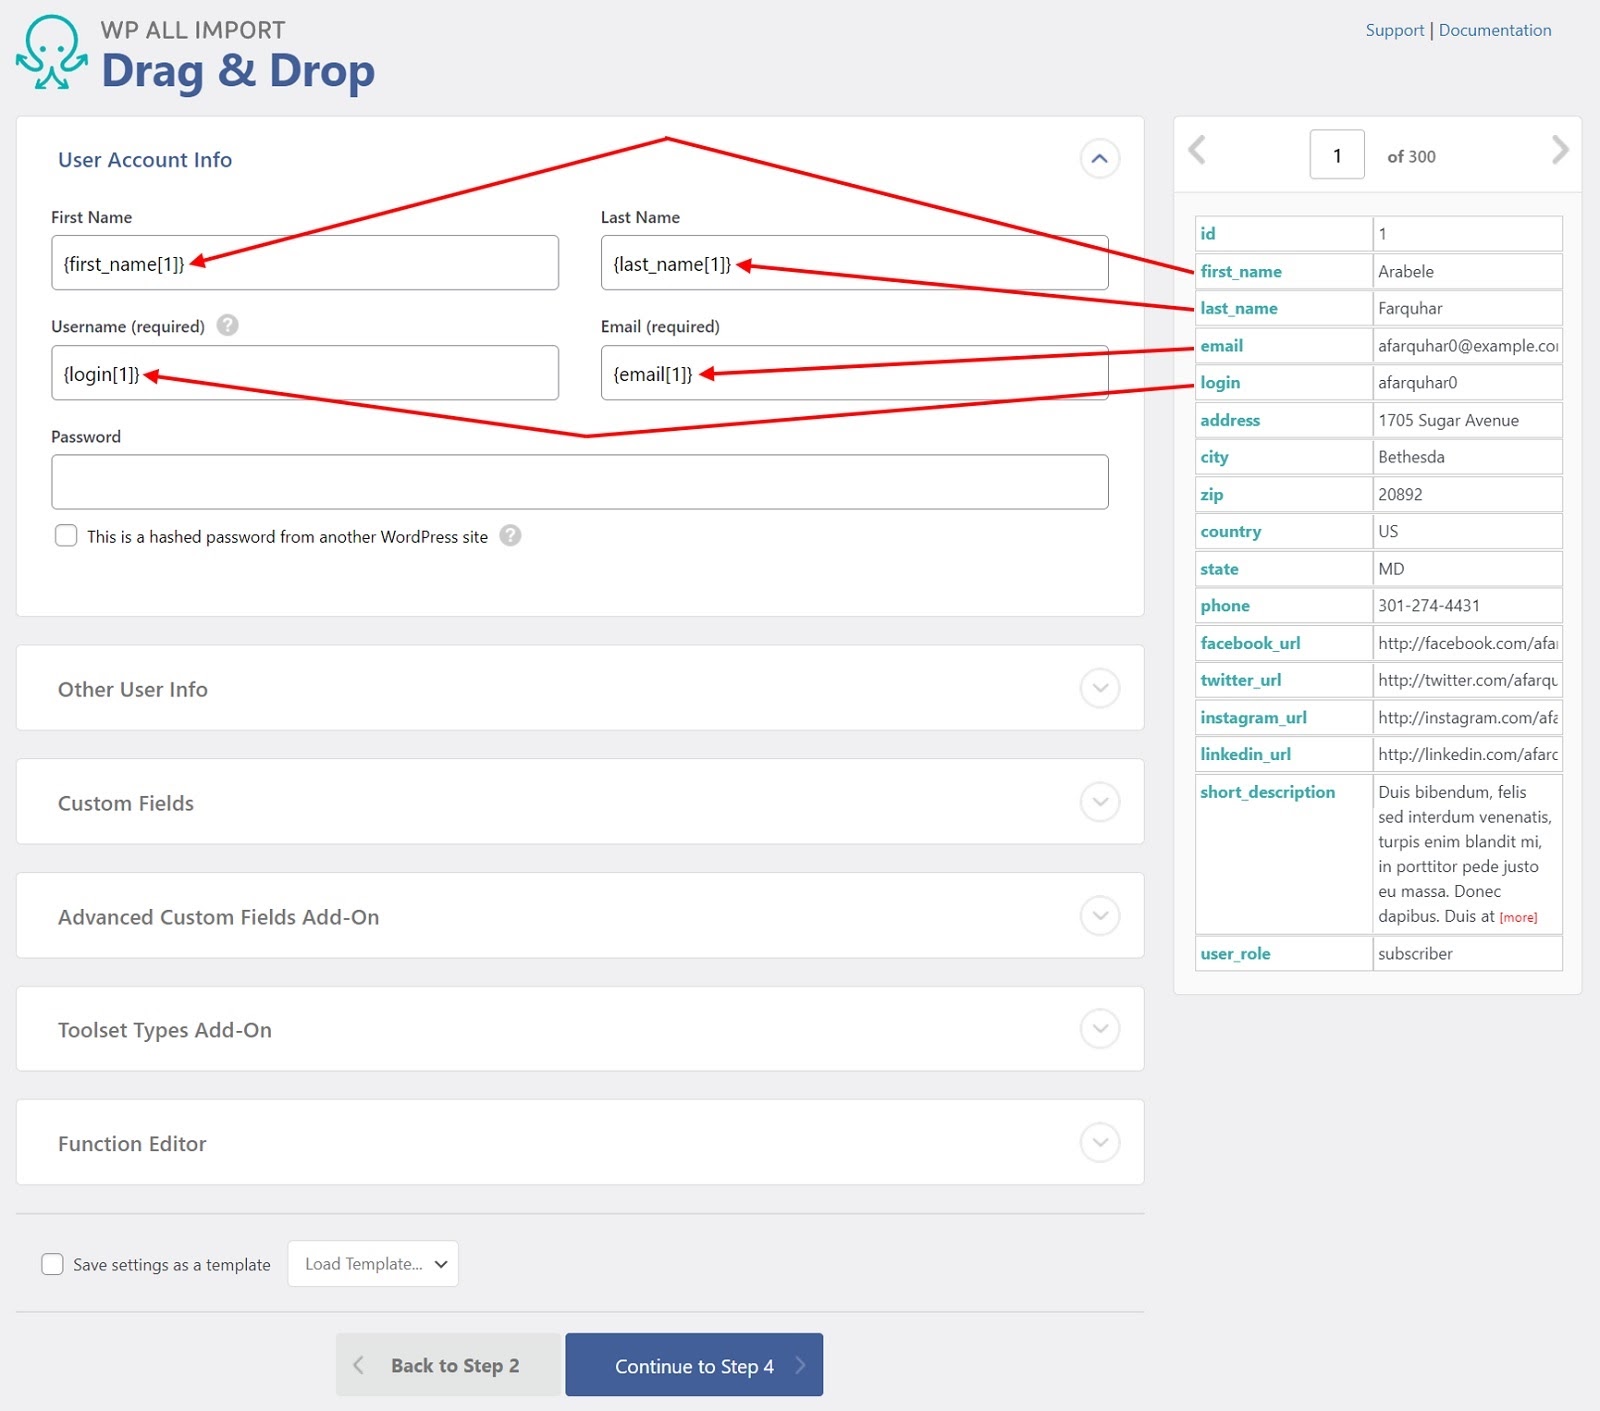
Some of the other sections require more sophisticated values but, for now, let’s assume that they are all simple mappings as shown above. We’ll return to describe some of the more sophisticated values in a later section.
Click the blue Continue to Step 4 button.
WordPress User Import Settings
The Import Settings page allows you to control exactly what WP All Import does with the data mapped in the Drag & Drop interface. Here are the relevant settings in the top two sections of this page:
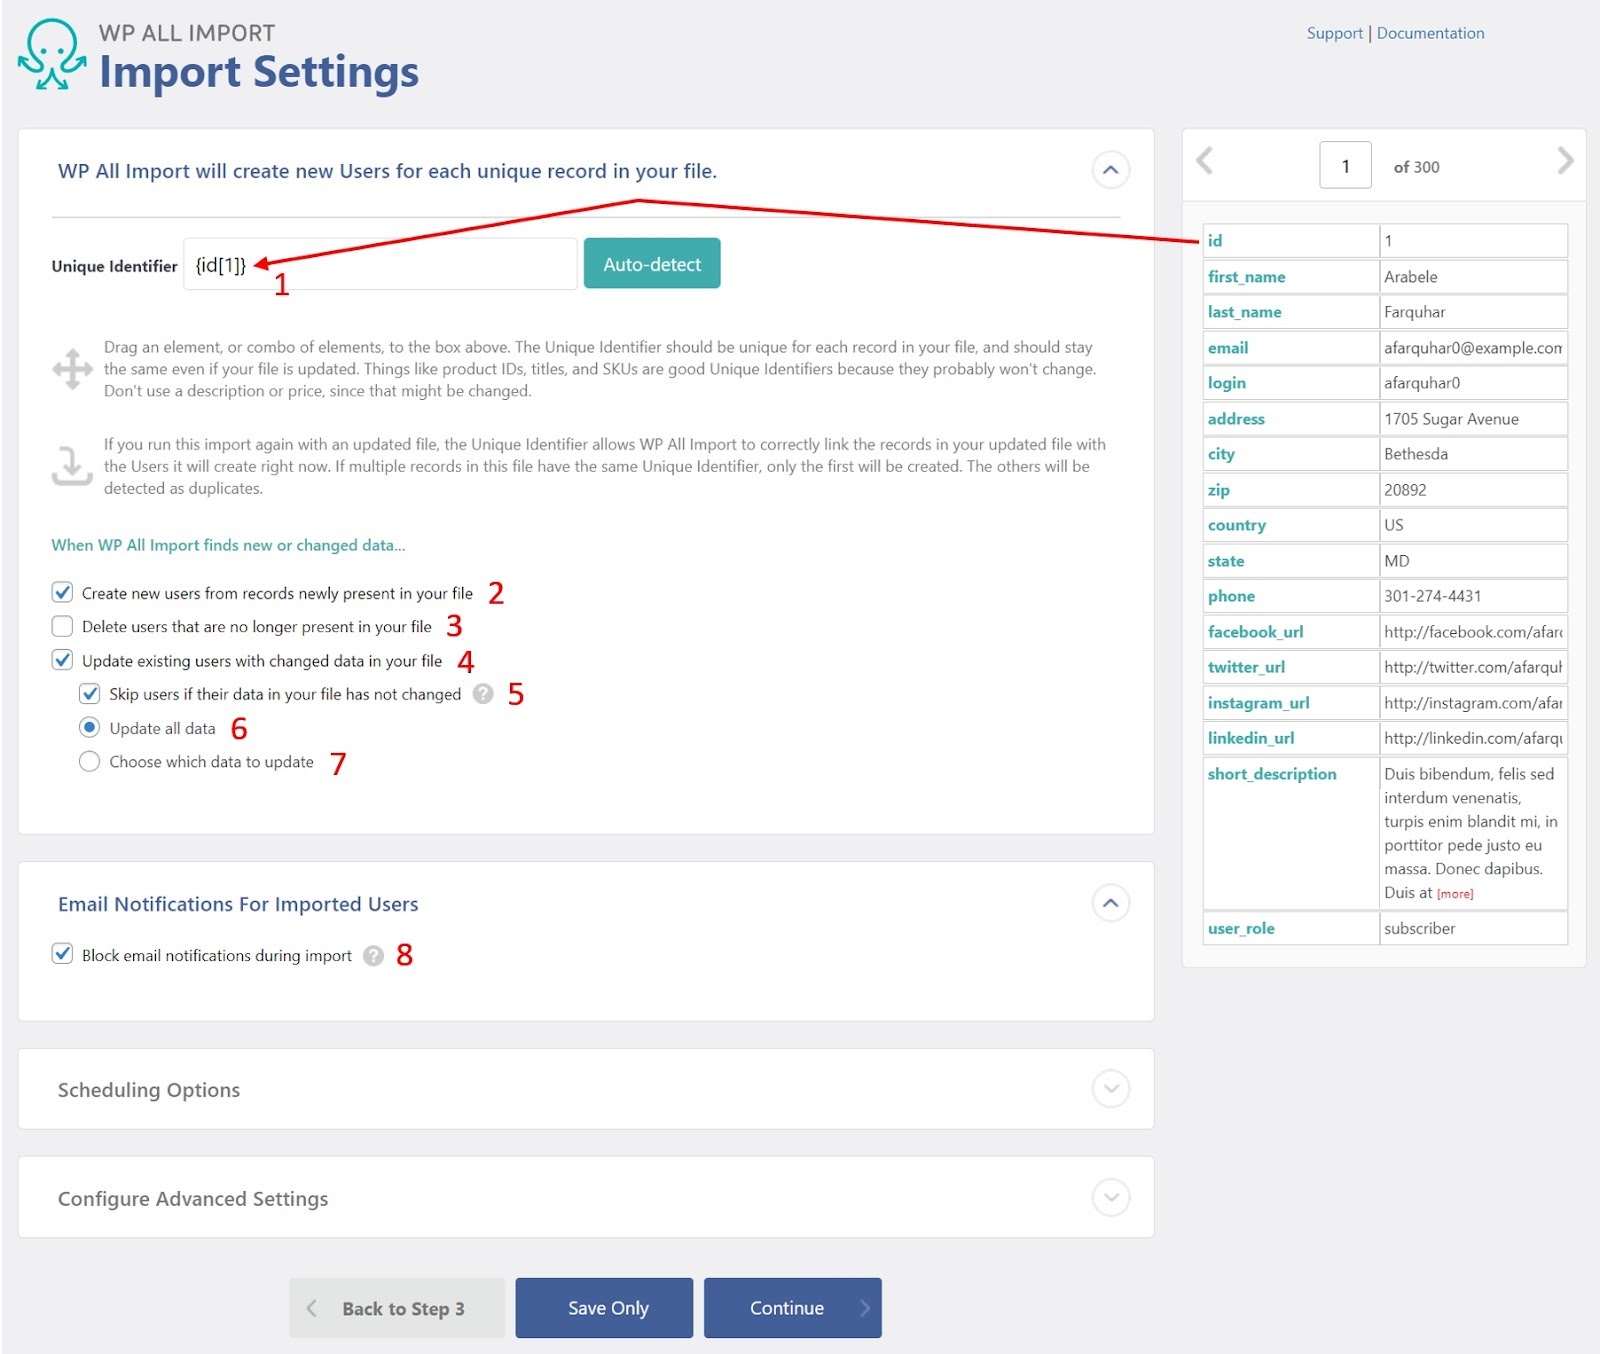
1. Unique Identifier. This identifier must be unique for each user, including all the users that already exist in your WordPress database. In the example image above, we’ve identified the “id” field as the unique identifier for each incoming user. But this may differ depending on the situation. For example, if you already had 100 users in your WordPress database, numbered from 1 to 100, you obviously could not import other users with ids in that same number range. You would have to start the import user ids at 101 or take some other approach. For now, just assume a simple import with no conflicts.
2. Create new users from records newly present in your file. If checked, WP All Import will create a new user for every incoming user whose unique identifier is not already present in the WordPress user table.
3. Delete users that are no longer present in your file. If checked and a user exists in the WordPress database that is not present in the import data, the existing user will be deleted from the database. Again, the unique identifier is used to determine if there is a match.
4. Update existing users with changed data in your file. If checked, any existing user will be updated with data from an incoming user if there is a match based on the unique identifier.
5. Skip users if their data in your file has not changed — a sub-option of point 4. If the data for the existing user and the incoming user is identical, any updates to the existing user will be skipped.
6. Update all data — another sub-option of point 4. If there is a match between the unique identifier of an existing user and an incoming user, the data for the existing user will be updated with data from the incoming user regardless of whether it has changed.
7. Choose which data to update — the third and final sup-option of point 4. If you select this option, WP All Import will present you with a long list of options for controlling which fields for the existing user will be updated with data from the incoming user.
8. Block email notifications during import. Normally, if you update a WordPress user, WordPress will email the user by default. This setting allows you to avoid these updates when importing user data.
Ignore the Scheduling Options and Configure Advanced Settings sections of this page for now. We’ll return to these subjects later.
Click the blue Continue button at the bottom of the screen.
Run the User Import
The next screen is the Confirm & Run page. On this page, click the green Confirm & Run Import button.
When the import is complete, you should see a confirmation screen that looks similar to this:

This screen indicates that 300 users were imported. To confirm this, go to Users in the main WordPress navigation menu. The result user listing should now contain the 300 imported users.
That’s it — you’ve just completed the basic process of how to import WordPress Users with WP All Import.
Advanced Features
In the preceding sections, we skipped over a few of the advanced features of WP All Import for importing users. In this section, we briefly describe some of those features.
Filtering User Import Data
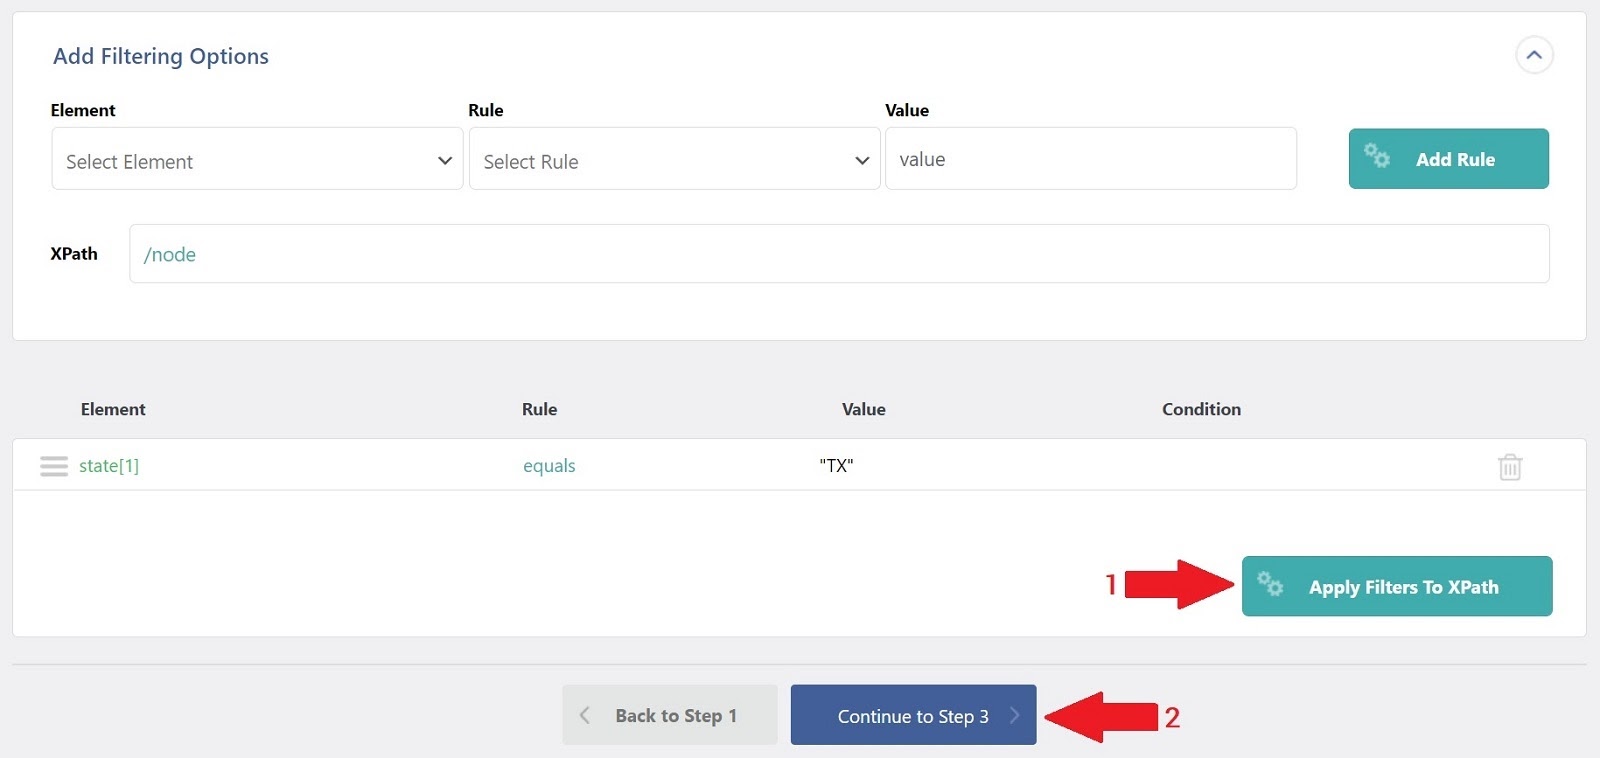
Back in the Review Import File screen (Step 2), there was a section at the bottom of the screen called Add Filtering Options. You can use this section to filter the records you import by pretty much any criteria. For example, say that your import data contains users from across the US but you want to import only those from Texas. Here’s what you do:
- In the Review Import File screen, expand the Add Filtering Options section at the bottom.
- In the Element box, select “state[1].”
- In the Rule box, select “equals.”
- In the Value box, select “TX.”
- Click the Add Rule button.
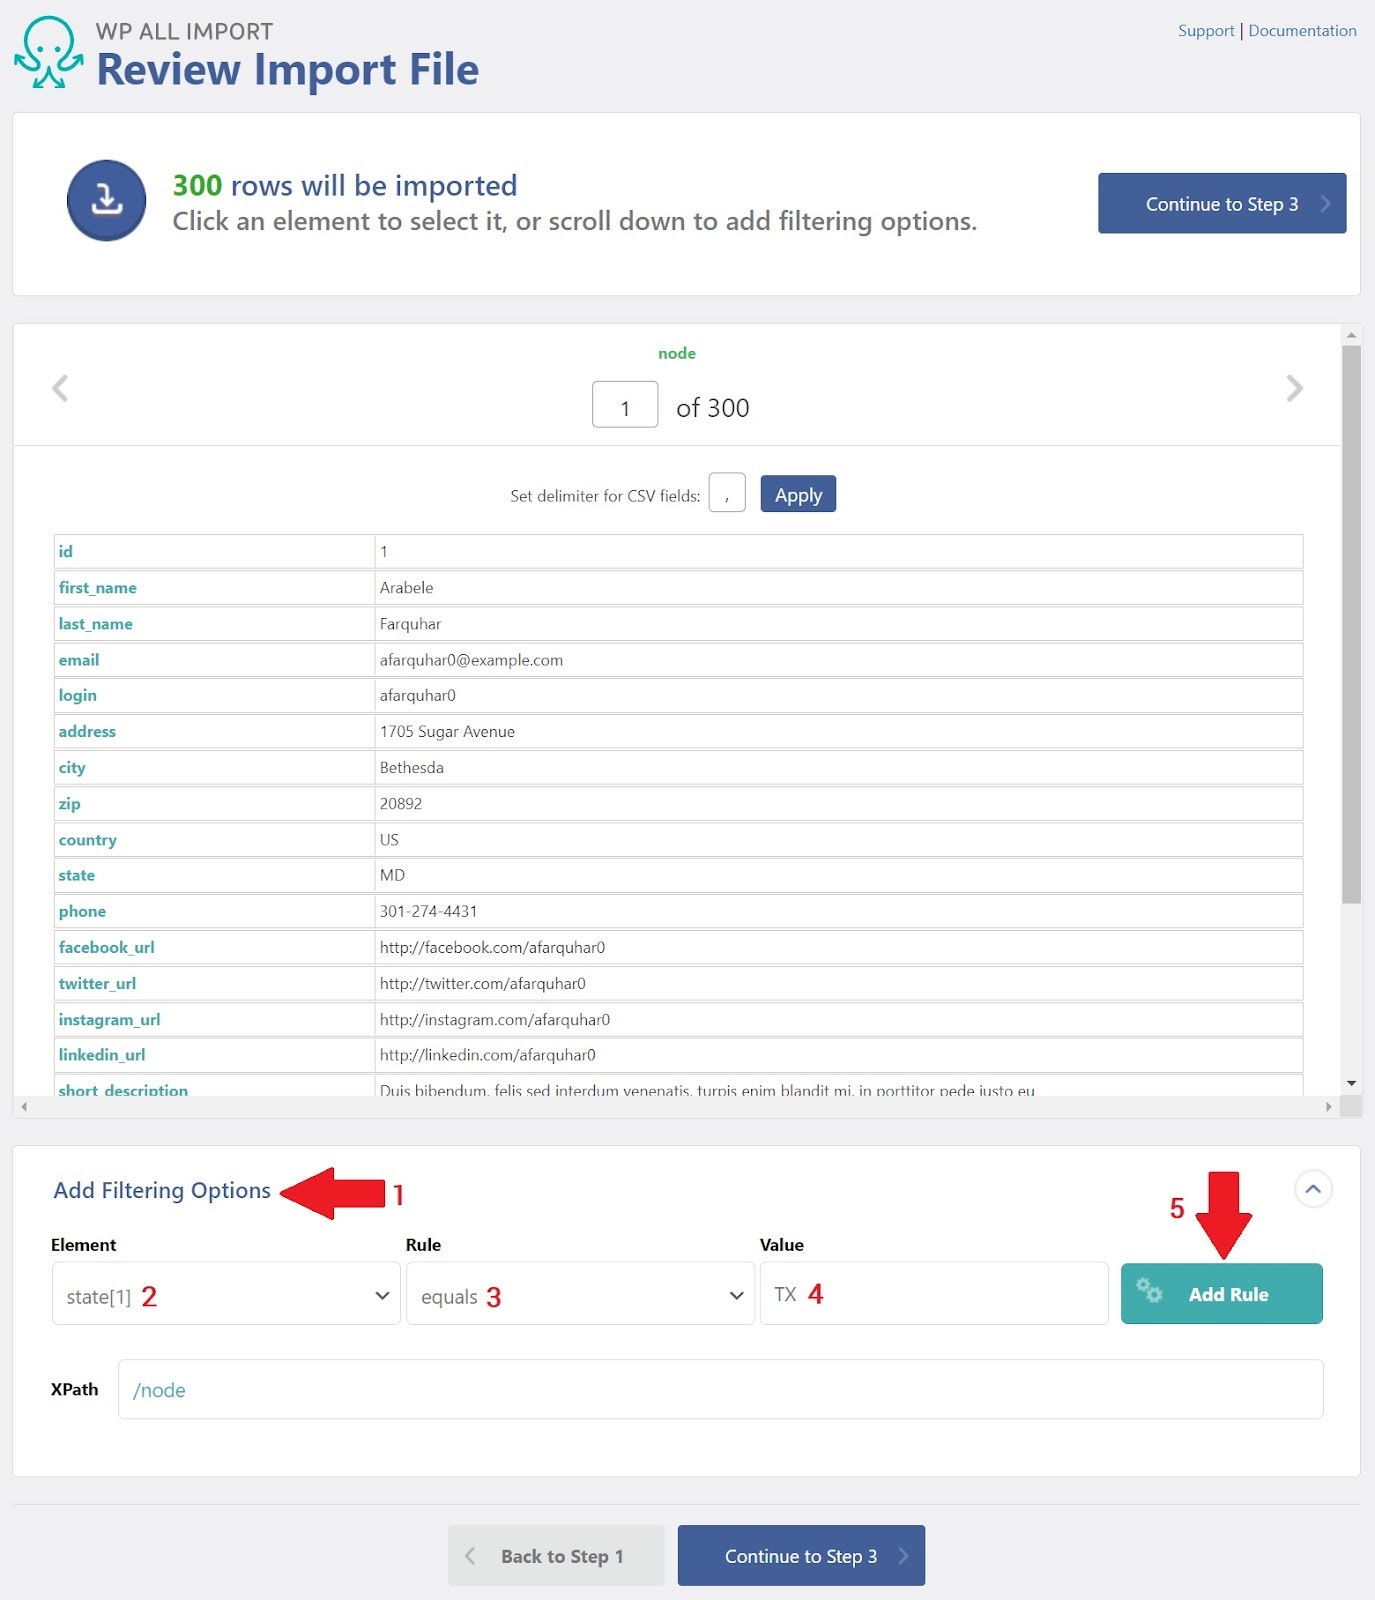
When you click Add Rule, WP All Import will open up a new panel showing the rule definition. In this new panel:
- Click Apply Filters to XPath. This will add the filter rule to the XPath box. It will also reduce the count of the rows to be imported from 300 down to 27 in our sample data.
- Click the blue Continue to Step 3 button and continue on as before.
User Passwords
In the User Account Info section of the Drag & Drop page, there is a password field. You can import either plain text passwords or hashed passwords from another WordPress site into this field. If the latter, you must check the box indicating that the password is hashed.
Hashing is a one-way action that irreversibly scrambles a string of text. It is not possible to reverse the hashing process to identify the original password. However, WP All Import allows you to import hashed passwords back into WordPress so that users will be able to log in with their old passwords.
This is the most secure way of transmitting user import data because the passwords are never visible to anyone who might intercept the file.
Other User Info
Although we did not cover this, there is another section in the Drag & Drop interface called Other User Info. As the name implies, this is for all the other user info stored by WordPress, which you can view by looking at any user profile. This includes:
- User role information
- Nickname, Display Name, and Nicename (a URL-friendly name)
- Description
- Registration date for the user
- A URL for the user’s website, if any
Custom Fields
If any user information has been added as a custom field, it will be accessible through the Drag & Drop page. This is one of the great benefits of using WP All Import, as it can identify and populate custom fields or fields from any plugin or add-on.
Function Editor
If you need to manipulate the incoming user in any way during the import process, you can create PHP functions to assist in this manipulation.
Scheduling Options
If you need to run a user import process on a schedule, you can do so through the Scheduling Options section of the Import Settings page. This is particularly useful if you need to keep WordPress user data synchronized with an external system.
In this model, the external system can output a new user import file on, say, a weekly basis. As long as the external system drops this file in an agreed-upon location, WP All Import can automatically import it by following a compatible schedule.
Advanced Settings
Importing an especially large user file? No problem. WP All Import provides a Configure Advanced Settings section on the Import Settings page. These settings allow you to break imports up into more manageable processing chunks, and also to increase import processing speed by disabling certain functions, importing only specified records, or using a StreamReaders instead of an XMLReader to parse the import data.
Finishing Up
As you can see, WP All Import makes it very easy to import WordPress Users. Give it a try with the steps outlined in this article.
With Nexcess WordPress Hosting, Better Is Built In
Nexcess offers fully managed hosting for WordPress designed for fast, high-performing sites. Nexcess also:
- Offers high performance and site speed.
- Dynamically scales and optimizes.
- Secures your site with always-on monitoring.
Check out the fully managed WordPress hosting plans from Nexcess today.

