Everyone wants their websites to run without a hitch. But no one is immune from accidents. Hackers, poorly coded plugins, faulty hard drives, or human error may break your site by corrupting or deleting data.
Fortunately there is a simple solution to it — backups. Simply put, a backup is a full copy of all your media files, plugins, theme files, settings, and databases. In case something goes wrong it will always be possible to restore your WordPress site to the point at which the backup was made.
Keep reading for a full overview on how to backup your WordPress website manually.
Why WordPress Backups Are Important
Having a restoration point can save you a lot of trouble, as it is not always possible to repair a site after an accident. The site can be infected so badly it would make no sense to scan and clean up all the affected files. In that case, it is easier to revert the site to its original state by using backups.
The example above is just one situation that can happen to your site so it is highly recommended to take backups at least weekly. The frequency mainly depends on what kind of website you have. While small low-activity blogs do not require numerous backups, it is a must for online stores to have daily or even hourly backups in order not to lose information related to new orders. Also, it is advantageous to make backups before updating or adding new WordPress plugins as they may potentially break your site.
The absence of backups in a critical situation can severely damage your business if not destroy it completely. Data loss is inconvenient. It also means you would need to rebuild your site from scratch. That involves extra time and lost potential revenue while your site is unavailable, not to mention credibility losses.
The golden rule is to have at least 3 off-server backups in different places. These can be any cloud storage solutions like OneDrive or Google Drive, a USB flash drive, portable SSD, and even your email account — just make sure to star it or put an important label on it. Any place you can easily access to download your backups is good to store them in.
Automatic vs. Manual Backups
Today there are a number of plugins on wordpress.org designed to make backups automatically. It is definitely a great method, but not ideal. Most of such plugins use up your disk space to store backups. It might not be a good solution if you are limited with your disk space or if your hosting company bills you for disk space usage — making weekly backups, let alone daily, very expensive.
Additionally, if the server containing local backups crashes, you will not be able to use them for restoration as they will be lost together with other data. And finally, if you decide to stick to the 3-backup rule mentioned above, it might not be possible to automate this process due to lack of integration with certain remote destinations — or in cases with SSD or USB flash drives.
On the other hand, manual backups require logging into the server each time you want to make a backup. It can be tedious but manual backups pay off with a higher degree of control — you can take a copy of specific folders or files, or make a database-only backup.
Usually, plugins help make only full site backups, however there are a few on the market like Solid Backups that also allow making database-only backups.
Also, manual backups are a must if you just made a considerable update to your website and the next automated backup is scheduled to be made in 5 days. You cannot risk losing your progress if something happens to the website or server within these 5 days.
Ideally, automated backups should be combined with manual backups where needed. This will ensure your website is fully protected after each update.
While automated backups are typically easy to configure within the plugin’s menu or your server’s dashboard, it is important to know how to back up a WordPress site manually.
How to Backup a WordPress Website Manually Using SFTP
SFTP stands for Secure File Transfer Protocol or SSH File Transfer Protocol — it is a network protocol used to access and manage files remotely. In terms of manual backups, we can use it to access the server which hosts the website and make a copy of the entire site or certain folders.
The first step would be to download and install an SFTP client. The most widespread are WinSCP or Filezilla, but you can choose any you like since in most cases this kind of software shares similar interface and features.
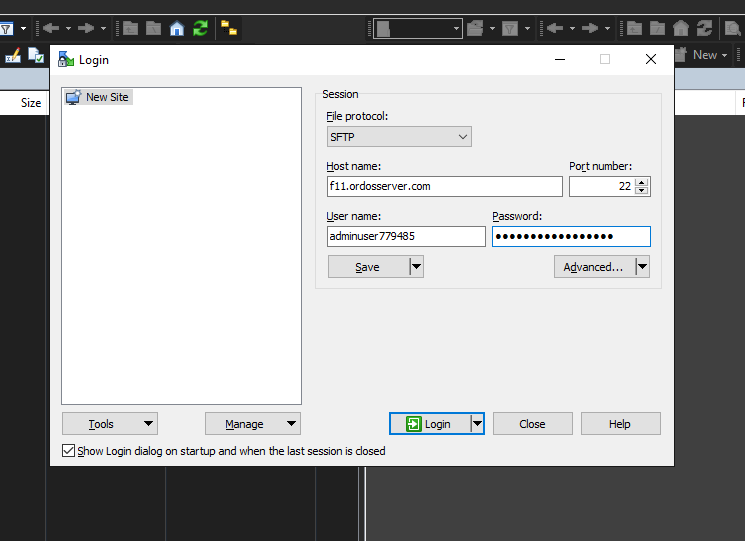
Once you have installed the SFTP client, you need to obtain credentials to connect to the server — SFTP server Hostname, Username, Password, and Port. If you do not have the credentials already, they can be obtained by contacting your hosting company’s support staff.
By default, SFTP utilizes port 22 so you can use it unless specified otherwise by your hosting company. Before you actually connect to the SFTP server, you might see something similar (WinSCP image below):
After you have connected to the server, you will see two panels representing files on your local machine (on the left) and on the remote server (on the right):
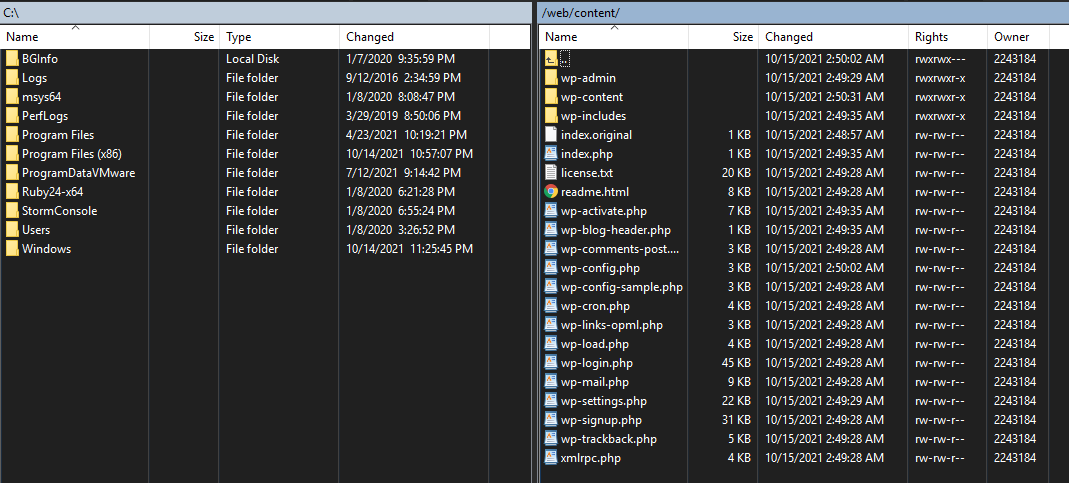
Depending on your server file structure, your WordPress installation might be located in different directories. In our example, it is /web/content, but in many cases it can be found in /public_html.
By selecting all the folders and files in this directory and dragging them to a folder on the left panel, you can backup your WordPress website manually.
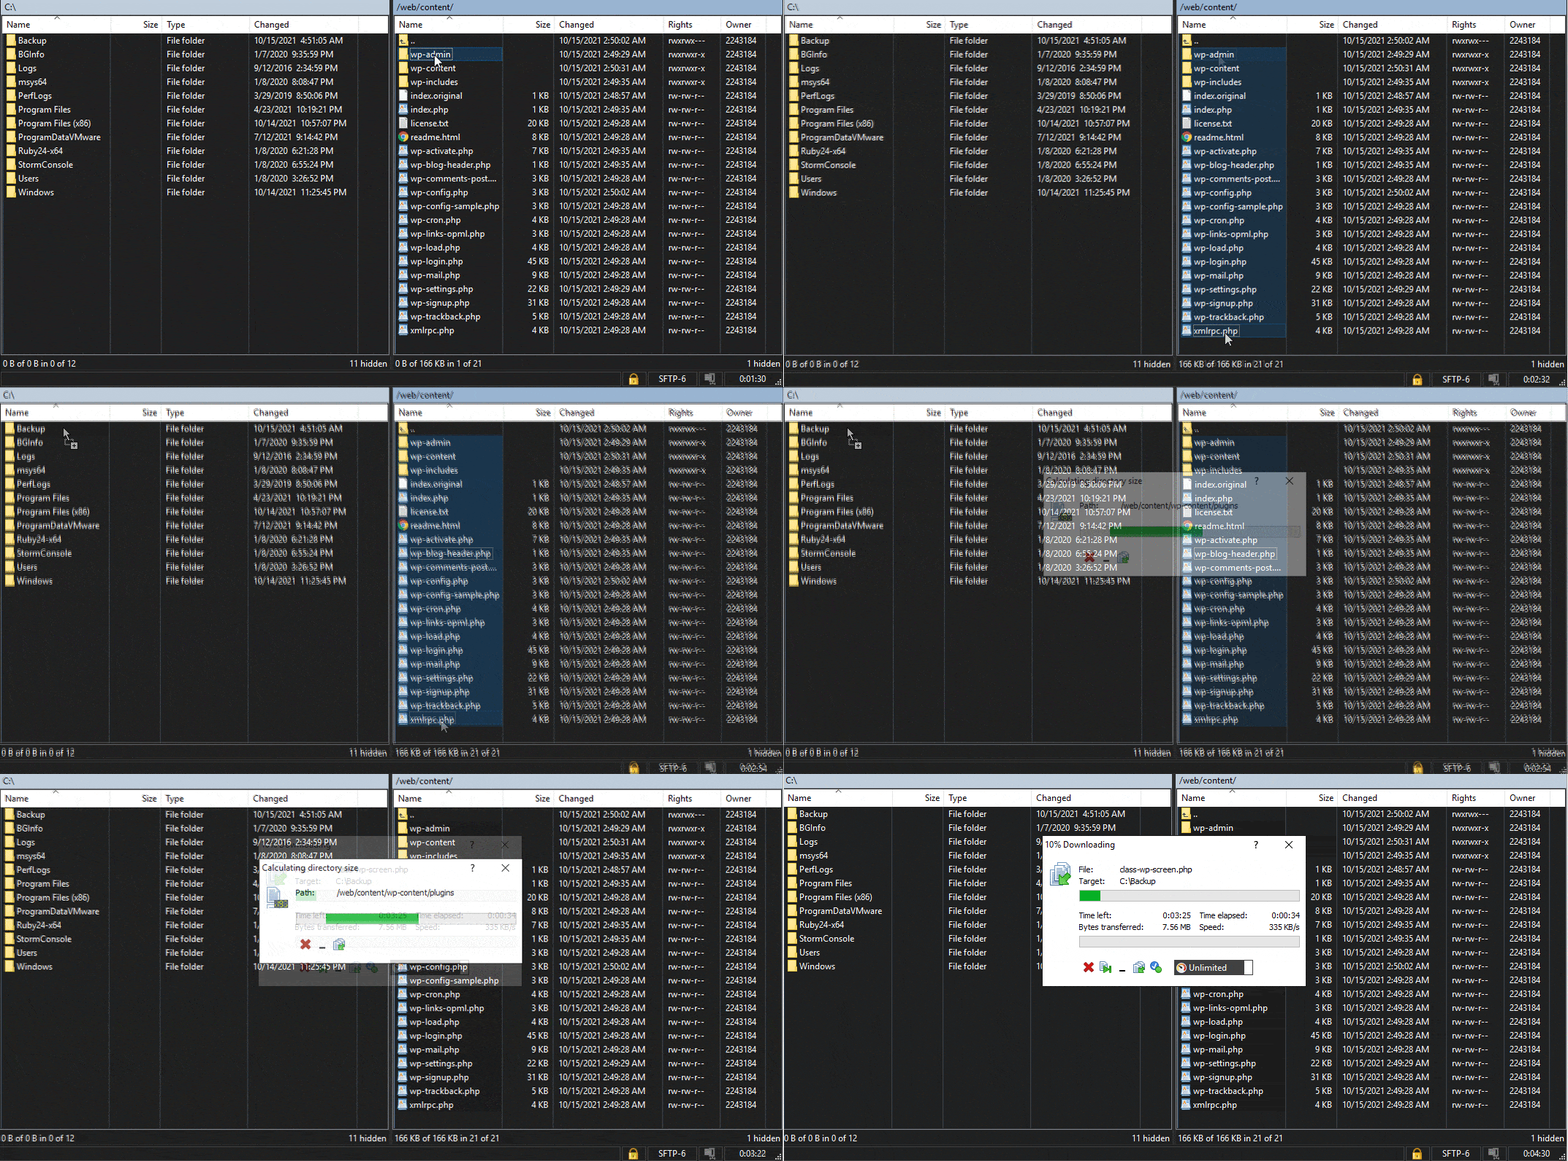
Once you have copied all the files, you can rename the folder into the “website.tld - mm.dd.yyyy” format to keep track of all your backups.
Since full site backups can be large in size it is also recommended to compress them by zipping. Also, having a single file makes it easier and faster to send it to remote destinations.
How to Backup a WordPress Site Manually Using phpMyAdmin
phpMyAdmin is a web-based tool used to manage MySQL databases. This method is used to make database-only backups but they are as vital as full site backups if your website crashes — they contain various settings, posts, pages, comments, and many other things that ensure your site works and displays the information properly.
The exact ways to access it may vary depending on your hosting company or control panel, but usually it is a link or button that brings you directly to the phpMyAdmin menu.
A fragment of the main page:
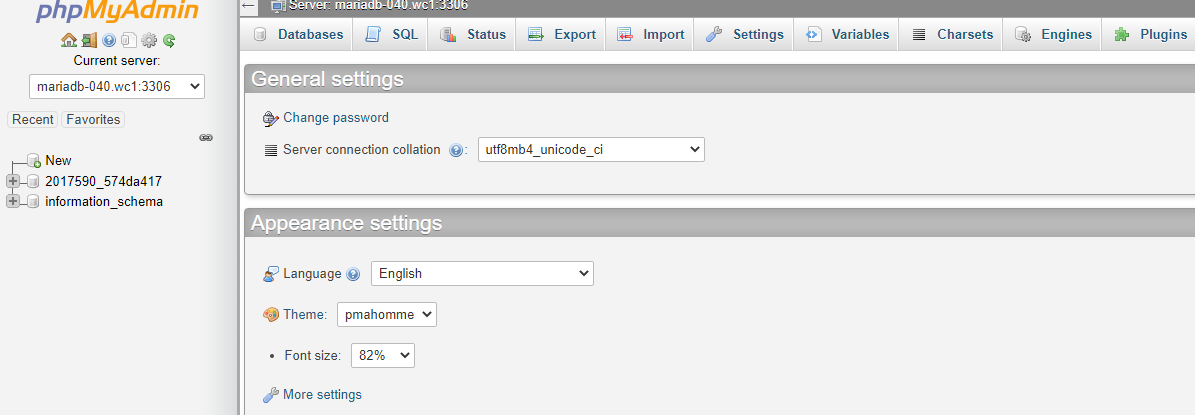
It is possible to make a backup of all the databases stored on the server — to do so just navigate to the “Export” tab on the header menu; for database-specific backup select one from the list on the left and then go to the “Export” tab.
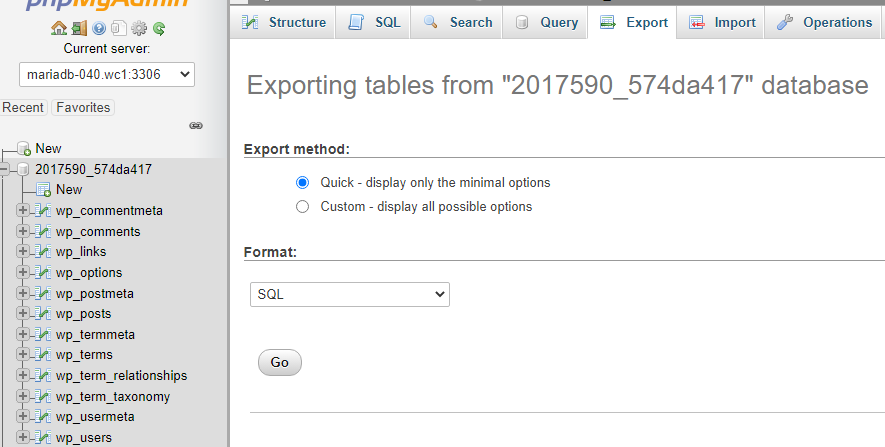
The Quick Export method should be fine for most cases, but advanced users can have a look at the Custom method if they have some special requirements.
The format should be set to SQL and upon clicking “Go” the database will be downloaded to your local machine in .sql format. This file can later be used in the “Import” tab to restore the database.
Consider Hosting With Nexcess
All Managed WordPress plans at Nexcess come with automatic 30-day daily backups. Not only will they ensure the safety of your data, but also save you some time and effort.
Our expert team will assist you with restoring your site using a backup no matter what — be it a cyberattack or termination over the past-due bill — we will always be here to help. Knowing your site is always protected will give you peace of mind allowing you to focus on expanding your business.
Combined with industry-leading performance and optimization, Nexcess brings Managed WordPress hosting on the next level.
Check out our fully managed WordPress hosting plans to get started today.

