

Magento offers advanced reporting features that allow you to track search events, product sales, and checkout abandonments. But it doesn’t provide insights into metrics such as customer demographics, devices, and behavior flows.
To access those insights, you need Google Analytics — a free tool that tracks online traffic across devices and platforms using a small snippet of code.
You can add Google Analytics in Magento 2 without an extension or custom code. You only need access to the Magento admin panel and a Gmail account to start.
Here’s how you can add Google Analytics in Magento using both a Universal Analytics (UA) tracking code and the latest generation Google Analytics 4 (GA4) global site tag.
How To Add Google Analytics in Magento 2
Google Analytics is a user-friendly tool that facilitates data-driven decision-making and helps you improve conversion rates. It’s no surprise that according to W3Techs, 56.5% of all websites on the internet use Google Analytics for online traffic analysis.
Here’s how you can get started with analytics for Magento in four simple steps.
1. Set Up a Google Analytics Property

Sign in to your Google account and open Google Analytics. If you haven’t signed up for a free Google Analytics account, you can go to the Google Analytics landing page and click on the Get started today button to configure Google Analytics.

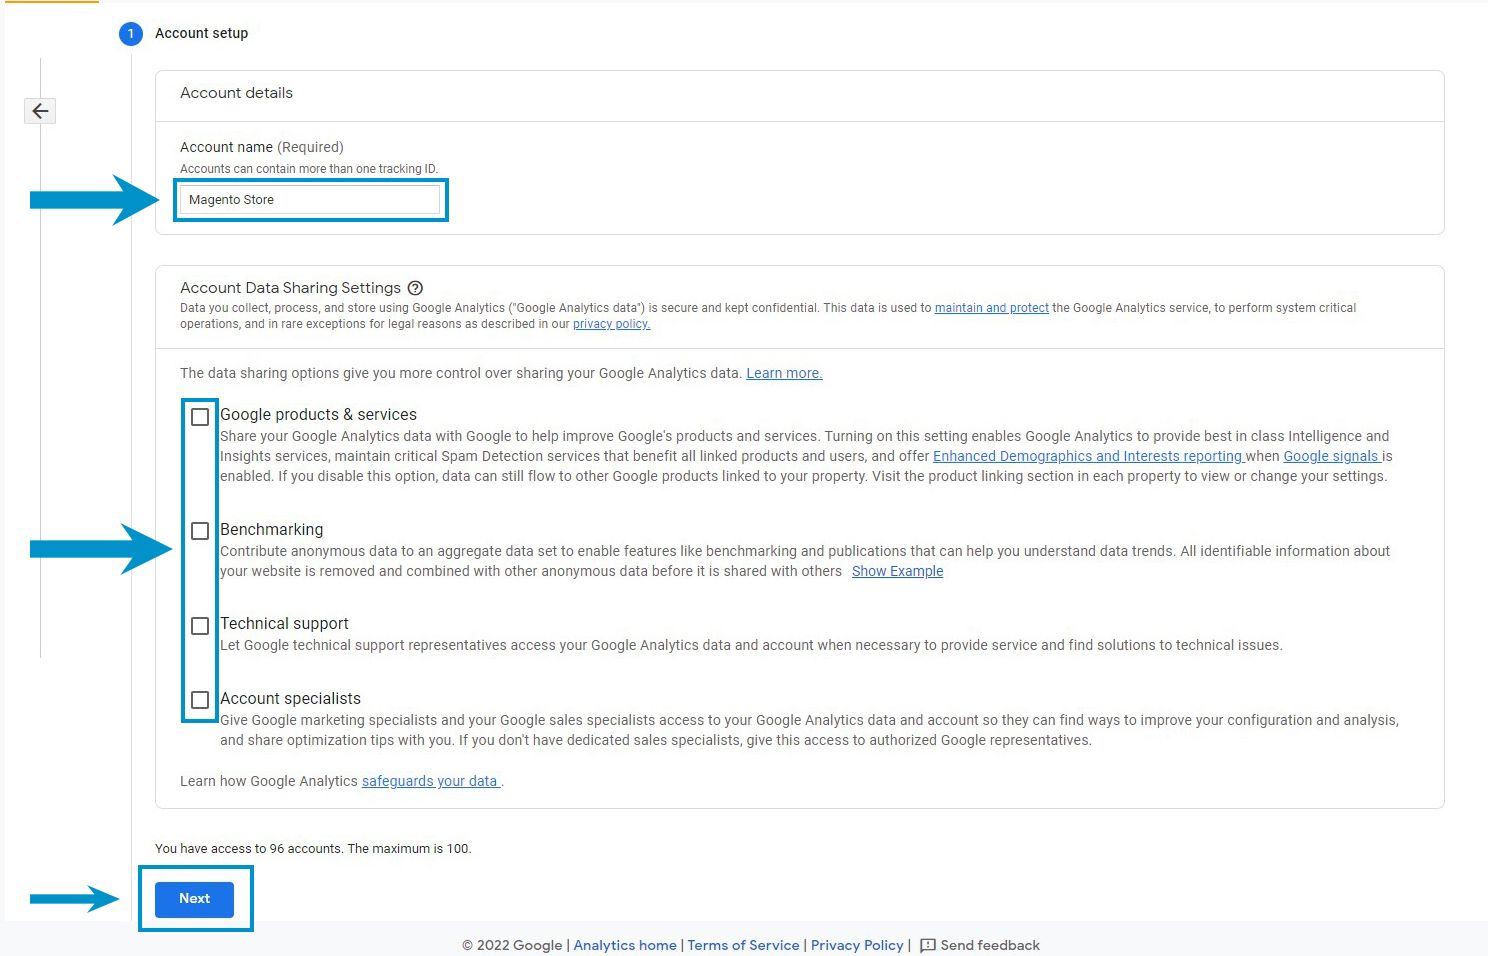
Enter an account name to identify the account in the Analytics dashboard. You can use your company, website, or any other descriptive name of your choice.
Customize how you wish to share tracking data with Google by checking or unchecking the checkboxes in the Account Data Sharing Settings section. You can uncheck all boxes without affecting your ability to add Google Analytics in Magento.
Once you’ve made your selection, click Next to proceed.

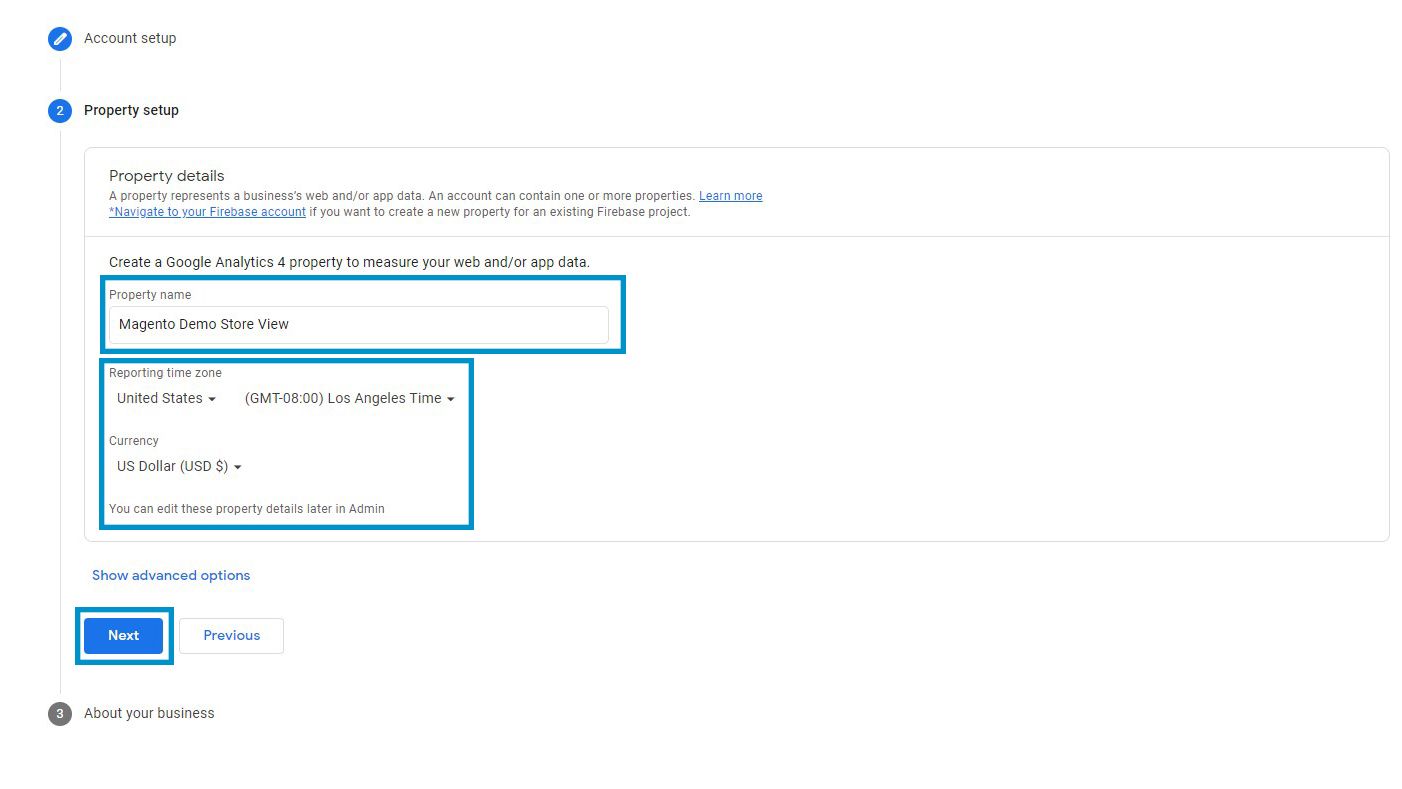
Enter a name for your Google Analytics property, set the reporting time zone, and select a currency.
Currently, Google creates a Google Analytics 4 property type by default. However, you can also create a Universal Analytics property by following these steps:

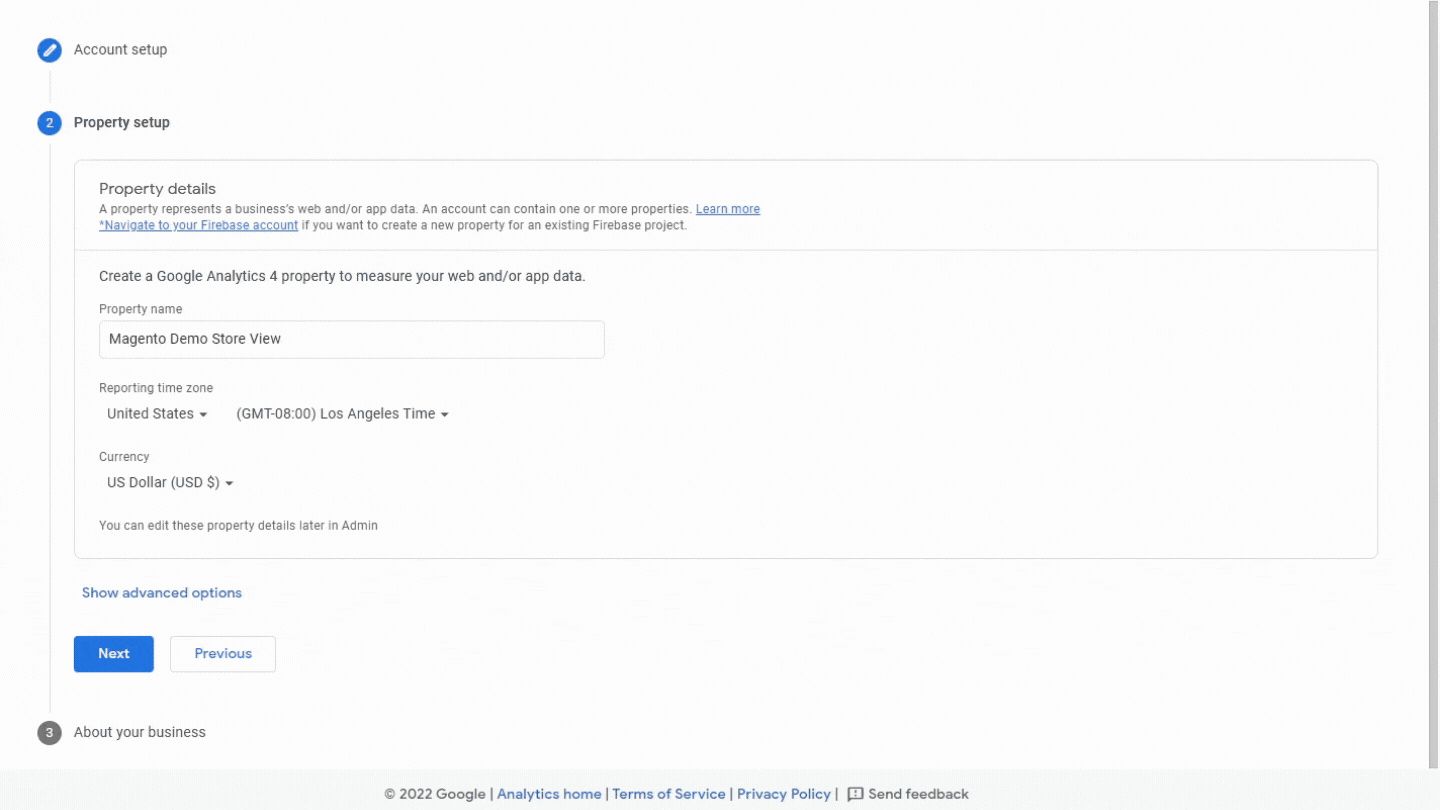
1. Click Show advanced options in the Property setup section.
2. Switch the Create a Universal Analytics property toggle.
3. Enter your store URL in the Website URL box.
4. Choose between creating both a GA4 and UA property or a UA property only. You can leave the enhanced ecommerce reporting option enabled.
5. Click Next when you’re done.

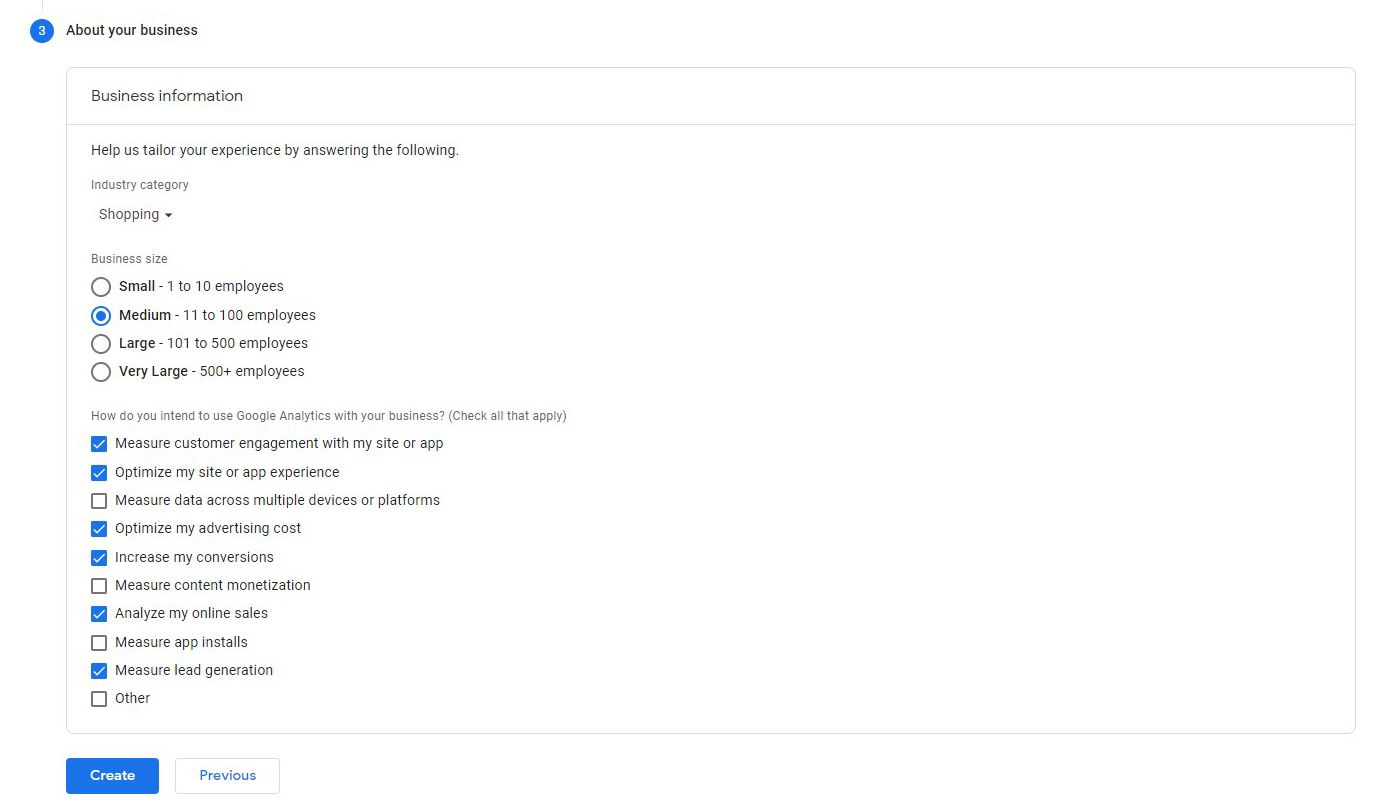
Select your industry, business size, and options that best describe how you plan on using Google Analytics. When you’re done, click Create.

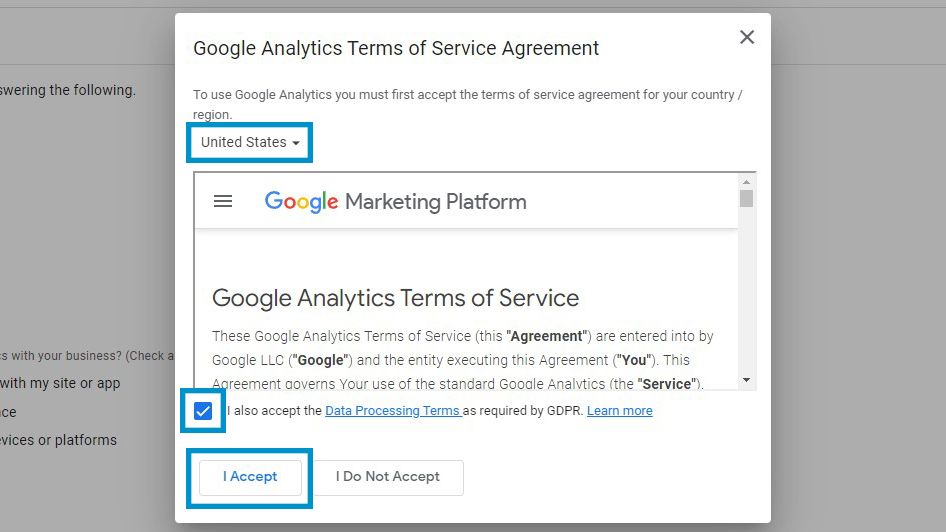
You’ll see the Google Analytics Terms of Service Agreement popup. Select your country, accept the data processing terms, and click I Accept to finish.
After that, you’ll be redirected to the Google Analytics admin area to configure your tracking code.
2. Copy Your Tracking ID and Google Analytics 4 Global Site Tag
The steps to access your tracking code or Measurement ID vary based on the analytics property type. If you’ve created a UA property, you can find the Google Analytics Tracking ID for your website in the Google Analytics admin area.

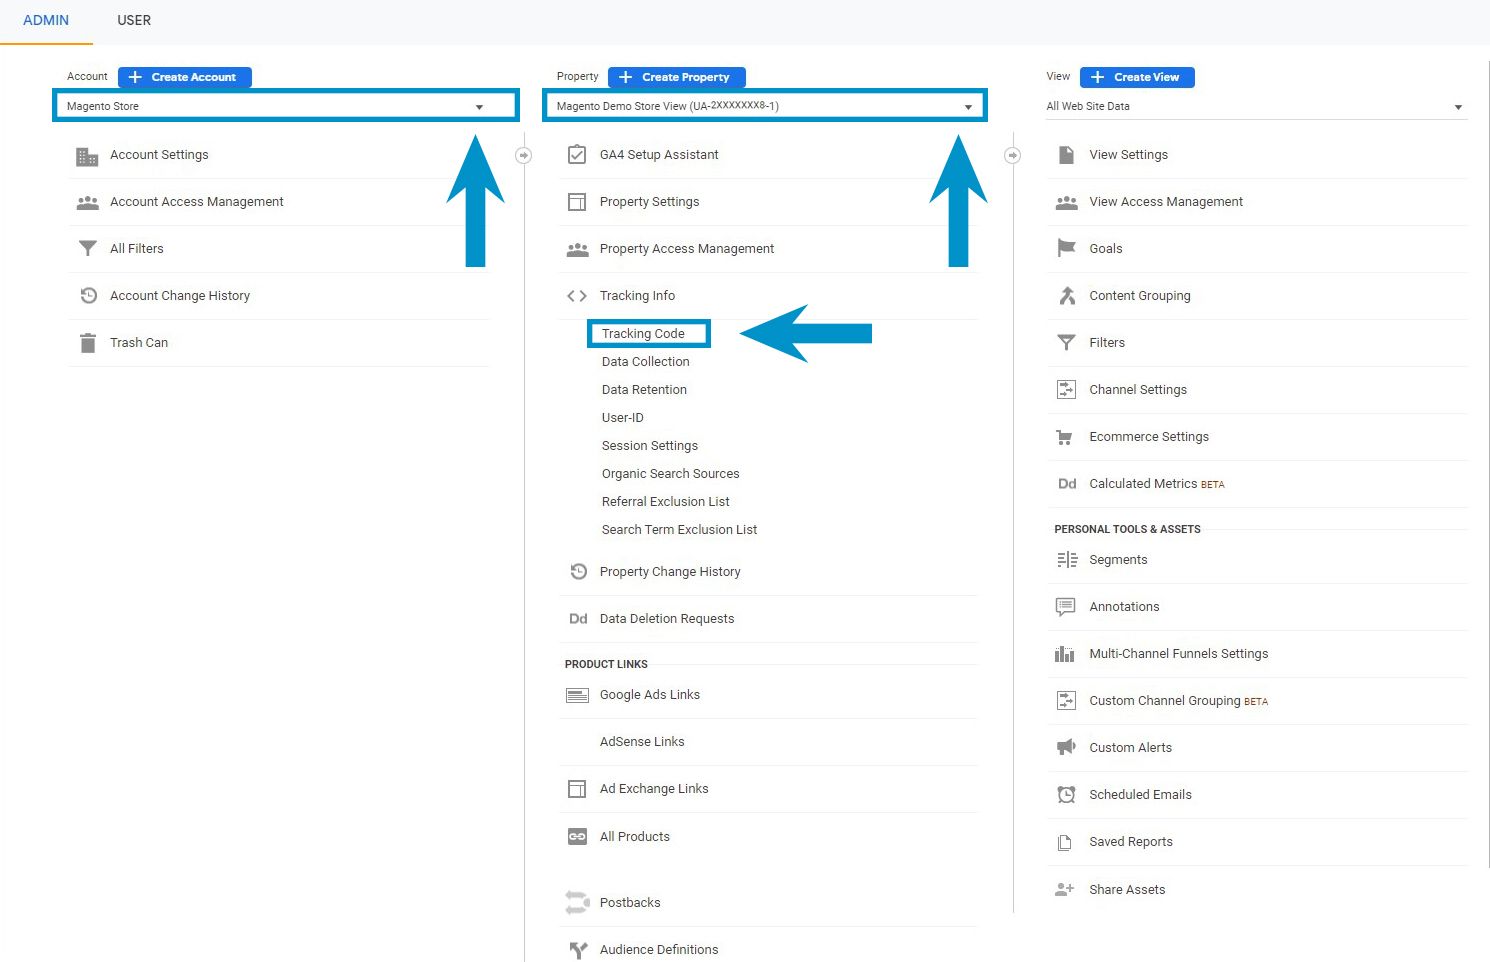
Navigate to the admin section and select the UA account and property using the dropdown menus. Then, go to Tracking Info > Tracking Code.

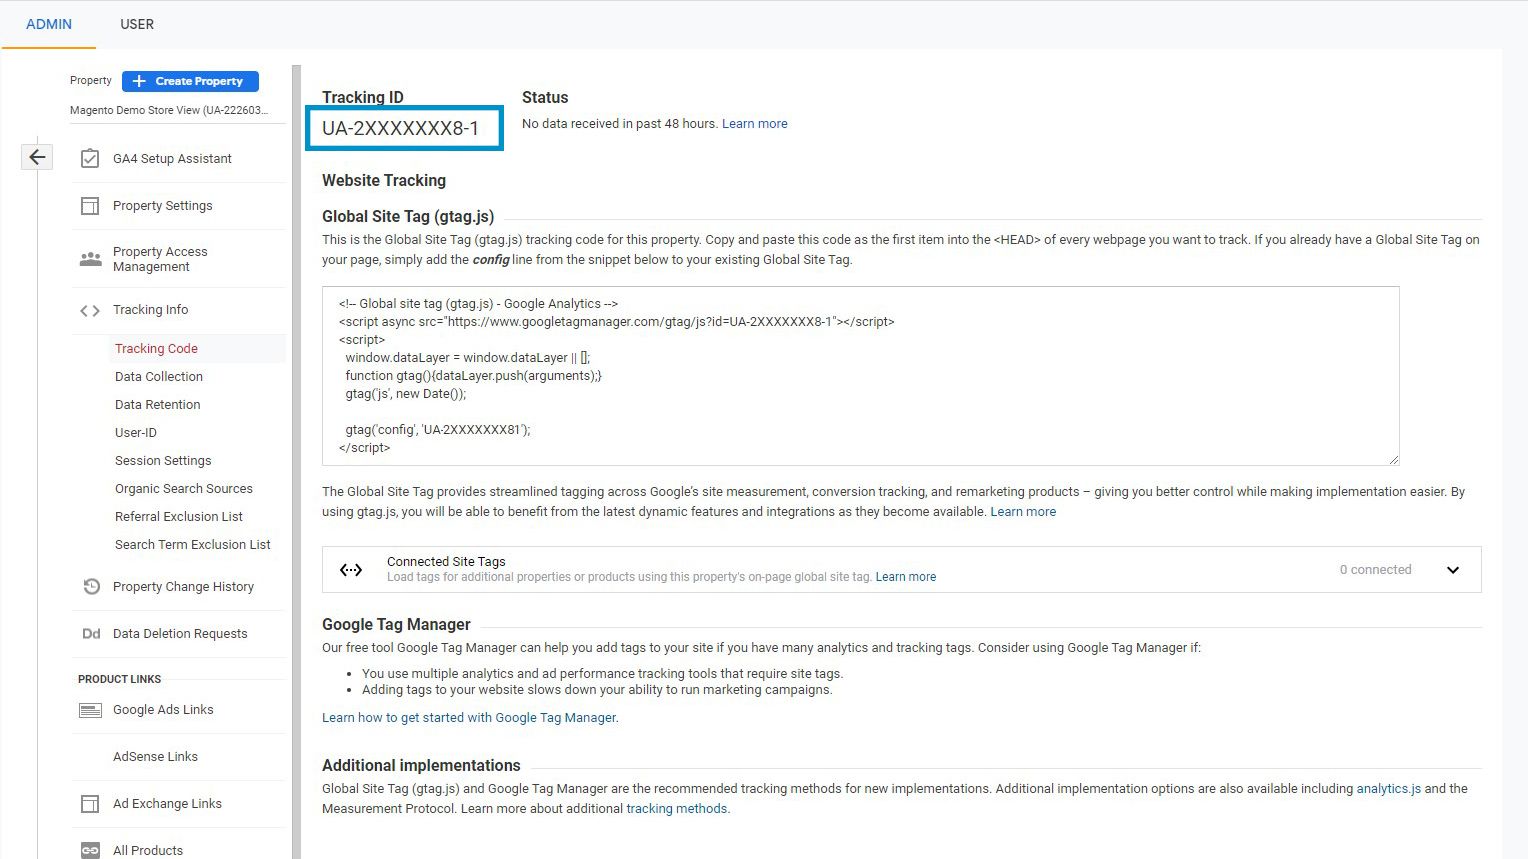
Copy the Tracking ID and head over to the Magento admin.

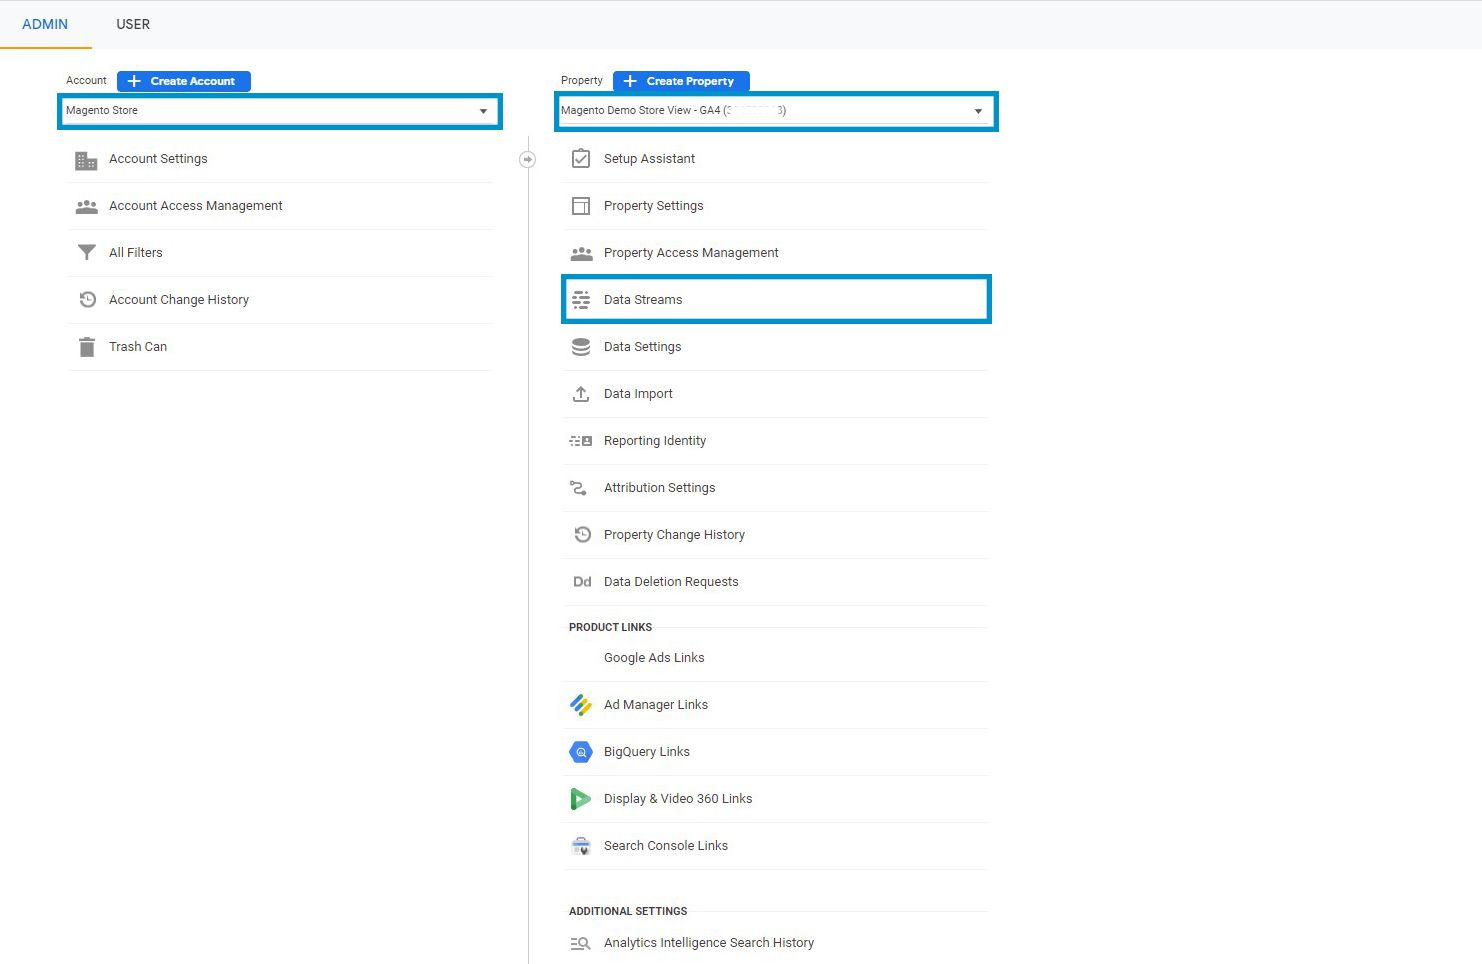
If you’ve created a GA4 property during the setup process, you can copy its global site tag by selecting the GA4 account and property in the Google Analytics admin and clicking on the Data Streams option.


In the Data Streams section, click on the data stream you’ve created for your online store.

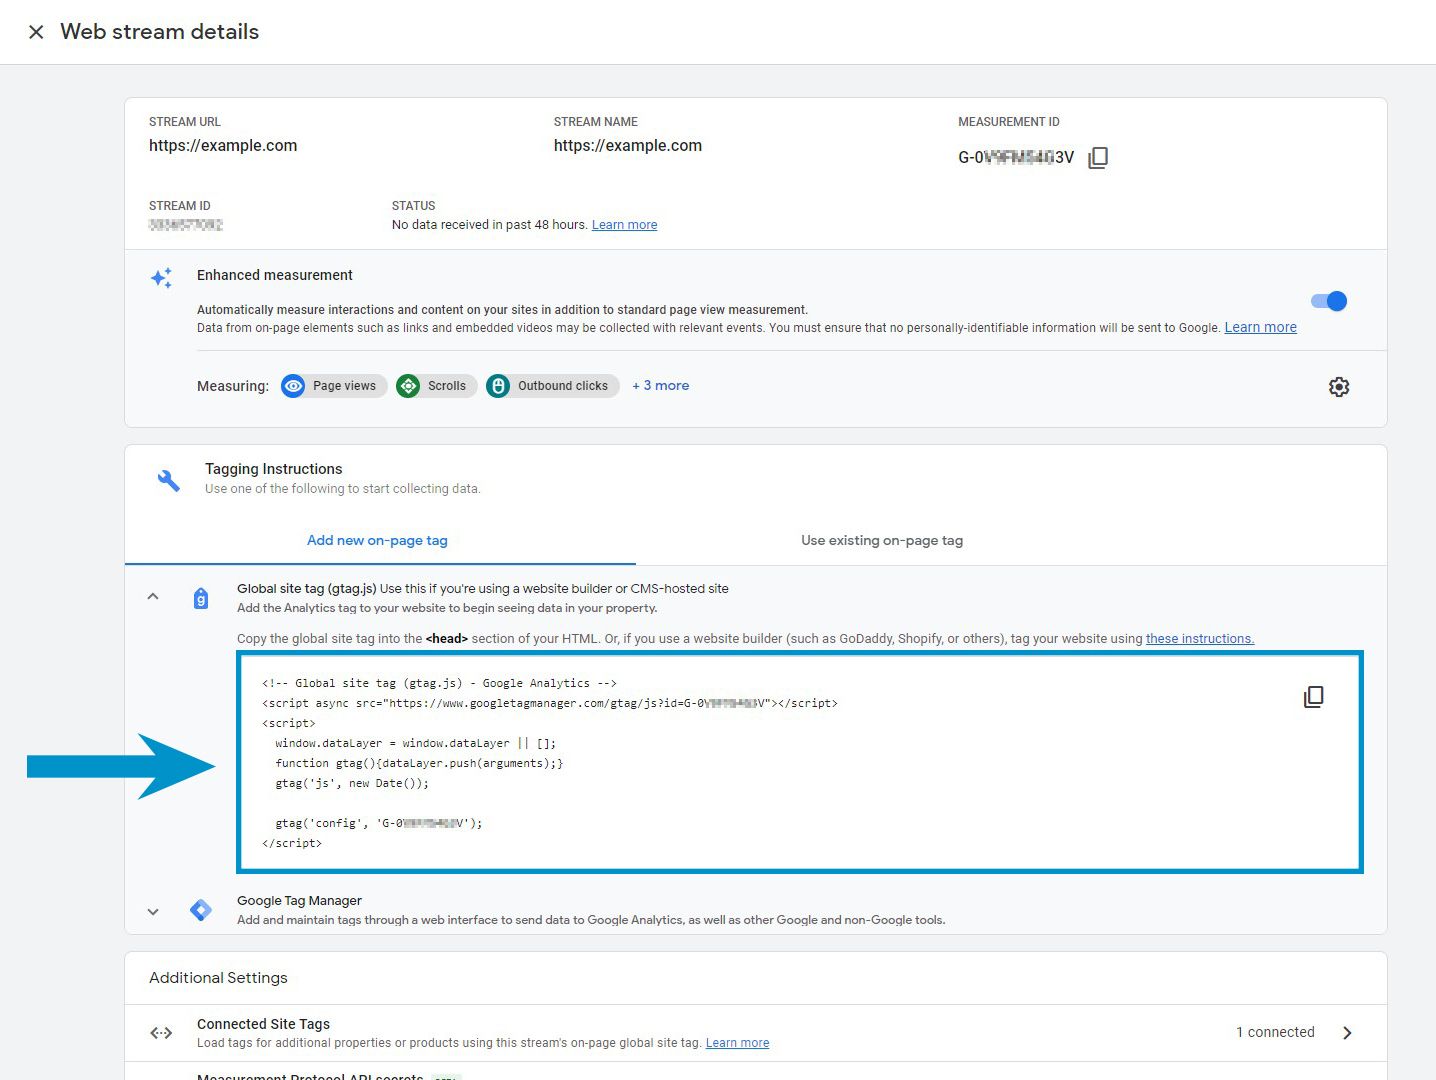
In the Web stream details section, copy the code snippet inside Tagging Instructions > Add new on-page tag > Global site tag (gtag.js) and head over to the Magento admin to add Google Analytics in Magento.
3. Add Google Analytics in Magento 2
Log in to the Magento 2 admin panel and go to Stores > Configuration > Sales > Google API. Expand the Google Analytics tab, uncheck Use system value, and change Enable from No to Yes. Add your UA Tracking ID to the Account Number text area and click Save Config.
Optionally, you can also set Anonymize IP to Yes to hide visitor IP addresses and set Enable Content Experiments to Yes to use ecommerce tracking with A/B testing.
If you’re using a GA4 property, you’ll need to add the global site tag to your website’s <head> section. Inserting the code at the starting of the head section ensures that events are tracked even when users prematurely stop a page from loading.

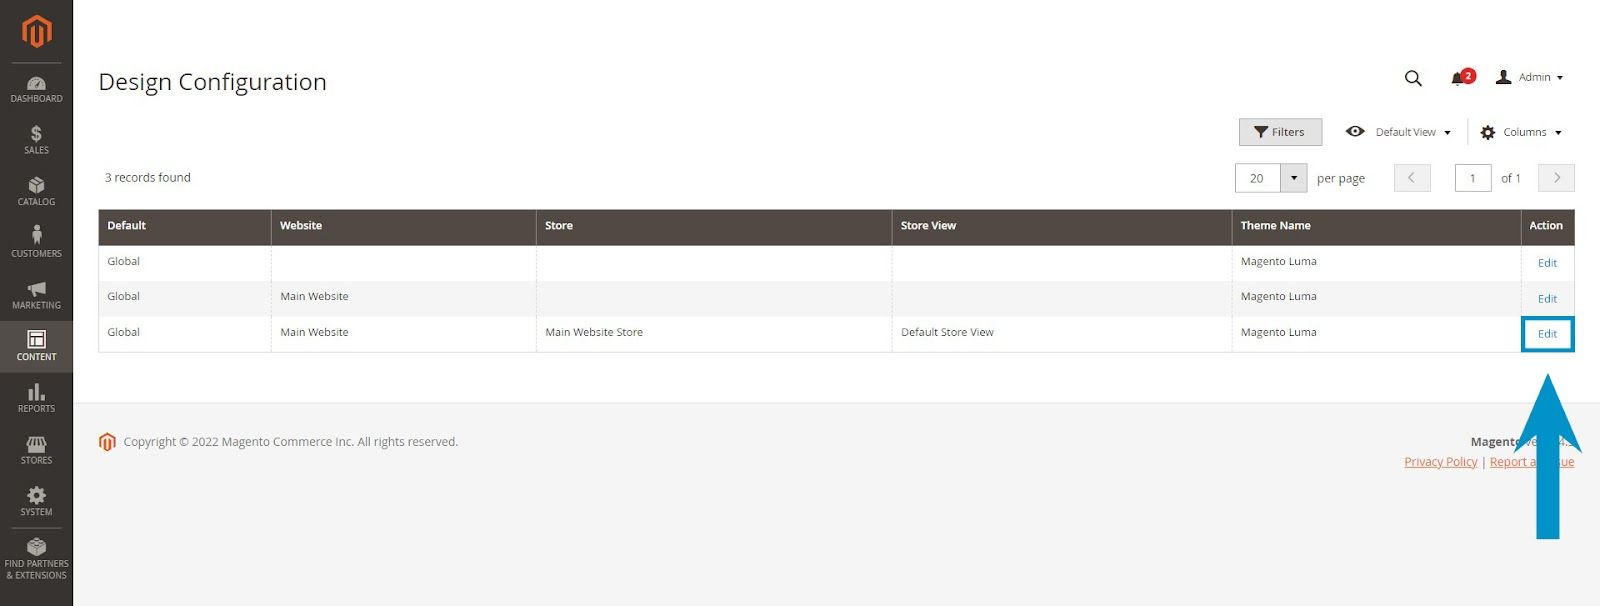
To add Google Analytics in Magento using the global site tag, navigate to Content > Design > Configuration in the Magento admin. In the Action column of the Design Configuration page, click on the Edit hyperlink beside your preferred ecommerce store view.

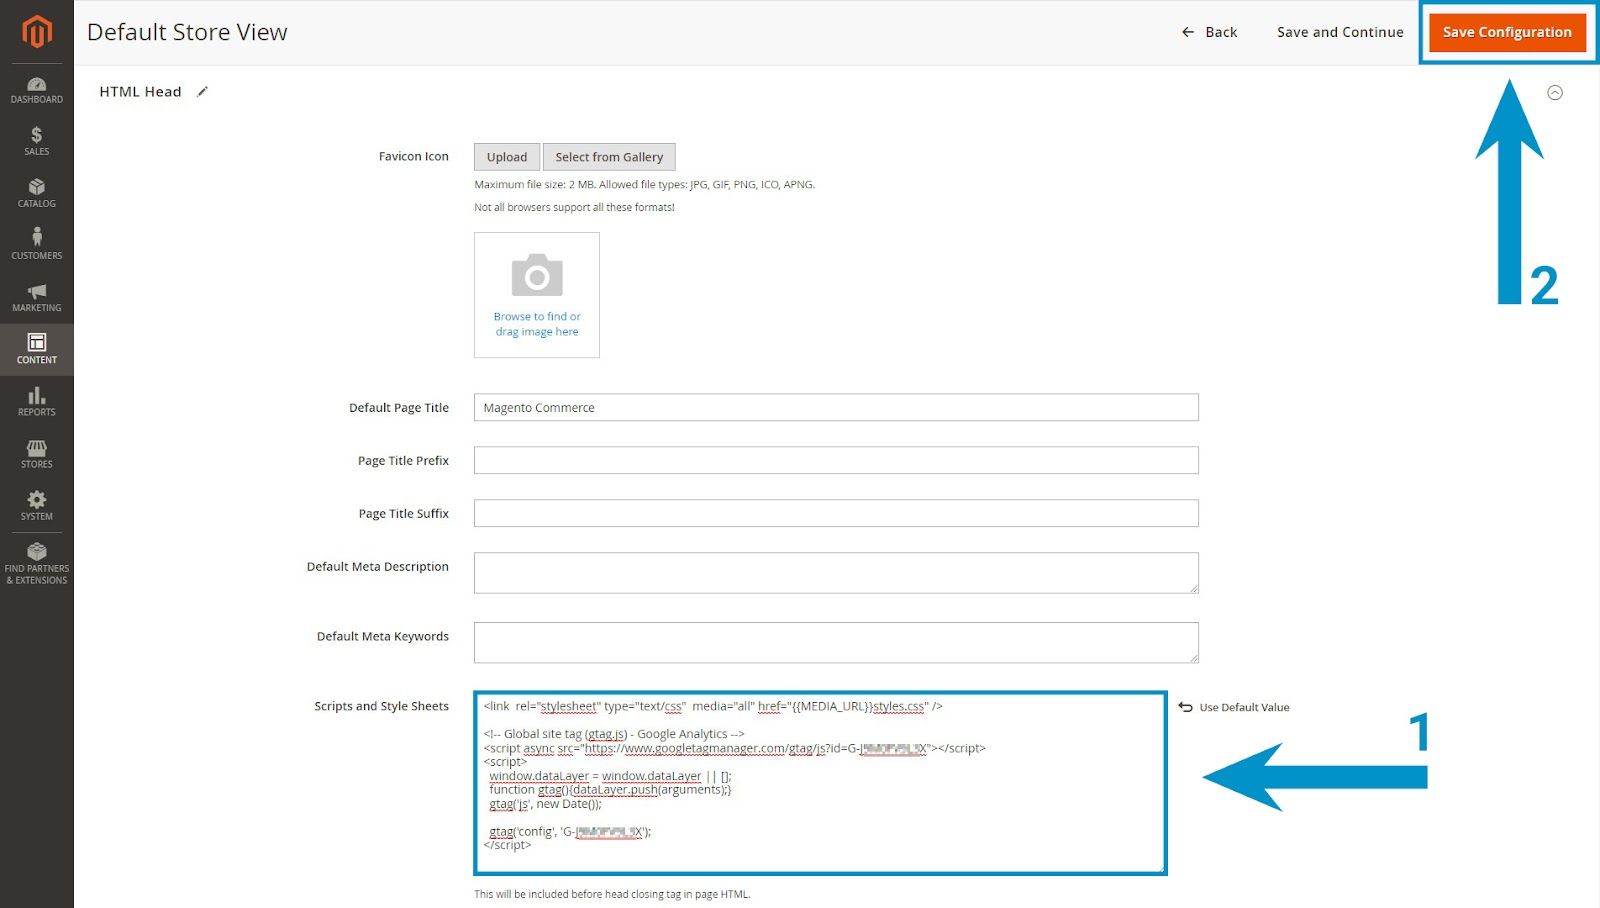
Scroll down to the HTML Head section, expand it, and paste the GA4 site tag in the Scripts and Style Sheets section.
Click Save Configuration.
Make sure you refresh the Magento cache to update the changes on the frontend.
4. Verify Google Analytics Is Working
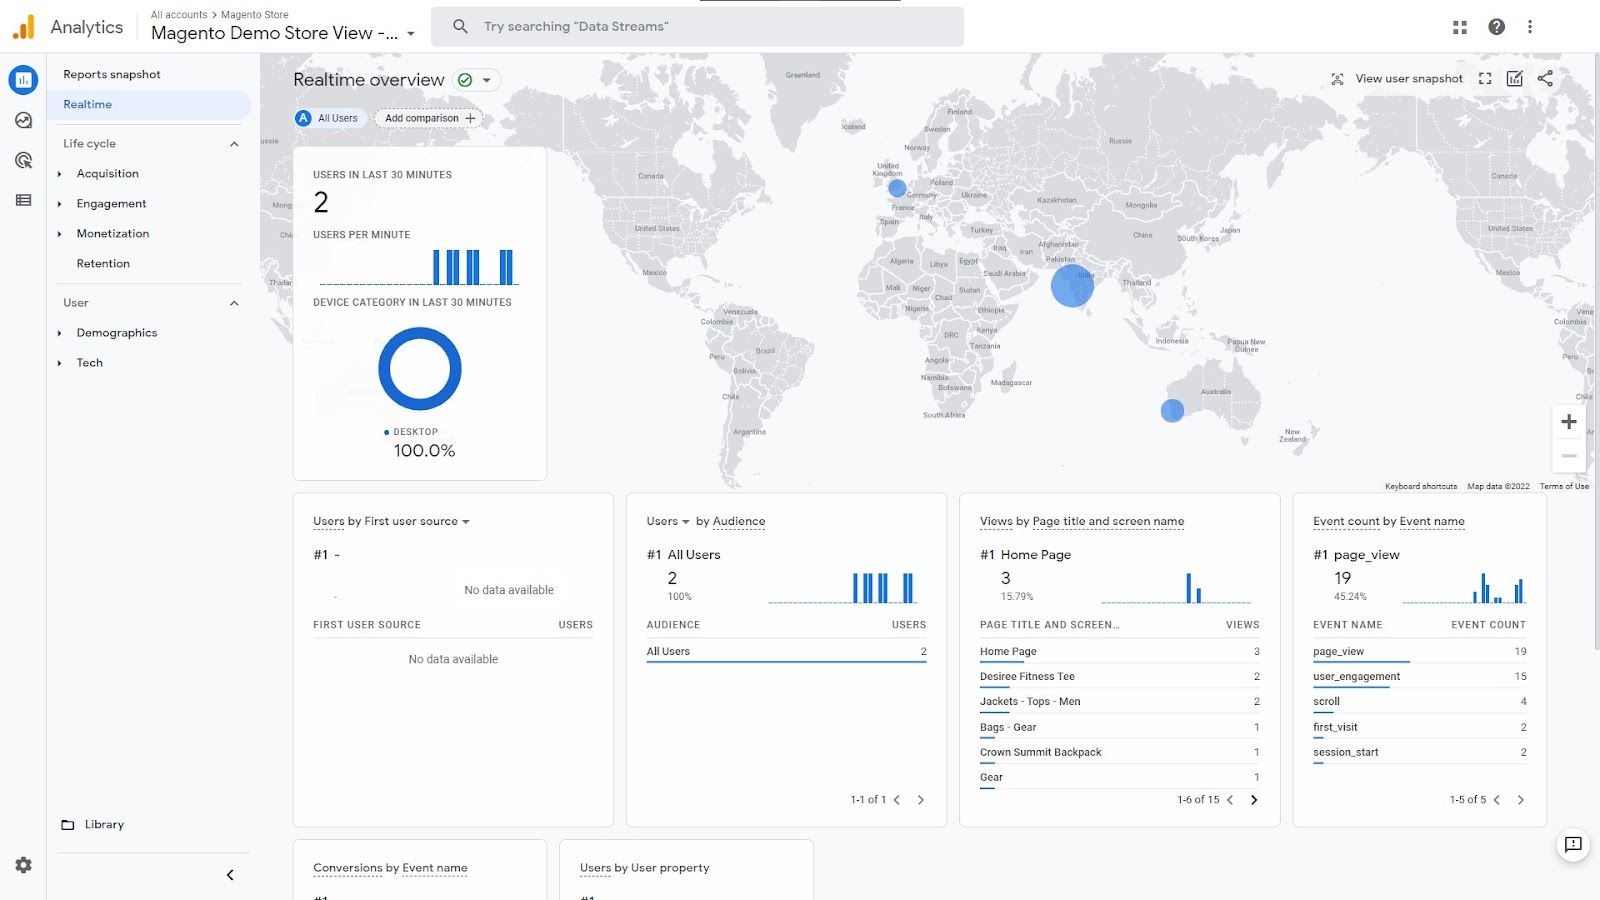
Open the Google Analytics dashboard and navigate to the Realtime section of your newly created property. You’ll be able to track live visitors on your site.
If you can’t see any live visitors on your dashboard, here are a few ways to troubleshoot Magento analytics tracking:
- Disable all ads and analytics blocking features in your browser.
- Verify the Google Analytics code in the backend is correct.
- Flush the Magento store cache.
After following these steps, you should see real-time activity in the Google Analytics tracking dashboard as potential customers view products and initiate the checkout process.
In addition to the manual method we've mentioned above, you can also use third-party tools to integrate Google Analytics into your Magento 2 store.
One option is the Mageplaza Magento 2 Google Analytics 4 extension, which simplifies the process and enhances functionality. This extension allows you to implement advanced tracking features without needing custom code, making it a great choice for store owners looking to save time and effort.
Final Thoughts: How To Add Google Analytics in Magento 2
Google Analytics is extremely easy to set up and use. Although you don’t need to be an ecommerce marketing guru or Magento developer to add Google Analytics in Magento 2, you need technical skills to host and optimize a Magento store.
Managed Magento Hosting by Nexcess eliminates the complexities of hosting a Magento store with Magento-optimized servers. All our plans include PCI-compliant hosting, auto-scaling, 24/7/365 support, and a 30-Day Money-Back Guarantee.
Sign up for a plan today.

