
To err is human — this age-old saying might come from a time when the first lines of code were yet to be written, but it still rings true today. Making mistakes is unavoidable, especially when repetition is involved. In deploying websites, repetition permeates the entire process.
If your site is complex enough, you may need to run a certain number of NodeJS (installing scripts, SCSS to CSS conversion, etc.) or Composer (installing libraries, running tests, etc.) tasks to begin with. You’ll then need to transfer all files to the server, clear the cache, and make sure everything works the way it should.
Even though they’re repetitive, these tasks are not that hard to handle — when you're flying solo, that is. The more people start working on one project, the more complicated it gets.
Luckily, you can make it simple and error-proof through WordPress deployment automation.
In this guide, we'll explore how to automate repetitive tasks and make your deployment process a breeze with Buddy. Let's get this show on the road!
Single Source of Truth: The Git Repo
Before you start transferring files to a server, let's think about what you can do to ensure that every team member working on your project has access to the same files — this includes all changes introduced by others. You can get all of that with Git. Without getting into much detail about Git itself, here are a few things this version control system gives you:
- Access to the up-to-date version of files for all collaborators.
- Detailed change history.
- Branches: a way to work on changes in isolated environments.
When you start using Git, you can say goodbye to overwriting changes prepared by other devs and forget the days of figuring out when and where the buggy code was written.

There are many ways to use Git:
- Using the command line.
- Through tools built into popular code editors, such as Visual Studio Code.
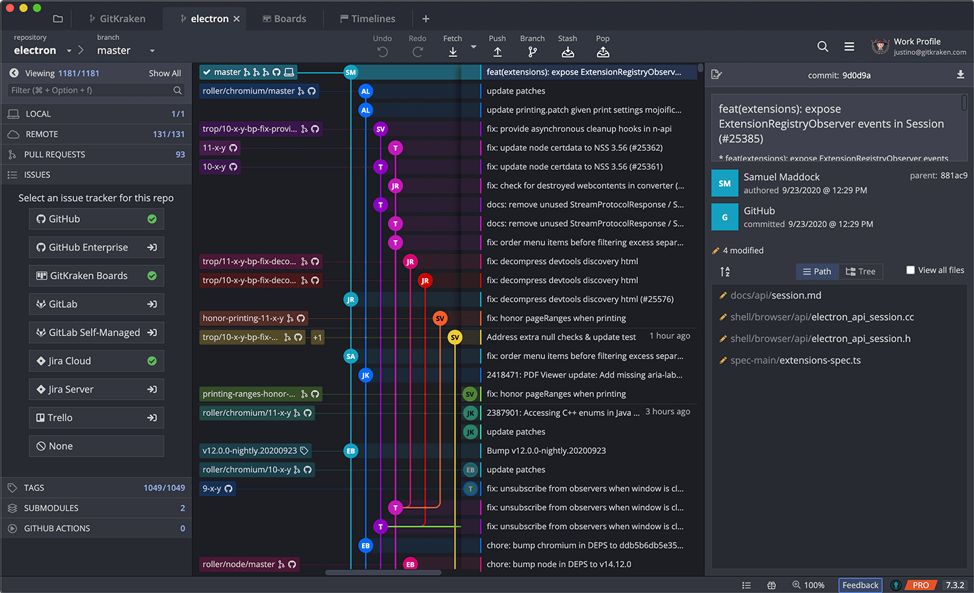
- With dedicated tools such as Gitkraken or Git Tower.
Let's also think about the things you should keep in a Git repository. There are many strategies and approaches to this and they change depending on what you're working on. To start our journey, I recommend using a .gitignore file with these contents:
# Ignore everything in the root except the "wp-content" directory.
/*
!.gitignore
!wp-content/
# Ignore everything in the "wp-content" directory, except the "mu-plugins", "plugins", and "themes" directories.
wp-content/*
!wp-content/mu-plugins/
!wp-content/plugins/
!wp-content/themes/
With this configuration in place, the repository will store only the files from wp-content/plugins, wp-content/mu-plugins, and wp-content/themes.
I recommend reading this GitKraken article to get started with Git.
Connecting the Repository to Buddy
After you set up the repository, connect it to Buddy. First, choose where you host your files. Choose between GitHub, Bitbucket, GitLab, Buddy Git Hosting, and a private Git server.

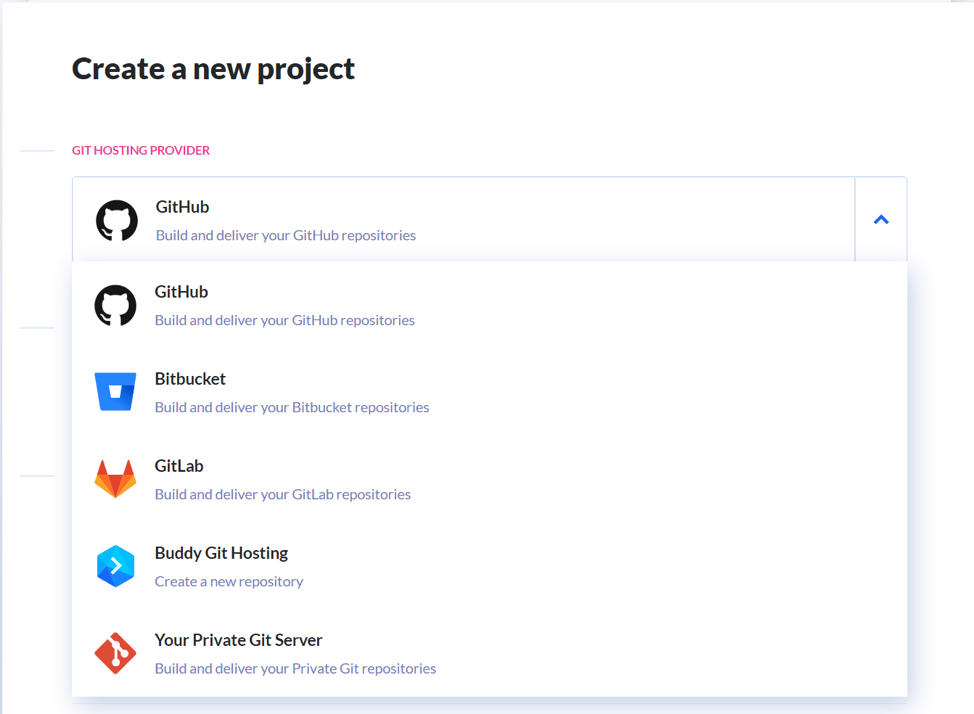
When you connect the repo, Buddy encourages you to add your first action and start automating.

Adding Pipelines
What is a pipeline? Think of it as a set of actions carried out in the specified order, triggered by an event of your choice.

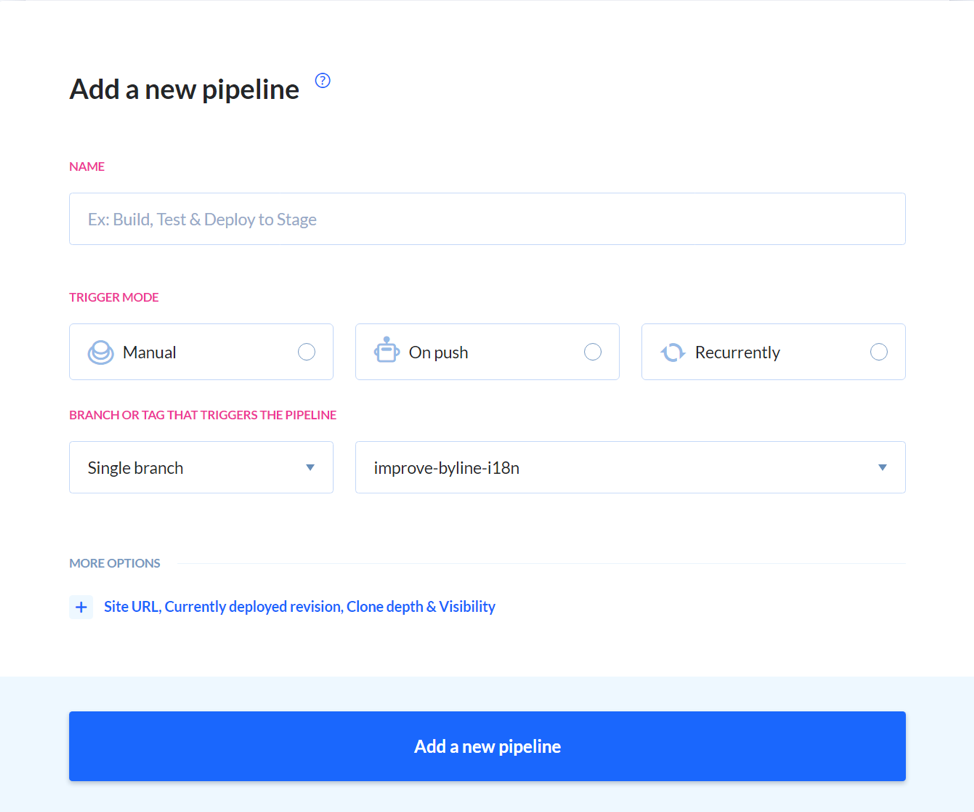
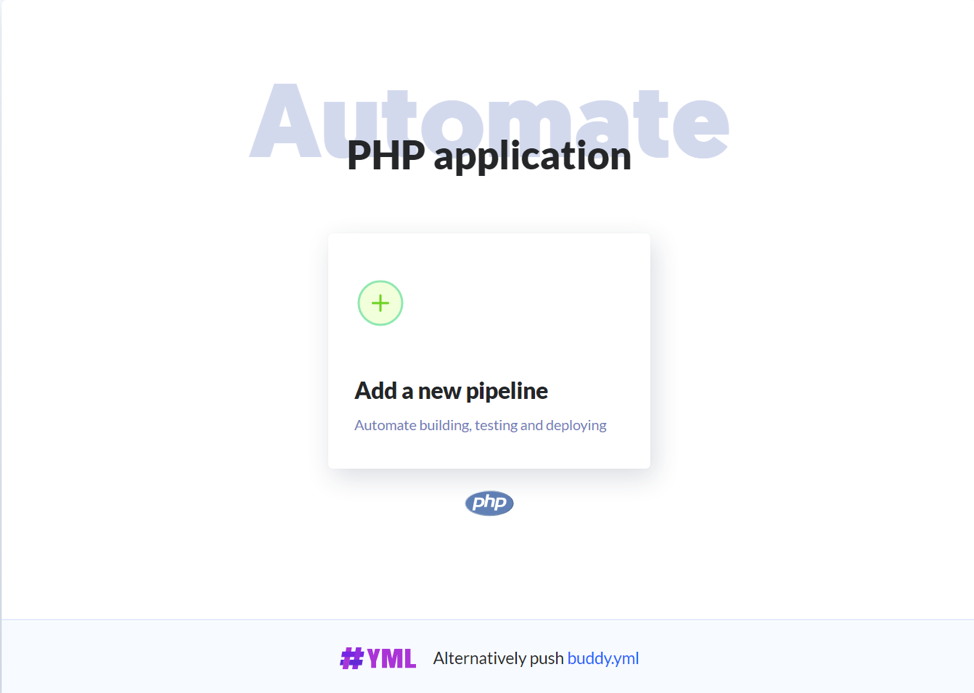
When you add a new pipeline, you must define its name, choose the trigger (manual, push to the repo, recurrency), and choose the branch which the pipeline handles.
Click “Add a new pipeline” to reveal a list of actions.

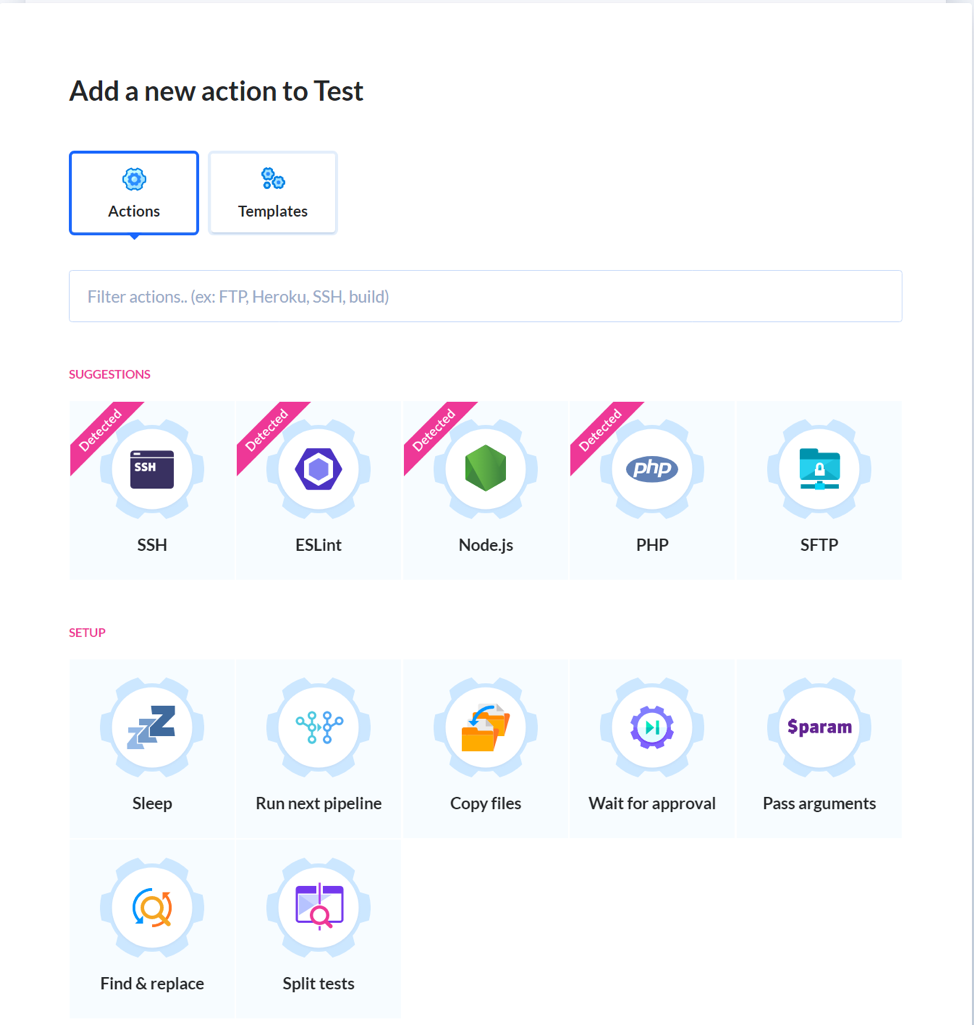
Building Assets and Installing Libraries
Thanks to package managers, such as Composer or npm, you can make your life much easier when it comes to managing package versions and ensuring that all installed libraries or packages are compatible with each other.
Additionally, you can get a lot of things done using scripts run with Composer or npm:
- Converting SCSS to CSS
- Running unit tests
- Checking code for errors with linters or PHPCS
However, before you start adding actions to your pipeline, I recommend reading these articles:
Now that you know how to use these package managers, let's handle the actions. To add Composer to your pipeline, add the PHP action and enter these lines in the action's terminal:
cd wp-content/themes/THEME_NAME
composer install


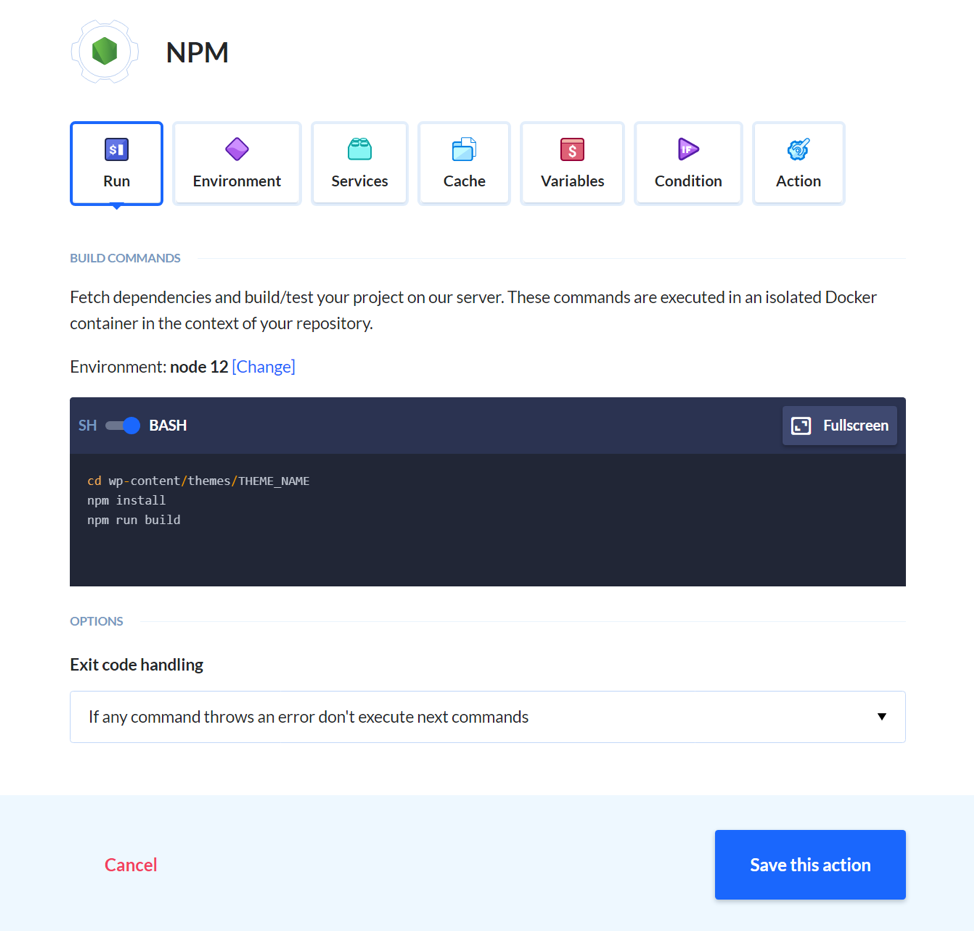
Next, install libraries and run npm scripts. You can handle this by adding a NodeJS action and entering these commands in the action's terminal:
cd wp-content/themes/THEME_NAME
npm install
npm run build
The npm run build command isn't universal — your app might use a different command to trigger builds. Check the package.json file to find out what command is used for building.

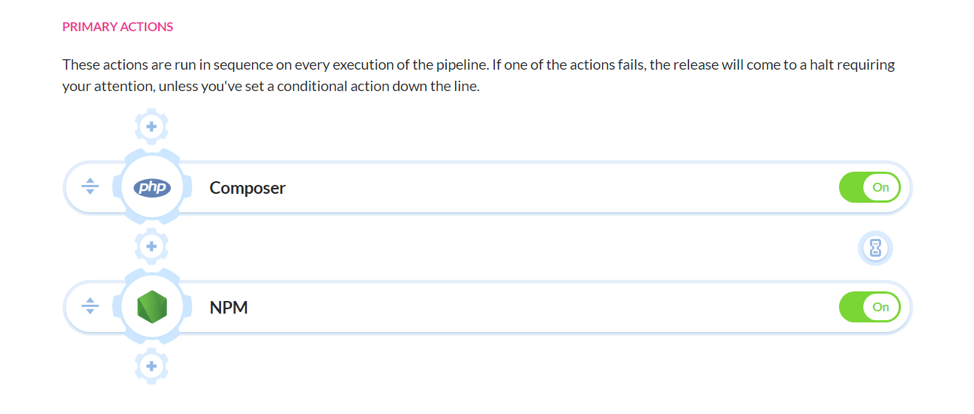
At this point, your pipeline should look like this:

Unit Tests and Code Analysis
So the website is ready for deployment — all libraries downloaded, all assets built. Now it's all about uploading it to the server, right? Before you do that, how about you run some tests that check if the code you've written works the way it should?
You can handle this testing stage in a couple of different ways:
- Use code sniffers — tools that check if the code meets set standards. For WordPress, we recommend using PHPSC fed with the right standards.
- Use static code analysis tools — PHP Stan and a WP plugin will help you find all errors without having to run the code.
- Use unit tests created with PHP Unit. These tests allow us to check if the methods we prepared work the way they should in isolation. We recommend reading this article about integrating PHP Unit with Buddy for WP applications, too.
Depending on your specific needs, decide which tools and approaches are right for you.
Use Composer to install the tools you need and add new commands to composer.json, for example:
{
"scripts": {
"test": "vendor/bin/phpunit",
"phpstan": "vendor/bin/phpstan analyse src tests"
}
}
After you handle the tools, add a PHP action to your pipeline and add these commands in the action's terminal:
composer install
composer test
composer phpstan

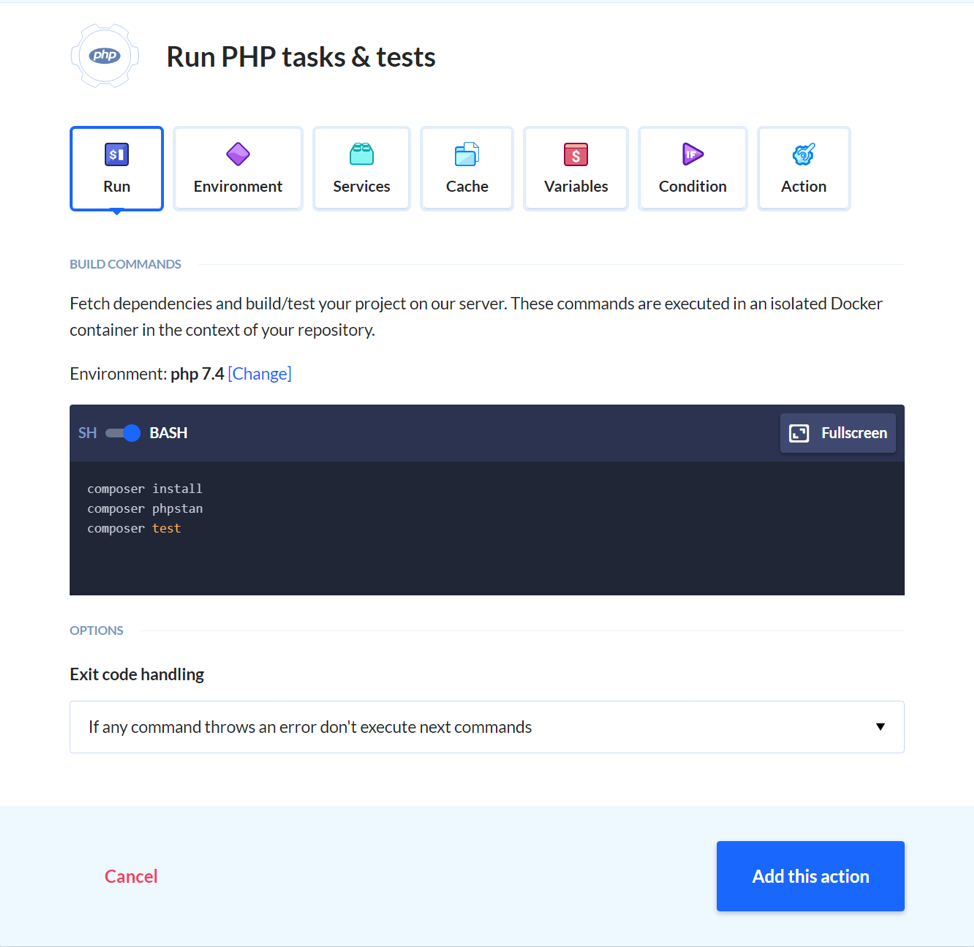
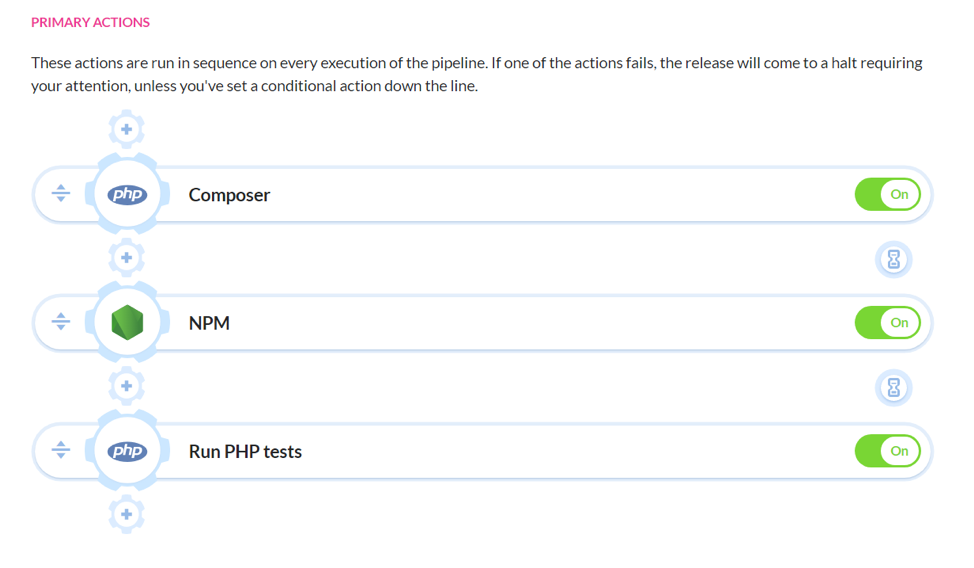
Now your pipeline should look like this:

Deploying to a Staging Environment
At this point, not only do you have your code all ready, but it's also checked and tested for any bugs. Time to deploy to production? Hold your horses, cowboy!
First, let's deploy the site to a staging environment. If you have a Nexcess server, creating a staging environment is extremely easy. Just follow this guide and you'll be done in no time.
With the environment ready, it's time to transfer all the files there. Use the SFTP action in Buddy to handle that. Remember to specify the right remote path — the directory to which the files are uploaded.

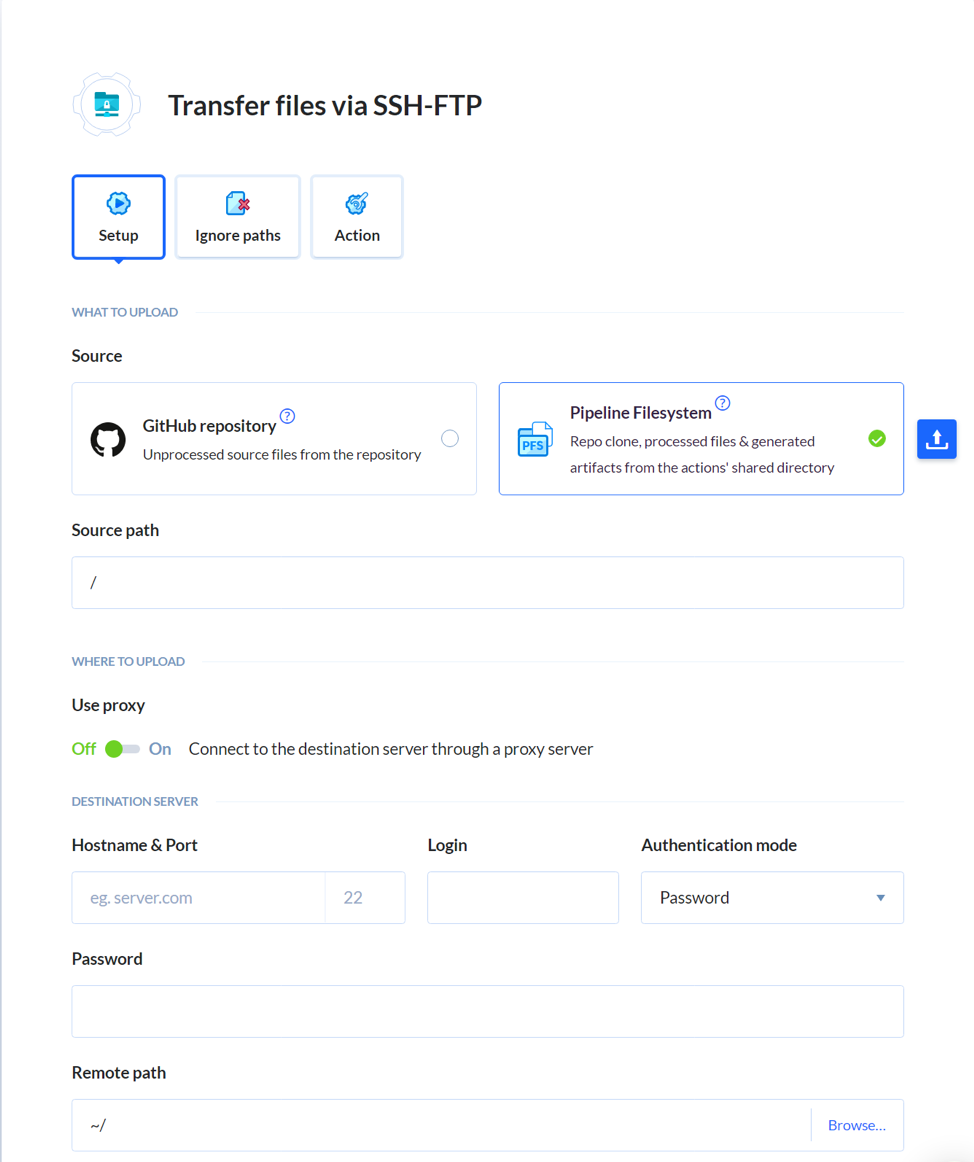
It's a good idea to use the action's Ignore paths tab to specify the list of files and directories you don't want to upload to the server, e.g. node_modules.
Once everything's uploaded to the staging server, you have to make sure that no additional actions run without your specific approval. Why? The fact that the code has been thoroughly tested doesn't automatically mean that you want to push it to production right away.
Sometimes the QA team wants to click around and check a few things manually. You should give them a chance to do that.
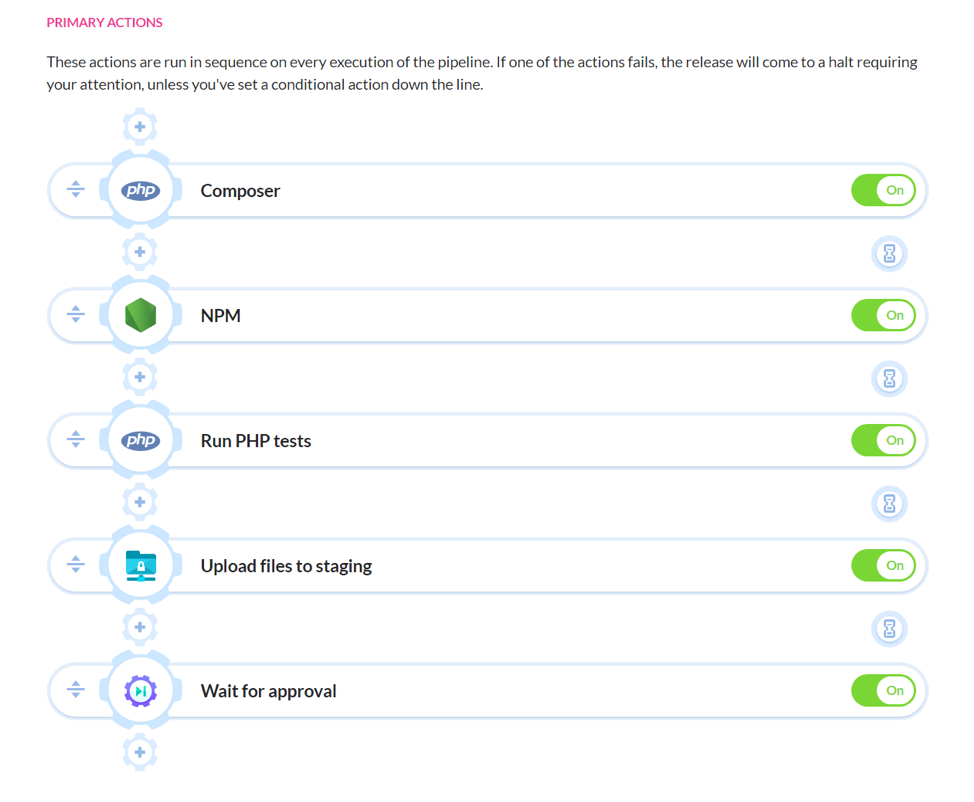
To facilitate that, add the Wait for approval action which stops the execution of any downstream steps until the person with the right permissions approves it.


With that said, here's what your pipeline should look like now:

Additional Tests
I know it's tempting to just approve the execution, get it over with, and deploy the app to production. But bare with me — let's run some more tests and make sure nothing's broken. It's worth it, believe me!
Buddy has a couple of actions you can use to run additional tests. You'll be happy to hear that they require almost no additional configuration.
Let's start with Visual Tests, which are regression tests that allow you to check if the look of the specified sections hasn't changed in an undesired way. To get this going, simply add a list of pages we want to compare. If Buddy detects differences between the pages, you'll have to give it a green light to mark the action as successful.


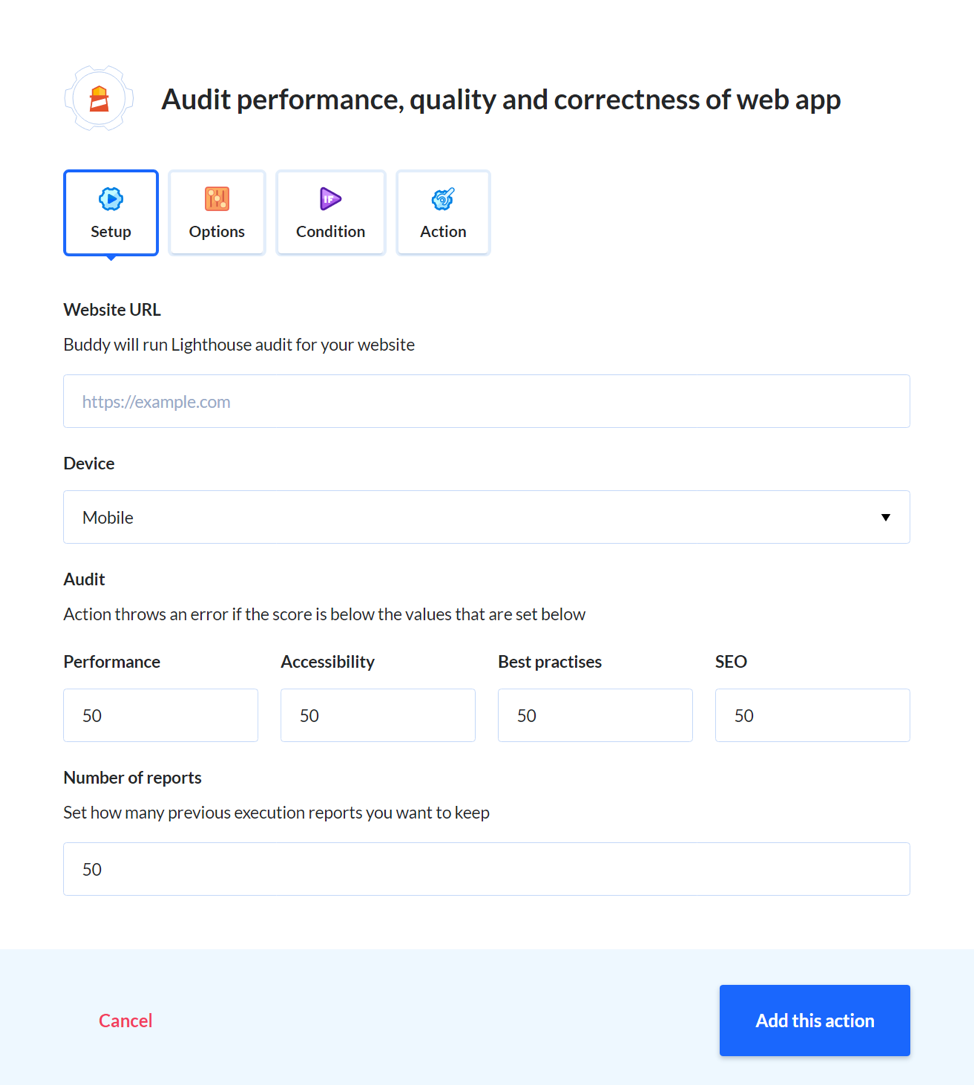
Next, it's worth checking if our changes don't have a negative impact on the Google Page Speed rating. We don’t want to slow down the page load time. To measure that, you can use the Lighthouse action. All you do is specify the page you want to test and the thresholds for results.

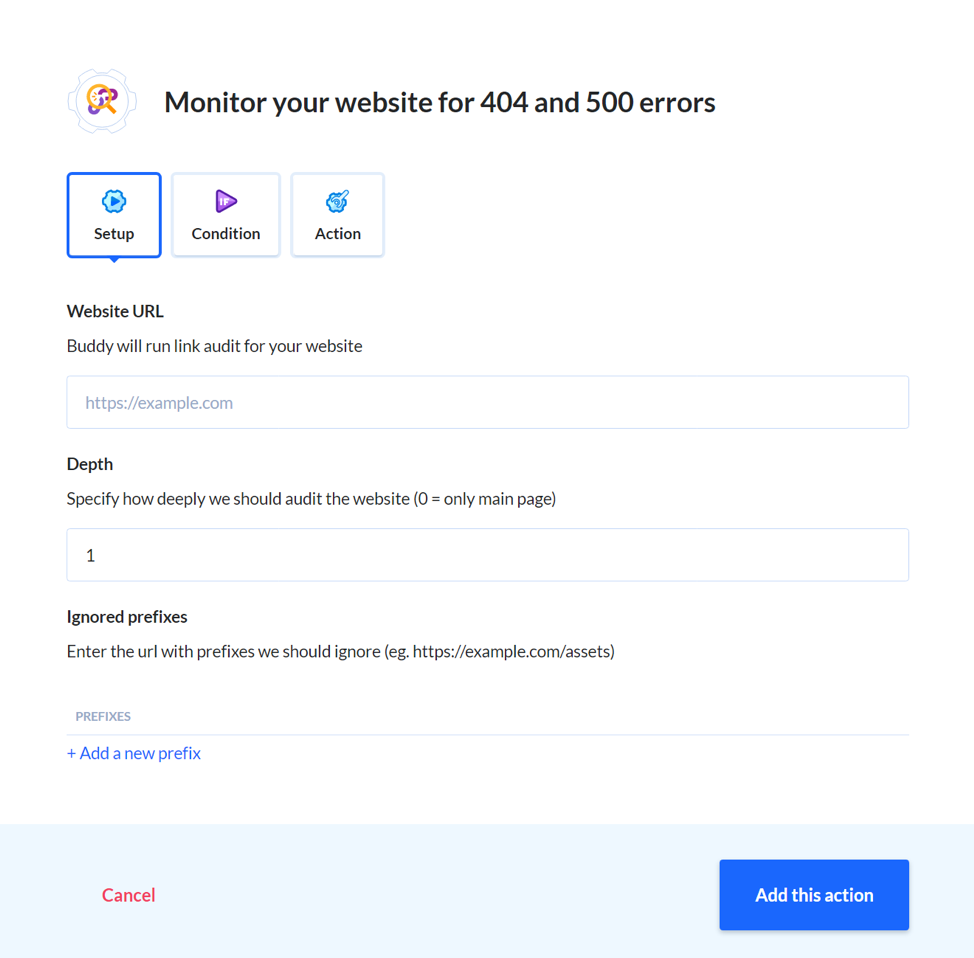
The last thing that's worth checking is if all links on your site actually work. To do that, you can use the Link Validator action, which checks if any of the links on your site return the erroneous 4xx or 5xx status responses.

Is this all you can do? Of course not! I won't describe EVERYTHING, though. We've covered the most universal and useful cases, but feel free to read up on some more interesting actions here.
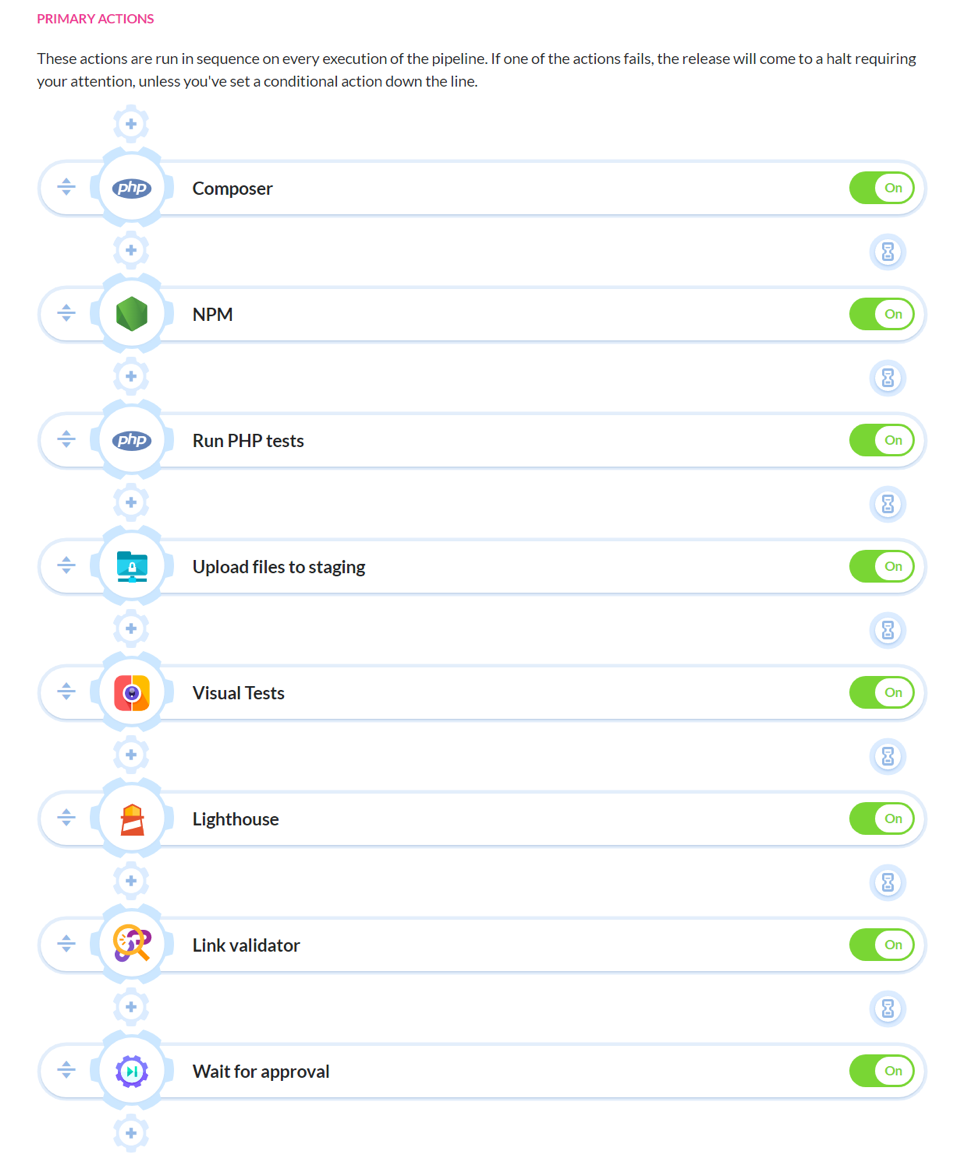
Here's what your pipeline should look like after adding all of the additional tests:

Deployment to Production
Okay, now it's time to deploy to production. Finally!
The first step — enable maintenance mode using WP-CLI. To make this happen, add an SSH action, configure server access details, and add these commands in the action's terminal:
cd public_html
wp maintenance-mode activate
Thanks to this, the user will get an appropriate downtime message when you upload files to the server.
Next, add the SFTP action, which will transfer all files to the server. The action's config will be very similar to the one we used to transfer files to the staging server:
Then add another SSH action which disables the maintenance mode. Add these commands to the action's terminal:
cd public_html
wp maintenance-mode deactivate
With all of these steps done, it's a good idea to notify all of the relevant people using Slack, Telegram, or other communication media. Read more about all available integrations here.
Don't stop at sending notifications when everything goes according to plan. It's a good idea to communicate when something goes wrong so that your team can jump in and fix the errors ASAP.
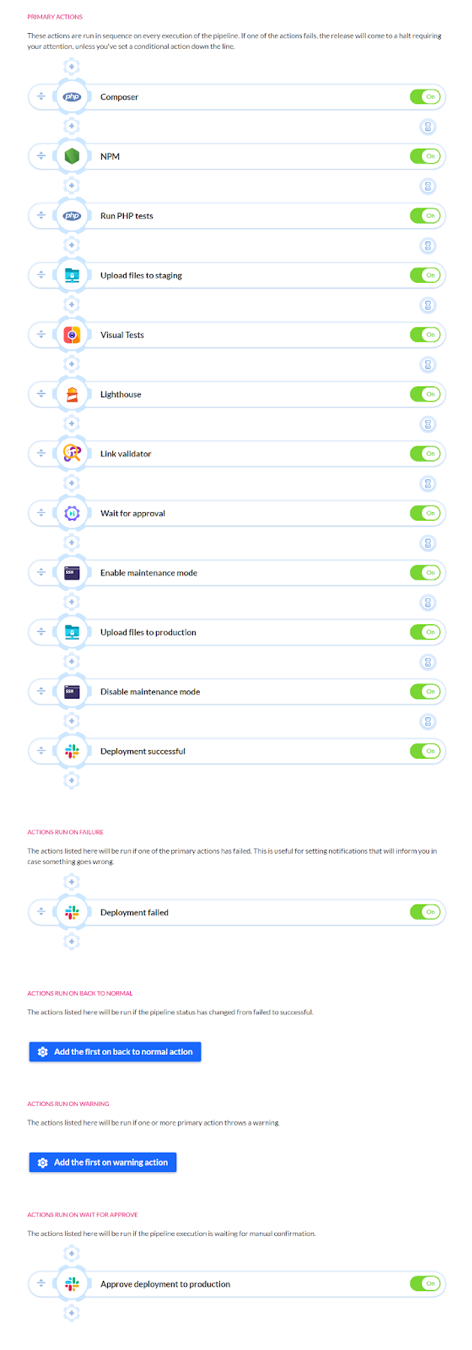
Here's what the final pipeline looks like when you're using Slack for notifications:

Now You Know WordPress Deployment Automation
Thanks to WordPress deployment automation and tests, deploying to production won't give you nightmares anymore.
While implementing the presented flow might take you a while, nobody says you can't add these steps gradually.
You can start easy with just building your assets and deploying. Then it's worth spending some time adding tests to the mix — start with the ones that don't require too much configuration, such as PHPCS or PHPStan. Alternatively, you can go with the testing actions that Buddy offers — Visual Tests, Lighthouse, etc.
When you're ready, bring out the big guns and add the tests that you have to prepare by yourself, such as PHP Unit or Cypress.io.
In need of hosting that’s optimized for WordPress? Check out Nexcess’ fully managed WordPress hosting plans today.

