

Consumers want to feel connected to the brands they buy. Lifestyle brands take advantage of this fact and make it easy for consumers to envision their product as part of a larger identity.
If you’re an ecommerce company, one of the simplest ways you can tap into the power of the lifestyle brand is to opt for lifestyle product photography: product images with a warm, breezy, and familiar aesthetic, usually in a styled setting.

This look is best achieved with natural light rather than studio lighting because natural light can help make your products look the way they do in real life. As an added benefit, natural lighting photography doesn’t require a lot of expensive equipment, extensive photography training, or hiring a photographer.
In this post, we’ll go over how to capture incredible images without the use of studio lighting equipment, as well as our best natural light photography tips.


The Basics of Natural Light Photography
You don’t need to take a lengthy course on photography to capture quality images in natural light, but there are a few camera settings you should be familiar with before beginning:
- Aperture is the size of the opening in your camera lens that lets in different amounts of light. The aperture is measured in f-stops. The higher the f-stop, the narrower the size of the opening and the less light is let into the camera. A higher f-stop will result in photos where more is in focus (think Ansel Adams). A lower f-stop means less will be in focus which can put more emphasis on your product.
- Shutter speed refers to the length of time the shutter on your camera stays open when taking a photo. Fast shutter speeds can “freeze” motion at a single moment with no blur. Slow shutter speeds do the opposite — often leading to intentionally (and artfully) blurred photos. You can have shutter speeds as quick as 1/100th of a second, or as slow as a couple of seconds depending on what look you want.
Adjusting each of these settings will help you get the right exposure, or the right amount of light and darkness, in your images. If you’re not comfortable adjusting these settings on your own, you can always turn to the automatic or program settings built into your camera.
Equipment You Need for Natural Lighting Photography
While you won’t need to purchase thousands of dollars of studio lighting, you do need the following essentials when shooting natural light photos:
- A DSLR camera. This is a type of camera that is an important step above a regular point-and-shoot digital camera. A DSLR camera has adjustable settings and changeable lenses to modify both the aperture and shutter speed to optimize for natural light.
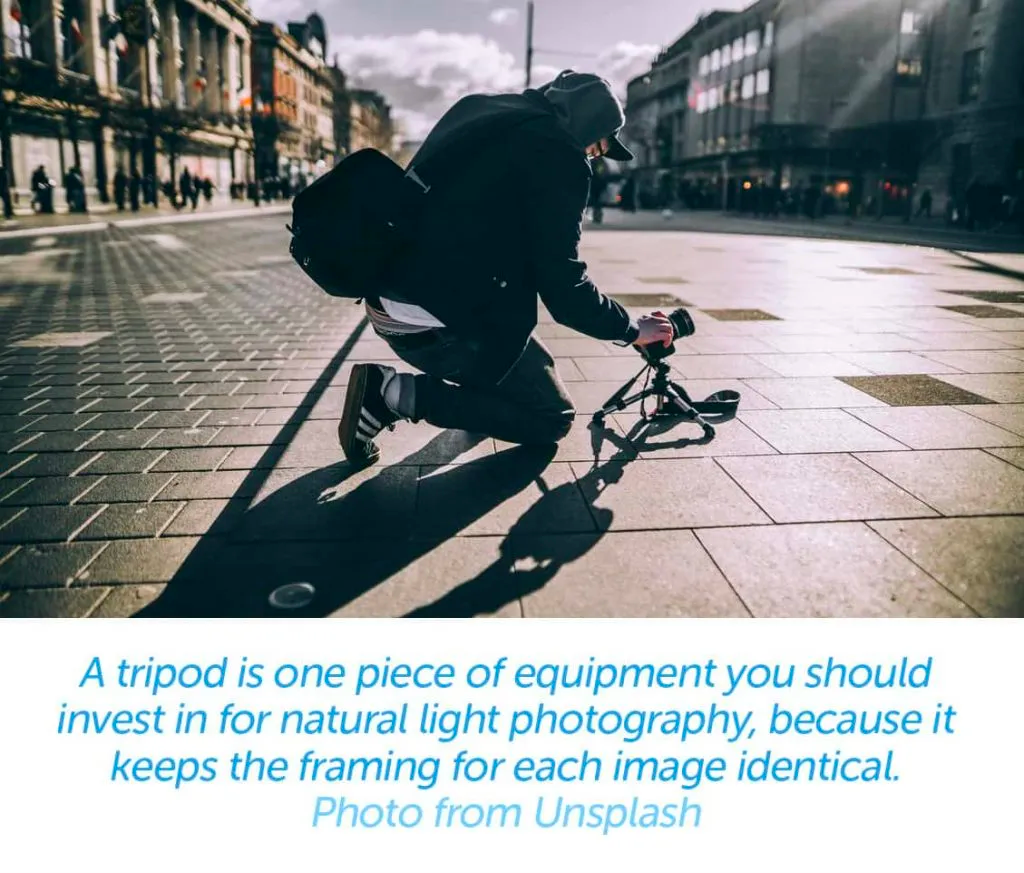
- A tripod. Using a tripod ensures that your photos aren’t blurry and the framing for each product is identical because it will keep the camera completely still throughout your photoshoot.
- A reflector. This is something you can use to reflect the light in a different direction if needed. If you’re on a budget, you can use white foam boards from your local craft store. Professional reflectors are available for a purchase price ranging from $15 to $300.

Natural Light Photography Tips
How to best photograph in natural light depends on many variables: whether you are indoors or outdoors, how cloudy it is, and the time of day.
Photographing With Indoor Window Light
When indoors, the natural light source will likely be from a window. This means the light will be soft and coming from one side.
Here are our tips for working with window light:
- Have your subject or product face toward the window, not away. This reduces the chance for shadows.
- Try to find a long window so that the light isn’t only coming from above.
- Use a reflector to even out the light. Place the reflector at an angle opposite to the source of natural light.


Photographing on Cloudy Days vs. Bright and Sunny Days
Your photos will look drastically different on an overcast day than they do on a day with full sun.
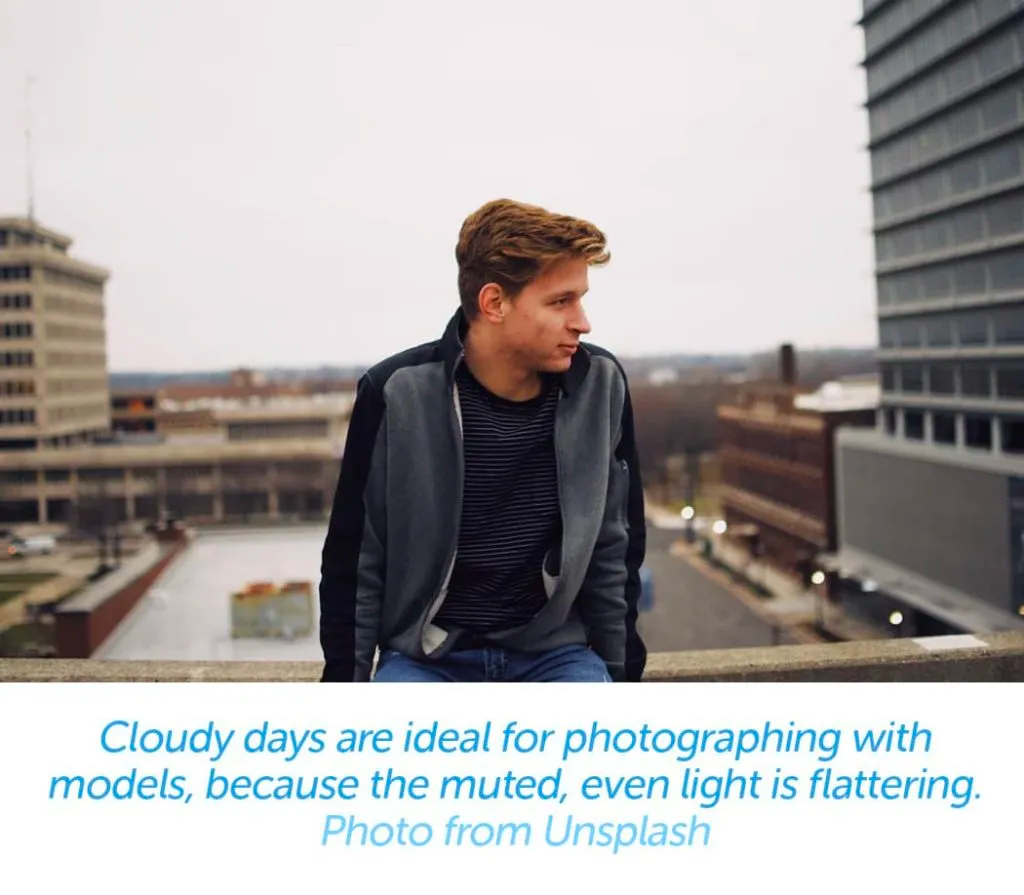
Many photographers love the soft, even light of cloudy days. These images have a bluish tone and there is little contrast. This type of natural light is ideal for any photos involving models or products with muted colors.
Sunny days have strong, direct light which can cause harsh shadows. However, when done right, this type of natural light can be powerful. It’s best for wide, distant photos or for up-close images of products with contrasting patterns or textures.
Here are a few tips for working with each type of light.
Cloudy Day
- Be extra vigilant for changes in light as the clouds may be shifting constantly.
- As a rule of thumb, widen your aperture setting by decreasing your f-stops by two or three. This can help increase the contrast between your subject or product and the background.

Sunny Day
- One photographer suggests setting your ISO between 50 and 100 and choosing a fast shutter speed of 1/100th of a second to optimize exposure on bright days.
- Use a neutral density filter to reduce the light coming into your camera. The filter works like sunglasses for your camera lens.
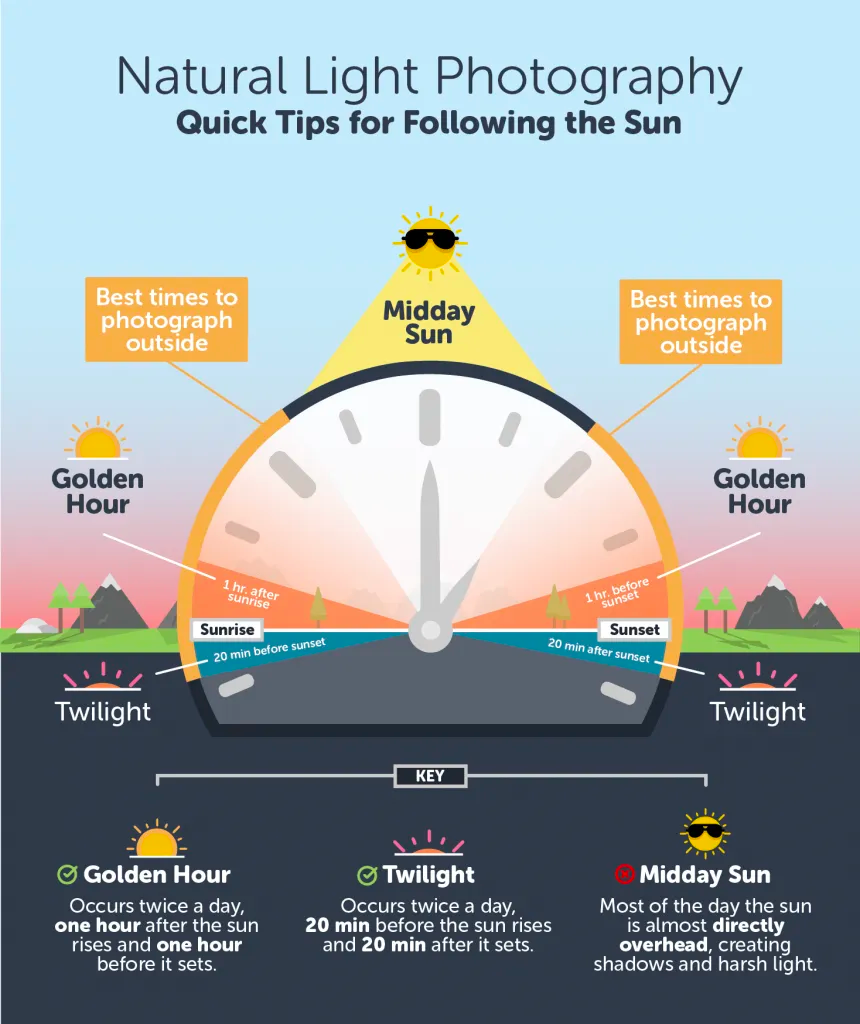
Photographing During Different Times of Day
Because you’re relying on the sun for light, the time of day heavily impacts how your images look as the sun moves through the sky. There are three main changes in light every day: golden hour, midday sun, and twilight.
Golden Hour
Golden hour occurs twice a day, one hour after the sun rises and one hour before it sets. The distinctive “golden” tone of the light at this time is what gave it its name. Here are our tips for photographing during golden hour:
- Come highly prepared with how and where you want to photograph because you only have an hour to get all your shots.
- Don’t use the automatic setting on your camera, because it “corrects” for the special light you are there to capture. Instead, set your aperture and shutter speed manually. If you aren’t confident with manual settings, choose the “cloudy” or “shade” automatic setting.


Midday Sun
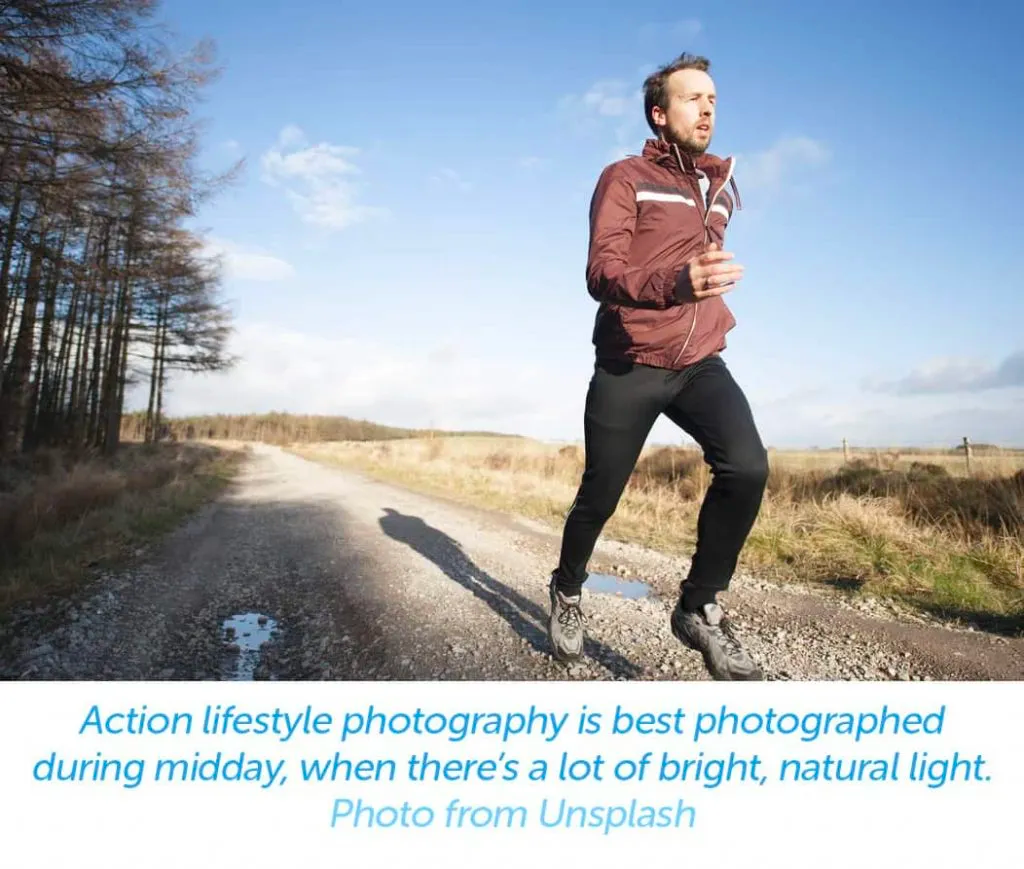
During most of the day, the sun is almost directly overhead, creating shadows and harsh light. This means you may have to work harder to find a position that doesn’t have shadows. On the other hand, the bright light is ideal for photographing texture or action shots. Here are our tips for photographing during midday sun:
- Avoid shadows by shooting in the shade, underneath a porch or tree.
- Use a neutral density filter to avoid washed-out images (as discussed for photographing on sunny days).

Twilight
Similar to the golden hour, twilight occurs twice a day. The first time is about 20 minutes before the sun rises, and the second is about 20 minutes after it sets. The light during twilight is dark and blue, but it’s not yet as dark as night. Here are our tips for photographing during twilight:
- When you need to get an up-close photo, don’t use the zoom on your lens. Instead, walk up to the subject or product. This way, you eliminate the shaking that’s amplified through zoom, especially in low light. You may need the help of a tripod to eliminate blur from movement.
- Use a lens with a much faster shutter speed than usual to capture crisp photos in low light.
Find the Natural Light That Best Aligns With Your Brand
Some people will tell you to always photograph during golden hour, while others will extol the benefits of photographing indoors with natural light streaming through a window. What really matters, however, is that your lifestyle product photography ultimately aligns with your brand.
Experiment with different types of photos taken in different types of natural light to find the image look that communicates the feeling your brand needs to convey.
Need an Ecommerce Hosting Solution?
Fully managed WooCommerce hosting from Nexcess comes standard with image compression which will keep your images looking excellent while retaining site speed, along with premium plugins which will enable more functionality for your product pages to shine.
Check out our plans to get started today.

