
Are you trying to learn how to install a Magento 2 extension? You can do it in two ways — using Composer or a .zip file. Although Adobe recommends using Composer, we’ll teach you both ways.
The steps to install Magento extensions are similar to those required to install a Magento theme, with a few crucial differences.
For instance, when installing a theme using a .zip archive, you must place the theme files in the app/design/frontend directory. In contrast, when installing a Magento 2 extension using a .zip file, you need to place the files in the app/code directory.
Are you ready to learn more?
Here’s what we’ll cover in this tutorial:
- How To Install a Magento 2 Extension
- How To Install a Magento 2 Extension With Composer
- Final Thoughts: How To Install a Magento 2 Extension
How To Install a Magento 2 Extension
1. Upload the Magento 2 extension files to your server.
2. Extract the .zip extension file.
3. Verify and copy the Magento extension files into the app/code folder.
4. Install the Magento 2 extension and check its status.
5. Clear Magento cache and disable maintenance mode.
Before we show you how to install a Magento 2 extension, make sure you backup your server, set pre-install file permissions, enable developer mode, and put Magento in the maintenance mode.
It also helps to install the extension on a testing server or local development environment to check for extension compatibility.
Get fully managed Magento hosting
Accelerate your store's potential, without the tedious maintenance
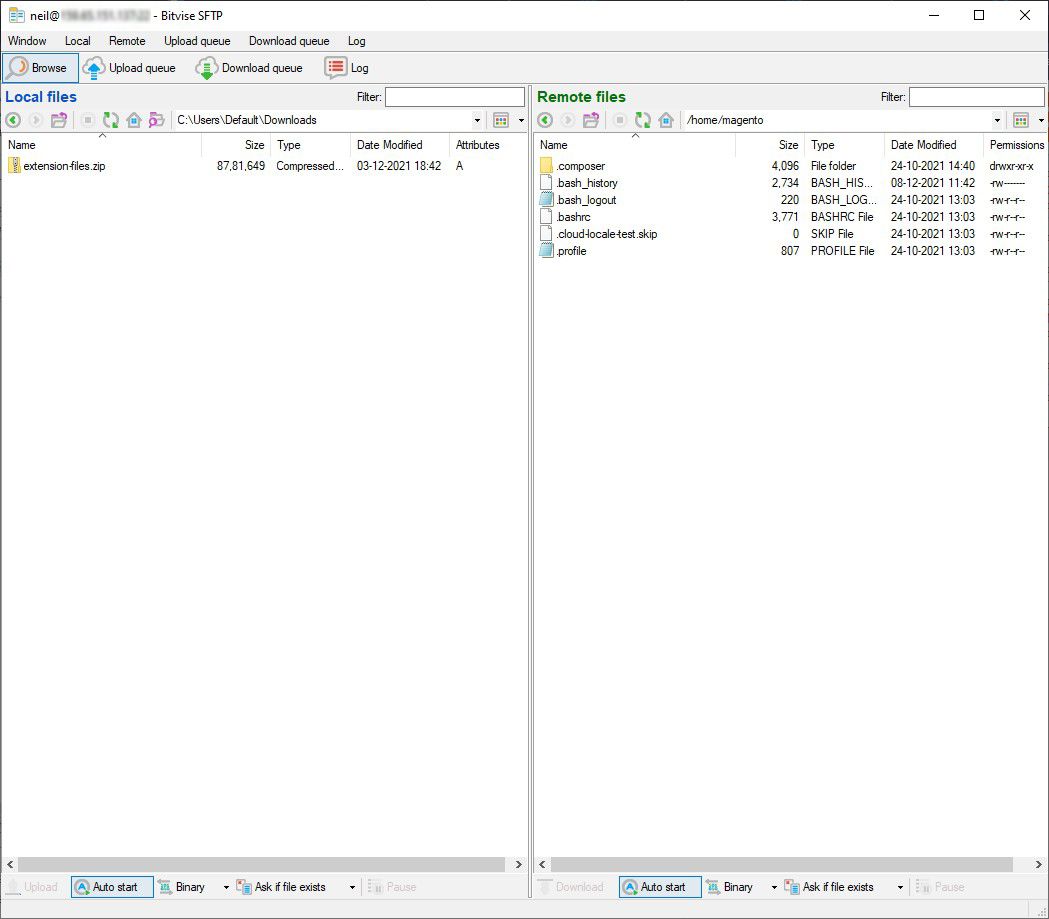
Step 1: Upload the Magento 2 Extension Files to Your Server
Log in to your Magento server as the file system owner.
Upload the .zip archive file to a new folder inside your user’s home directory using SSH or SFTP.

Step 2: Extract the .zip Extension File
Extract the .zip extension file into a new folder called extension using:
<pre><code>

$ unzip <archive>.zip -d /home/magento/extension

</code></pre>
Once you finish the extension installation process, you can delete this folder using:
<pre><code>

$ rm -R /home/magento/extension

</code></pre>
Step 3: Verify and Copy the Magento Extension Files Into the app/code Folder
Verify the extracted component file structure meets Magento’s required “vendor/module-name” format.
Navigate to the Magento project root directory and copy the extension files to the app/code folder using:
<pre><code>

$ cp -R /home/magento/extension/* app/code

</code></pre>
The app/code directory doesn’t exist in the default Magento filesystem. If this is your first attempt to install a Magento extension manually, create the directory using:
<pre><code>

$ mkdir app/code

</code></pre>
Step 4: Register the Magento 2 Extension and Check Its Status
Complete the Magento 2 extension installation process by executing:
<pre><code>

$ php bin/magento setup:upgrade

$ php bin/magento setup:di:compile

$ php bin/magento setup:static-content:deploy -f

</code></pre>
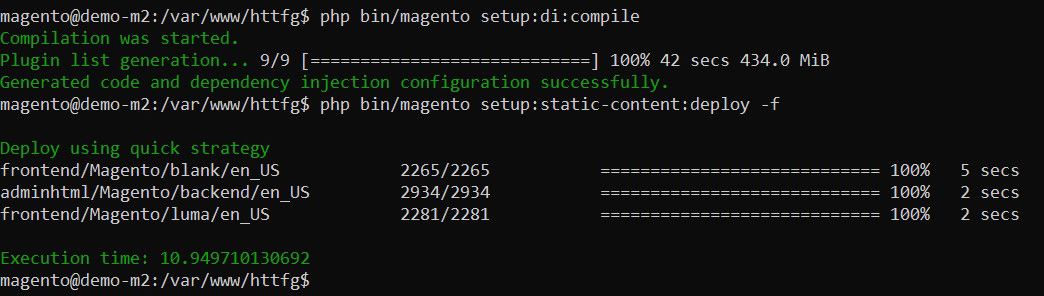
The “setup:upgrade” command registers the Magento 2 extension and updates the Magento database schema and data. The subsequent commands compile Magento code and deploy static view files.
Note: You don’t need to deploy static view files in developer mode unless your extension developer’s documentation mandates it.
Verify the status of the extension:
<pre><code>

$ php bin/magento module:status <VendorName>_<ComponentName>

</code></pre>
If it’s disabled, you can enable it using:
<pre><code>
$ php bin/magento module:enable <VendorName>_<ComponentName> --clear-static-content
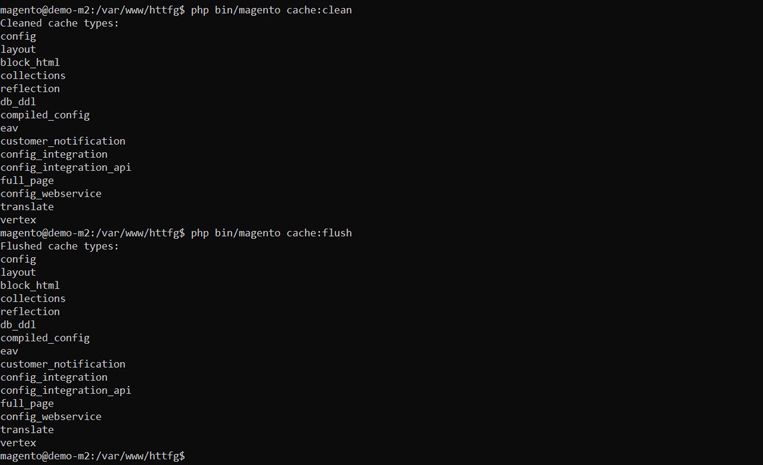
</code></pre>Step 5: Clear Magento Cache and Disable Maintenance Mode
Clear the Magento cache using:
<pre><code>

$ php bin/magento cache:clean

$ php bin/magento cache:flush

</code></pre>
Follow Adobe’s guide to set permissions for a production file system. Then, disable maintenance mode using:
<pre><code>

$ php bin/magento maintenance:disable

</code></pre>
Nice work! You’ve learned how to install a Magento 2 extension using a .zip file.
How To Install a Magento 2 Extension With Composer
Before we show you how to install a Magento 2 extension via Composer, make sure you:
- Back up your server.
- Set pre-install file permissions.
- Enable developer mode.
- Put Magento in maintenance mode.
Once you’ve met the above conditions, follow our installation guide.
Step 1: Obtain the Extension’s Composer Name and Version
Log in to your Magento Marketplace account and navigate to [Your name] > My Profile.


Go to Marketplace > My Products and click My Purchases.

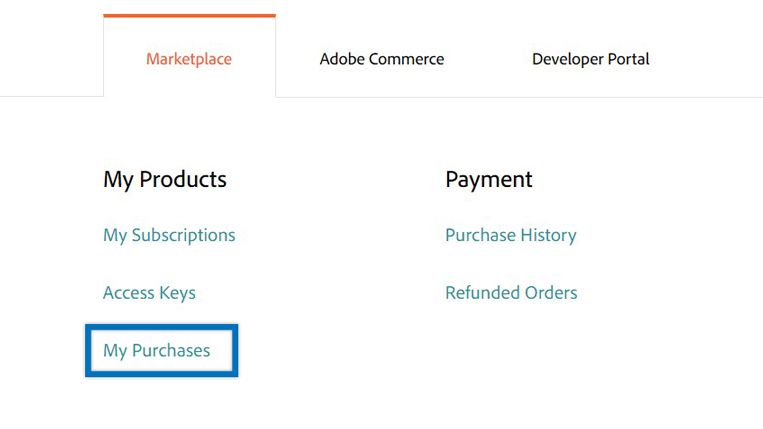
Locate the Magento 2 extension you want to install and note its Component Name.
Click on the Versions available dropdown and note the version number to install a specific version.

Step 2: Update the Magento composer.json File
Log in to your Magento server as the file system owner and navigate to the Magento root folder to install the module via Composer.
Update the composer.json file from the command line interface (CLI) using:
<pre><code>

$ composer require <component-name>:<version>

</code></pre>
Replace “component-name” and “version” with the values obtained in the previous step. For example:


If prompted to enter access keys, copy and paste your public key as the username and private key as the password.
Wait for Composer to update the Magento project dependencies. In case of errors, address them before proceeding.
Step 3: Register the Extension and Clear Magento Cache
Run the following commands to register the Magento 2 extension, compile code, and deploy static view files:
<pre><code>

$ php bin/magento setup:upgrade

$ php bin/magento setup:di:compile

</code></pre>
Clear the Magento cache by executing:
<pre><code>

$ php bin/magento cache:clean

$ php bin/magento cache:flush

</code></pre>
Step 4: Check the Magento 2 Extension Status
Verify the extension status:
<pre><code>

$ php bin/magento module:status <VendorName>_<ComponentName>

</code></pre>
If disabled, enable the extension:
<pre><code>

$ php bin/magento module:enable <VendorName>_<ComponentName>  --clear-static-content

</code></pre>
Step 5: Update File Permissions and Disable Maintenance Mode
Set file permissions for a production file system based on your hosting setup. Then, disable maintenance mode as follows:
<pre><code>

$ php bin/magento maintenance:disable

</code></pre>
Congratulations! You’ve successfully learned how to install a Magento 2 extension using Composer.
Final Thoughts: How To Install a Magento 2 Extension
Learning how to install a Magento 2 extension is the best way to add and extend Magento store functionality. Since Adobe deprecated the Web Setup Wizard in Magento 2.3.6 and above, you can only install Magento 2 extensions using the methods described above.
No matter which method you choose, make sure you backup your server before you begin and set production file permissions after you’re done.
If that seems too much work, sign up for managed Magento hosting with Nexcess and enjoy the convenience of automatic nightly backups and a secure Magento 2 hosting environment.
Browse our plans to learn more.

