

Are you looking to better manage your Magento 2 ecommerce platform? Our Magento 2 FAQ is right here for you with the answers to the most frequently asked questions.
Is Magento 2 a good platform?
Are you in the market for a complex yet powerful, an open-source Content Management System (CMS) ecommerce platform like Magento 2 will satisfy your requirements. Magento brings you endless customization and scalability possibilities for your business.
This Magento 2 FAQ article will address the most common questions.
How do I upgrade to Magento 2?
The answer this Magento 2 FAQ question is made up of five steps.
Step 1: Back up your Magento store
Learn how to create a manual backup using the command line in our related help article.
Step 2: Turn on maintenance mode
It would be best if you put your store in maintenance mode while upgrading. Use the command below to enable it:
php bin/magento maintenance:enableStep 3: Upgrade to Magento 2 store
The step to upgrade to Magento 2 store has several substeps.
Step 3.1: Check the Composer version
Check Composer version using the below command:
composer -V

Magento 2.4.2 introduced Composer 2 support. Magento 2.4.1 must first be upgraded to a version of Magento compatible with Composer 2. Hence, if you find that your Composer version has not been upgraded, run the following command:
mkdir -p ~/.local/bin ; cd ~/.local/bin ; wget https://getcomposer.org/composer-2.phar ;
chmod 755 ./composer-2.phar ;mv composer-2.phar composer ;
echo "export PATH="$HOME/.local/bin:$PATH"" >> ~/.bashrc ;
echo "COMPOSER 2 INSTALLED" ; source ~/.bashrc ; composer -V
Step 3.2: Flush the Magento cache
Refer to our Magento help article on how to flush the Magento cache, or follow the steps in the command lines below:
php bin/magento cache:flush
rm -rf var/cache/*
rm -rf var/page_cache/*
rm -rf var/generation/*
Step 3.3: Run the upgrade module for Magento via CLI
Run the upgrade module and complete the Magento 2 setup upgrade. Use the command below:
php bin/magento setup:upgradeStep 3.4: Run the compile command, followed by the reindex command
Next, you want to run the compile command, followed by the reindex command as shown below:
php bin/magento setup:di:compile
php bin/magento indexer:reindex
Step 4: Disable maintenance mode
Then, disable maintenance mode:
php bin/magento maintenance:disableStep 5: Check version
The overall Magento 2 setup and installation process has been improved. Now you may check the Magento version using the following command:
php bin/magento --versionDoes Magento 2 support WebP?
Yes, indeed! WebP is a suite of tools used to support the WebP image format, which was designed for speed. You may download the suite of tools via the following URL:
https://developers.google.com/speed/webp/download
In most cases, it is best to have all of them installed except for, since that's just a WebP file viewer, which isn't needed on a server. We hope this information about support for the WebP image format answered this Magento 2 FAQ question.
How to use the custom admin URL in Magento 2
In a common setup, the admin URL immediate follows the base URL. However, there are ways to the store admin URL in other paths, including for it to be located in one directory below the root.
Changing the Magento 2 admin URL path to another location is possible. Magento allows you to customize the admin URL for your store in three ways. So, the answer this Magento 2 FAQ question has three options.
1. Customize the admin URL for your store via the Magento 2 Admin Panel
You can customize the admin URL for your store via the Magento 2 Admin Panel by following these steps:
a. Log in to Magento 2 Administration > Stores> Settings > Configuration.
b. On the left menu, under the Advanced section, click Admin.
c. Expand the Admin Base URL section and Set Use Custom Admin URL to “Yes” and continue.
d. Then, enter the Custom Admin URL that you want to.
e. Set Custom Admin Path to “Yes” and continue. Then, enter the Custom Admin Path.
f. Click Save Config:


2. Customize the admin URL for your store via the env.php file
You can customize the admin URL for your store by changing the admin path in the env.php file:
a. Access the domain document root.
b, Open app/etc/env.php file in the website directory.
c. Search for the code that says 'frontName' and replace the code in the statements to one side of 'frontName' and replace 'administrator' with your new admin URL.
<?php
return [
'backend' => [
'frontName' => 'admin'

3. Customize the admin URL for your store by customizing the admin URL for your store via SSH
You can customize the admin URL for your store via SSH:
a. Log in to your server via SSH.
b. Navigate to the document root of your store.
c. Run the below command:
php bin/magento setup:config:set –backend-frontname=“newadminurl”How do you manually back up the Magento 2 site and database?
We keep 30 days of incremental automatic backups as a standard practice. So, despite the fact that your site will be supported naturally, as an admin, you have the option to manually make a backup of your site whenever you prefer.
Please note that the 30 days of automatic backups are run for live sites, developer sites, and staging sites. Here are steps to manually back up a Magento 2 site as an admin:
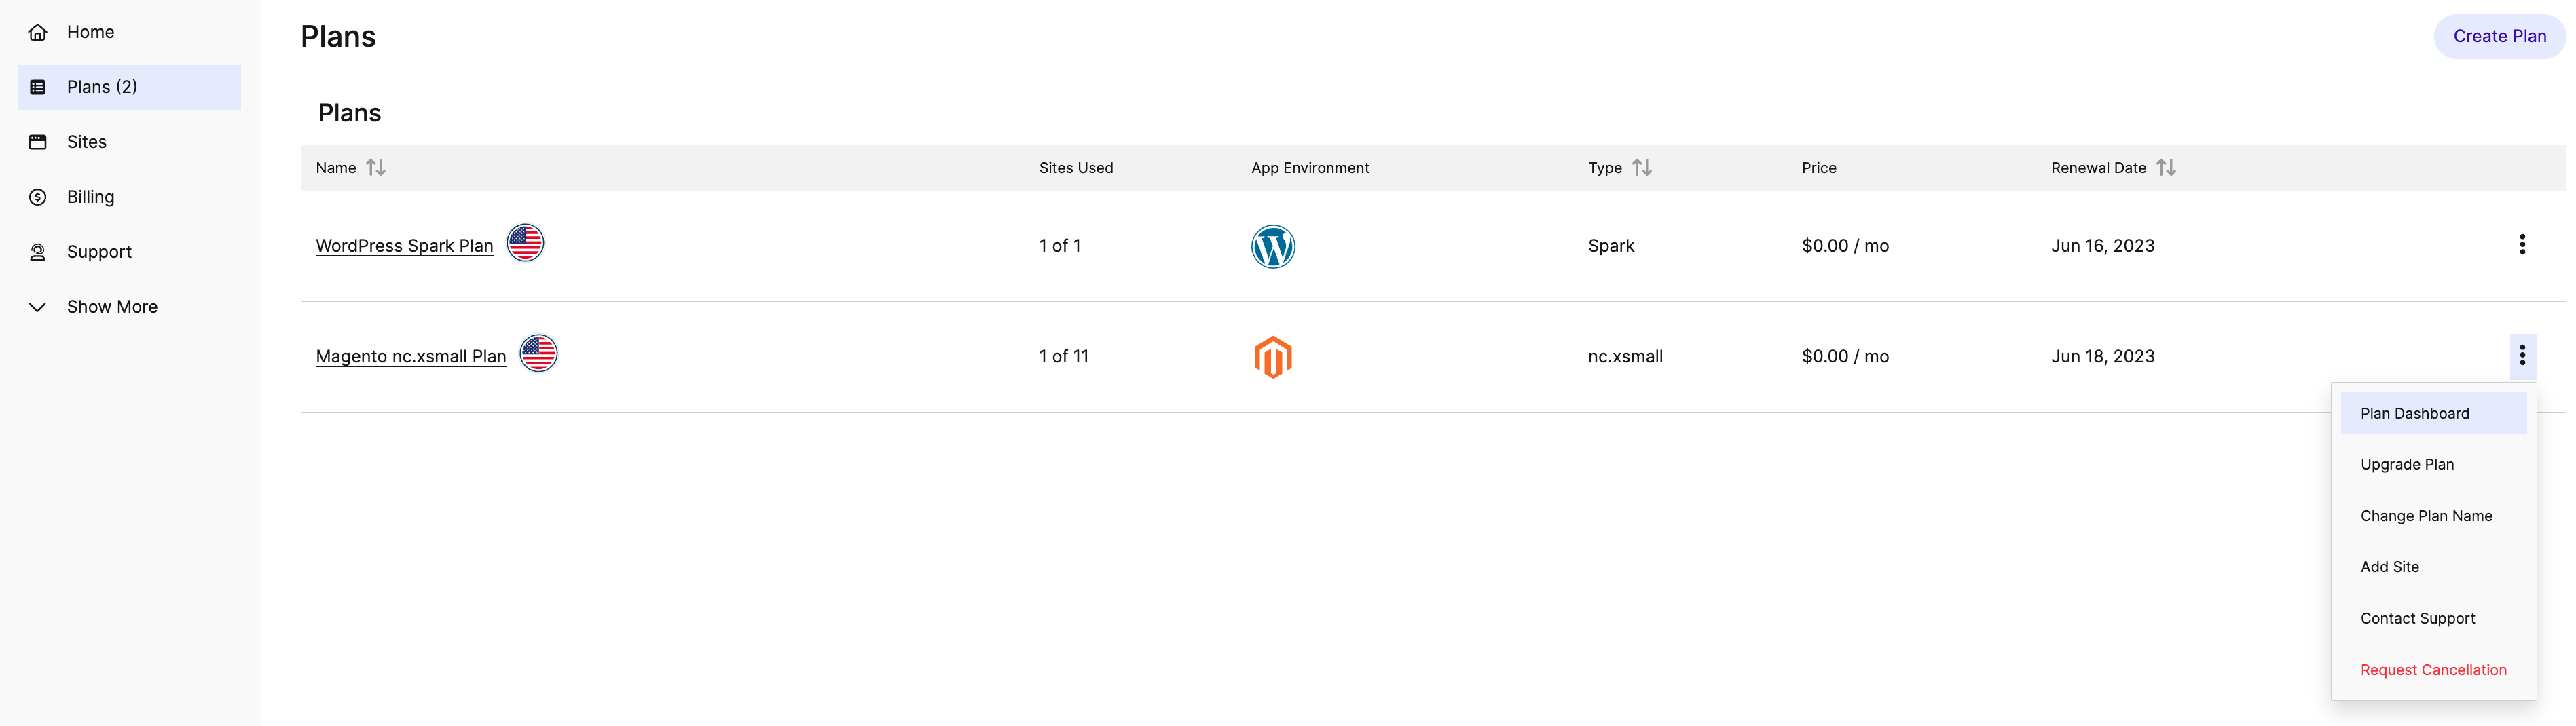
a. Log into your Nexcess Client Portal, and from the main menu click Plans:


b. Please choose your desired plan, then click its name or select Plan Dashboard from the menu:

c. Click the site name that you want to create the backup.
d. From the main menu, click Backups:

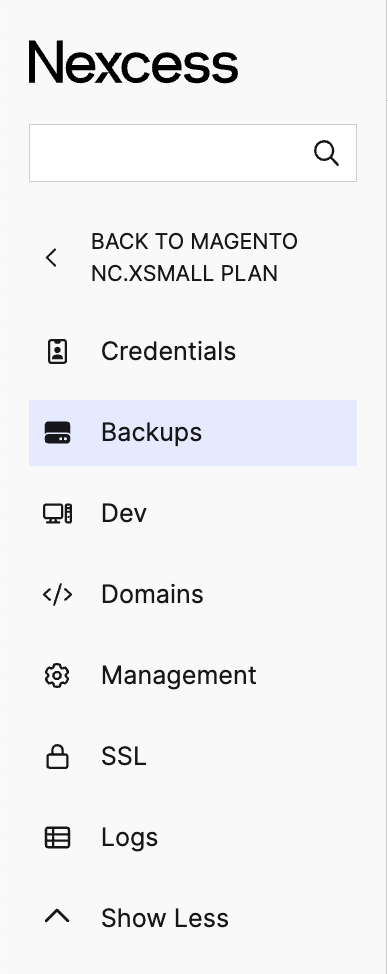
e. Click Create Backup:


f. Click Create Backup again to confirm.
g. Check out this article from our Nexcess Knowledge Base to find out how to create a manual backup via the command line.
How to configure Elasticsearch on Magento 2
Magento requires Elasticsearch as a catalog search engine, starting with version 2.4. Refer to our Magento 2 help article for details about installing Elasticsearch and initial configuration. This is a popular Magento 2 FAQ question.
Why does Magento 2 perform slowly?
If Magento 2 fails to meet your speed expectations, you can try to:
a. Upgrade Magento to the latest version.
c. Set flat categories and products to increase the read speed of the database.
d. Reconfigure JavaScript and CSS settings on Magento 2.
e. Set up Content Delivery Network (CDN).
f. Optimize images and themes.
g. You can find detailed explanations of each point in The Ultimate Magento 2 Checklist for Performance.
How to enable and disable a module in Magento 2
Modules can be enabled or disabled in Magento 2 by executing a command from the Magento root. Use the following command to list all modules if you do not know the exact name of your module:
php bin/magento module:statusa. To enable or disable available modules, run the below commands:
magento module:enable [-c|--clear-static-content] [-f|--force] [--all] <module-list>magento module:disable [-c|--clear-static-content] [-f|--force] [--all] <module-list>b. Enable module:
php bin/magento module:enable Vendor_ModuleNamec. Disable module:
php bin/magento module:disable Vendor_ModuleNamed. Run the following command to update the database schema if you enabled one or more modules:
php bin/magento setup:upgradeHow to schedule cron jobs in Magento 2
Refer to the How to schedule cron jobs in Nexcess Cloud article. This is another popular Magento 2 FAQ question.
How to change the domain name in Magento 2
Follow these steps to change the domain name in Magento 2:
a. On the Admin Panel, select Stores > Configuration.
b. Then, select General and then Web navigation menu.
c. Expand the Base URL section. For example, if you want to change the current domain to example.com, you should replace it with the new one:

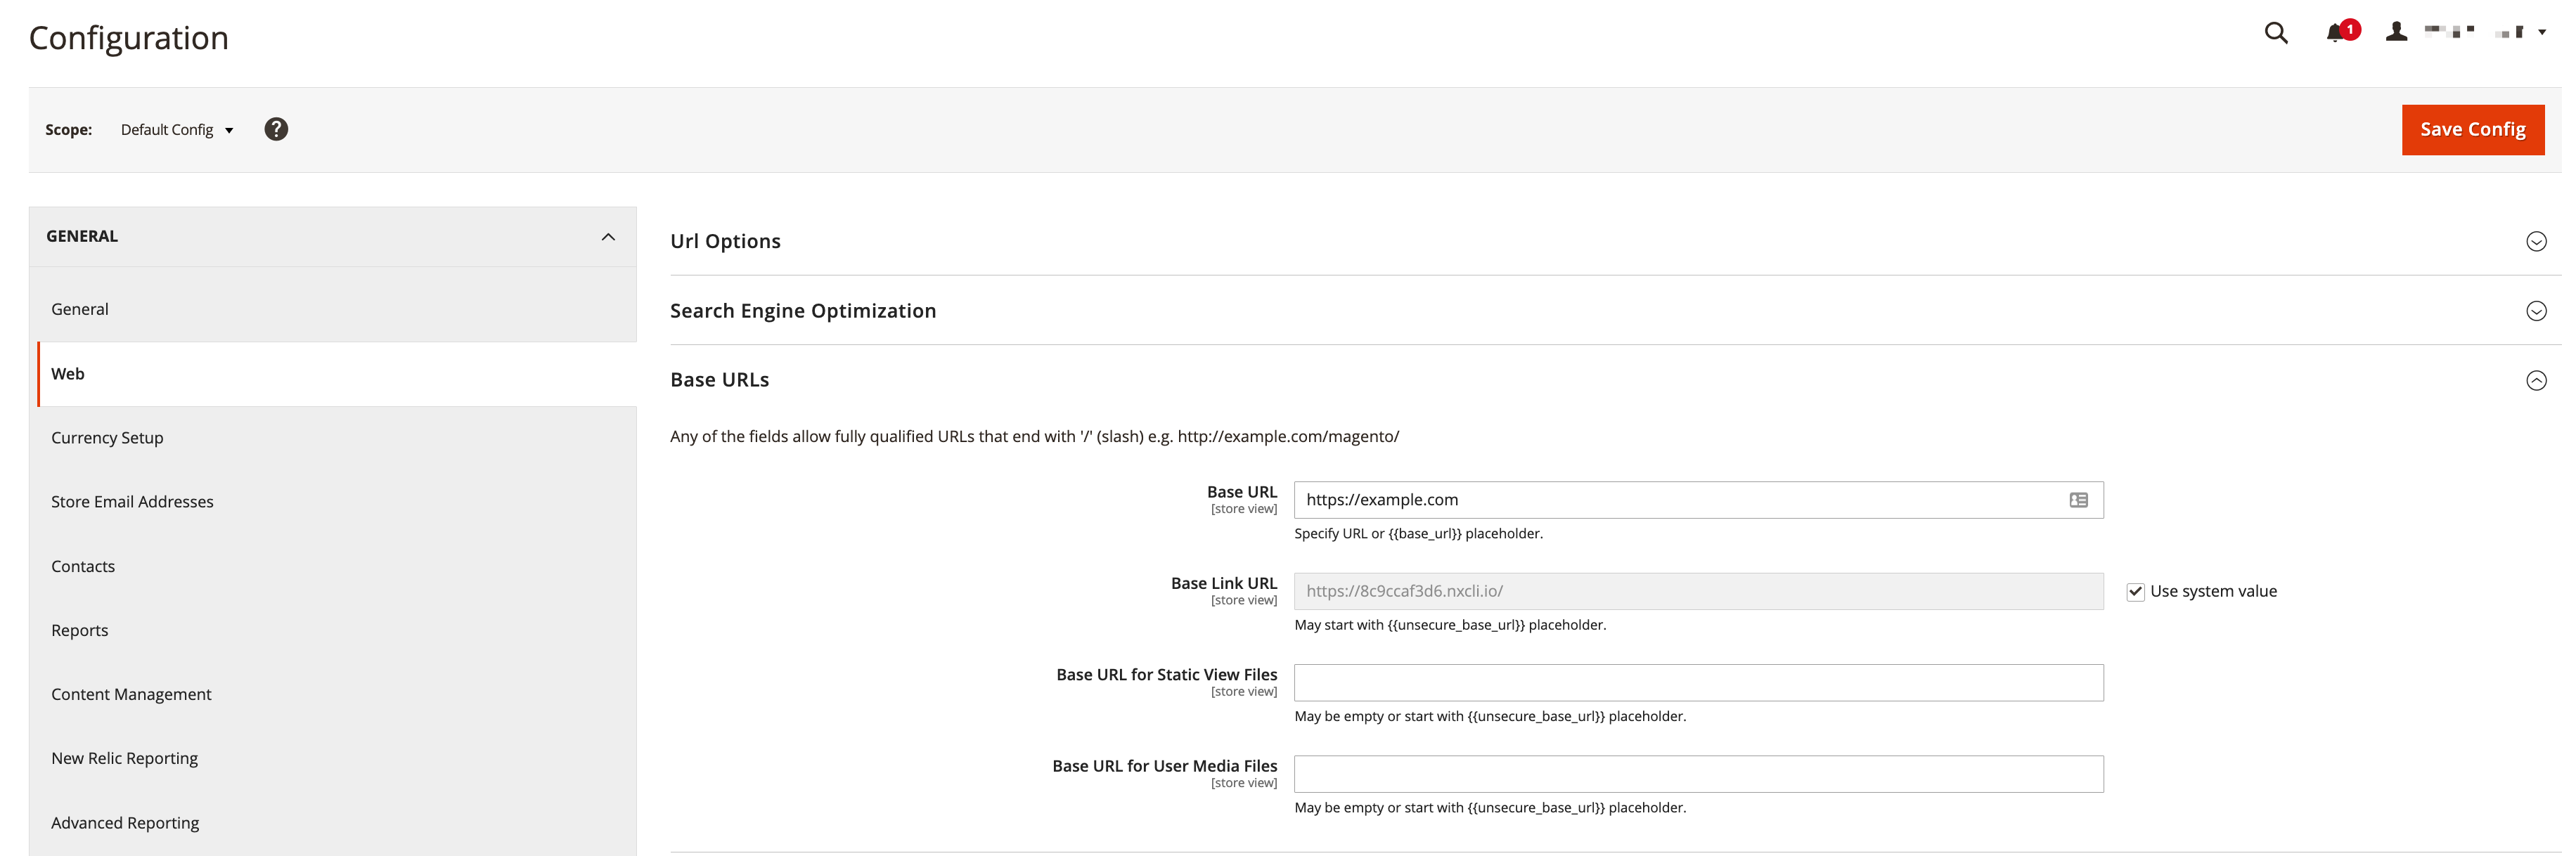
d. Similarly, update the same in the Secure Base URL.
e. Click on Save Config.
Resources for more information
Need more help than what was provided in this Magento 2 FAQ? The Applications > Magento 2 and Magento 1 sections within the Nexcess Knowledge Base are important resources for those seeking additional knowledge. Or, check out our related articles below.
Support: 24-hour assistance
If you need any assistance with the above-mentioned Magento 2 FAQ, don't hesitate to reach out. For 24-hour assistance any day of the year, Nexcess customers can contact our support team by email or through your Nexcess Client Portal.
New customers seeking fully managed hosting solutions
Not a Nexcess customer yet? Check out our fully managed hosting solutions. The option to chat with an expert is also available.
Find web hosting from web hosting experts
Discover managed hosting for the industry’s top content and commerce platforms.
Note about the original publication date
This article was originally published in September 2019. It has since been updated for accuracy and comprehensiveness.


