

A secondary domain functions as an independent domain with its own set of appropriate features, including FTP, SSH, Email, MySQL Databases and Accounts, Backups, SSL, Bandwidth Statistics, etc. However, the secondary domain shares resources and feature limits with the primary domain.
This article will explain all of the aspect of adding a secondary domain in the Nexcess Client Portal. Our user interface was built to allow customers control the various aspects of adding a secondary domain in the Nexcess Client Portal — the admin panel for managing your hosting plans and sites with us.
Overview of additional domains for your Nexcess account
In our cloud hosting plans, you can create up to 10 additional secondary domains under the primary domain. You can visit our product pages to explore available Nexcesss Flexible Cloud hosting plans with specifications and pricing.
Adding and managing a secondary domain name
To add a secondary domain using the Nexcess Client Portal, follow the steps provided below in the next sections.
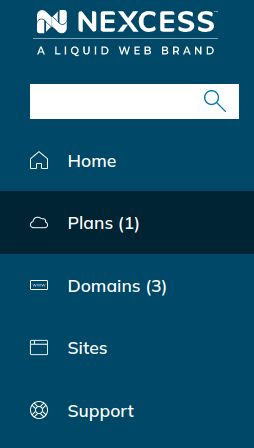
Step 1
Log in to your Nexcess Client Portal. Then, from the homepage, click Plans in the menu on the left side of the screen:

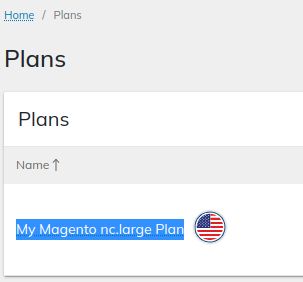
Step 2
Click on the name of the plan:

Step 3
Click the Add Site button:


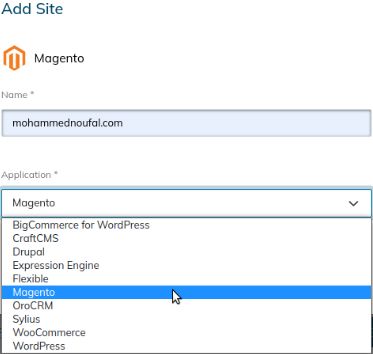
Step 4
The Add Site window appears. Enter the domain name in the Name field. From the Application field's dropdown menu, select the application or platform for which want to install for the secondary domain:

Step 5
After filling in the Name and Application fields on the Add Site window, click the Add Site button:


Step 6
You can view the newly created secondary domain listed in the Sites area shown on the screen:

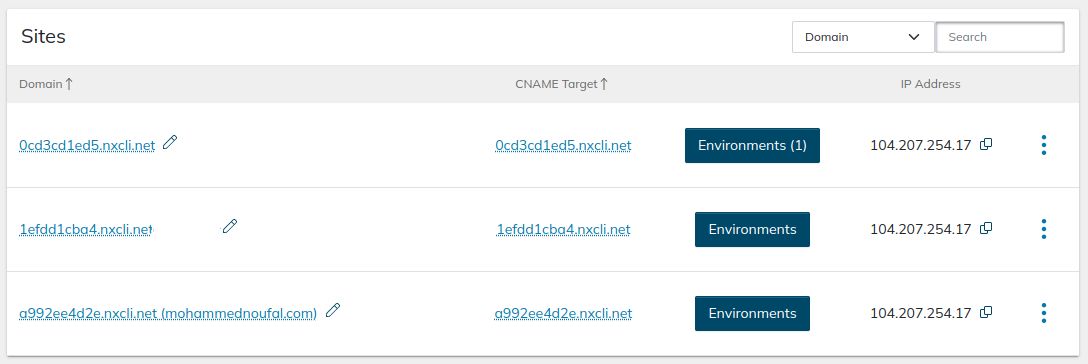
Step 7
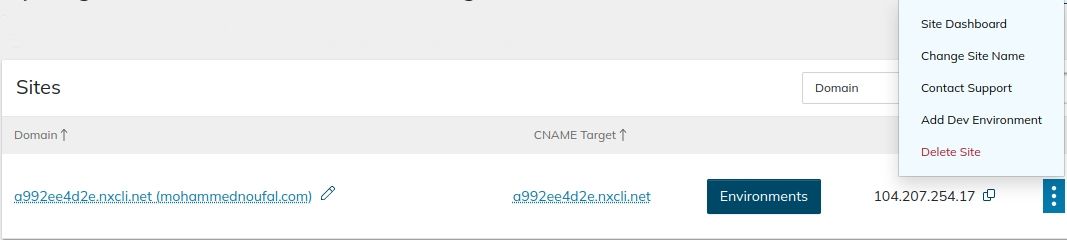
To access the Site Dashboard for the secondary domain, click the three dots icon to the right of the domain in the same row. Then, select the Site Dashboard menu option:

Viewing the FTP/SSL (via explicit TLS) and SSH/SFTP access details for the secondary domain
Once you have pulled up the Site Dashboard area of the user interface, you can find the FTP/SSL (via explicit TLS) and SSH/SFTP details for the secondary domain under the corresponding sections by clicking the Access tab on showing within the left navigation column:


Finding the FTP/FTPS (via explicit TLS) and SSH/SFTP access details in the Nexcess Client Portal
As documented with more details in the following articles, you can also find your FTP/FTPS and SSH/SFTP account access information from elsewhere in your Nexcess Client Portal:
- How to find your FTP/FTPS details from your Nexcess Client Portal
- How to find your SSH/SFTP details from your Nexcess Client Portal
Modifying domains and domain options
Using the Domain Options tab on the left side of the screen, you can modify the master domain using your domain name by clicking the Modify Master Domain button:


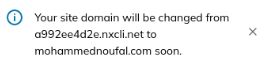
You will be asked to enter your domain name. Once you enter it, click the Change Domain button:


Then, along the top left portion of the screen in the Nexcess Client Portal, you will receive the site domain change confirmation message like this one shown:

Once everything related to the site domain change is completed on the servers, you can check and confirm that the changes have been made as expected in the Domain section:


Modifying domains in the Nexcess Client Portal
Reviewing the contents of the following article, you can learn more about modifying the master domain from via your Nexcess Client Portal:
Managing the Let’s Encrypt SSL and paid SSL certificates for your secondary domain
Using the SSL tab on the left side of the screen, you can install and manage the Let's Encrypt SSL certificate for the secondary domain:


Reviewing the instructions for Let’s Encrypt SSL and paid SSL certificates in the Nexcess Client Portal
Using the following more in-depth documentation, you can read more about installing and managing the Let’s Encrypt SSL and paid SSL certificates for your secondary domain:
- Managing the Let’s Encrypt SSL certificate for the domain from the Nexcess Client Portal
- Managing the paid SSL certificate for the domain from the Nexcess Client Portal
Viewing the log details for the secondary domain
You can find the available log files related to the secondary domain from the Logs tab on the left side of the screen:


Looking at guidance for log files in the Nexcess Client Portal
You can also look at the guidance in the documentation below to view the log files for a secondary domain:
Managing full and daily backups for the secondary domain
From the Backups tab, you can find full backups and daily backups that were made for the secondary domain:

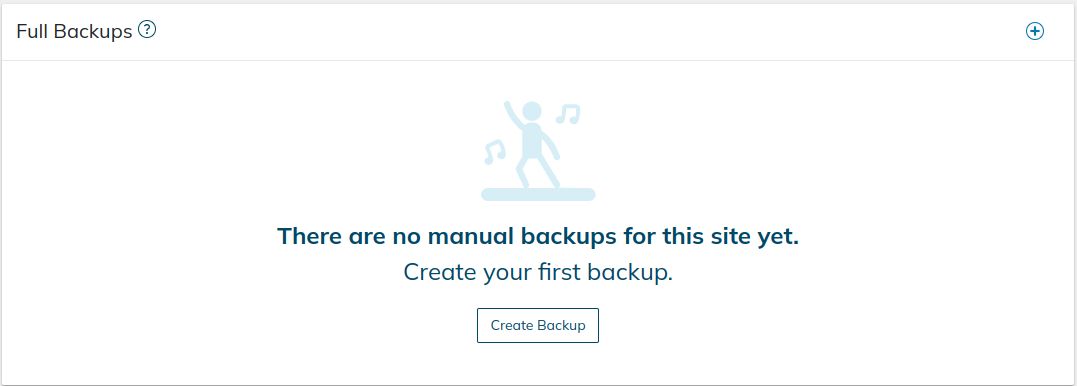
You can manually create a backup for the secondary domain and download the backup from your Nexcess Client Portal.


Once the backup is successfully created, it will be listed under the Full Backups section.
Please note that your Full Backups are stored locally and consume storage resources allocated to your hosting plan with Nexcess. We recommend you delete these Full Backups when they are no longer needed. Automatic Daily Backups do not consume your hosting plan's storage resources.
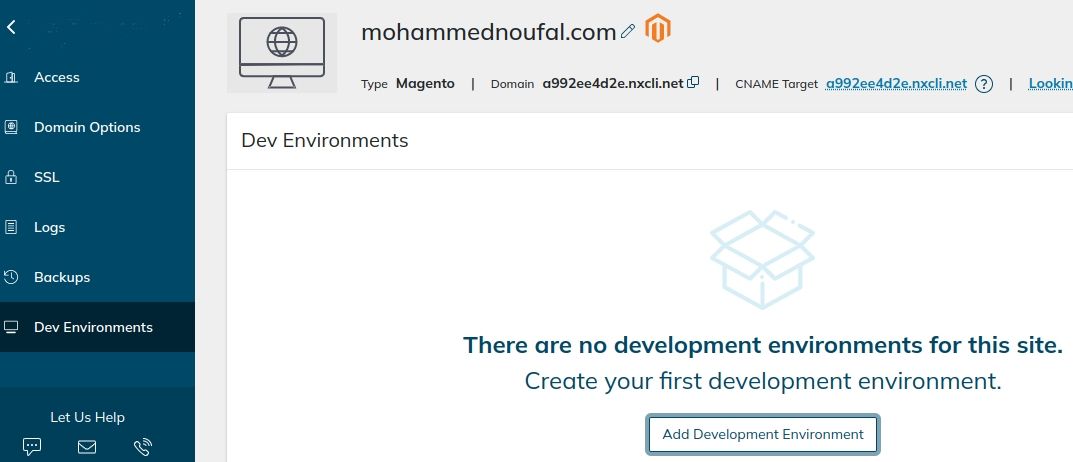
Managing development environments for the secondary domain
You can create a dev site for the secondary domain from the Dev Environments option in the menu on the left in the navigation column shown:

Studying the creation steps for development environments in the Nexcess Client Portal
You can study all aspects of creating a development site for the secondary domain by referencing the article below:
Managing email and MySQL accounts for the secondary domain
If you have the appropriate admin privileges to access the Control Panel, you can create and manage both email and MySQL accounts for the secondary domains. Otherwise, you can contact us at Nexcess to get help with this task or these tasks.
Email accounts
To create email accounts for the secondary domain, navigate to Hosting Features > Email > Mailboxes in the Nexcess Client Portal. On the Add an Email Box screen, enter the required details and click the Add button:


After clicking the Add button, you will see the "Mailbox added successfully" confirmation message:


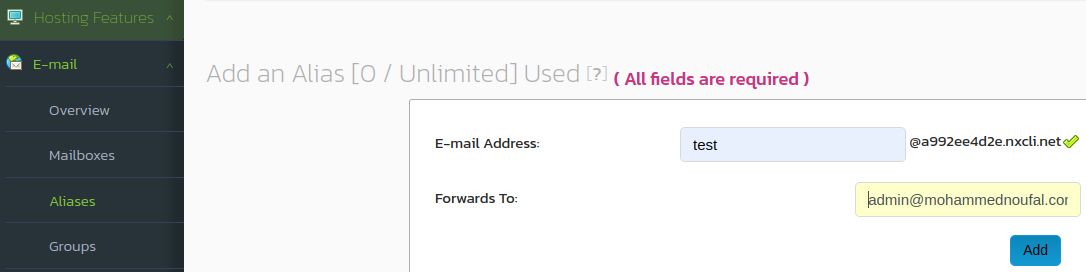
Email forwarders using aliases
To set up an email forwarder for the email account created under the secondary domain, go to Hosting Features > Email > Aliases in the corresponding user interface area.
When the Add an Alias screen comes up, enter the required details and click the Add button:

Next, you will be presented with the "Mailbox already exists, but alias was successfully added" confirmation message:


MySQL database and the first database user account
To create a MySQL database and the first database user account for the secondary domain, follow the menu options of Hosting Features > MySQL > Databases in the portal. On the Add a MySQL Database screen, enter the database name.
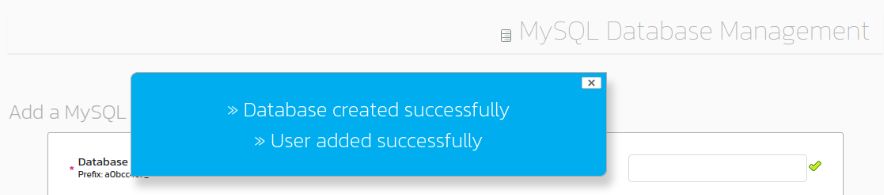
Then, select Create User and enter the Username. You can generate or enter a password along with MySQL Databaser Permissions for the new user. After all details have been entered and double-checked, click the Add button:


Your database and database user creation processes are confirmed with the "Database created successfully" and "User added successfully" messages on the screen:

Conclusion
If you are looking for fully managed hosting for your websites, Nexcess is the right choice for you. We provide different types of fully managed hosting plans for WordPress hosting, Magento hosting, and WooCommerce hosting with technical support.
More fully managed services from Nexcess
Whether you're creating a brand-new site or looking for better hosting, we can help you find the right product or customized plan to help you get there.
We support a plethora of cloud-based website platforms. In particular, our technology stack is optimized for the popular and robust WordPress, Magento, and WooCommerce website suites. That means a faster, more secure, and scaling-ready website. Furthermore, our smart monitoring tools are built-in to help you keep it that way.
We await your partnership here at Nexcess. We remain ready to facilitate a stellar web presence on your behalf!
Recent articles
- Magento 2 registrations — how to stop/prevent spam bots
- How to use the Nexcess support ticketing system
- Apache Solr search for Magento 1 — Frequently Asked Questions (FAQ)
Related articles
- Nexcess Knowledge Base > Nexcess Client Portal category
- Nexcess hosting and Nexcess Client Portal guide
- Logging into Managed WordPress and Managed WooCommerce portal
Note about the original publication date
This article was originally published in September 2019. It has since been updated for accuracy and comprehensiveness.


