
A contact form is an important part of your website that lets visitors send you questions and feedback. It lets you collect information, such as the visitor's name, contact information, and a message.
WordPress does not have built-in contact forms. But not to worry. This article will show you how to add a contact form in WordPress.
What is a WordPress contact form?
A WordPress contact form helps your website visitors get in touch with you safely and securely. Visitors can send in their questions, feedback, or complaints through the contact form. You, in turn, can collect the details of potential leads and subscribers.
A contact form prevents your mailbox from being flooded by spam emails. A WordPress contact form helps collect the necessary information from visitors in an organized way.
Best WordPress contact form plugins
Here’s a list of some of the best WordPress contact form plugins based on their features and ratings. We’ve included both paid and free WordPress contact forms.
WPForms
WPForms is a popular WordPress contact form plugin with a drag-and-drop feature. The free edition includes basic form fields, spam prevention, email notification, and confirmation and thank-you pages. The premium edition helps you build multi-page forms, email subscription forms, payment forms, and so on.
Contact Form 7
Contact Form 7 is one of the oldest and most downloaded free WordPress contact forms. This plugin is a bit complex since it’s HTML based. Contact Form 7 empowers you to create any number of forms you like, and you can use them in as many websites as you wish.
Gravity Forms
Gravity Forms comes only in the premium version. It’s loaded with advanced features to help you build more elaborate forms, such as surveys and user-submitted content.
Get optimized WordPress hosting
Get a faster, more secure, and scalable website with Nexcess
Jetpack Forms
Jetpack Forms offers many pre-built forms, such as feedback, registration, and newsletter signup. It has both free and paid versions.
Formidable Forms
Formidable forms is an advanced WordPress contact form plugin with a drag-and-drop interface. You can use it to build form-based solutions, such as job board postings, rating systems, and event calendars. It has free and premium versions.
HubSpot Forms
HubSpot Forms is a free WordPress contact form plugin. It’s an all-in-one marketing toolkit easily integrated with CRM and sales tools. Besides a form builder function, HubSpot Forms includes features like live chat, popups, and analytics.
Ninja Forms
Ninja Forms helps you create interactive forms quickly. The premium version lets you connect with Campaign Monitor, SMS notification, Salesforce, and so on.
How to add a contact form in WordPress
Here is how to add a contact form in WordPress using two of the available plugins.
WPForms
Step 1: Adding a new form
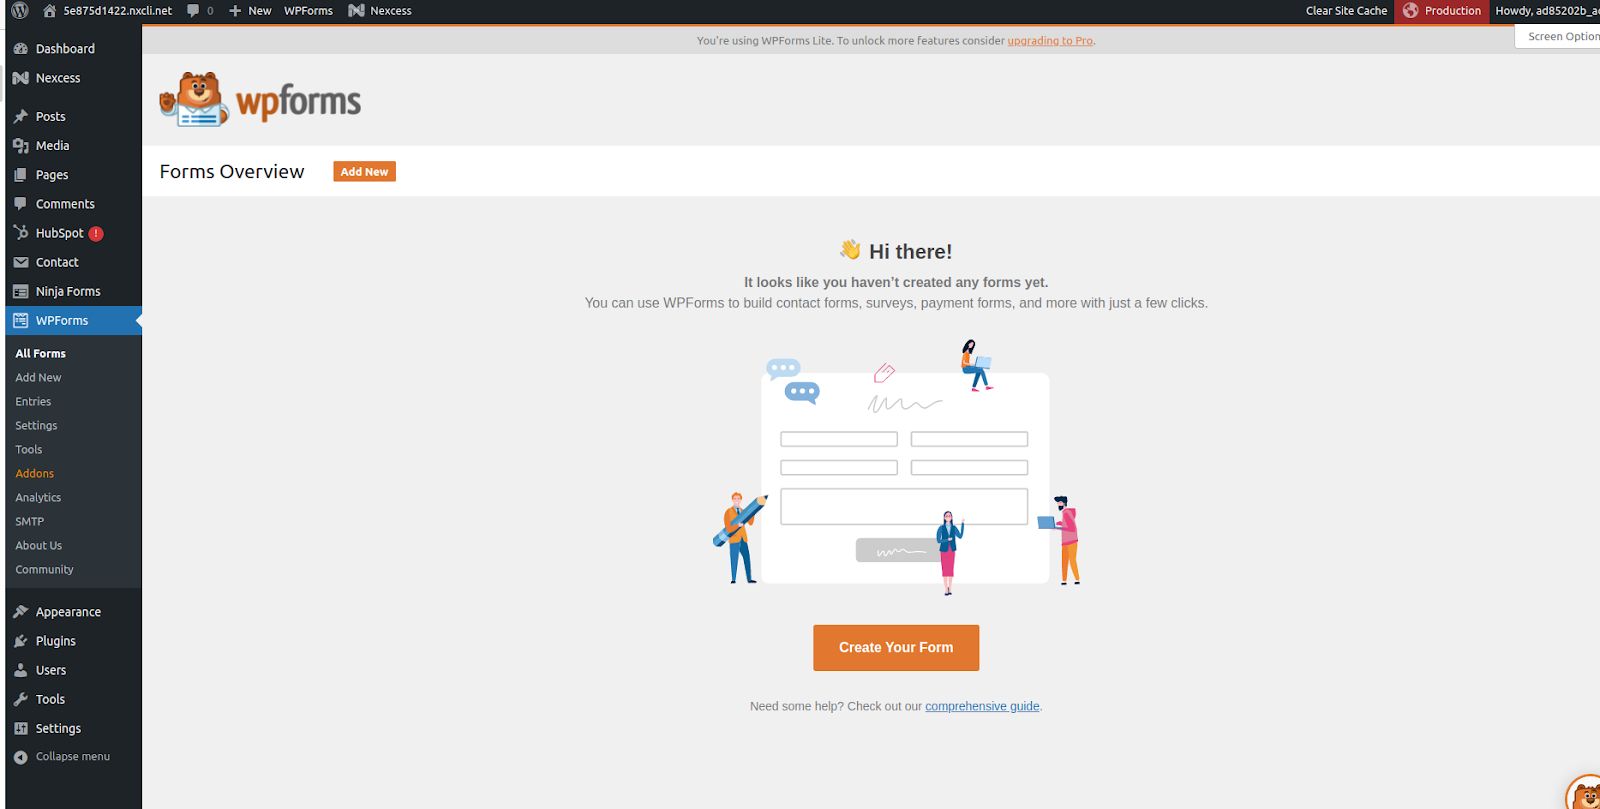
First, log in to your WordPress admin area. Navigate to the admin sidebar and click on WPForms.
Select “add new” to access the WPForms form builder.

You can give your form a name (such as "Contact Us") in the Form name field on the Setup page.

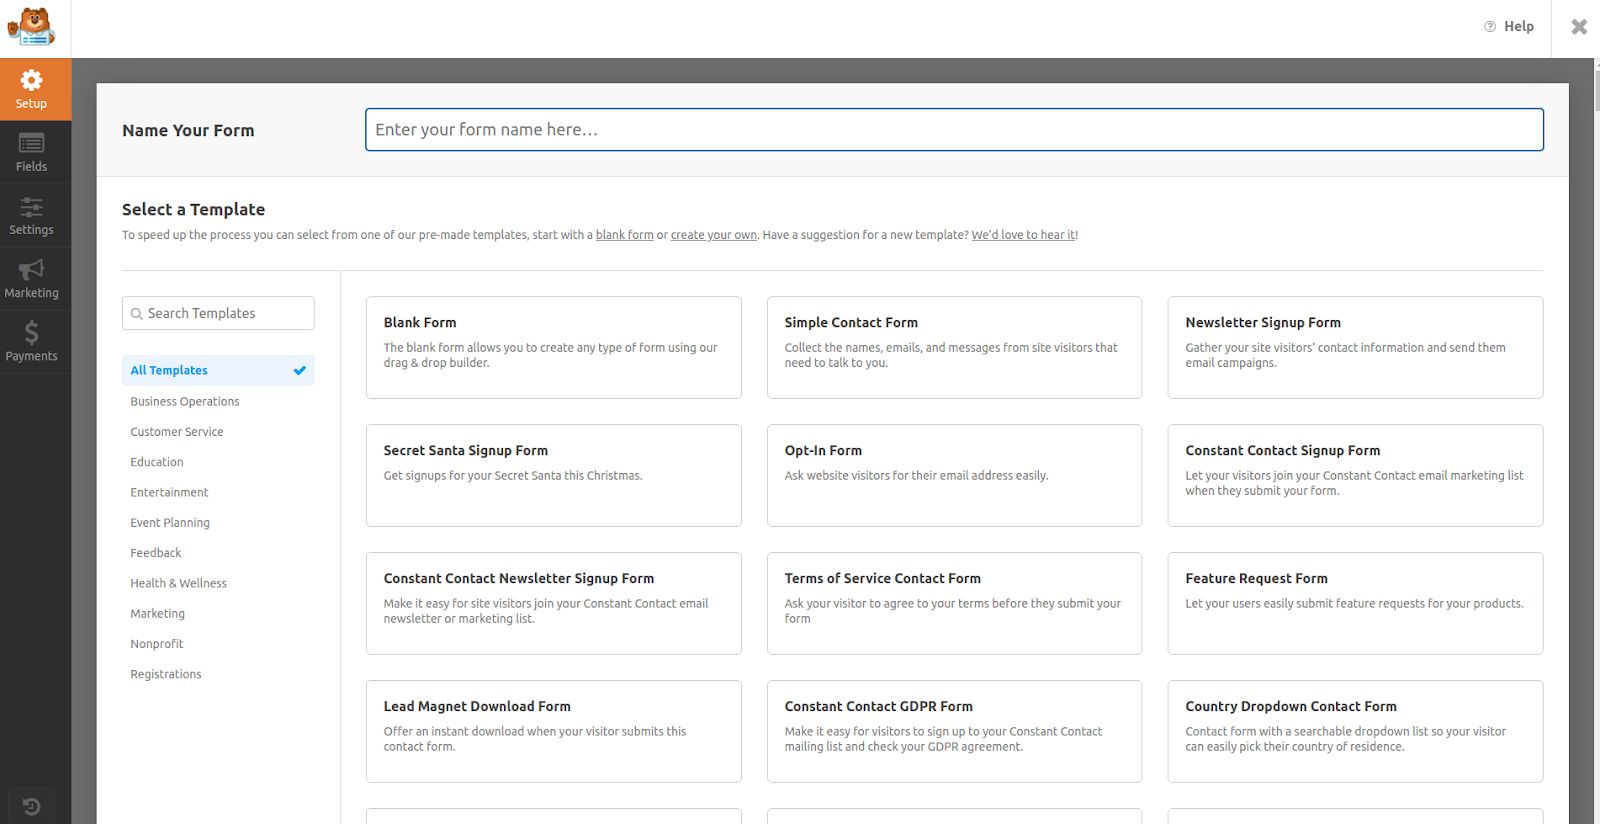
Below that field, you’ll find form templates in the Select a template section. These are the pre-built templates of commonly used forms.
Step 2: Customizing your form
The form builder takes you to the Fields screen once you've chosen a form template.
The accessible fields will be displayed in the left panel.

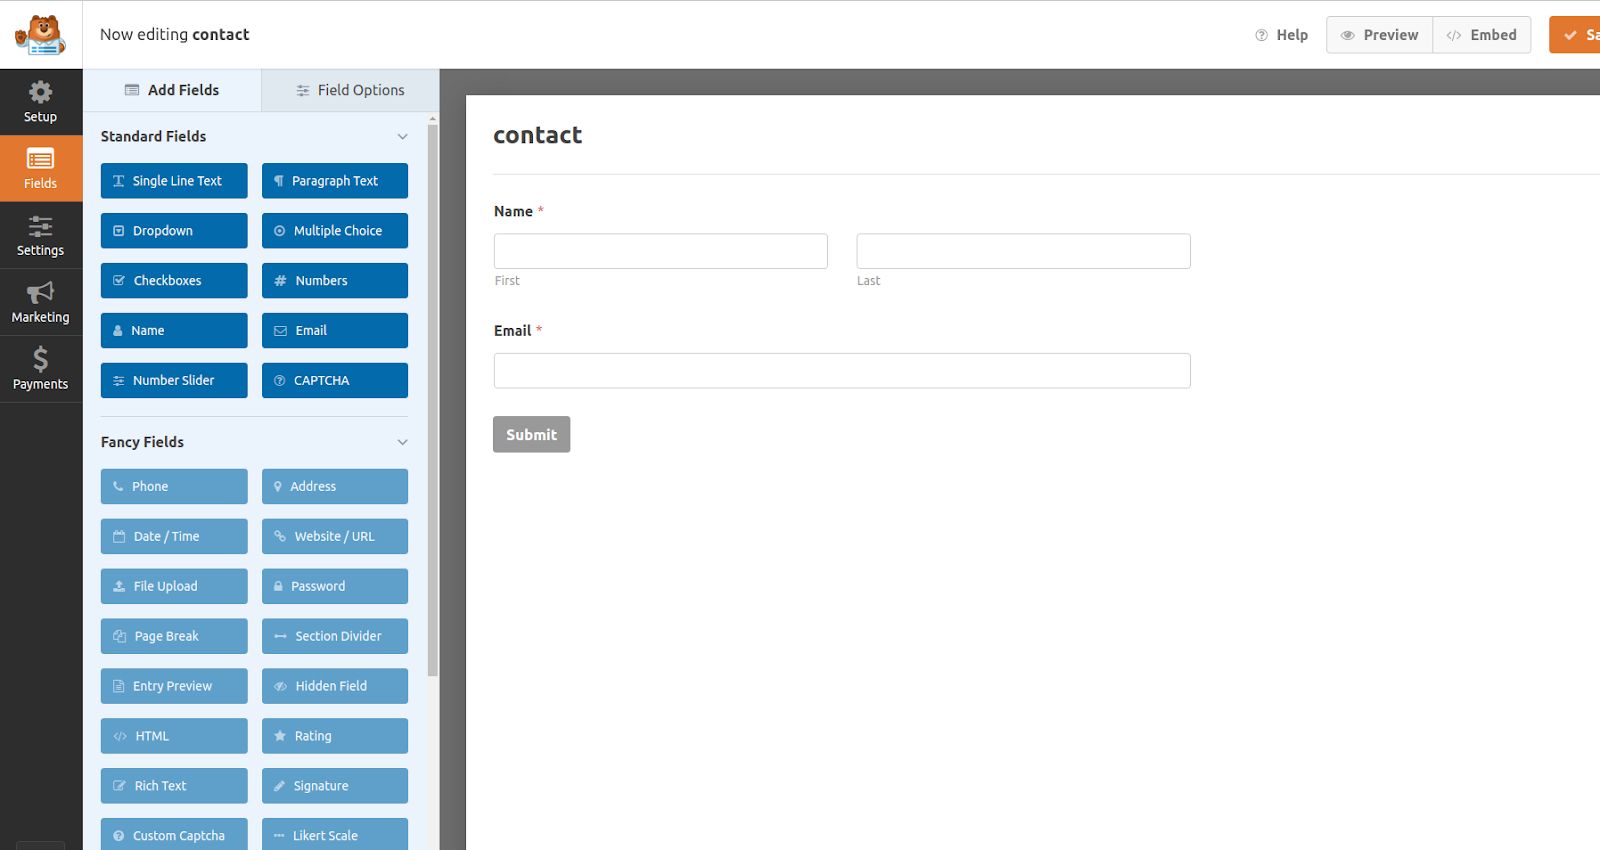
To add a field to your form, you can either click on it in the left-hand panel or drag and drop it directly into the form preview.
To delete a field from your form, you can hover over it and click the red trash can icon.
Field options let you configure the details and settings of each field.
Step 3: Editing form settings
Click on the Settings tab on the left side of the form builder to access your form's settings.

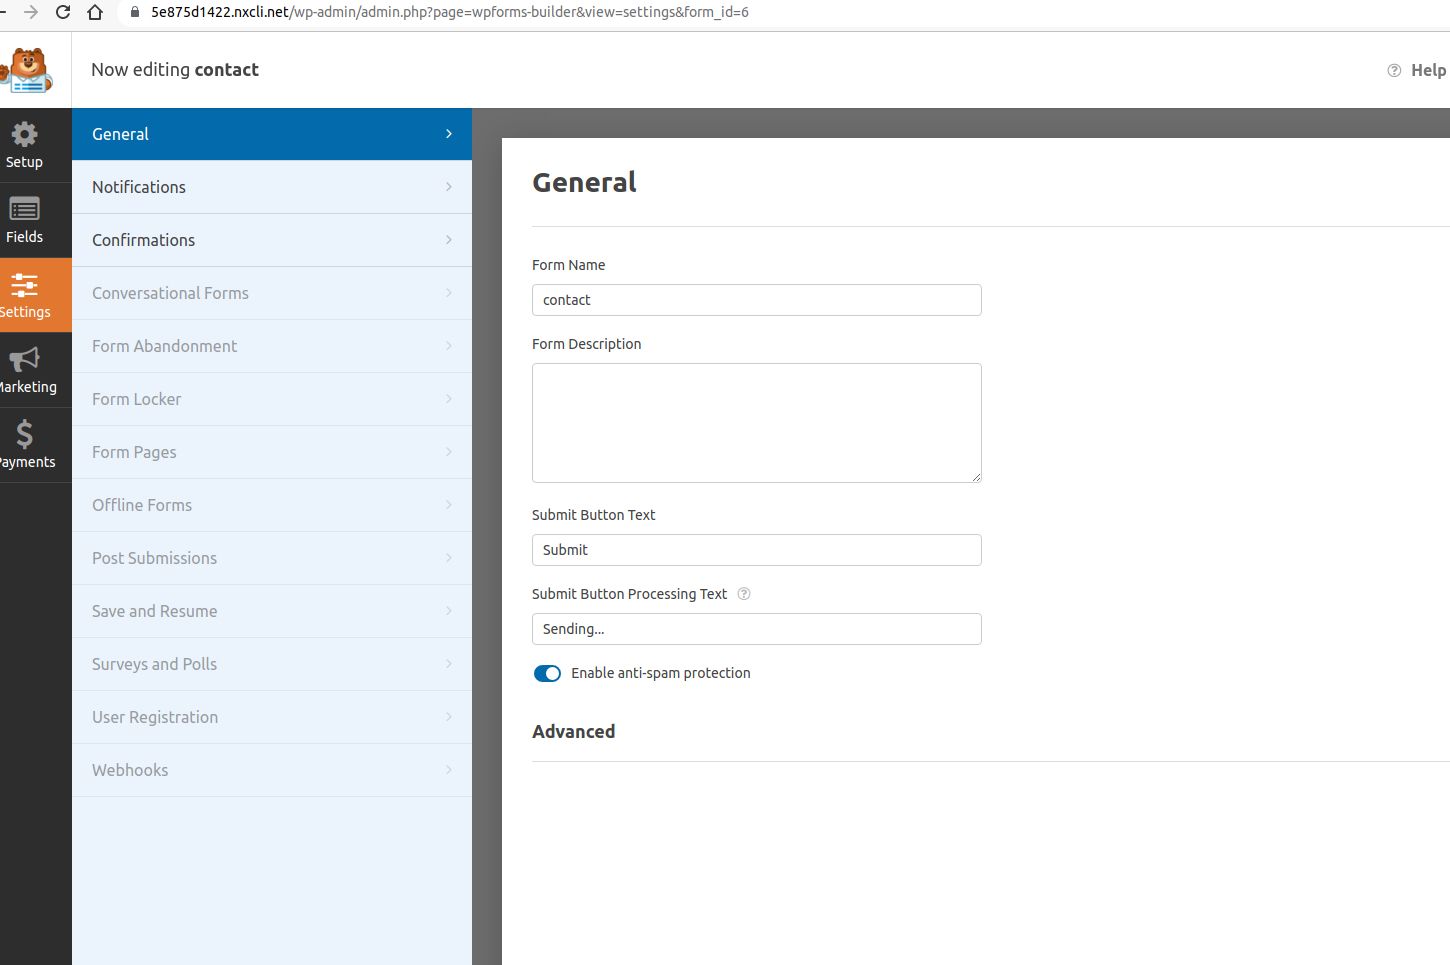
The first three settings are General, Notifications, and Confirmations.
General: Here, you can change the form name and description. You can add custom CSS to your forms in the Advanced box.
Notifications: Form alerts are emails automatically sent when users fill out forms. You can customize these emails under the notifications settings.
Confirmations: This informs users that their form has been submitted successfully. You can utilize confirmations to give users extra information or options.
Step 4: Displaying forms on your site
There are several ways to add your forms to your site.
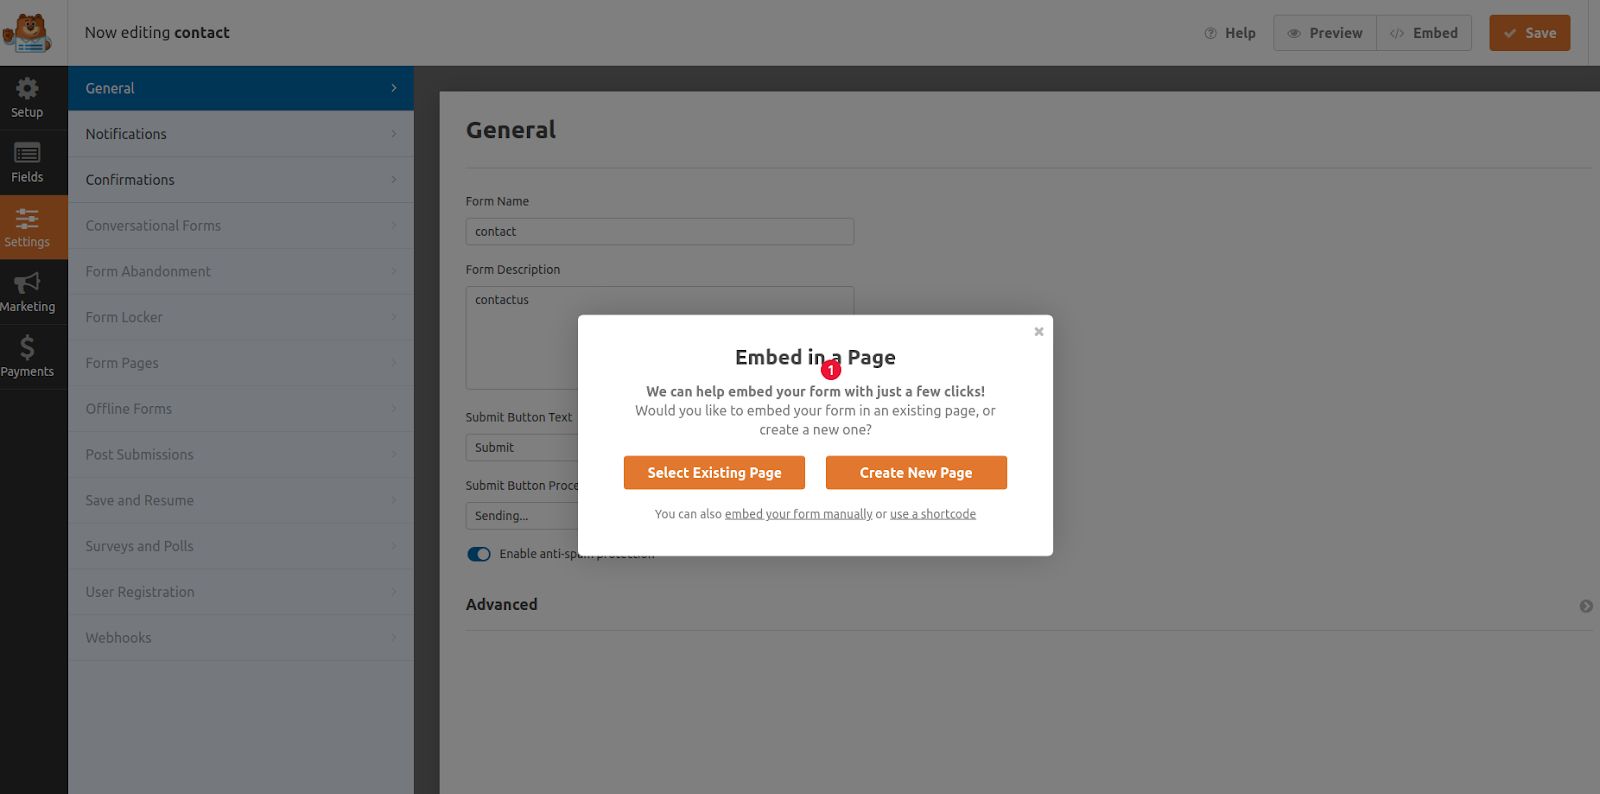
Embedding your form on a WordPress page
You may utilize the Embed wizard directly from the form builder by clicking the Embed button.

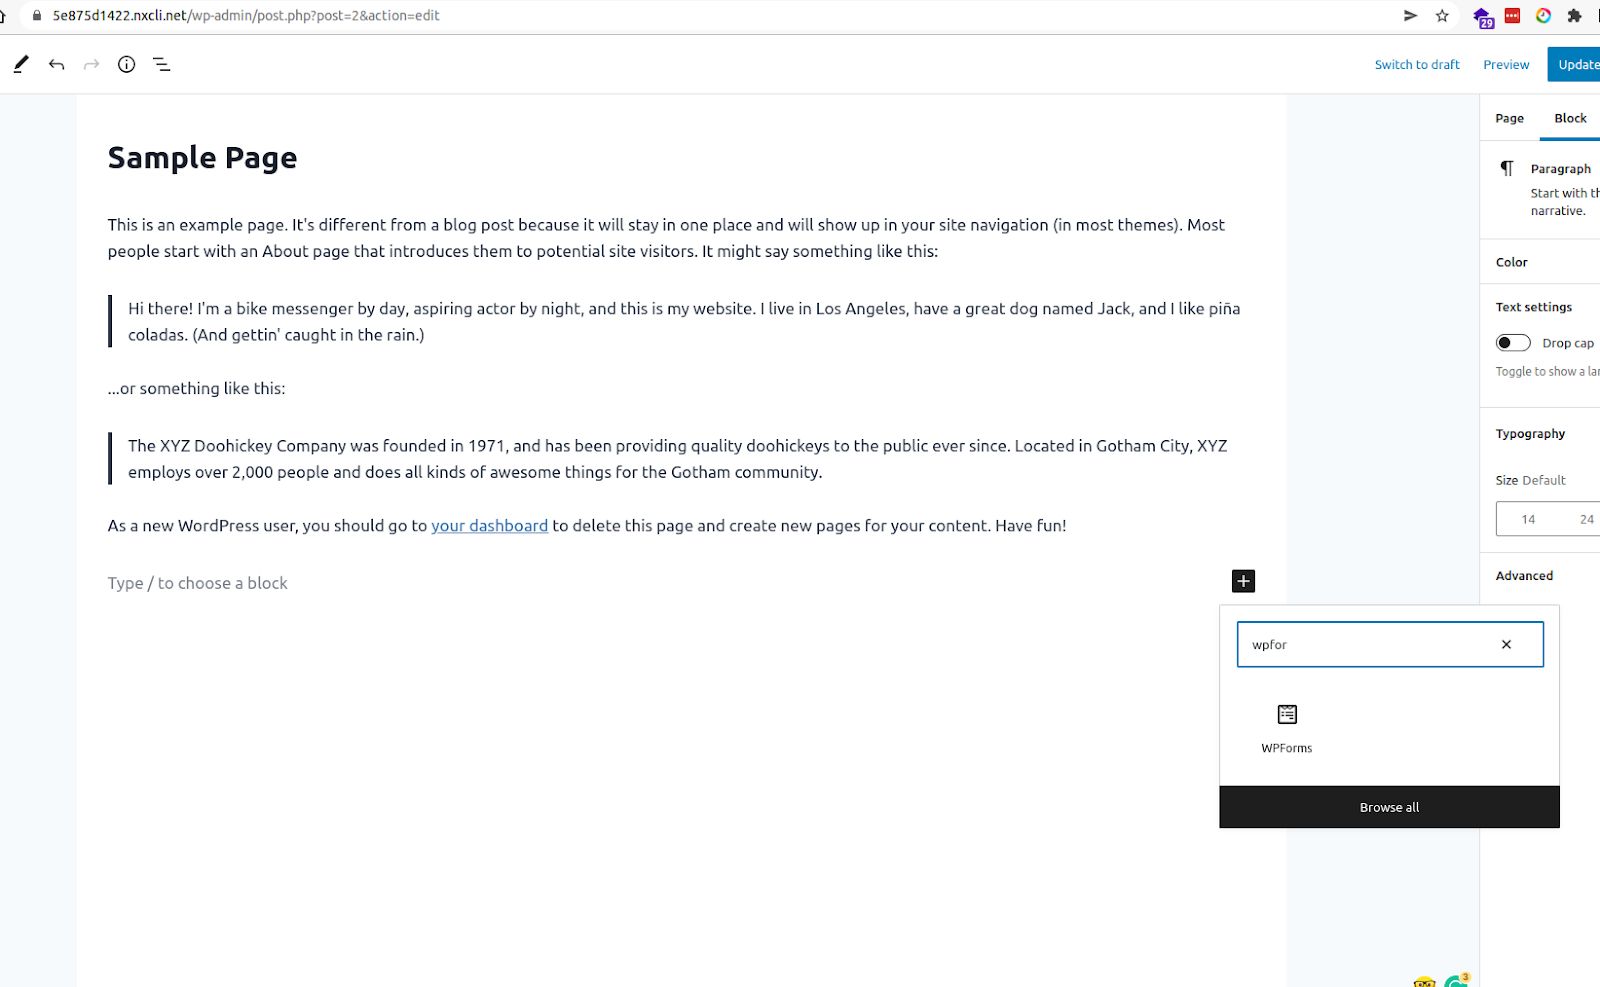
Embedding a form with the block editor
After you've opened the page editor, select the plus-sign icon to add a new block. This will give a block options menu.
You can search for "WPForms" or scroll down to the Widgets category to find the WPForms block. Select the block.

Contact Form 7
Step 1: Adding a new form
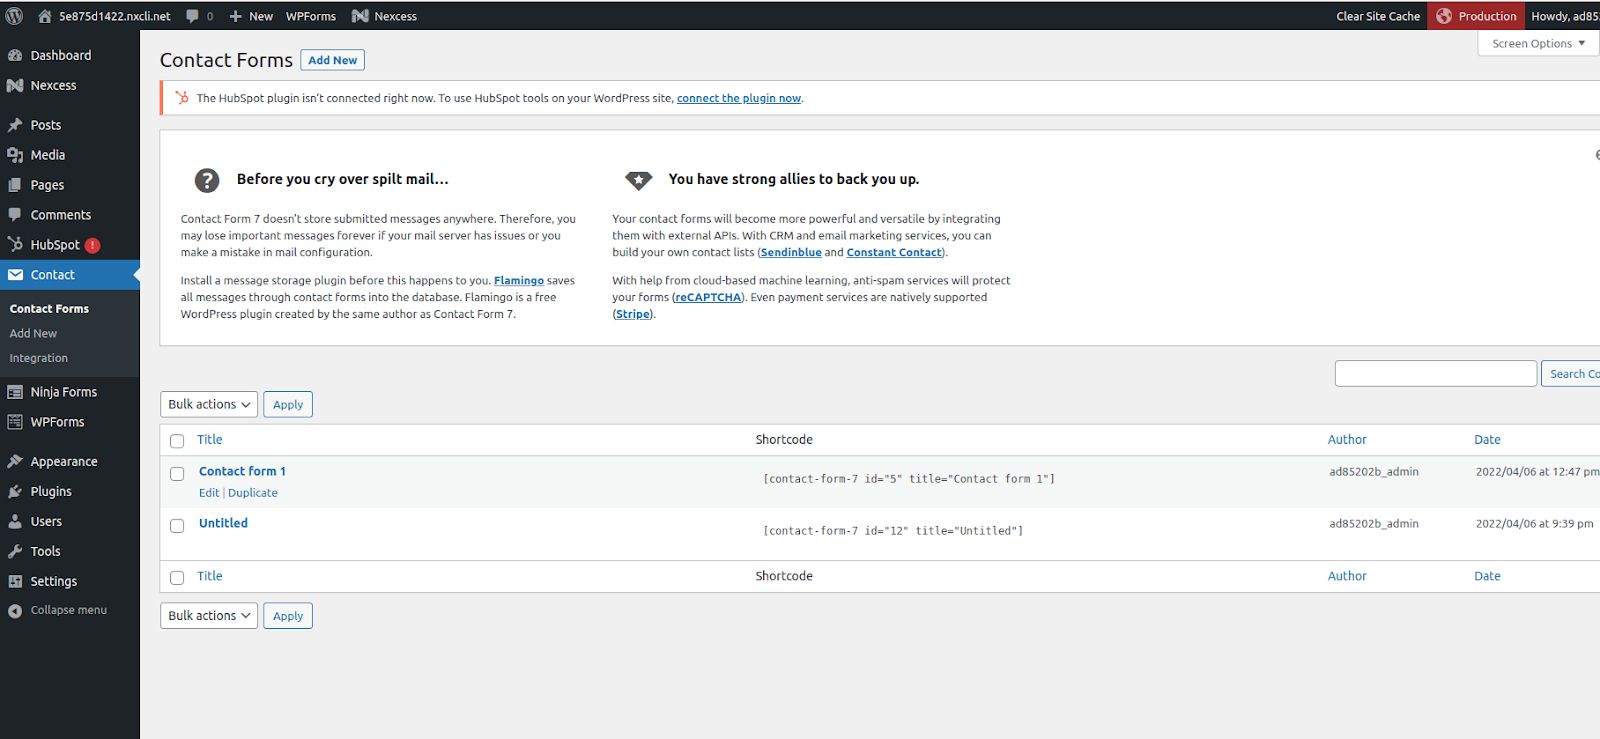
From Contact, go to Contact forms.
After selecting “add new,” enter your chosen name.
You'll get a new form with pre-added fields like name, email, subject, and message.

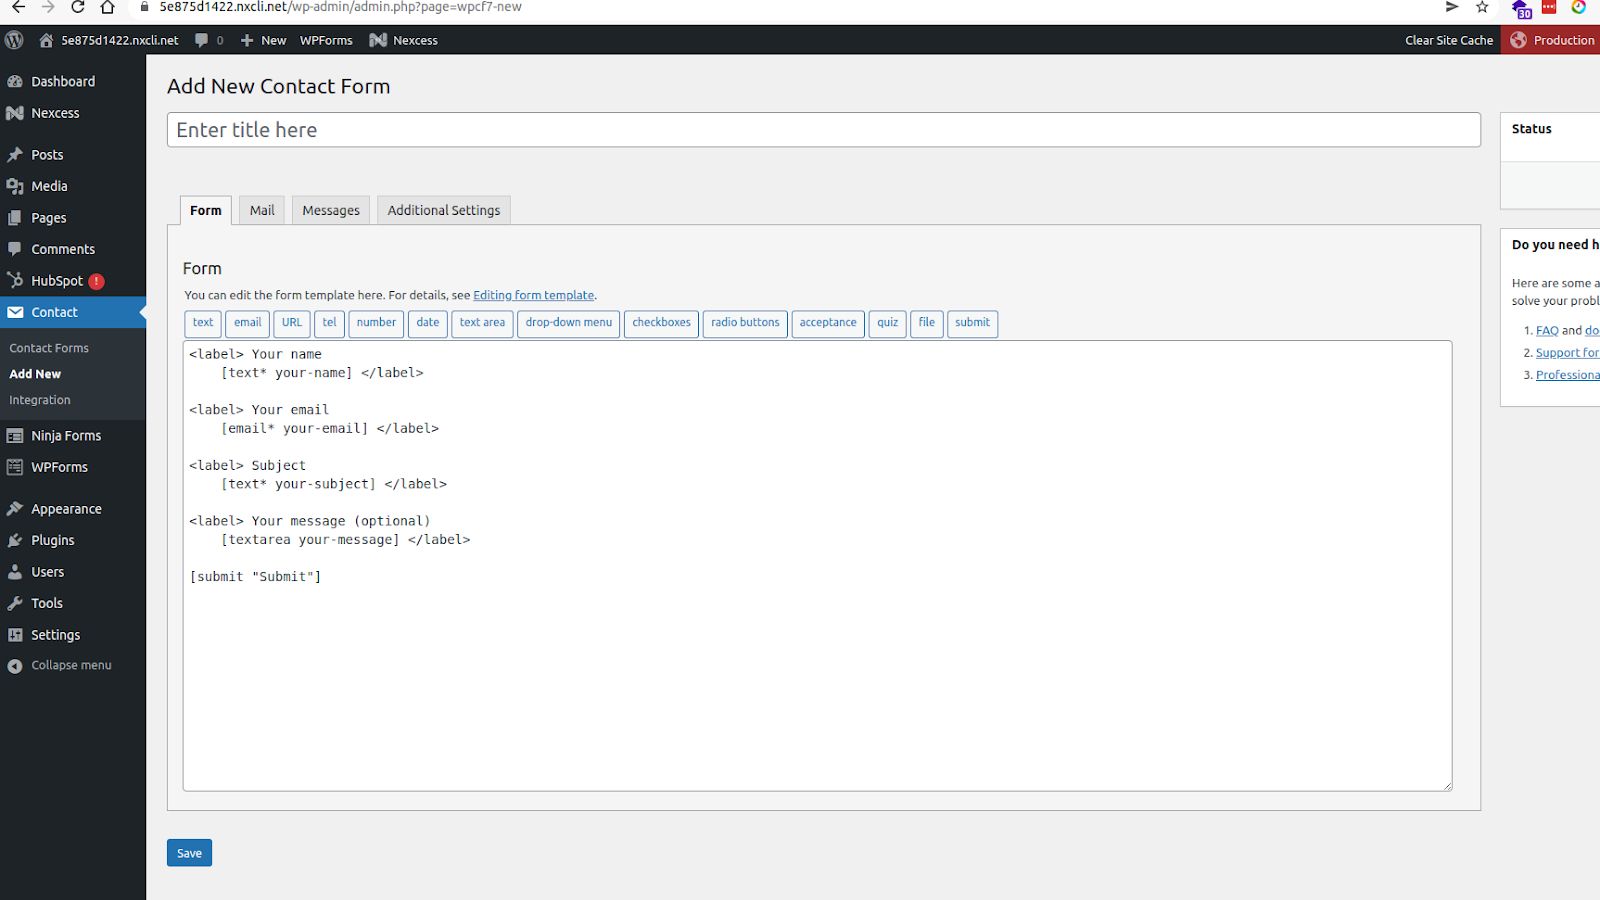
You might want to keep these fields and add a few more.
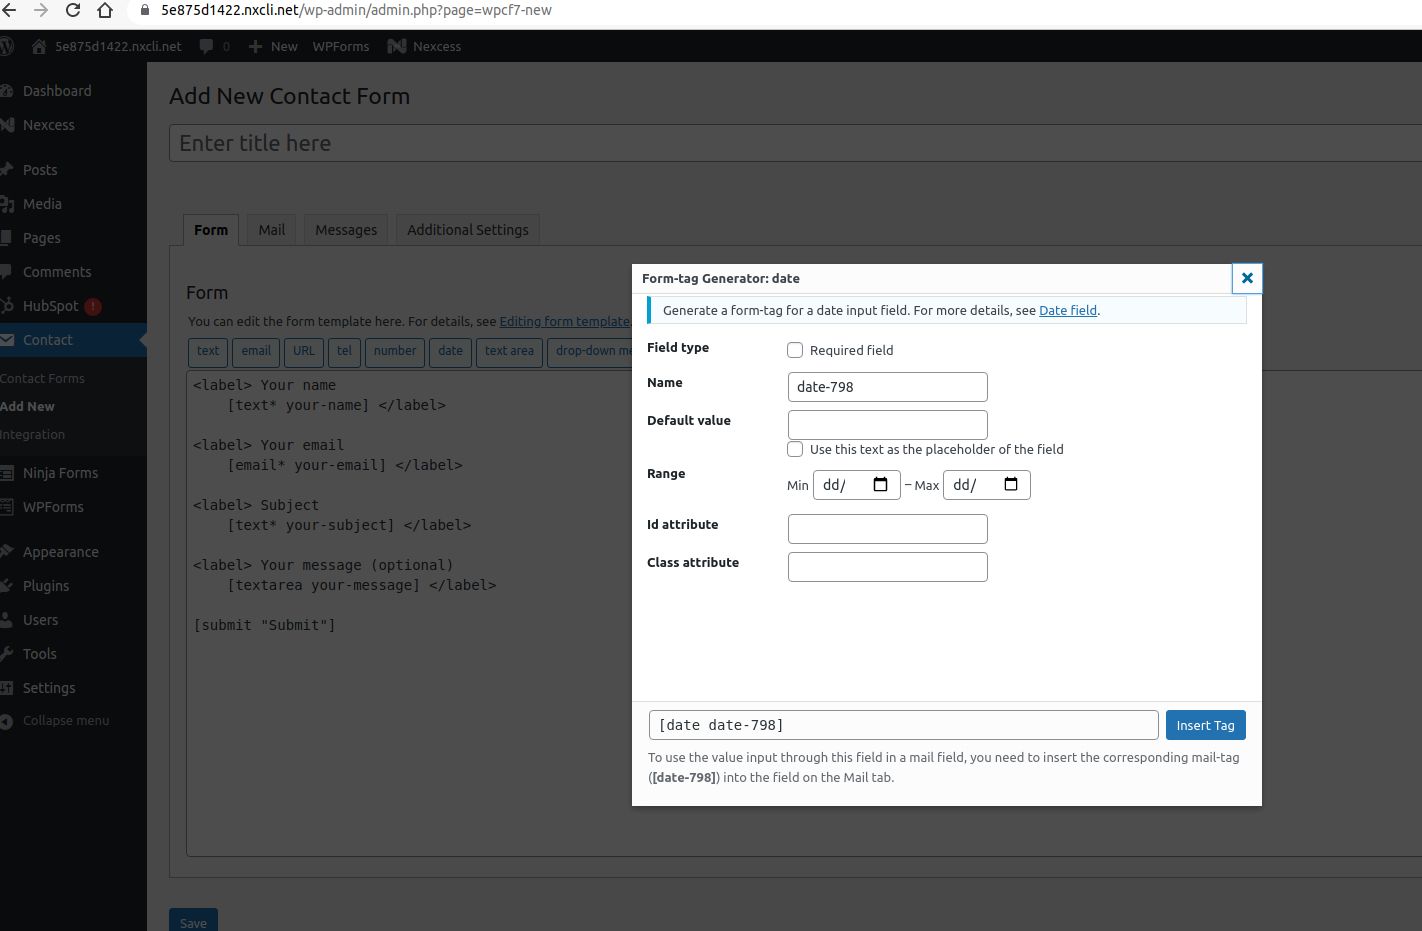
We'll show you how to add a date field.
Choose a tag from the list at the top of the form editor panel to add a new field. This is what it looks like:


To add a date field, click on the date tag.
You'll get some options in the popup that appears, out of which you can keep the Name, Default value, Class attribute, and ID attribute.
Check the Required field box. Then choose “insert tag.”

Step 2: Configure mail delivery settings
You can personalize what happens when someone contacts you through the form. This is a crucial step since you will be notified when someone fills out the form only if the emails are properly configured.


Let's examine each of the options.
To: The plugin will send an email to this email address whenever someone fills out the form. Contact Form 7 utilizes the site administrator's email by default.
Subject: This lets you customize the subject of the email.
From: This allows you to change the emails’ from field. It's recommended to put the name of your website here. The email address of the sender is also included.
Additional headers: Here, you add the cc and bcc recipients.
Message body: Here's where you put the message you'd like to send.
File attachments: Include your file tag here if you've checked the option to upload files on your contact form.
Mail (2): This lets you craft an automated message that visitors receive when they use the contact form.
Step 3: Publish the form
From Contact, go to Contact forms. Here, you get the short code that you can include on your website.

Go to the page where you want the contact form to be displayed. In the post editor, paste the short code in the space for text.

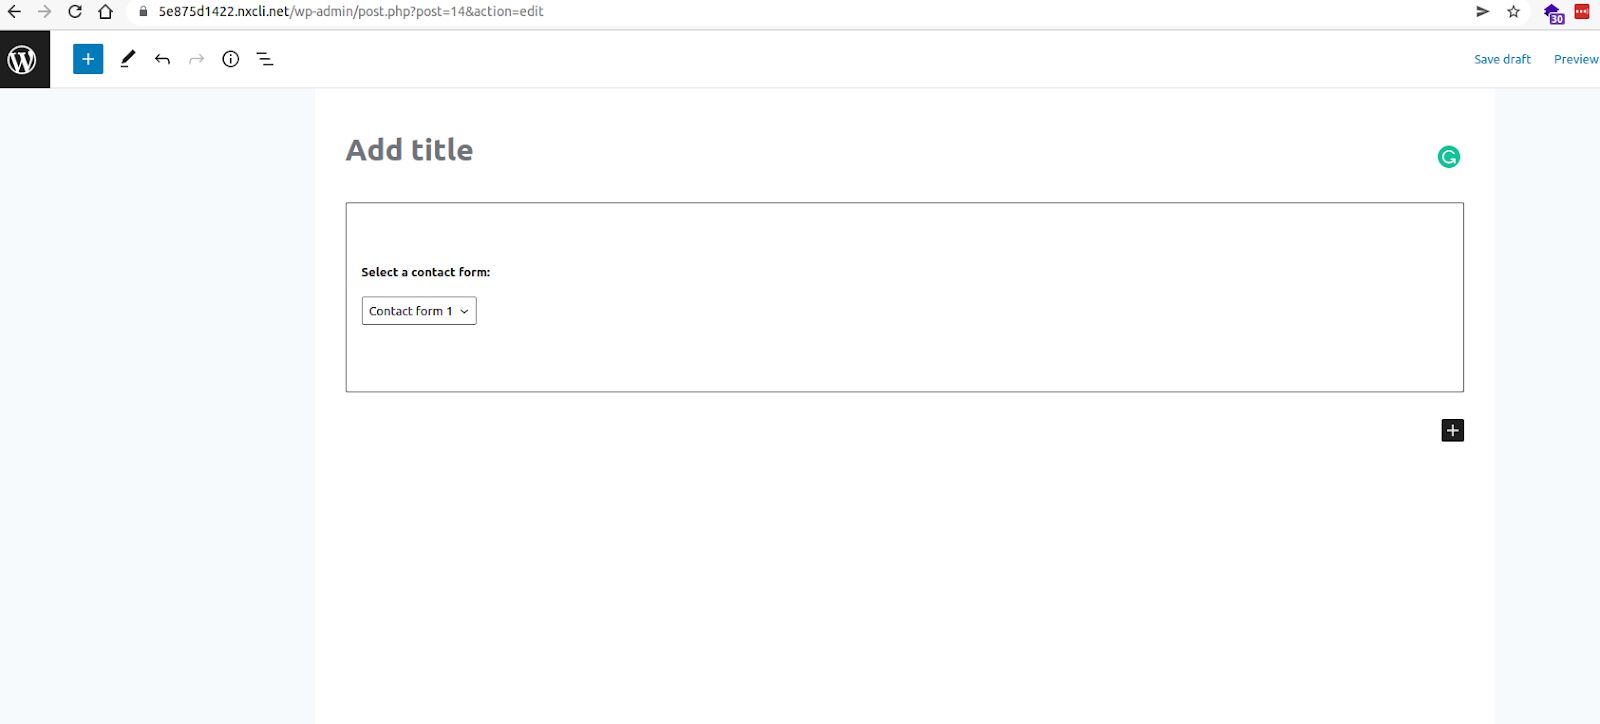
Make sure to preview the page and make changes, if needed, before publishing.
Now that you've learned how to add a contact form in WordPress, you can choose to add more plugins to your contact form.
Power your WordPress site with fully managed hosting
When using fully managed hosting, you don't have to worry about taking care of the essential tasks required to maintain your website and server.
The managed WordPress hosting plans by Nexcess deliver excellent results at affordable prices. Our WordPress experts will help get your site up and running in no time.
Try fully managed WordPress hosting from Nexcess
Here are some reasons why you should choose Nexcess:
- You get 24/7 support and security monitoring.
- You enjoy superfast website loading time.
- You can migrate your website to our hosting service for free.
- You receive automatic plugin updates.
- You won't ever be charged any hidden fees.
