

Weebly is a great way to get started, but WordPress, WooCommerce, and Magento from Nexcess, give you more capabilities and flexibility for a stellar website.
Keep reading to learn how to transfer a Weebly site to another host.
Why Nexcess is an Excellent Alternative to Weebly
Weebly is a great way to get started quickly, but part of what makes them so fast is abstracting away a lot of the complexities of creating a website. Unfortunately, the abstractions mean a lot of restrictions on what you can do with your website.
WordPress or Magento allow you to dig in as much or as little as you'd like into coding or customizing different parts of your website.
At Nexcess, we not only offer managed WordPress and managed Magento but also managed WooCommerce and StoreBuilder, both built specifically for WordPress. Managed WooCommerce comes with WordPress and WooCommerce installed for you. At the same time, the StoreBuilder Plan also comes with WordPress installed, allowing you to customize your store how you like with no code required and no extraneous fees to pay on top of your server bill.
Each option has multiple plan size ranges fitting the smallest company with one site, to a massive company with up to 30 sites, a flexible Weebly alternative.
Is Weebly Hard to Use?
- The content editor is pretty restrictive.
- The design templates are somewhat outdated.
- The Weebly authoring environment and resulting website may hinder creativity.
What are the Primary Disadvantages of Using Weebly?
- There are limited blogging tools, features, and functionality.
- There are limited photo editing capabilities.
- There are limited support options without paying more fees.
How to Transfer a Weebly Site to Another Host, Nexcess
Like other proprietary sites, Weebly doesn't want you to be able to take very much with you. But, by transferring Weebly to another host, you'll own all of your data moving forward. We will walk through the Weebly export process in a moment, but it will be a better experience for you if you use a third-party export tool to get the information you need. So, let's review both options!
Export with a Third-Party Tool
Because the third-party export file contains so much more content and will make importing easier, we will start with that process. For this example, we will be using the Weebly to WP tool. This tool is completely free, with several options for you to select.
First, go to the website linked above. Depending on the size of your browser, you will see something like this:

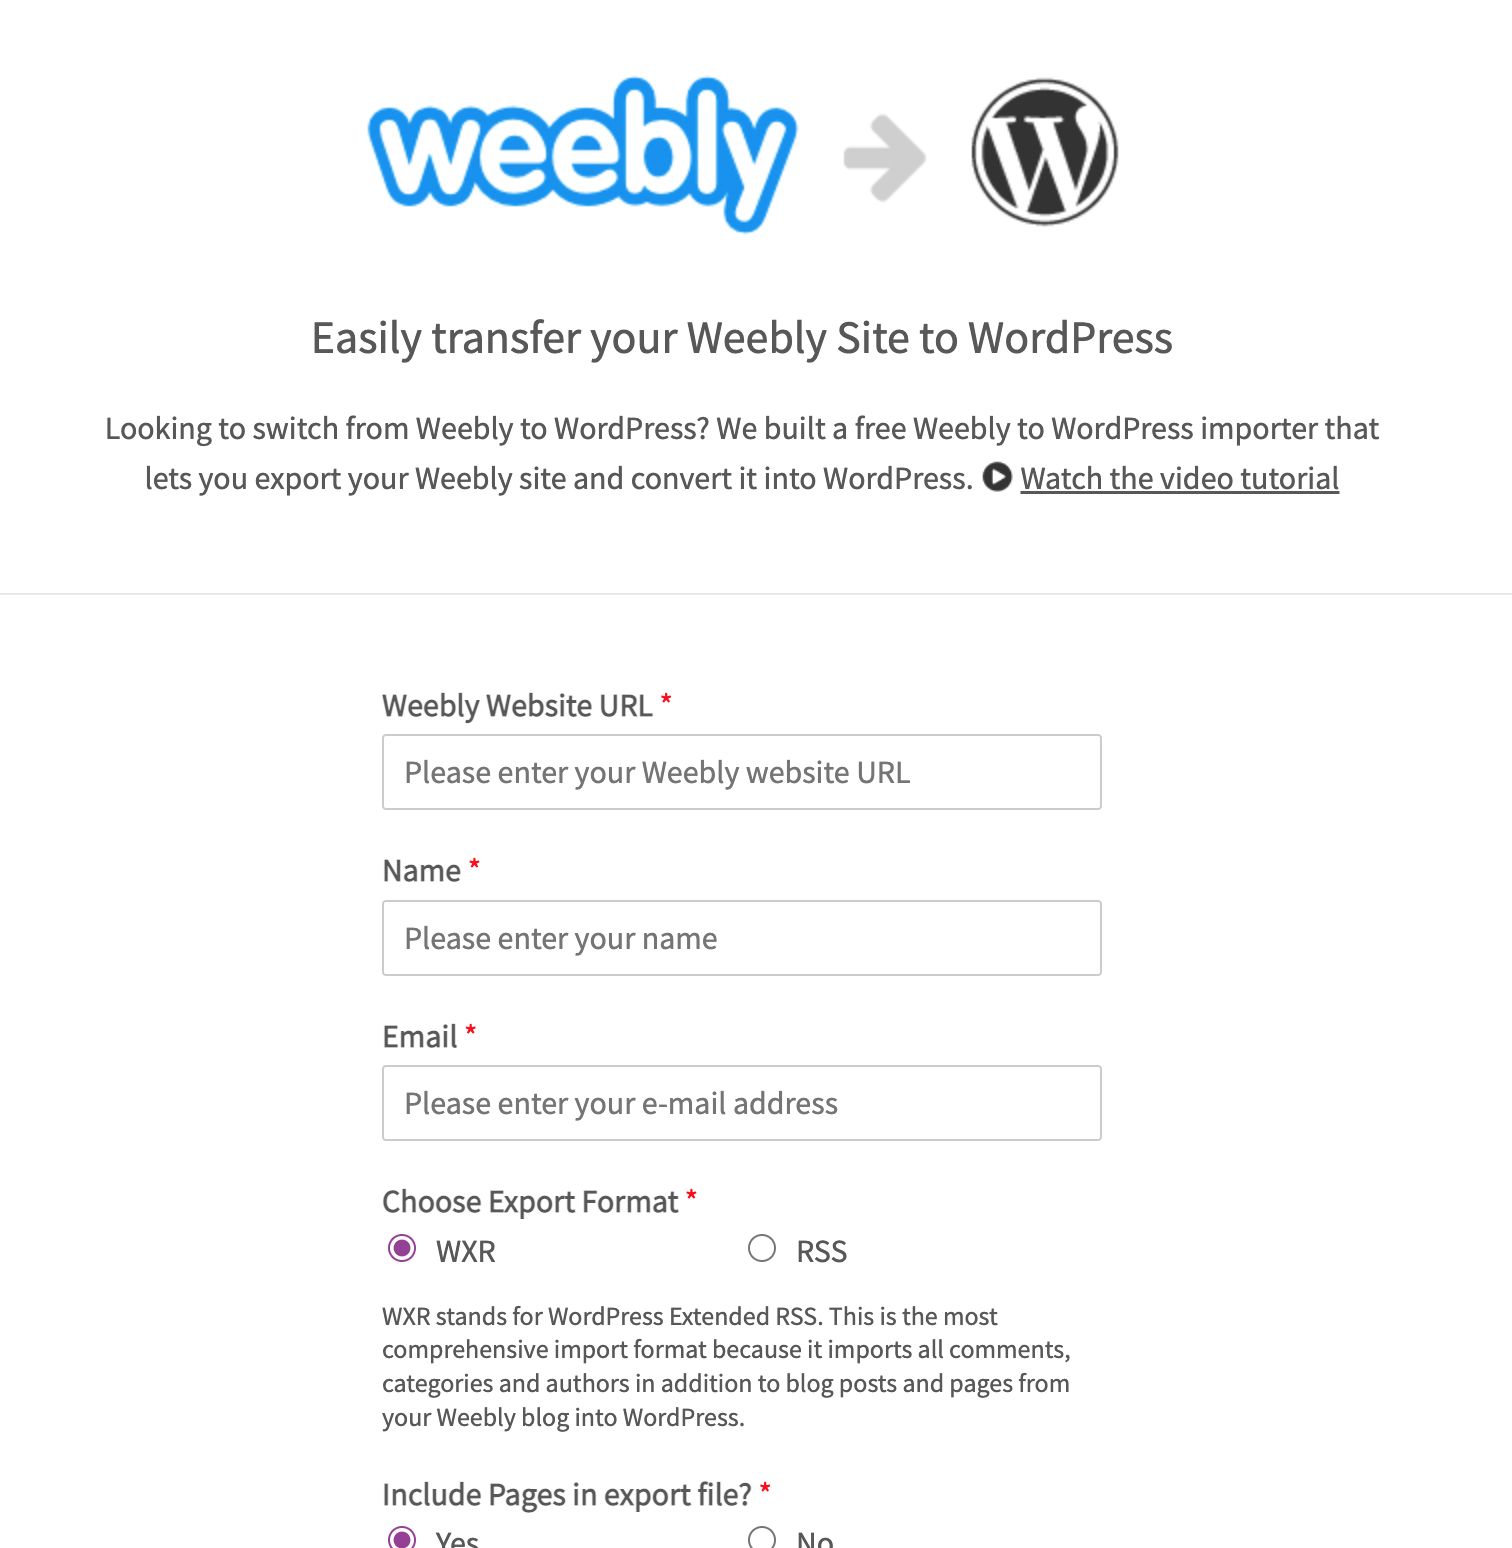
Scroll down so that you can see the complete form to fill out. Fill out the form fields. If you are using a free Weebly domain, don't forget that your URL is a subdomain, and instead of https://www.example.com/, your URL will be https://www.example.weebly.com, with the example being replaced with your actual domain.
WXR is the default format and the best for ensuring you capture the most data to import. It is WordPress' extended RSS format that is specific for importing to WordPress. You may use RSS, but you won't get the same information. Therefore, we recommend that you use the WRX format. By default, the export will select to include pages. Unless you specifically want to leave the pages behind, leave this selected:

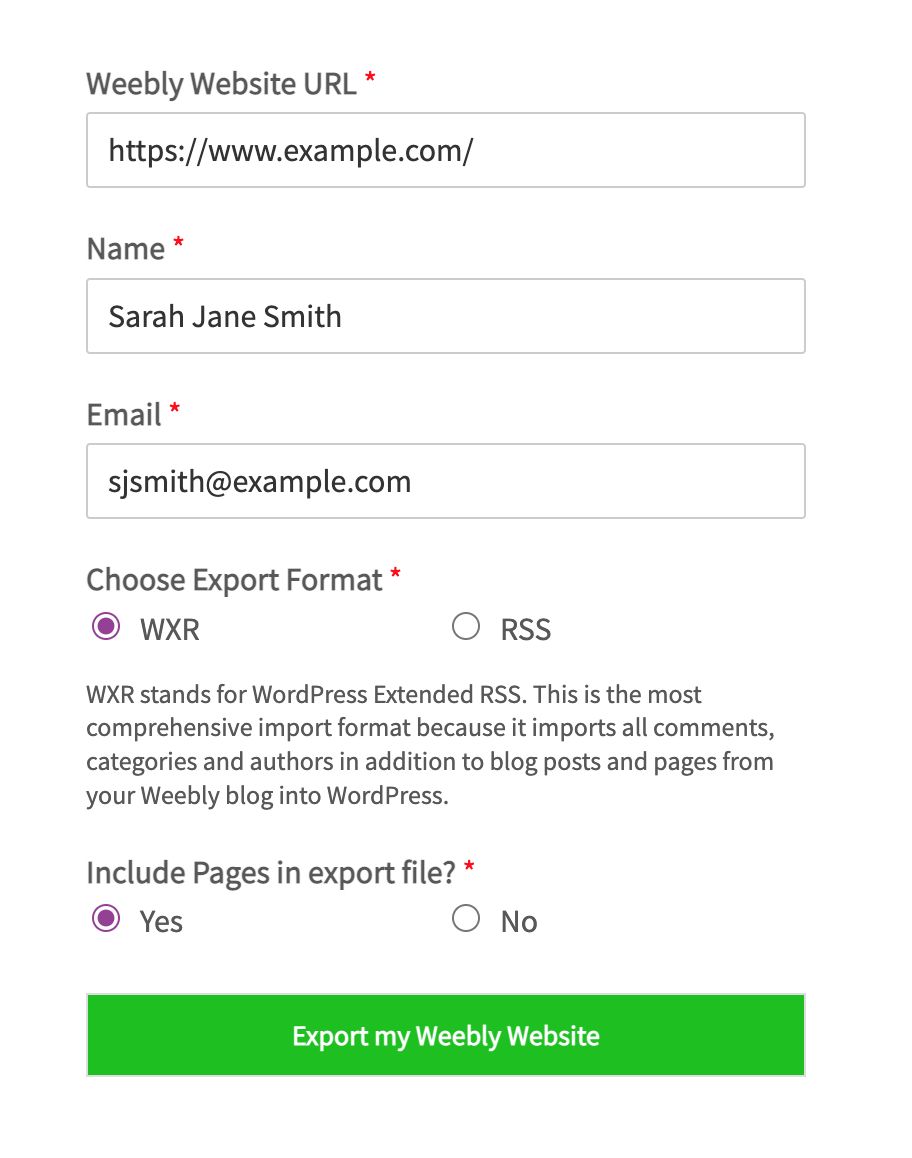
After you've filled out the form, click on Export my Weebly Website. Depending on the size of your Weebly site, this may take some time. So be patient while the tool works:

While it is working, you should see something like this:

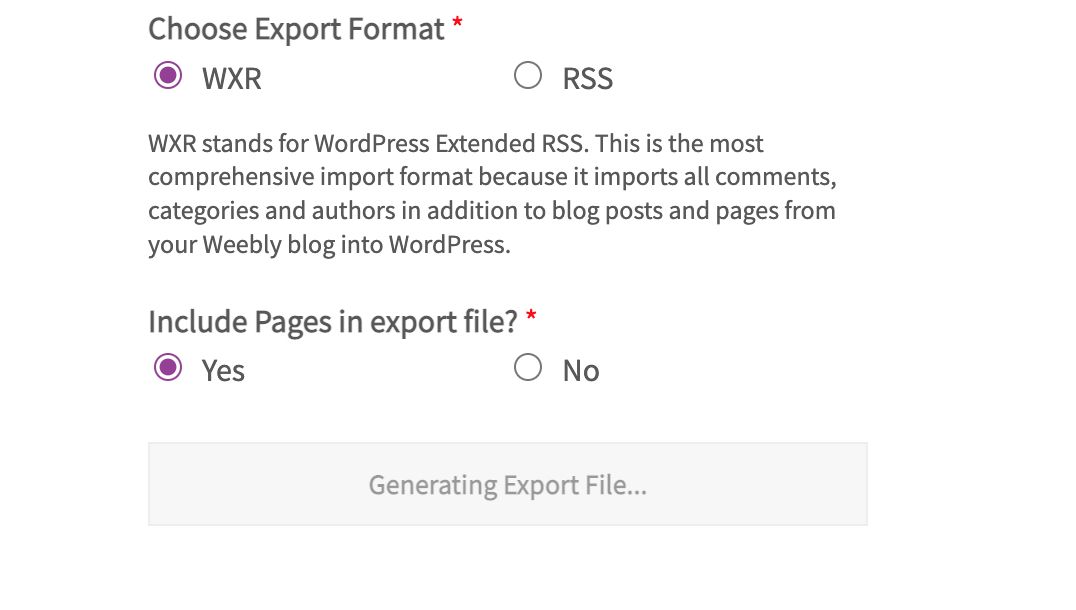
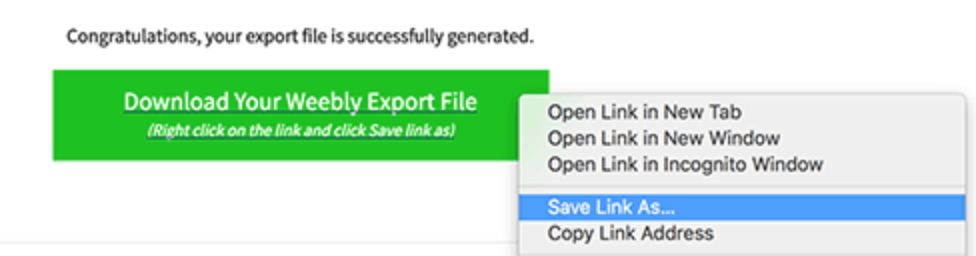
Once the export is complete, you will see a green button with a link that says Download Your Weebly Export File. You'll need to right-click on the link and select Save Link As. Remember where you save this export file (export.xml) as you will need it for import to WordPress in a moment:

Exporting within Weebly
It is certainly possible if you would still like to export from Weebly directly. However, Weebly sends you a .zip file that is not easily imported to WordPress because Weebly doesn't want you to transfer to another host. You will still be doing much manual input work with this direct export method. We recommend using a third-party tool as described above.
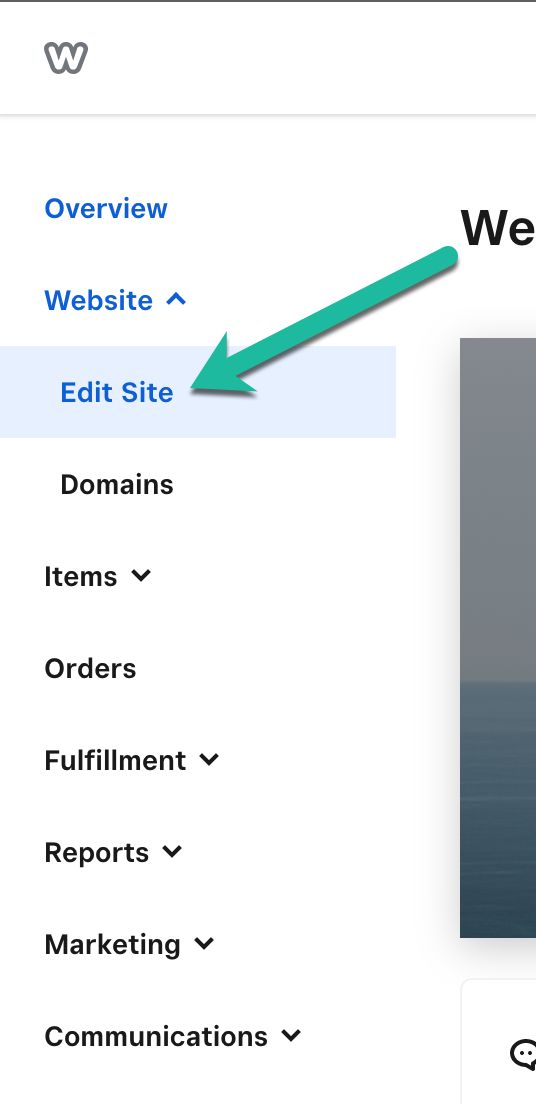
Log in to your Weebly Dashboard. On the left-hand menu, you will see a Website dropdown below Overview, click on it:


In the dropdown, select the Edit Site option:

When the page loads, you will see an Edit button on the right upper corner — click it:


In the editor, you will see a menu across the top with a Settings option — select it:


Enter your email in the text box, then select Email Archive to send the zip file to your email:


Once you receive the zip file, you are free to begin entering the data exported to WordPress. Unfortunately, this will be a long process, as Weebly does not send you an easily importable file to WordPress.
Importing to Nexcess with WordPress
After you sign up for an account with Nexcess and your WordPress site is installed, you can import your export file from Weebly, obtained via Weebly to WP. So let's get started importing!
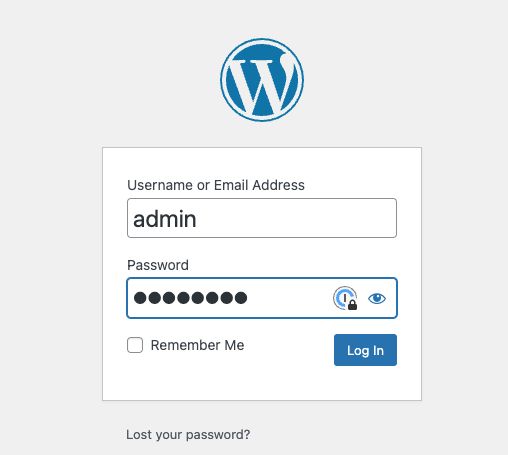
Sign in to your WordPress Administration page:

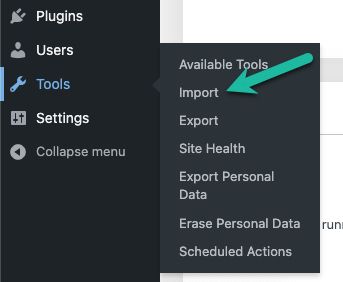
Once you are logged in, you will see the main home page, with a menu on the left. On the bottom left, you will see a menu item called Tools:

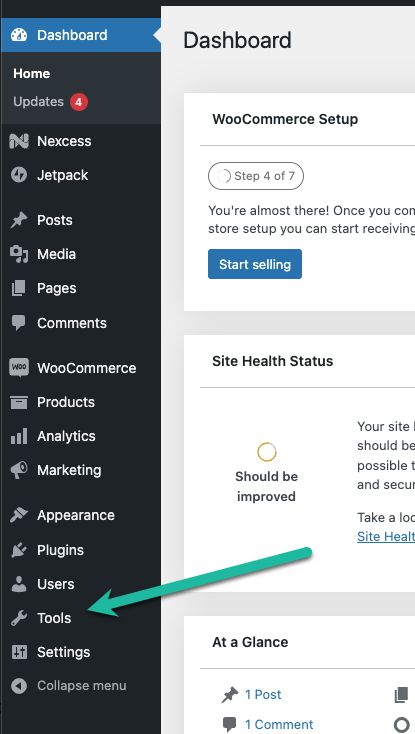
If you hover over Tools with your mouse, another menu will appear. Click on Import to go to the import page:

You will see a list of options to import from on the Import Page:

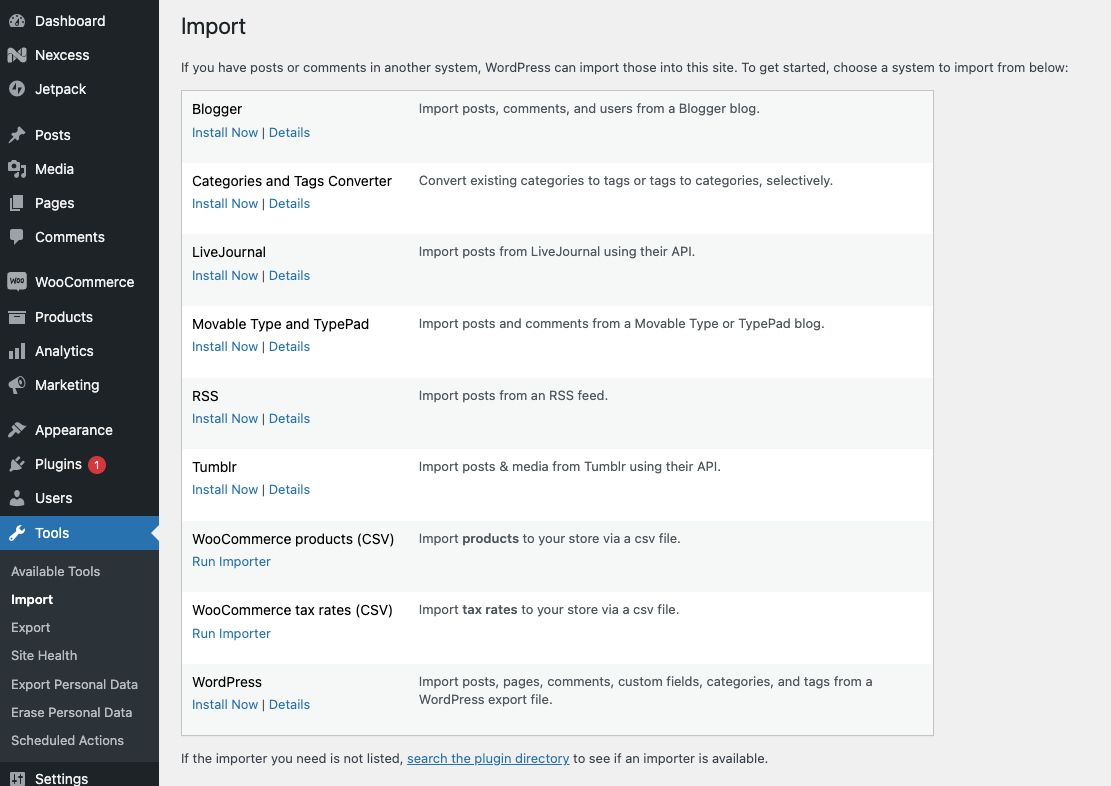
Because you have an export file, you will want to install the WordPress Importer. Click on Install Now at the bottom of the page:
Once it's installed, click on Run Importer to move to the next step:


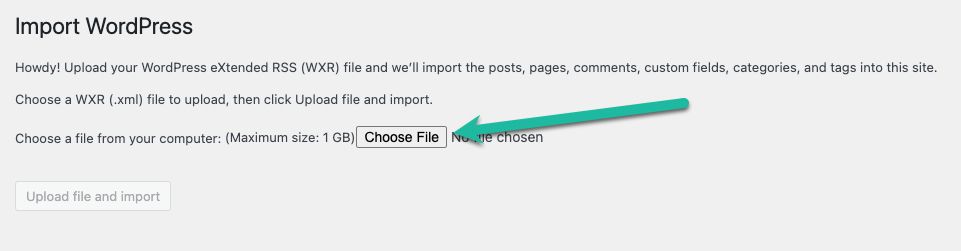
On the Import page, click Choose File, and navigate through your filesystem to where you saved the export file:

Select the file, and click Open, you will see your file's name to the right of the Choose File button, and Upload File and Import will turn blue. Click it to start the import process:

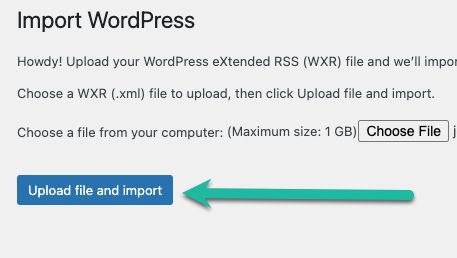
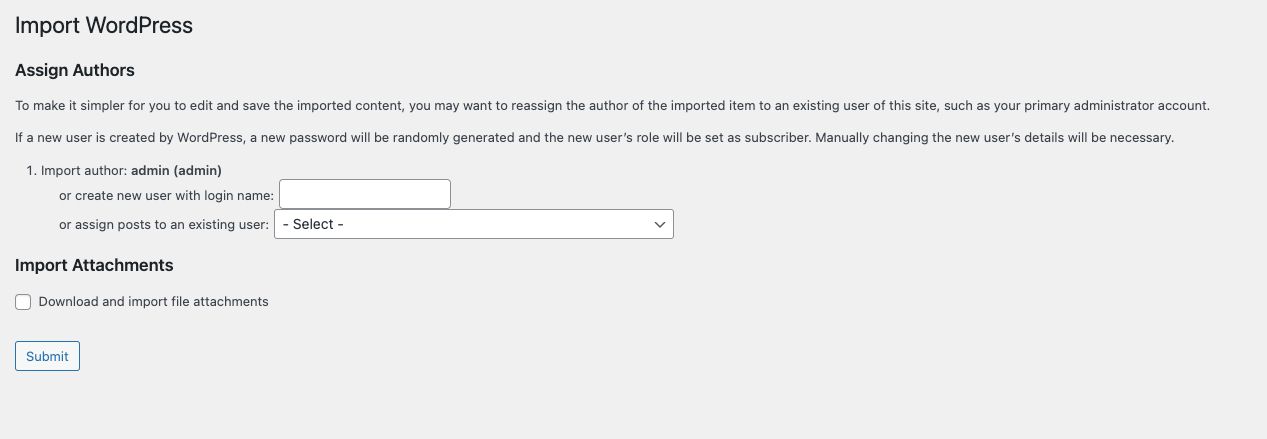
Clicking Upload File and Import will start the import process. WordPress recommends that you assign the incoming posts to one author as a part of the process. You can select an existing user from the dropdown or create a new user to assign them to. Of course, once the import is complete, you can always reassign the posts to the proper authors if you so choose. Once you have selected a user, click Submit to import your file:

Once the import is complete, you should see a success message, and all of your content should be under posts. You'll want to carefully review your website to ensure everything you want is there before redirecting your Weebly site/account. Now is the time to manually move over anything you've noticed that was missed in the export. Depending on the size of your site, this could take some time.
Missing Images? No problem!
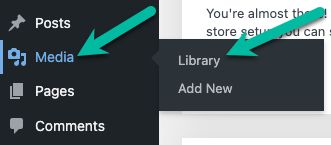
The first step is to find out if the import process successfully imported your images to your media library. Go to Media then Library — if you see your images, then all you need to do is update the URLs used for your images in your posts:

Before you do this update, back up your WordPress site as precaution in case something goes wrong. Making backups is an excellent habit to get into before making changes to your site.
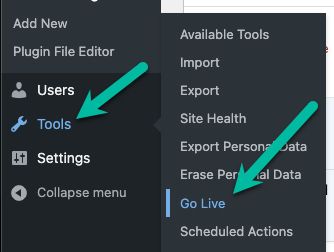
After you've made a backup, install the Go Live Update URLs plugin and activate it. Then go to Tools and Go Live to get started:

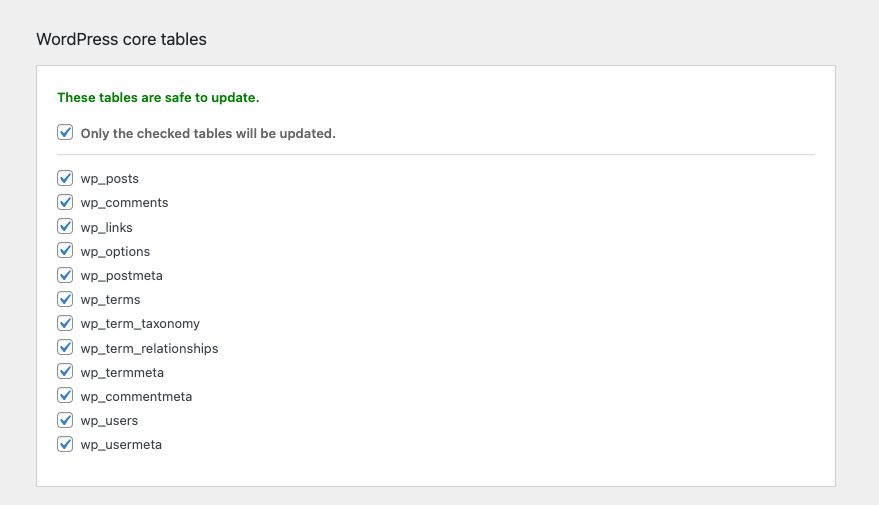
You will see a list of tables that are safe to update with the free version of the plugin, and a list of tables that are only safe to update with the Pro version. For our purposes, you can safely ignore what can only safely be edited by the Pro version and proceed with the free version:

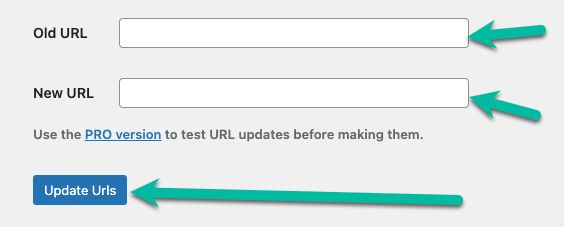
Scroll to the bottom, fill out the old and new URLs, and click Update URLs. This step will go through and update the URLs in the selected tables with the new URL:

However, you may not see your images in the media library, and the previous steps won't help you. Fortunately, there is a (free!) plugin you can use for this, called Auto Upload Images, that, once installed, can help you fix your images without a long process of downloading and reuploading.
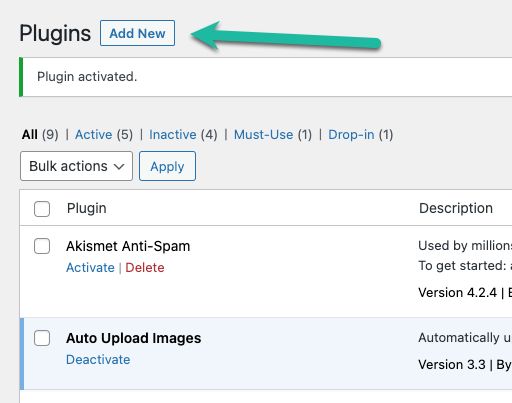
First, install the plugin. You can either download from the link above, install and activate it, or search for it in Add New on the Plugins page:

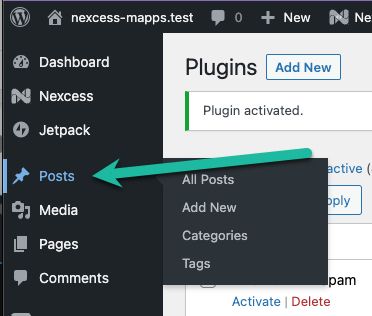
Once the Auto Upload Images plugin is installed, you need to head over to the Posts section of your admin page:

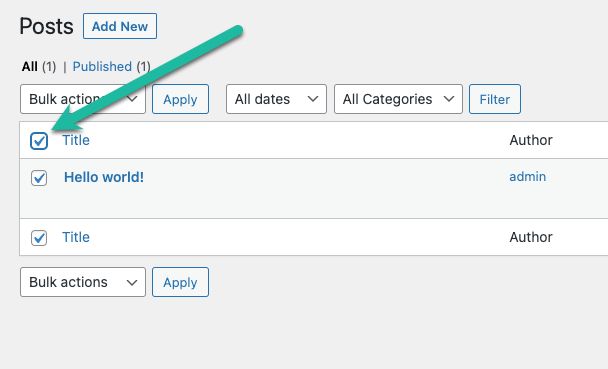
On the Posts page, make sure that you set your Posts per page to 999 so the next step will select all of your posts. Then, click the box in the upper left corner to select all the posts you just imported:

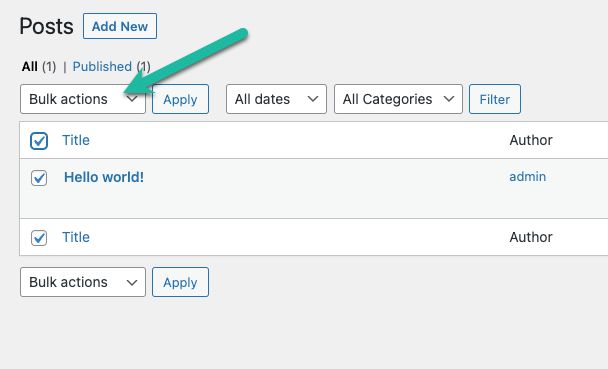
After selecting all the posts, click on the Bulk Actions dropdown:
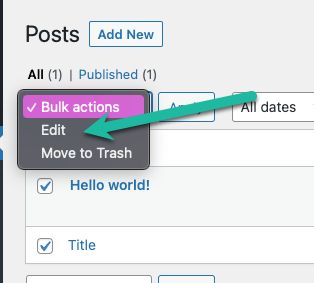
Select Edit from the dropdown menu:

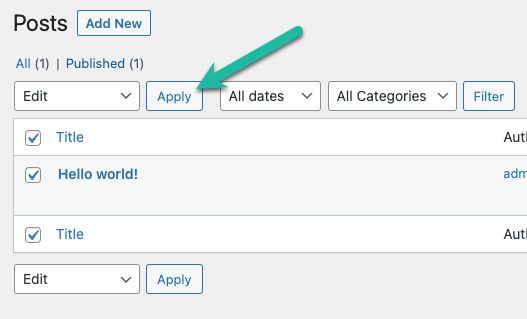
Then select Apply — a new window will show up:

On the resulting window, click Update without changing any other settings:

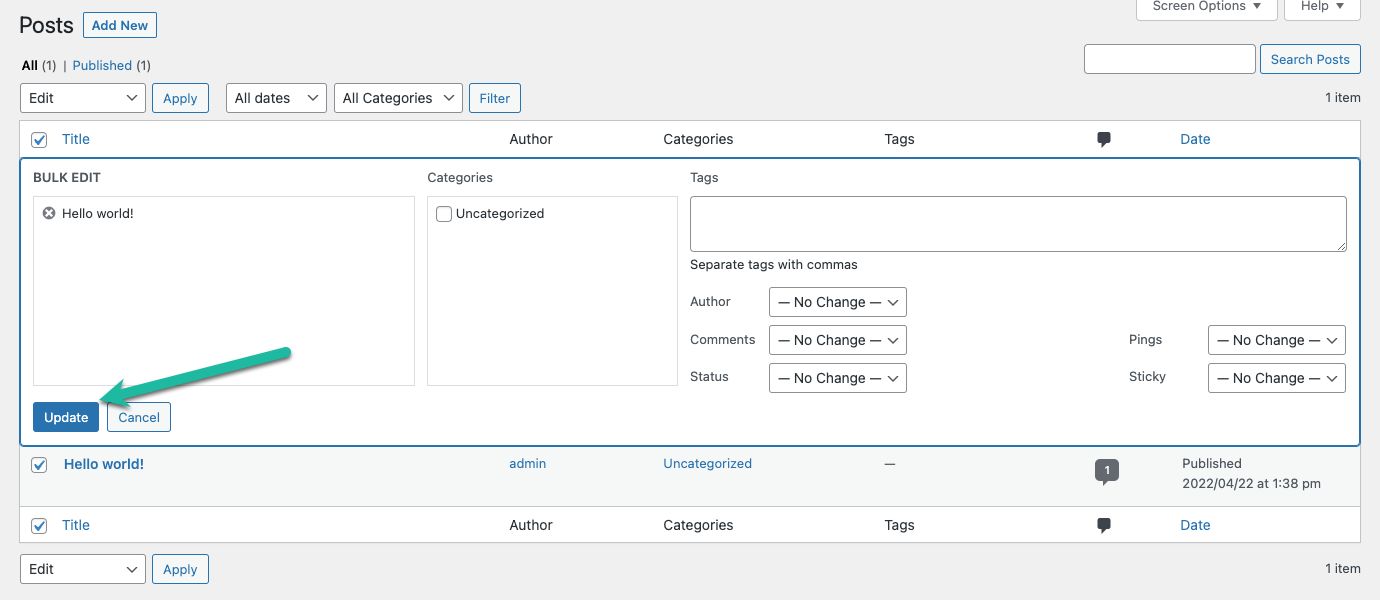
This action will automatically save the images still linked to the old source links to your WordPress Library and update the links in your posts.
Import Your Site to Nexcess with Magento
While Magento is a good Weebly alternative, as there are open source and paid options, there is no built-in import feature sponsored by Magento. There is a Weebly to Magento extension called Migrate From Weebly available in the Magento Marketplace. You can try it out for free, but the full migration can cost a bit of money. You can contact the creators, LitExtensions, to check pricing. Another (paid) option with a free demo is Next Cart. This can also be used to move Weebly to WordPress, but the more you have to move, the more expensive it is. For example, moving 100 entities is $20, but moving 1,000 entities is $69.
You may also go the longer route of manually moving your site bit by bit to Magento, but that would be rather tedious. Instead, we highly recommend you look for a similar migration tool, if either of these don't fit your needs. These tools allow you to port your Weebly site into Magento directly, and are a definite time saver.
Handle Your Domain
You may choose to rebrand when you move away from Weebly. If you are early in your site's days, it's easier to change your domain than if you've been there for a while and have brand recognition. If you have brand recognition, abandoning the previous domain and choosing a new one could result in losing customers if not marketed properly.
If you have a Weebly subdomain (for example https://sarahjanesmith.weebly.com) you will not be able to take that domain with you, and you will need to purchase a new domain (for https://sarahjanesmith.com) and set up your nameservers as a part of that transition.
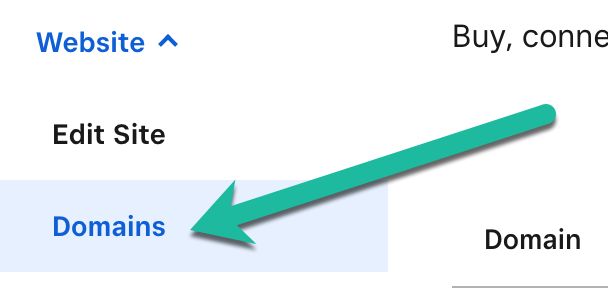
If you do not have a subdomain of Weebly but did purchase a domain from them (example.com or sarahjanesmith.com), you can, in the same Website dropdown from earlier, click on Domains, then and Manage to unlock your domain and move it to another provider. There is a help thread with Weebly that can help you with your domain move.

Keep in mind that right after you purchase your domain, or if you have recently transferred it, your domain may be locked for 60 days. This lock is standard procedure, but can slow you down in your move. If you purchased your domain from a registrar like Namecheap, you don't have to transfer your domain, but don't forget to update all the domain records to the new server(s) you are setting up. The domain records, or nameservers, point people to your website when they put your URL into their browser.
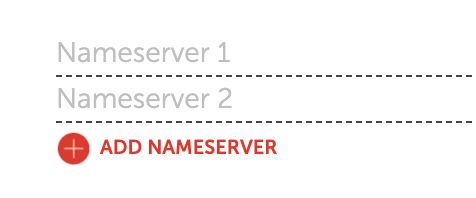
This is similar to what you will be looking for. Since you already had nameservers at Weebly, you'll update them to your new nameservers, instead of filling them in from blank like in the below screenshot:

Once your nameservers are updated, it may take up to 24 hours for the change to be reflected when you go to your site's URL. You'll want to make sure you have everything moved over and your site is working how you want it to before you forward your Weebly site to your new site. Don't forget the MX Records for your email if you have a custom email with your domain!
Set Up Redirects & Update Your Permalink Structure
Redirect Your Weebly Subdomain
If you have a subdomain at Weebly, you can redirect it to your new non-subdomain site. Then, on the main dashboard, follow the steps to get to edit your website from earlier:
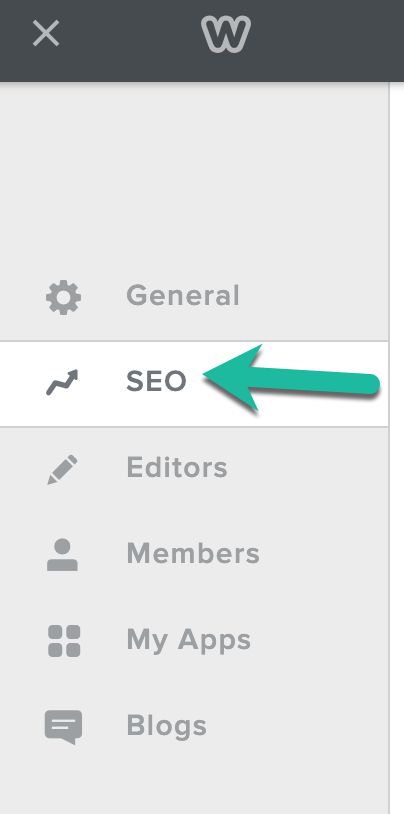
On the left-hand menu on the settings page, click on SEO:

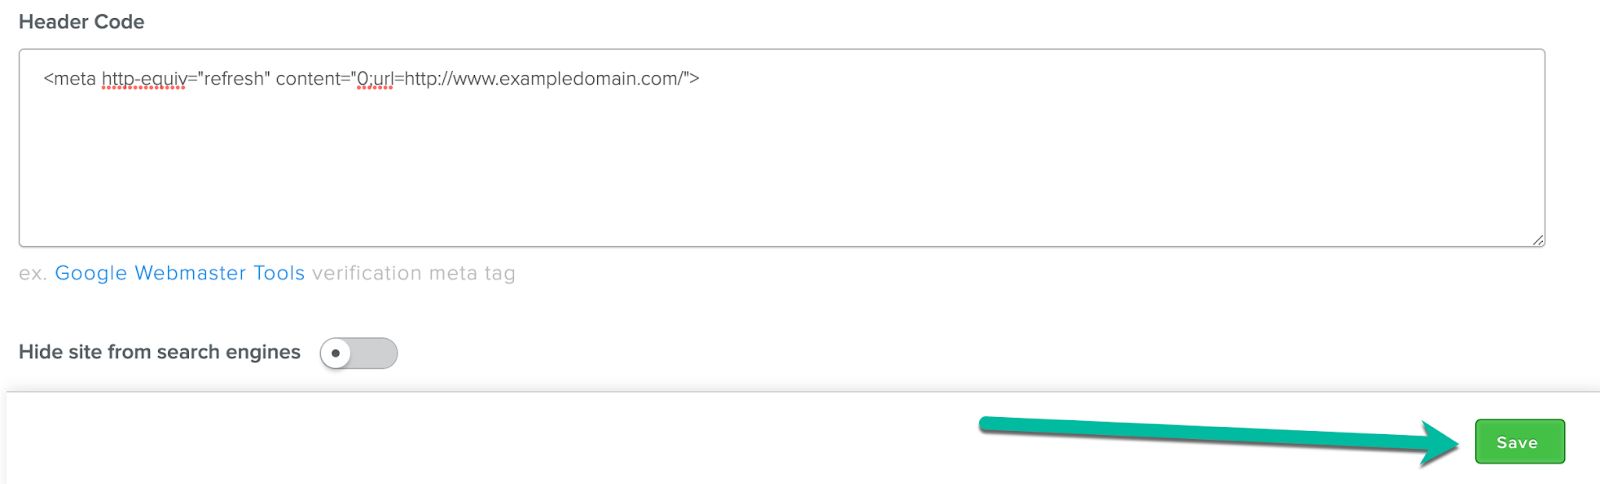
Scroll down on the SEO Page until you see a text box labeled Header Code:

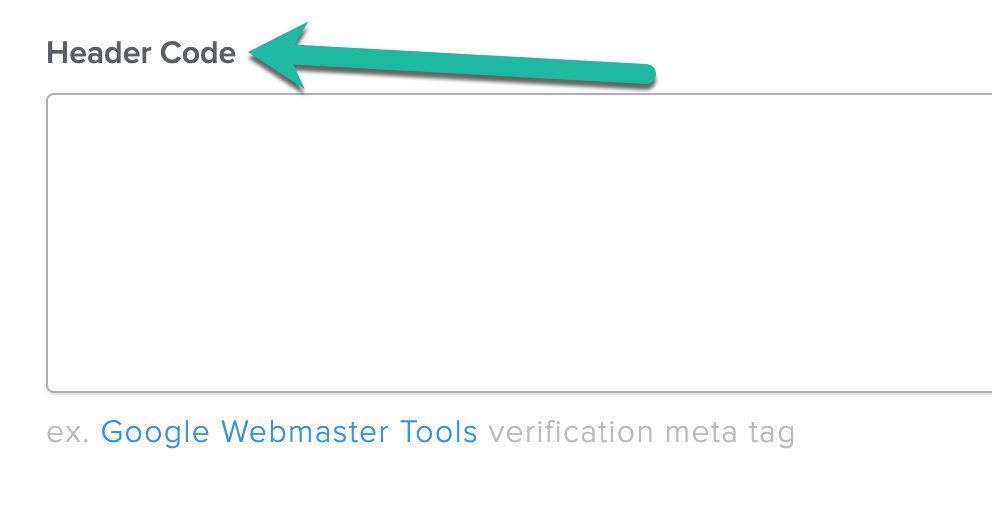
In this box, copy the following line, but with your actual domain in place of exampledomain.com:
<meta http-equiv="refresh" content="0;url=http://www.exampledomain.com/">
Don't forget to save!

It is recommended that you leave the redirect in place for two to three months to ensure that everyone knows that you made this change. It's crucial for SEO purposes, but after two to three months, it gets a little redundant and can harm your SEO.
Fix Your Permalinks
Weebly has a specific URL structure that they use. Usually, you will see http://sarahjane.com/blog/post-title/ for blog posts and http://sarahjane.com/page-title.html for pages. So let's take care of the blog posts first.
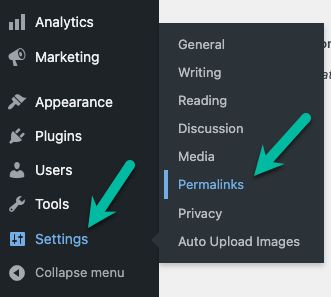
In your WordPress Admin area, on the left-hand menu, you will see Settings toward the bottom. Either click or hover over Settings then click on Permalinks:

From the Permalinks page, select Custom Structure and copy /blog/%postname% into the text box, like the example below:


After making that update, scroll to the bottom, and click Save Changes to update your permalinks.
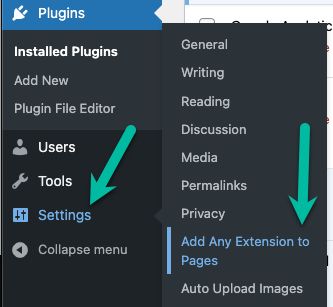
To fix your page links, you'll need a plugin that will allow you to add an extension to your pages. We suggest using Add Any Extension to Pages. You may download and install it from the link or search for it in the plugin section by clicking on Add New on the Plugins page. Once it is installed and activated, go to Settings then Add Any Extension to Pages:

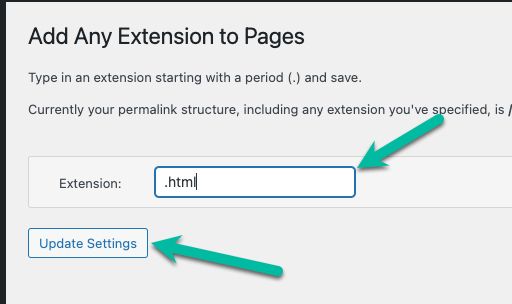
The resulting settings page will ask you to confirm that your permalink structure is how you want it to be before setting this up. Double-check to make sure the permalinks are set how you expect based on the above. After you've confirmed, add .html (make sure to include the period before html) to the text box, then click on Update Settings to save the change.

Wrapping Up
Now you know how to transfer a Weebly site to another host.
Though this is a comprehensive guide, there are still links that could be missed, images that don't import correctly, and other issues you might see on your site. So thoroughly go through your site to ensure all the images, texts, and products (if you have them) show up how you are expecting. With most of the import handled automatically, you should only have a few tweaks here and there.
Get Started With Nexcess
Check out our fully managed hosting plans to get started today.
Related Articles
- Scope of Support - Managed WordPress & Managed WooCommerce
- Getting started with managed WordPress and WooCommerce hosting
- Migrating to Nexcess with managed WordPress and managed WooCommerce hosting
- Going live with your site in Managed WordPress and Managed WooCommerce hosting
- WordPress Cleanup 101: 9 Easy Ways To Clean Up and Optimize Your WordPress Site
- How to configure the Nexcess CDN with WordPress and CDN Enabler
- The Nexcess Plugin Performance Monitor
- What is Scalable WordPress hosting?
- Everything You Wanted to Know About Auto Scaling
- Viewing AWStats for Managed WordPress & WooCommerce


