
Looking for an easy way to increase sales and improve customer experience for your ecommerce store? Want to make an impactful change for your online store that doesn’t require being able to code? Optimizing your WooCommerce category pages can help you do just that!
WooCommerce lists your products on your shop page, where you can filter and search through them. While that’s certainly where you can leave it, there’s a lot more you can do to optimize your WooCommerce category pages. In this article we’ll show you how to:
- Increase your product catalog by displaying variations on your shop page.
- Display product options on the shop page as swatches or buttons.
- Display multiple images per product on your shop page.
- Add products to the cart without ever leaving the shop page.
Displaying Variations
When your customers are looking at your store, they can filter products to narrow the selections down to the exact type they would like to buy. Perhaps they’re looking for green t-shirts, white sweaters, or rainbow headbands. When they only see one product advertised to them, they may not realize the product they’re looking for is available in the color or style they want.


When setting up your products in WooCommerce, you’ll have added attributes to each product. “Red,” or “sweater,” or “Medium” for example. To make things easier for that customer who may not realize the pictured green sweater also comes in red, you’ll want to make it as simple as possible to get them from “searching” to “buying.”
Related reading: How to Improve Conversion Rate: 7 Ecommerce Conversion Hacks >>
Utilizing a plugin such as WooCommerce Show Single Variations by Iconic, you can display additional variations of your products and make customers aware they’re available, all without needing additional SKUs or product pages. Let’s talk about how easy it is to set this up with that particular plugin:
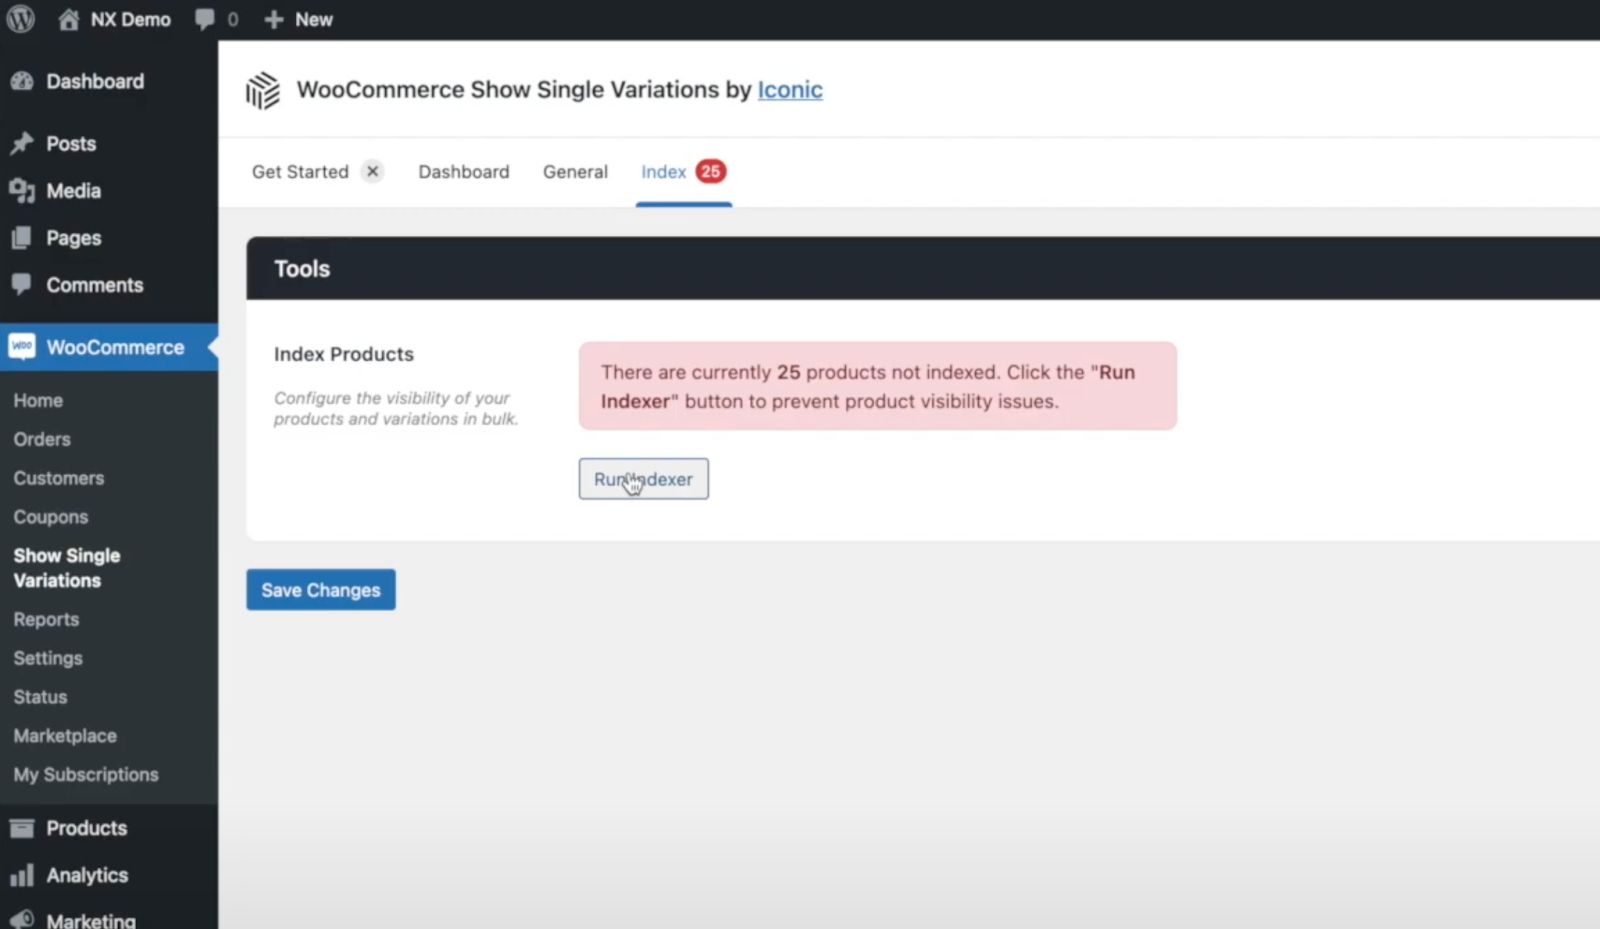
1. After you’ve installed and activated the plugin, click on “Index.”
2. If you have products that are unindexed, click “Run Indexer.” This will run through your entire catalog and ensure your visibility settings are exactly how you want them.

3. Select which options you would like to enable variations on: your catalog page, filtered results, and search results.
4. Select which options you would like for visibility of variable products. For our purposes, leave them unchanged. There are additional options should your needs be different.
5. Go to “Products” on your dashboard to edit the variable parent products. Select “exclude from filtered results” and click “update.”

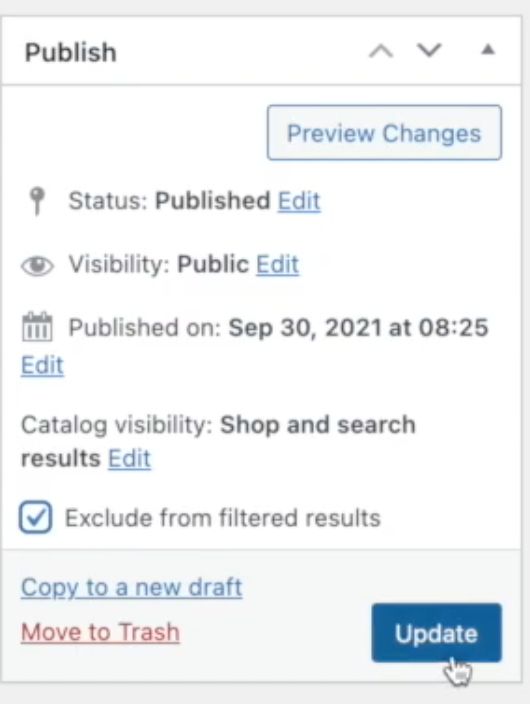
The parent product will still display in the main catalog page.
6. When you refresh your filtered results page, only the products with attributes you have selected will appear when you filter.
This is a great way to showcase all the different combinations of products you have available in your store. There are also free plugins that function similarly for showing variations on your WooCommerce category pages such as WPC Show Single Variations or Additional Variation Images Gallery.
Related reading: How to Price Your Products: 10 Retail Pricing Strategies Ecommerce Shops Can Adopt >>
Product Options As Swatches or Buttons
When you’re browsing for clothes online, you’ll see variations of products displayed as swatches or buttons. Clicking the different buttons lets you pick the item you want in a different color or style instantly. WooCommerce doesn’t offer this option by default, so you’ll need a plugin.
One plugin you can use to gain this functionality is WooCommerce Attribute Swatches, by Iconic, which we’ll go into detail here:
1. Install and activate your plugin.
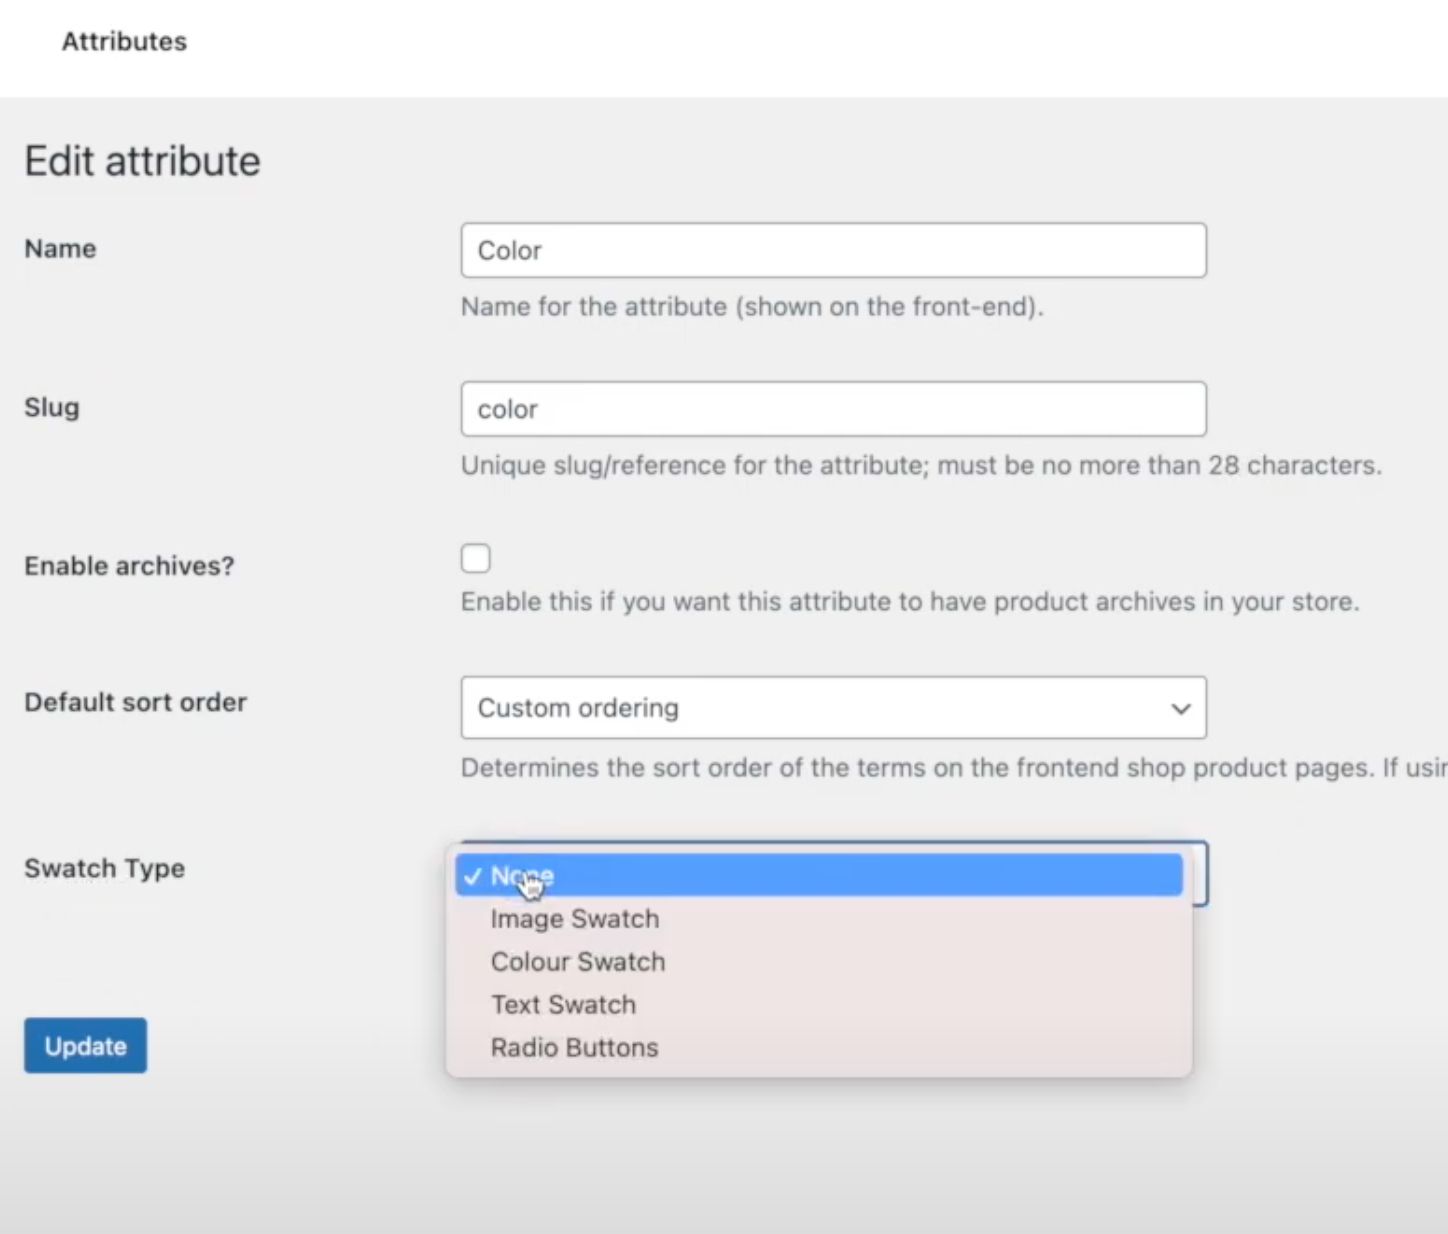
2. Navigate to Attributes in your Products menu.


3. Select the attribute you wish to add swatches to.


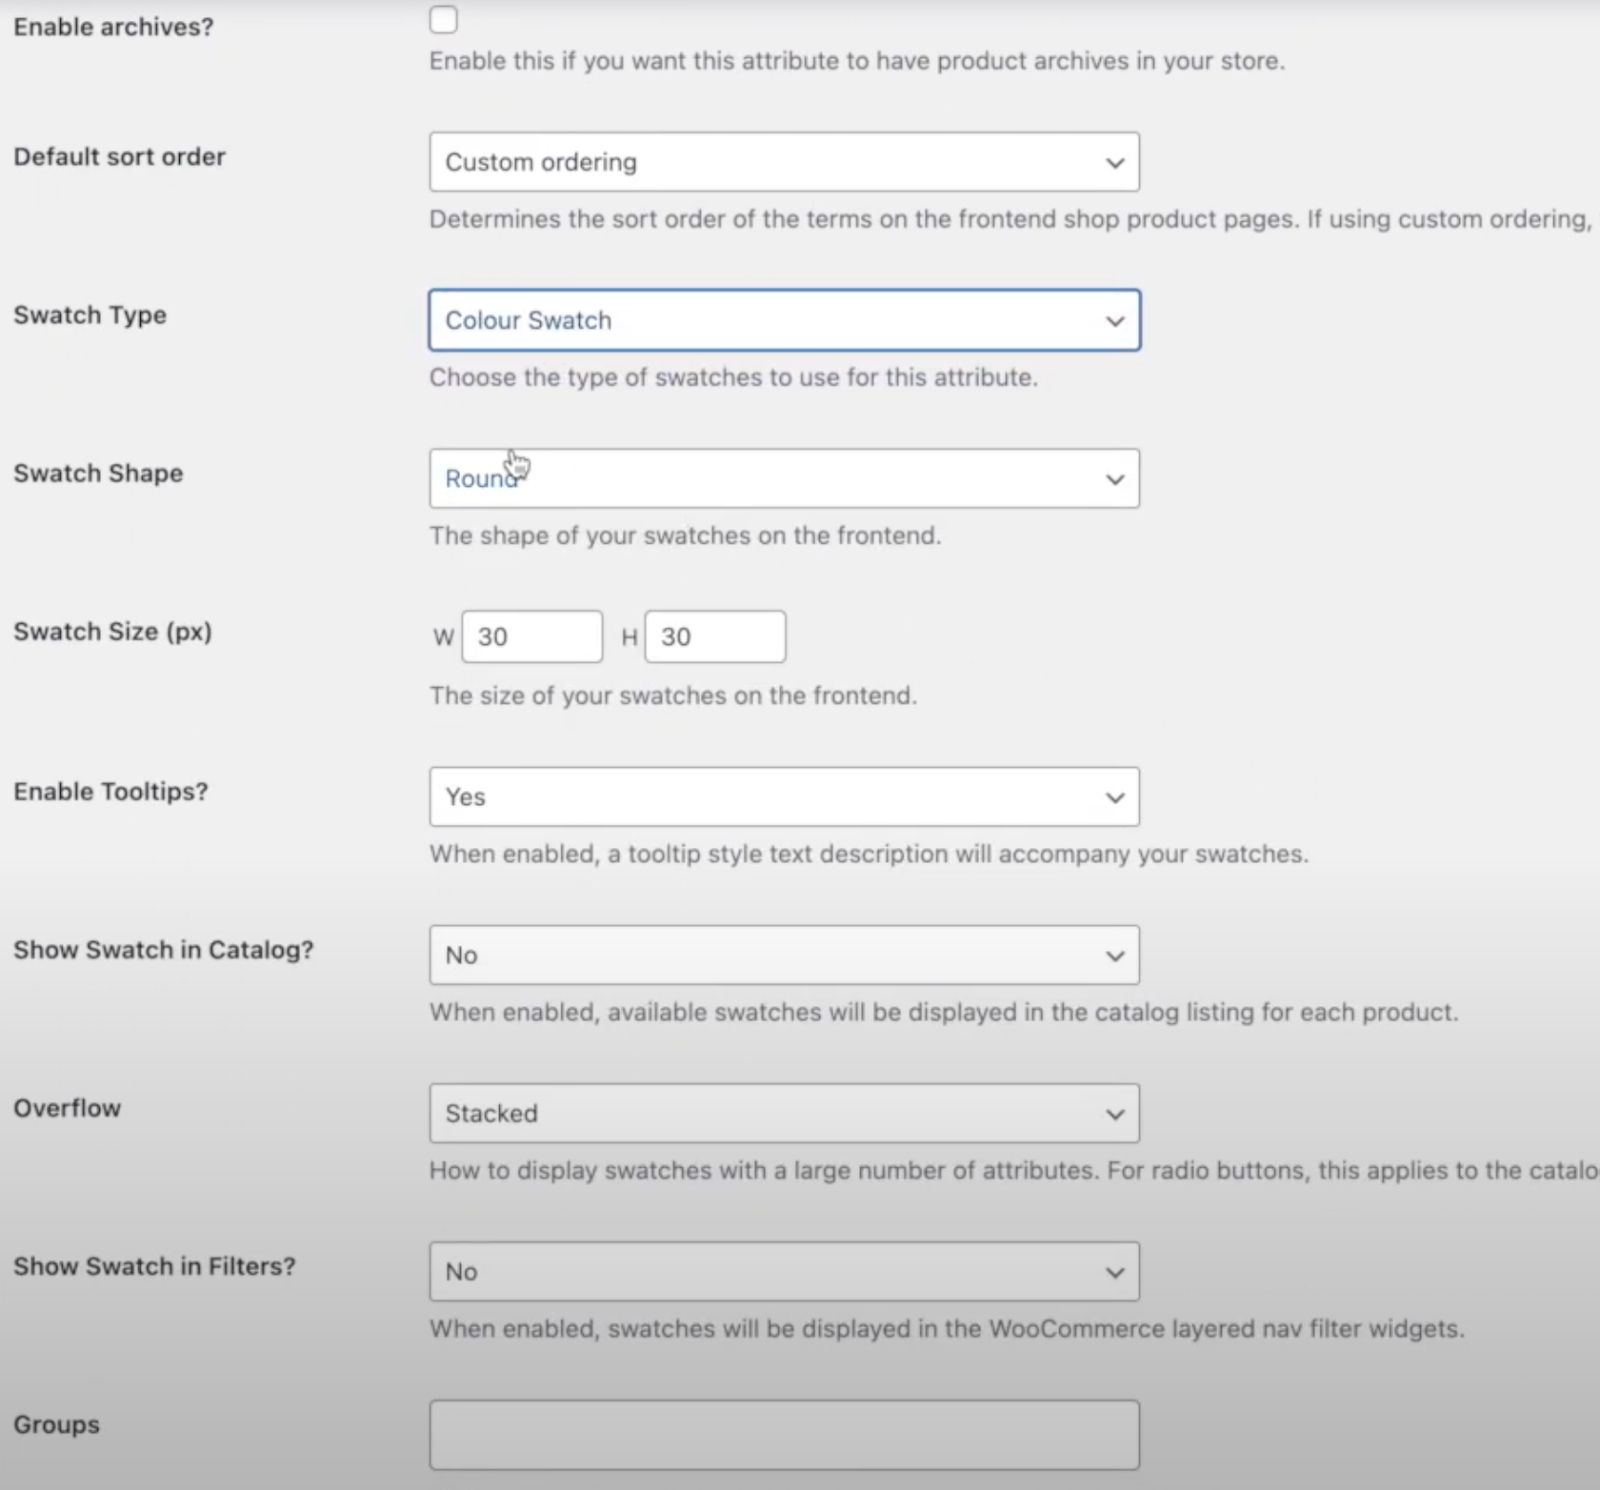
4. Select “Swatch Type” and select your preferred type from the drop down menu.

5. Edit the options for the swatch type, selecting the option that best fits your attribute whether it’s color, style, size, etc.

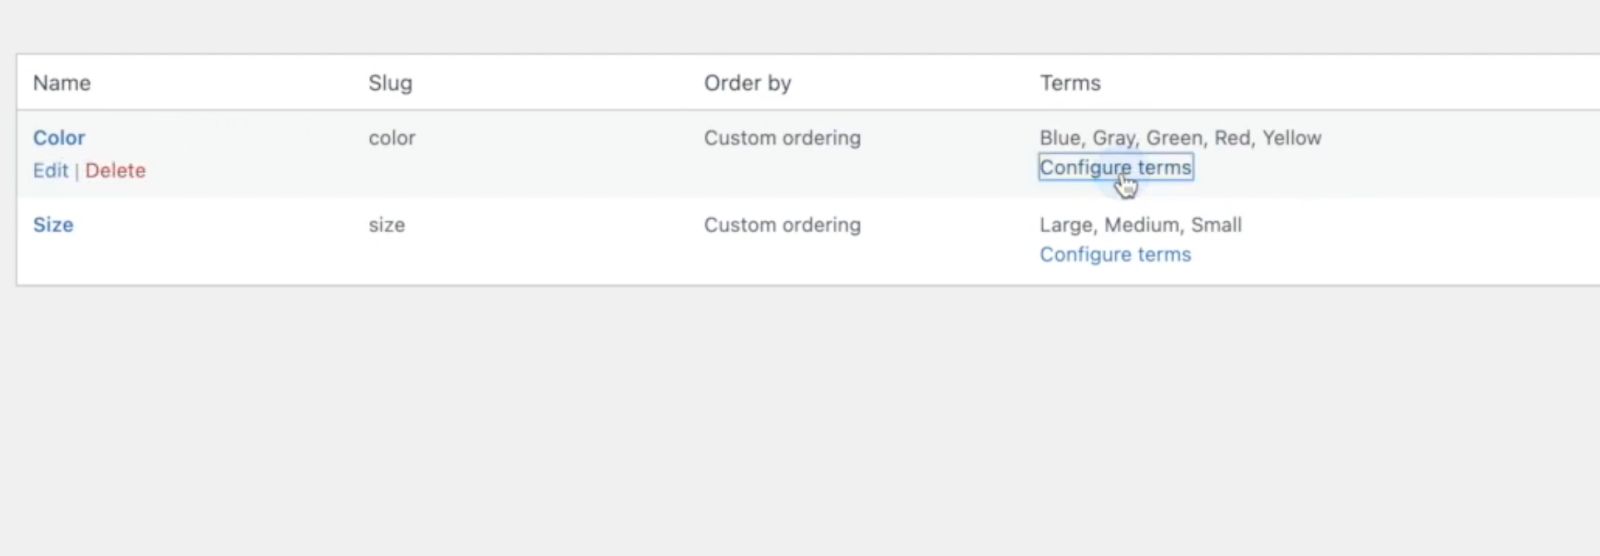
6. Update/save your changes and go back to the “Edit Attribute” screen. Select “Configure terms.”

7. If you had already set up these attributes, you’ll notice a new section: “Color Swatch."

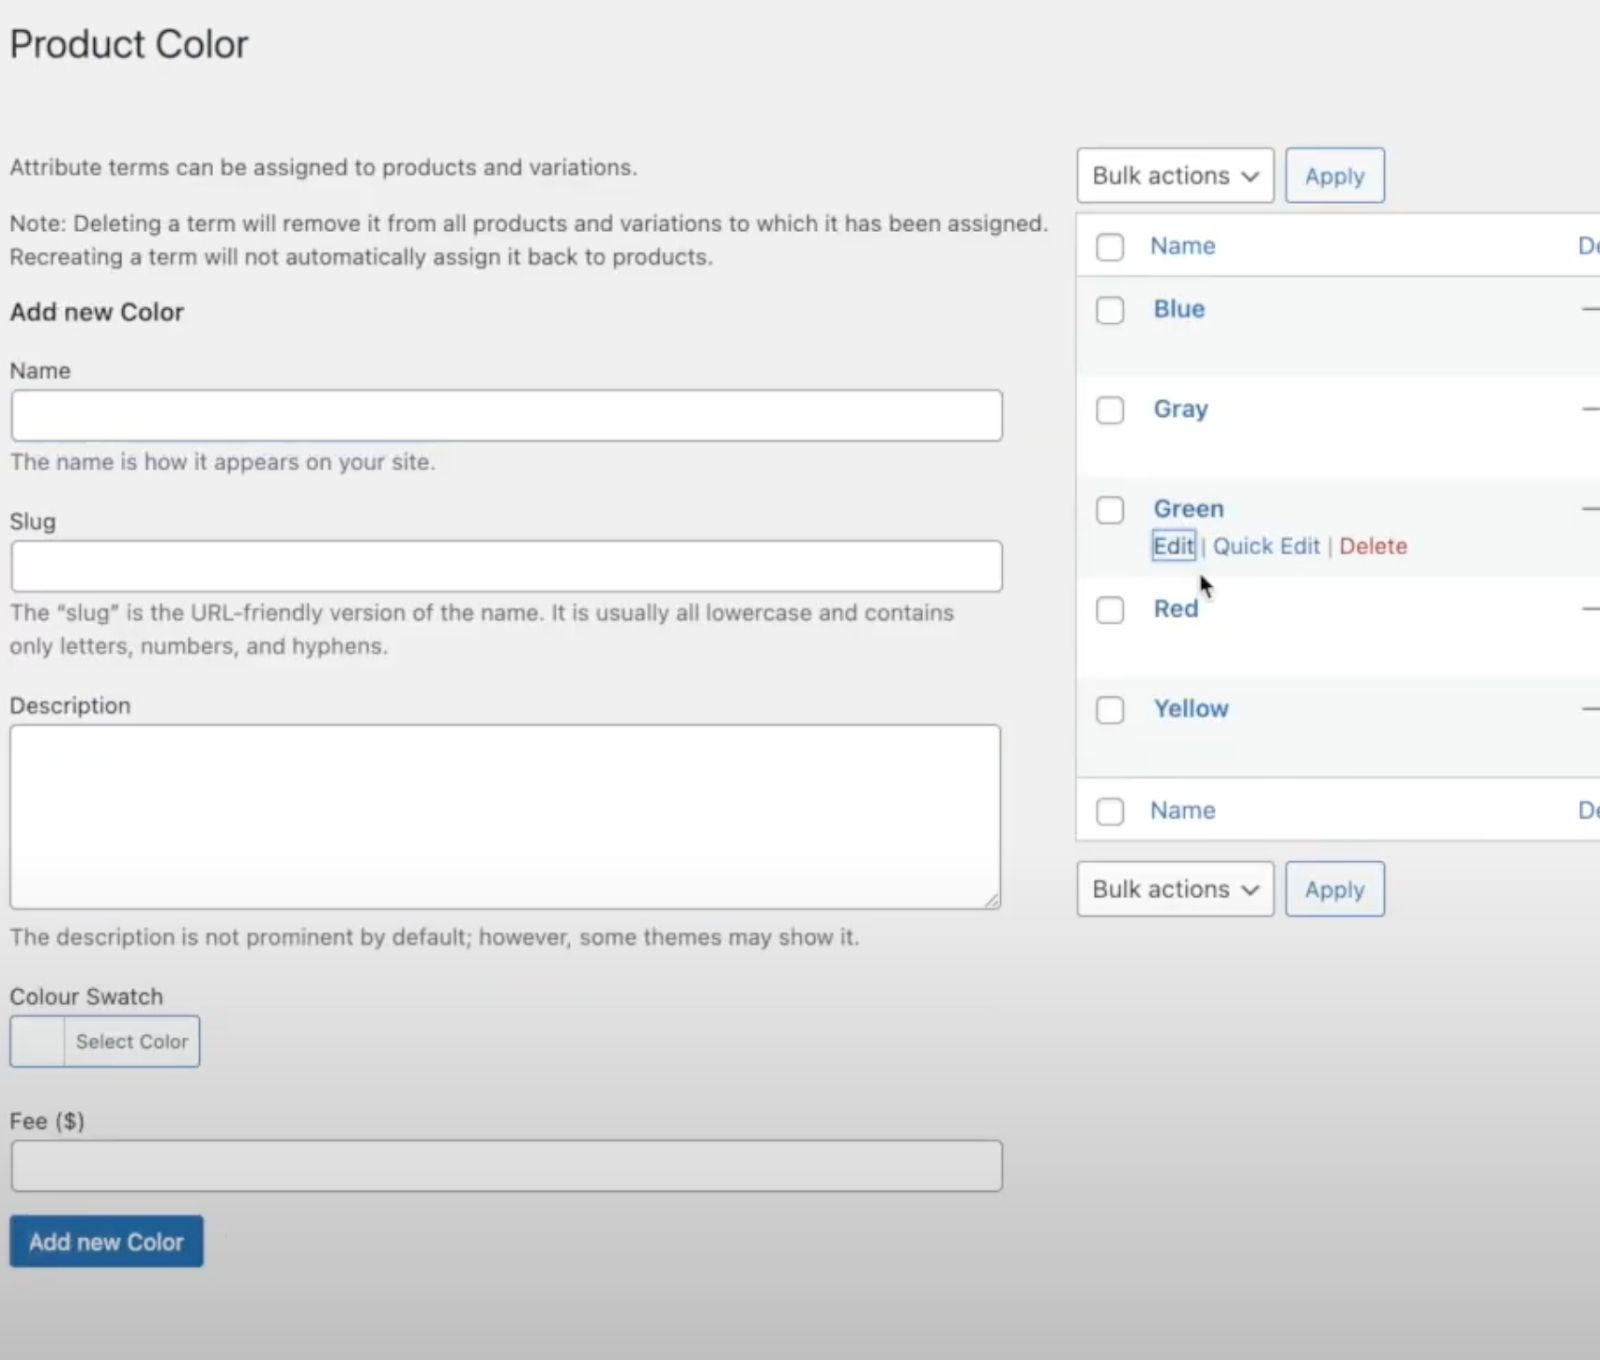
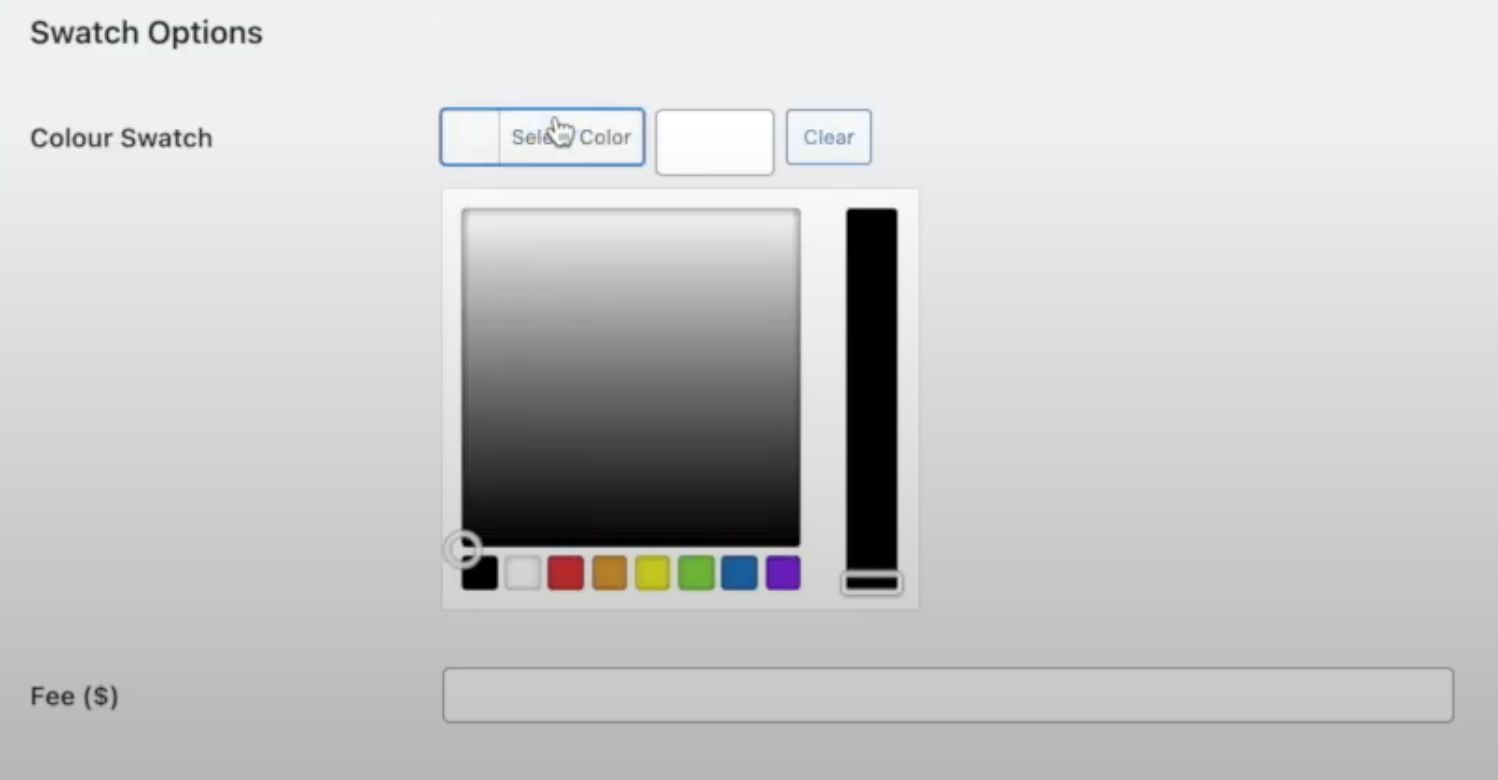
8. Click “Colour Swatch — Select Color” and select the color that best fits your product variation. There are also other options, such as text to select instead of swatch, in case color is not the variation you’re offering.

9. Repeat this process for each variation you have for the selected product. Now you should see swatches underneath each product you’ve edited.

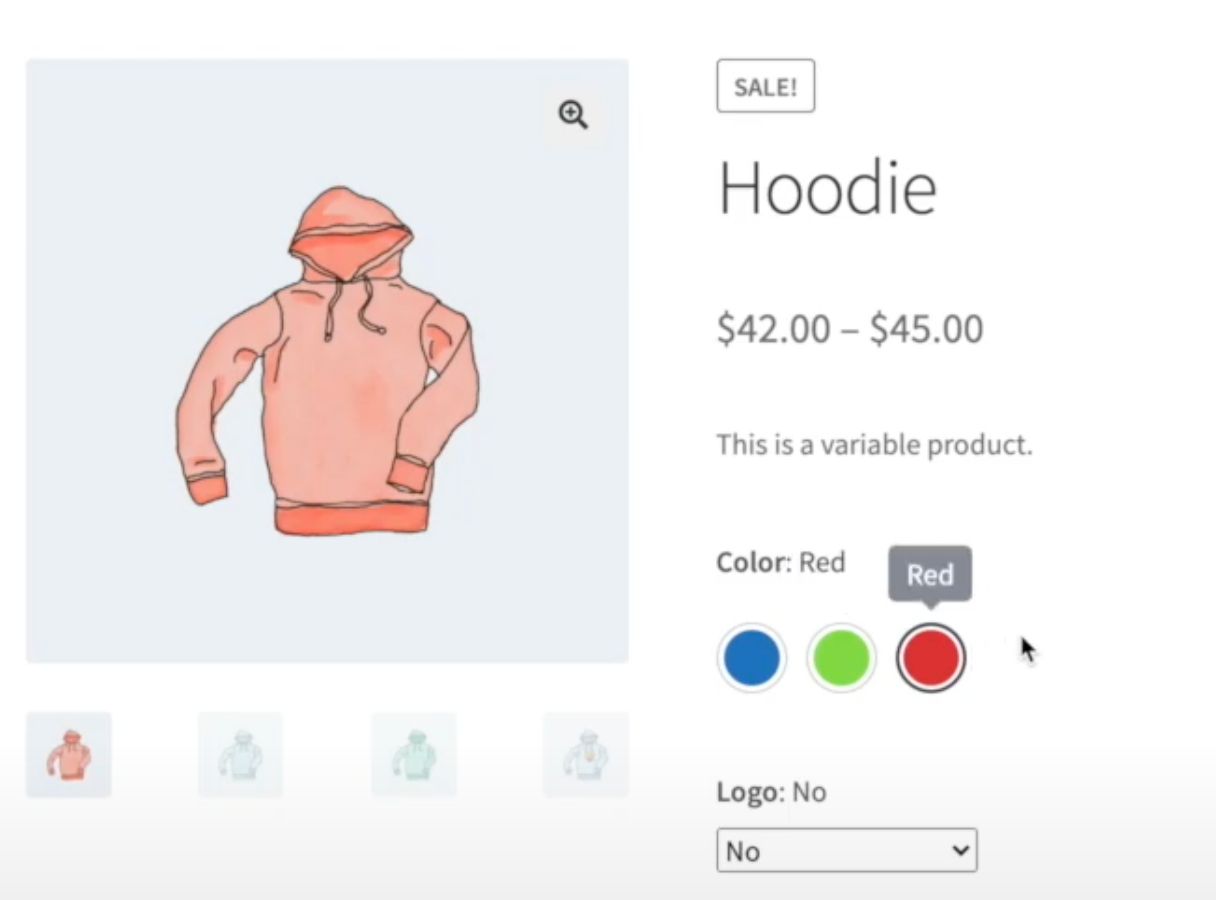
10. Additionally, you may want to go into Attributes -> Edit and turn on the “Show Swatch in Filters” option. This will enable customers to filter by color using the swatches.
This is a great way to add a visual component to your product selections that make it easier for customers to navigate and find exactly what they’re looking for. You can also use free plugins such as Variation Swatches for WooCommerce or Product Variation Swatches for WooCommerce to help optimize WooCommerce category pages.
Related reading: How To Increase Ecommerce Sales on Your Online Store >>
Adding Effects To Product Listings
Depending on what you're selling, sometimes one image simply isn’t enough. Maybe you have different designs on each side of a shirt. Maybe your product, such as a handmade art piece, needs a couple of pictures to showcase its many features. There are ways to accomplish this without it being flat and boring.
Image Swap for WooCommerce by Iconic offers image flipping and hover effects for your product listings. Let’s explore how we can use this plugin to enhance your product listings and category pages.
1. Install and activate your plugin.
2. After you enter your license key, you’ll be brought to this dashboard screen. If you click on “General” you can choose the effects your images can have on your product category pages. This enables you to flip to the back of the shirt and slide through several images.

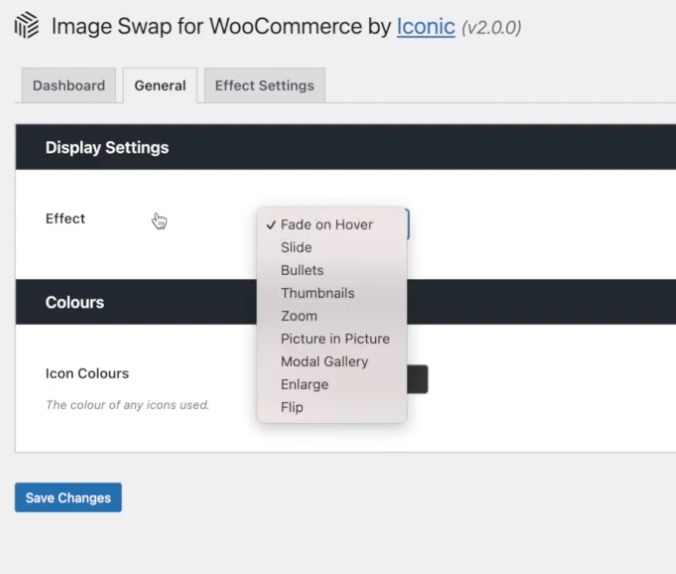
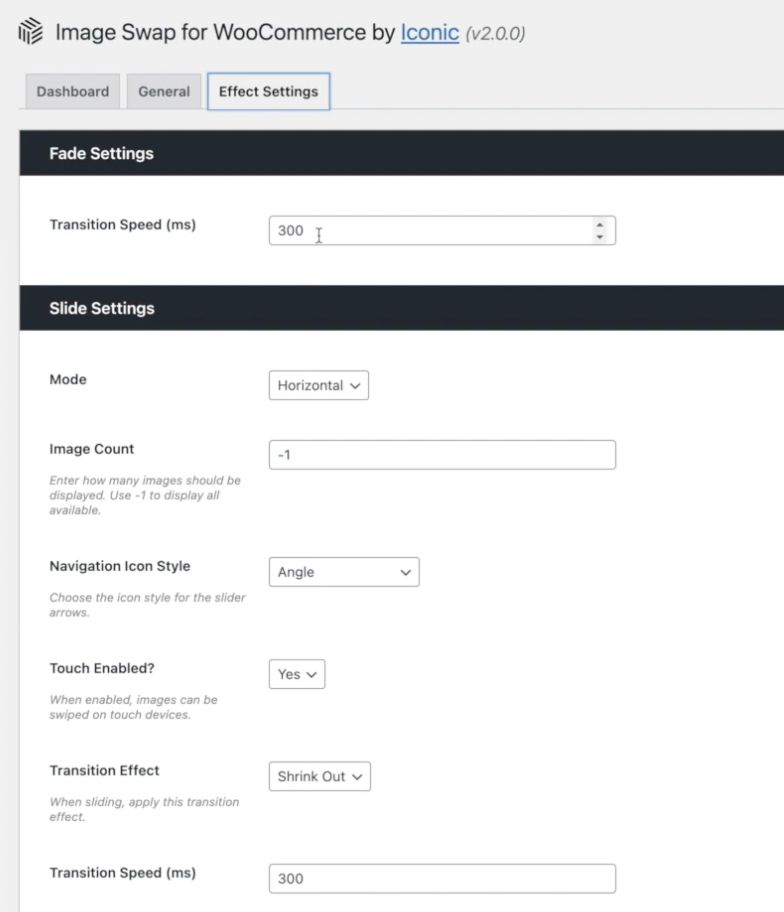
Clicking on Effect Settings enables you to change settings such as the timing of the fade effect and how many pictures to use.

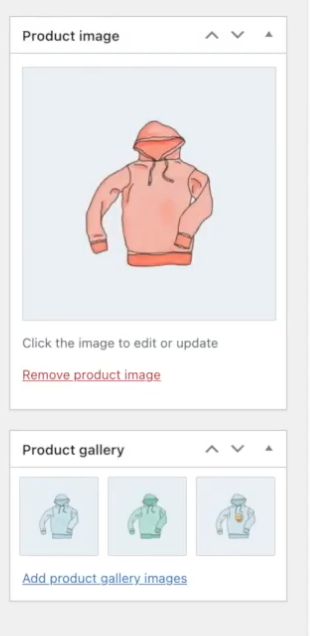
3. The images are sourced from your product gallery, and the featured image will be the primary one shown, with the rest of the gallery for each item being sorted through with your chosen effect.

There are a number of effects to choose from. It’s a great way to give your customers additional information without overloading them or forcing them to read through lengthy descriptions.
As long as your product galleries are populated, you’ll have a number of images for customers to sort through, making their purchase decision easier. There are also free plugins that work similarly such as Image Hover Effects Ultimate.
Utilizing Quick View
If you’ve ever shopped online, you’re probably familiar with pop-ups. While ads can be annoying and take away from the customer experience, quick views do quite the opposite. It’s easy to hover over an item and directly add it to your cart without having to navigate to a new page. In ecommerce, the easier and faster it is to buy something, the more likely it’ll be bought.
The WooCommerce Quickview plugin by Iconic helps you do exactly that.
1. Install and activate your plugin.
2. Choose between “Click” and “Hover” to trigger the Quickview screen.

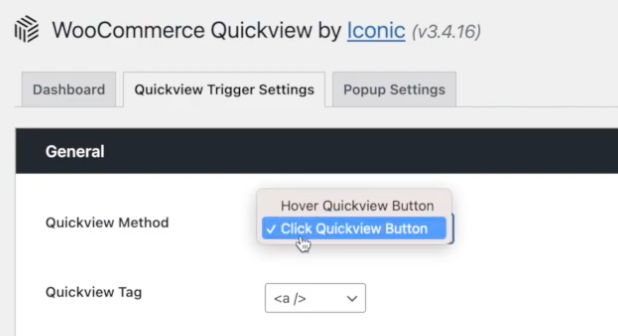
You can also choose to anchor a button. If you’re displaying the Quickview inside a product cart, that’s already an anchor or link. You’d want a button because you can’t nest an anchor inside an anchor.
3. Refresh the page, and now you’ll have the QuickView button available.

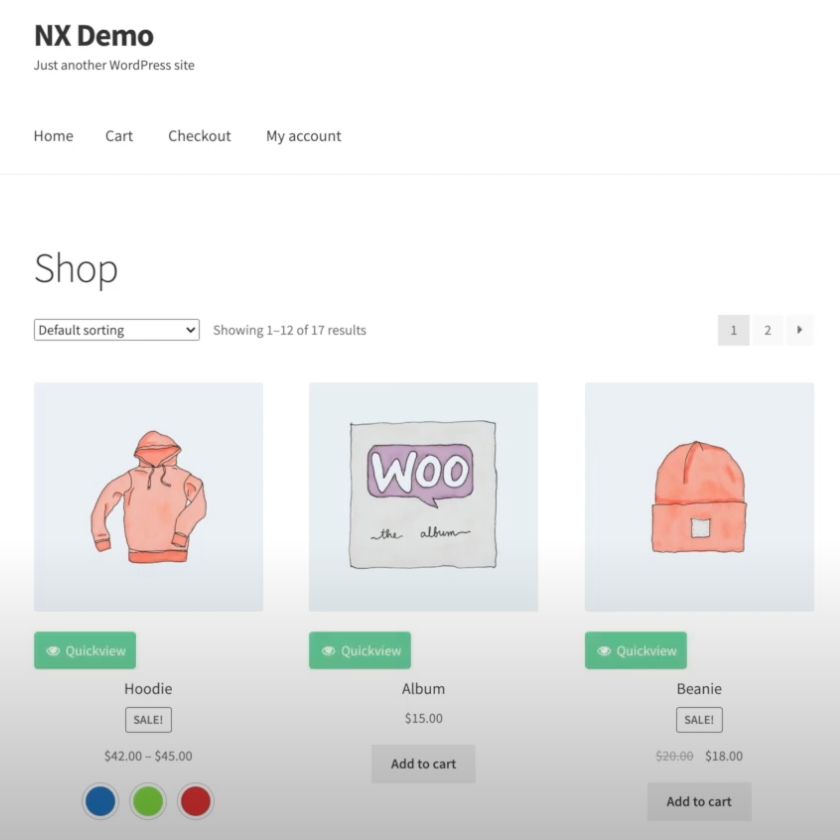
When you click on it, the Quickview popup will appear.

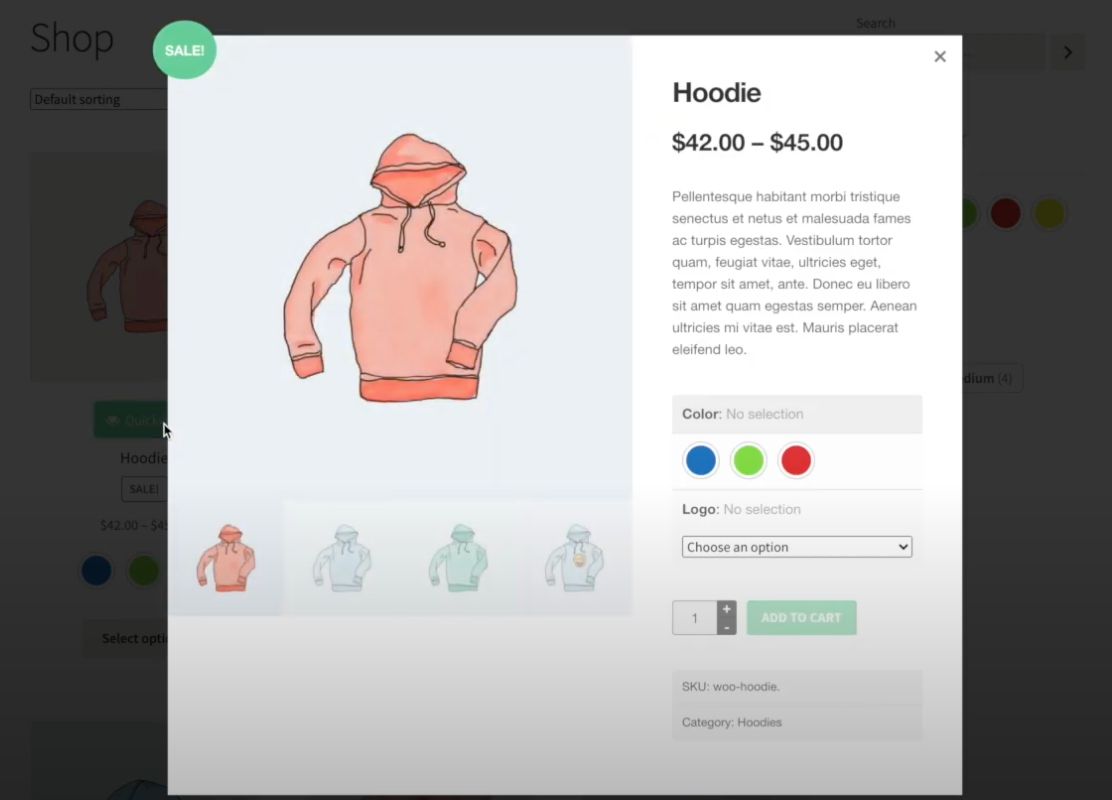
4. There are additional options such as Gallery View, enabling AJAX, and general color options which you can further edit as your needs dictate.
The Quick View feature is becoming more and more common in stores. It’s a great way to help customers quickly see additional options without ever navigating off the page they’re on, as well as giving them the ability to add to their cart at the same time.
Free options that offer similar functionality include YITH WooCommerce Quick View and WooCommerce Quick View.
Choose Nexcess for the Best WooCommerce Experience
It’s not just your category pages that customers are looking at, it’s your site as a whole. We all know customers expect fast speeds, secure transactions, and easy navigation. When you’re working in the ecommerce industry, you want a hosting solution that provides that — and, hopefully, more.
When you choose Nexcess, you’re not just getting great WordPress ecommerce hosting. You’re getting access to premium plugins and themes, the ultra fast Nexcess CDN, and top notch security built right in. What’s more is that all WooCommerce plans get access to our Sales Monitoring and Plugin Performance Monitor, and WooCommerce Automated Testing.
Try Managed WooCommerce by Nexcess for your online store today.

