

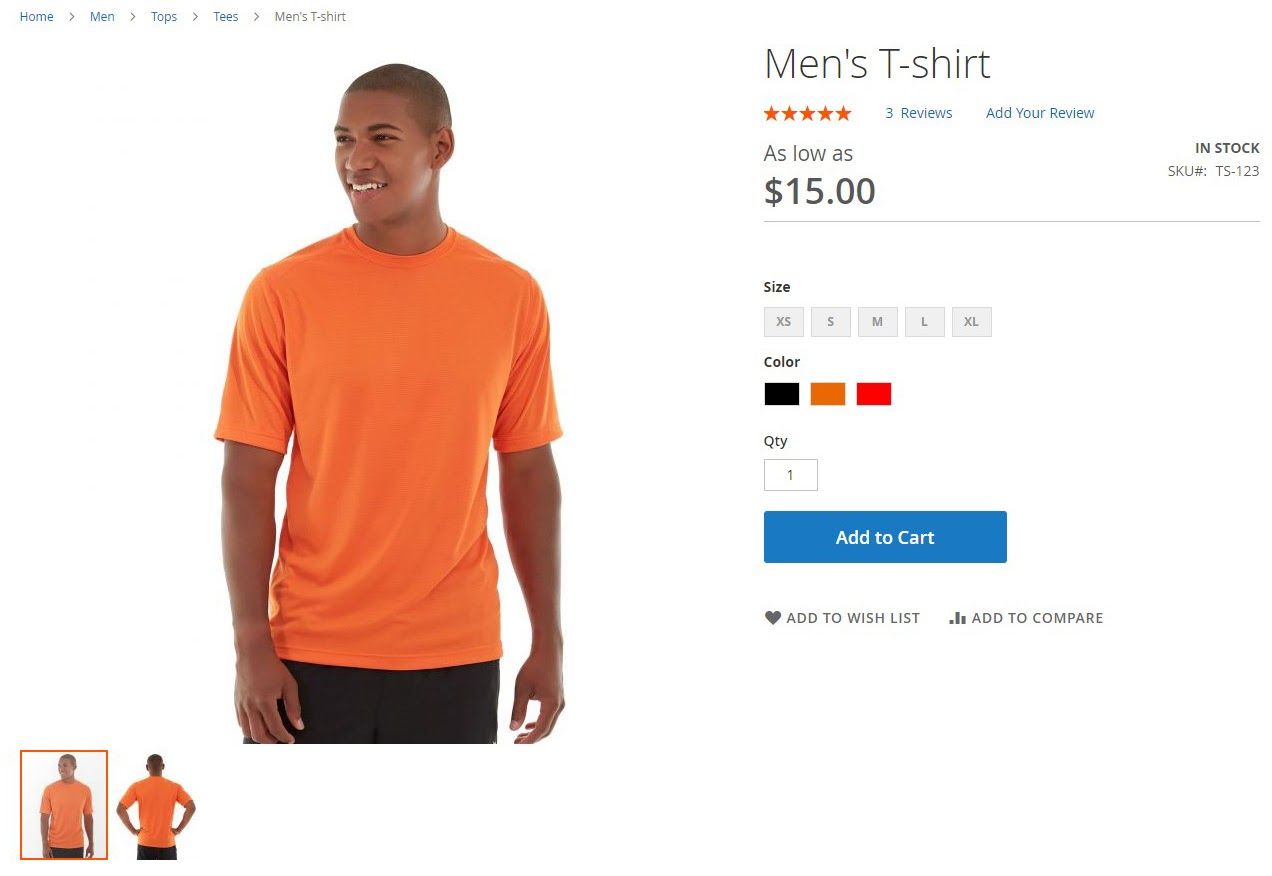
A configurable product in Magento 2 consolidates all variations of a product. On the storefront, it looks like a product that offers options and allows customers to choose between variations based on attributes like color and size.
However, on the backend, each variation represents a different simple product associated with a unique SKU in the inventory. Each variation or “child product” can be tracked separately on the backend.
While it may sound complicated, it’s incredibly easy to add configurable products in Magento 2. The default Magento 2 product creation template guides you through an intuitive, step-wise process and leaves little room for error.
To help you avoid that small margin, we’re going to detail each step of the process. Let’s get right to it.
How To Create a Configurable Product in Magento 2

Before you create configurable products in Magento, create an attribute set that enables your preferred input types for each attribute. Alternatively, you can use Magento’s default set that offers simple dropdowns for the attributes for color and size.
Step 1: Choose the Configurable Product Type

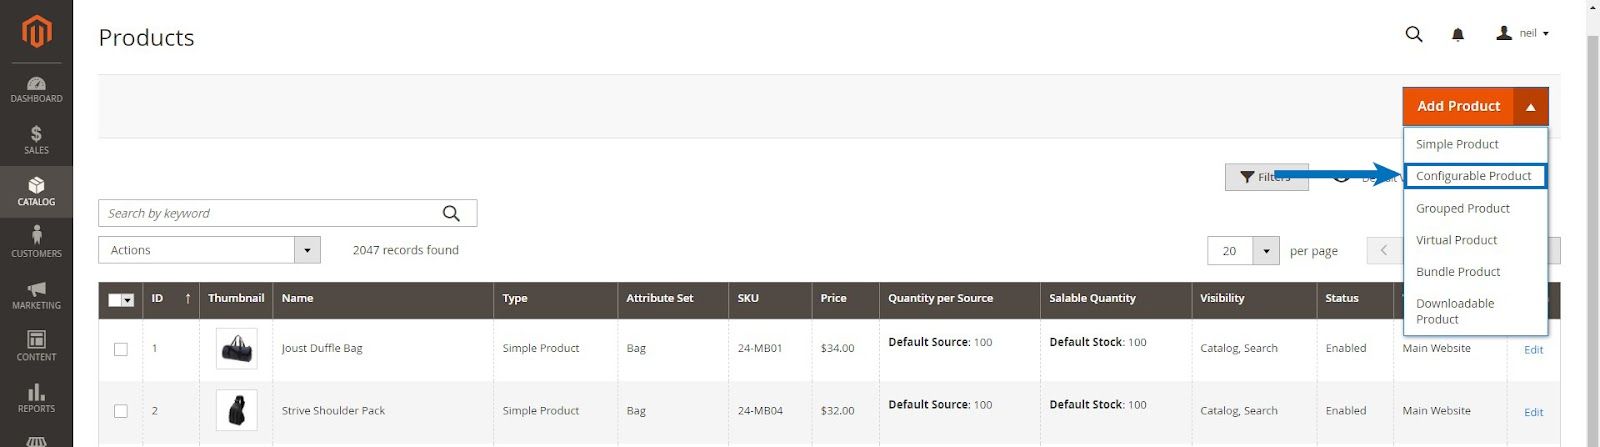
In the Magento 2 admin panel, navigate to Catalog > Products, expand the Add Product menu, and select Configurable Product.
Step 2: Assign an Attribute Set

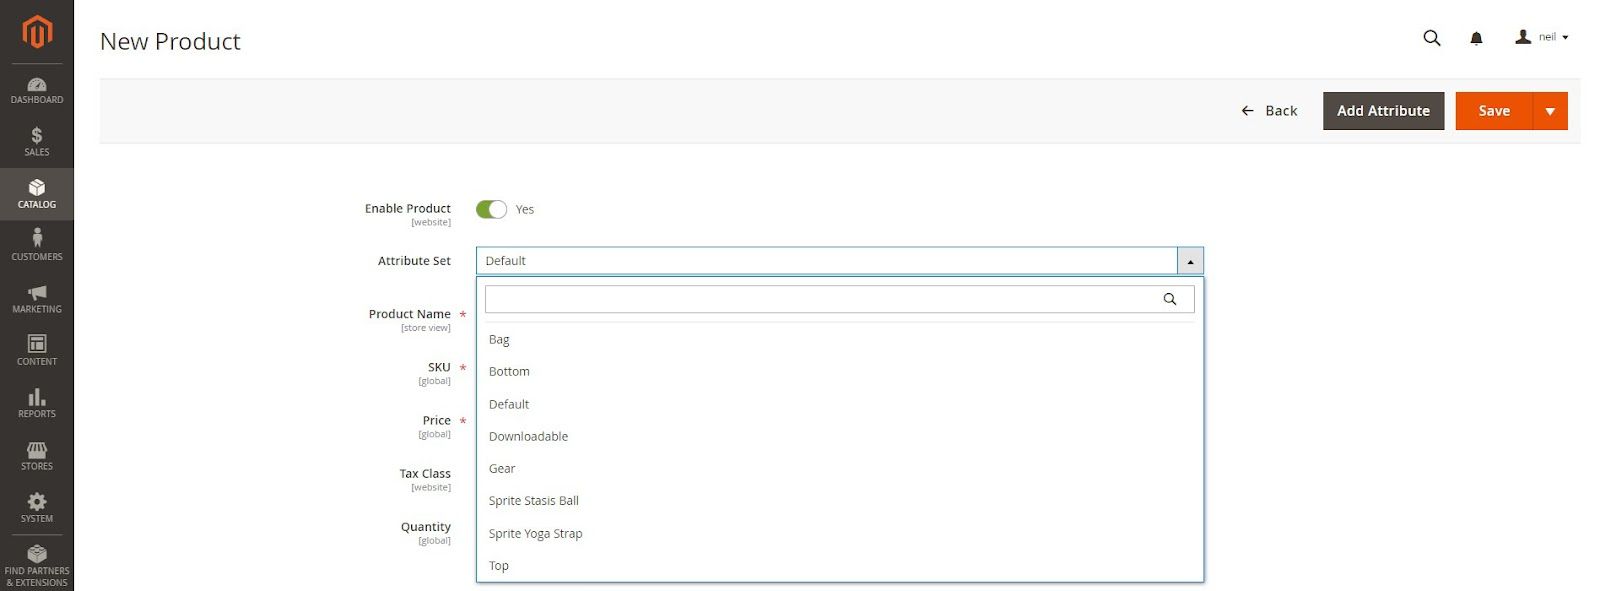
On the New Product template page, expand the Attribute Set dropdown and search for the applicable attribute set for the product.
If you haven’t created one, you can click on Add Attribute to add a new one or continue with the default set.
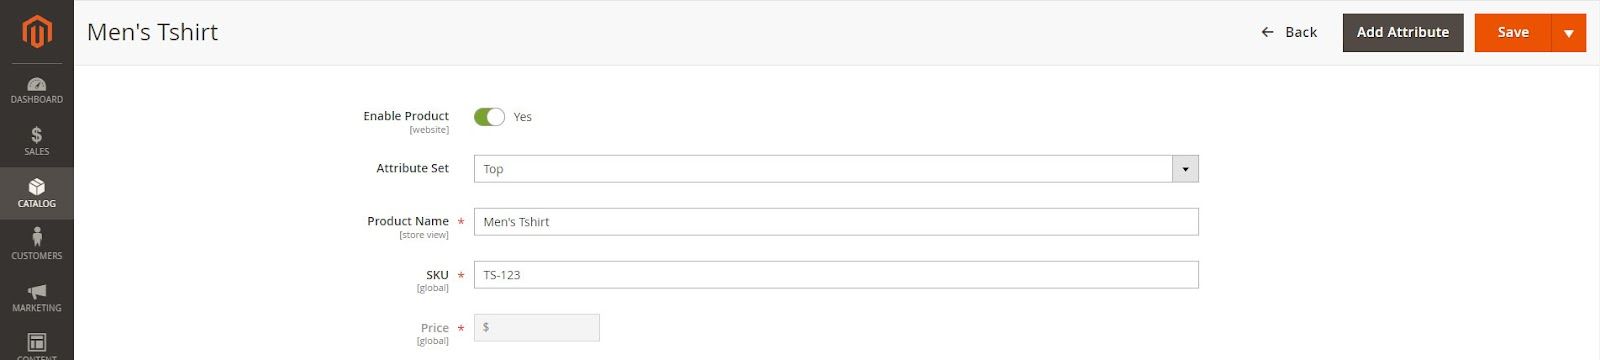
Step 3: Add All Mandatory Product Information

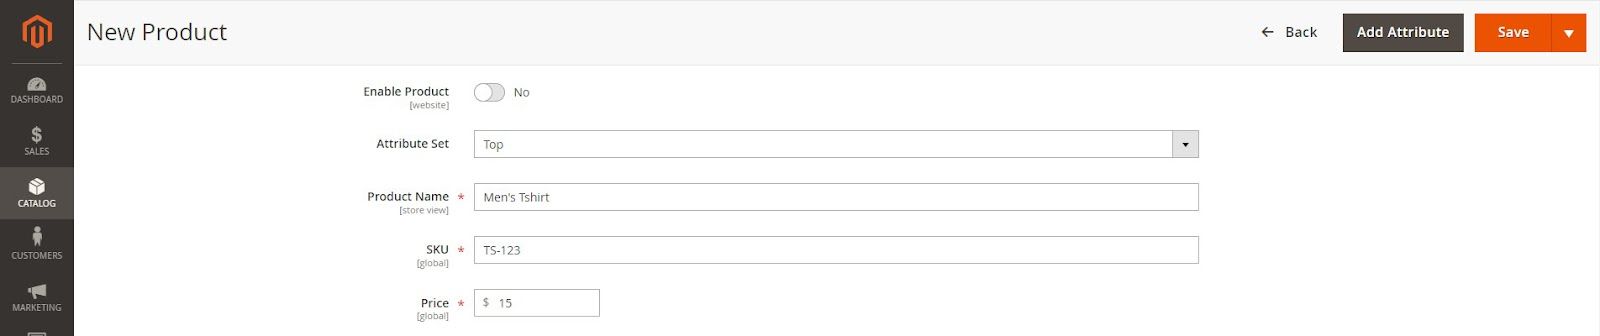
First, update all the required fields marked with an asterisk such as Product Name, SKU, and Price.
Next, click on the toggle beside Enable Product to change it from the default Yes to No. We’re not ready to publish the product just yet. We’ll enable this in the end once we create the configurable product in Magento.
To finish, click the Save button on the upper-right corner and continue to the next step.
Step 4: Complete the Basic Product Information

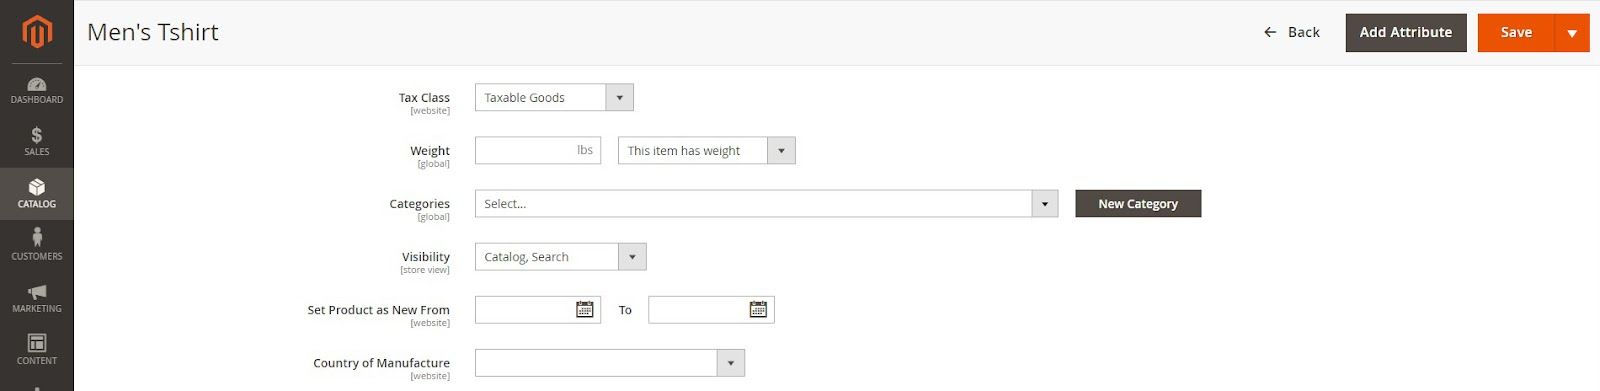
Update the following basic product settings as necessary:
- Tax Class: Select a value from the available options.
- Weight: Enter the weight of a single product unit. All configurable products require this value.
- Categories: Assign an existing category from the dropdown or create a new category by clicking the New Category button.
- Visibility: You can use the default setting of Catalog, Search or select a different value from the dropdown.
- Set Product as New From: Add the product to the New Products List widget in Magento in this section. Or, leave it blank and proceed to the next step.
- Country of Manufacture: Choose a Country of Manufacture from the dropdown.
Once complete, save the product before moving on to the next step to create configurable products in Magento.
Step 5: Add the Configurable Product Configurations
This step consists of four sub-steps that help you assign attributes, attribute values, and generate product variations in bulk.
Step 5A: Select the Product Attributes


Scroll down to the Configurations section and click on Create Configurations.

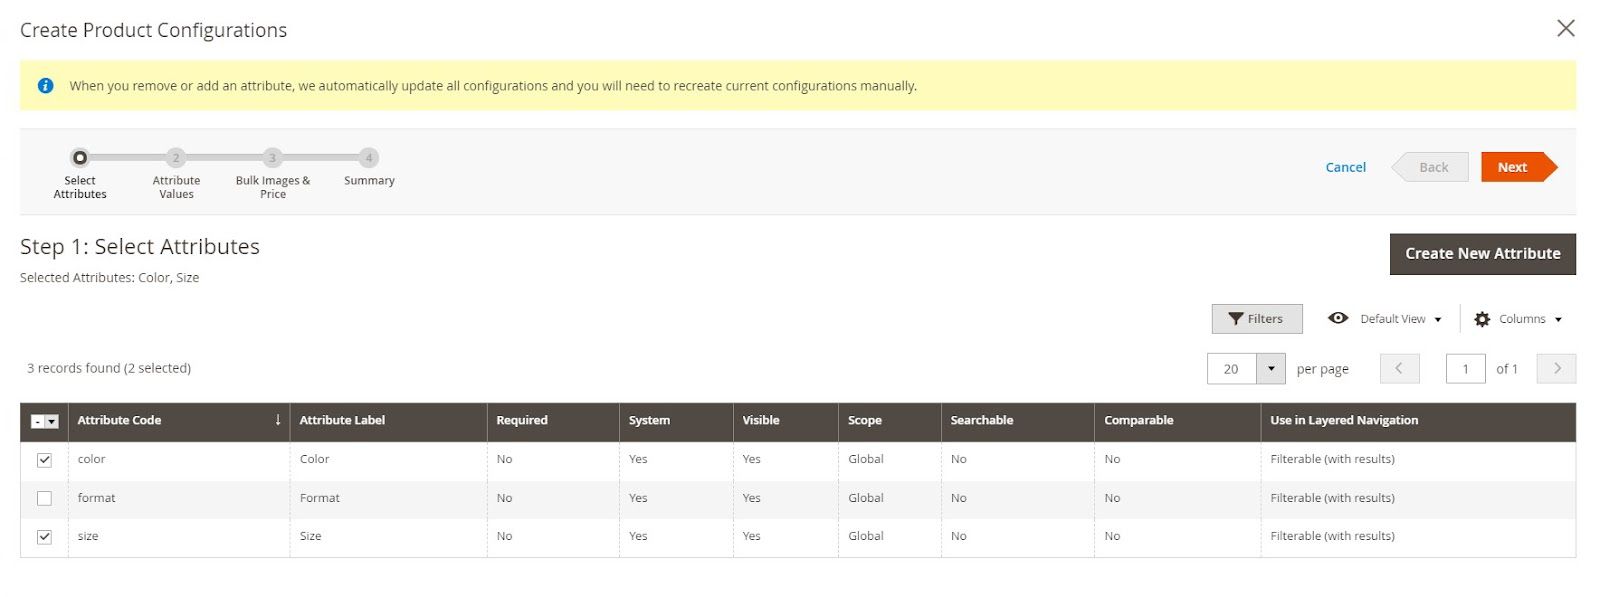
Then, select the configurable attributes from the available options. Optionally, you can also add a new attribute at this stage using the Create New Attribute button. Once complete, click Next to proceed.
Step 5B: Configure the Attribute Values

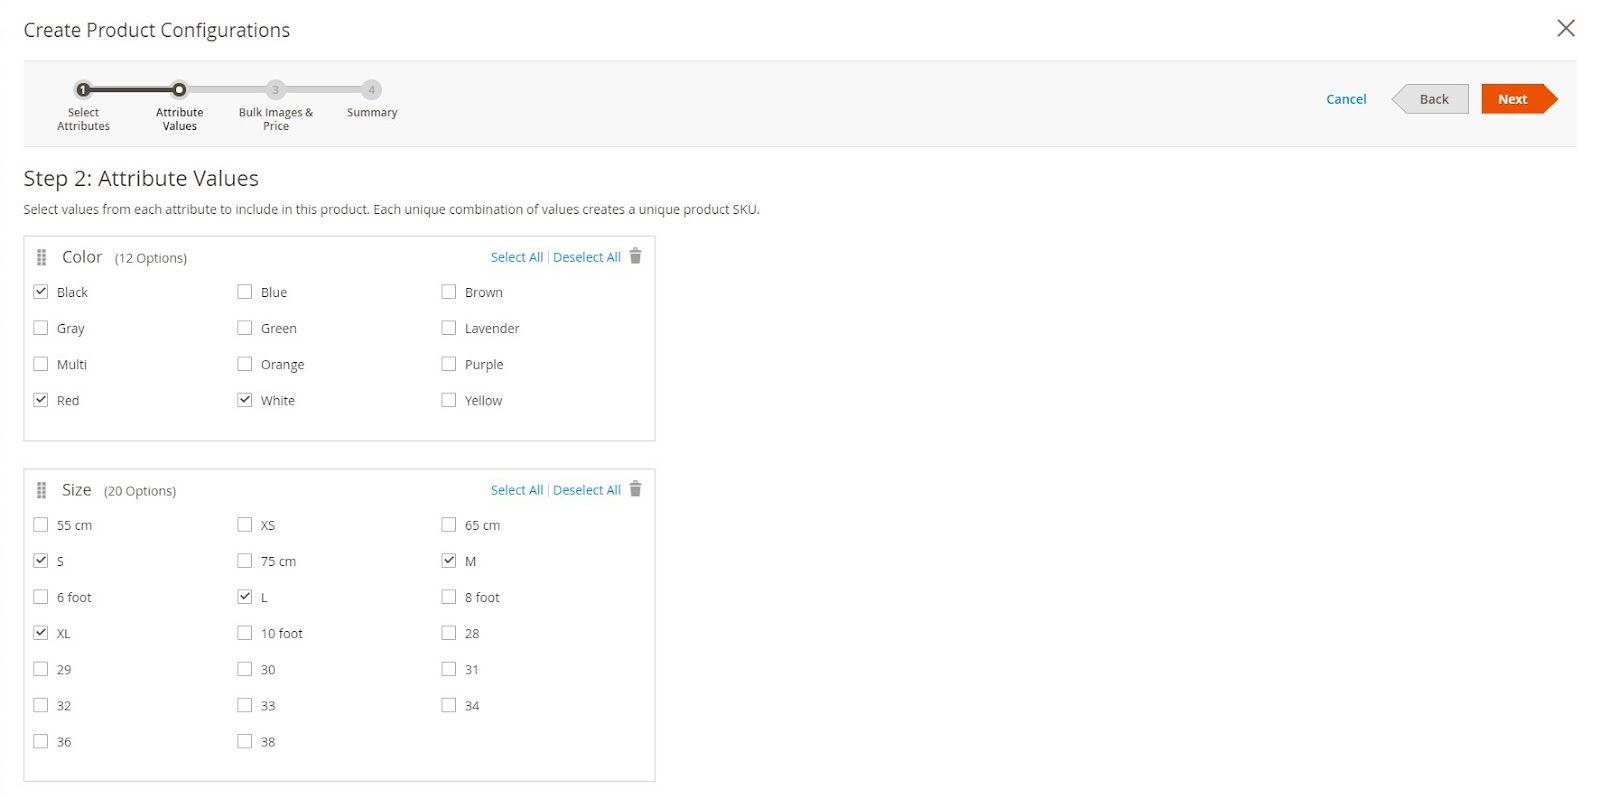
First, select the values using the corresponding checkbox for each attribute option.
Now, rearrange the display order of the attributes on the frontend using the change order grid icon to drag and reorder.
Once complete, click Next to proceed.
Step 5C: Assign Images, Price, and Quantity to Variations

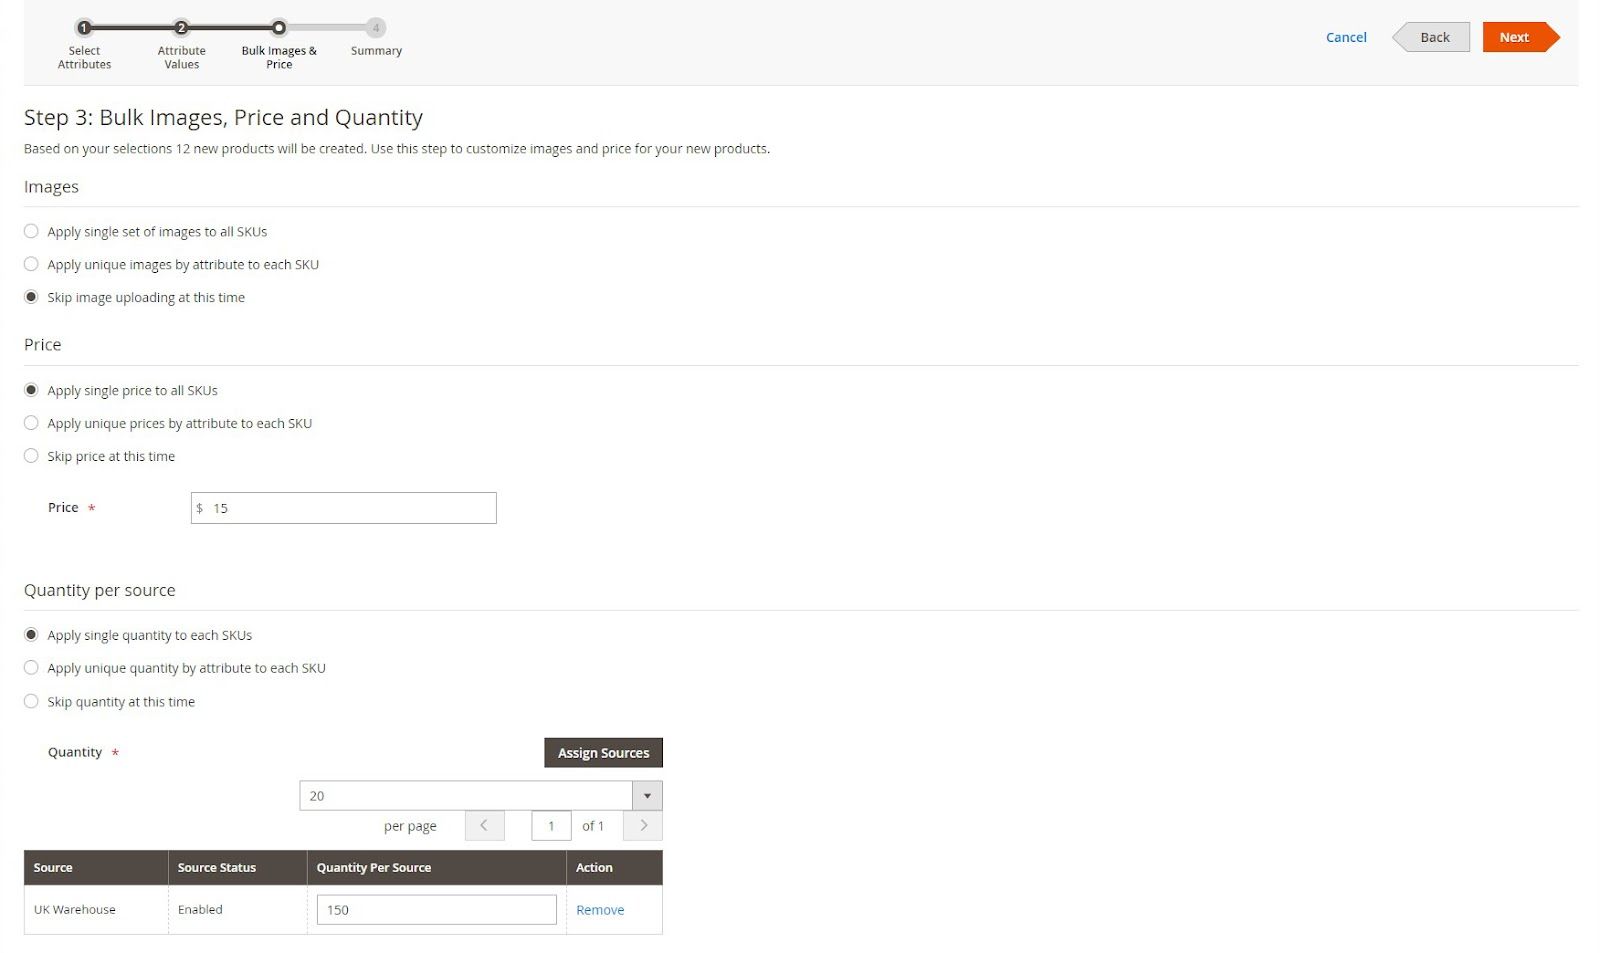
Images: Assign a single set of product images to all SKUs, or upload unique images by attribute.
- Price: Assign a product price to all SKUs collectively or add a different price to each product attribute.
- Quantity: Assign a quantity to all product options or customize the product quantity by attribute if needed. If you’re using a Multi-Source inventory, you can assign inventory sources at this stage by clicking the Assign Sources button.
Once you finish, click Next to proceed to the final step.
Step 5D: Generate the Product Configurations

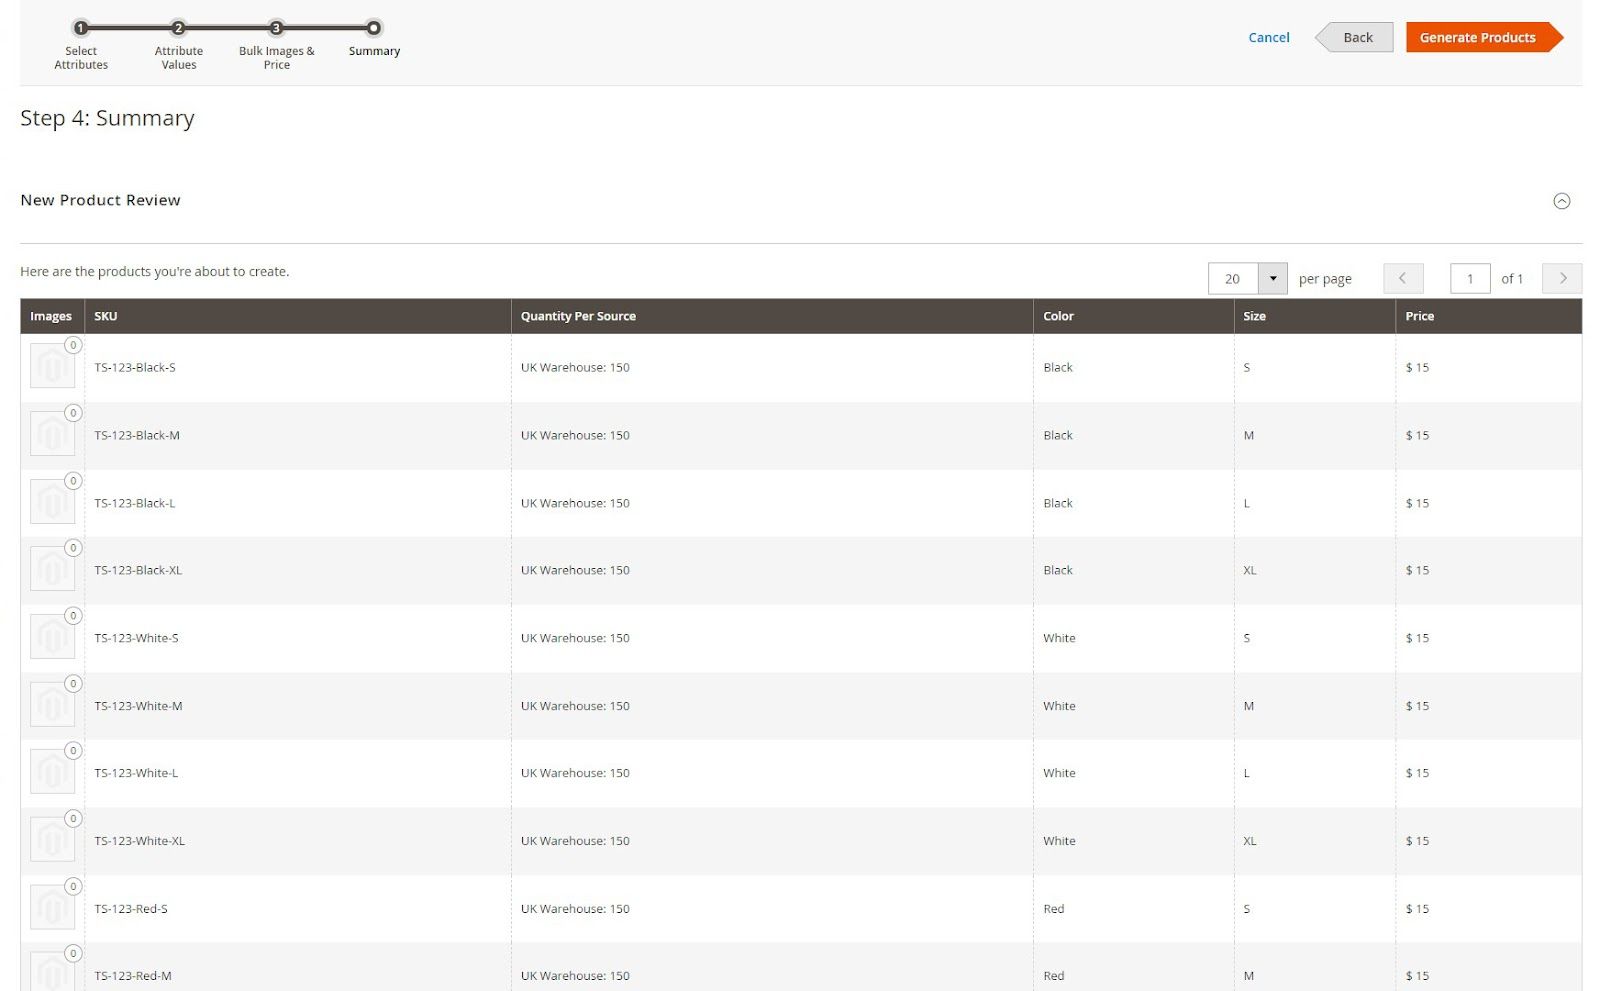
Wait a few seconds till Magento generates the entire list of products using your selections.
Next, verify all the associated products and click Generate Products to proceed. If you’d like to change anything, click Back.
After that, the Configuration section will list the generated configurable product variations.
Step 6: Assign a Product Image

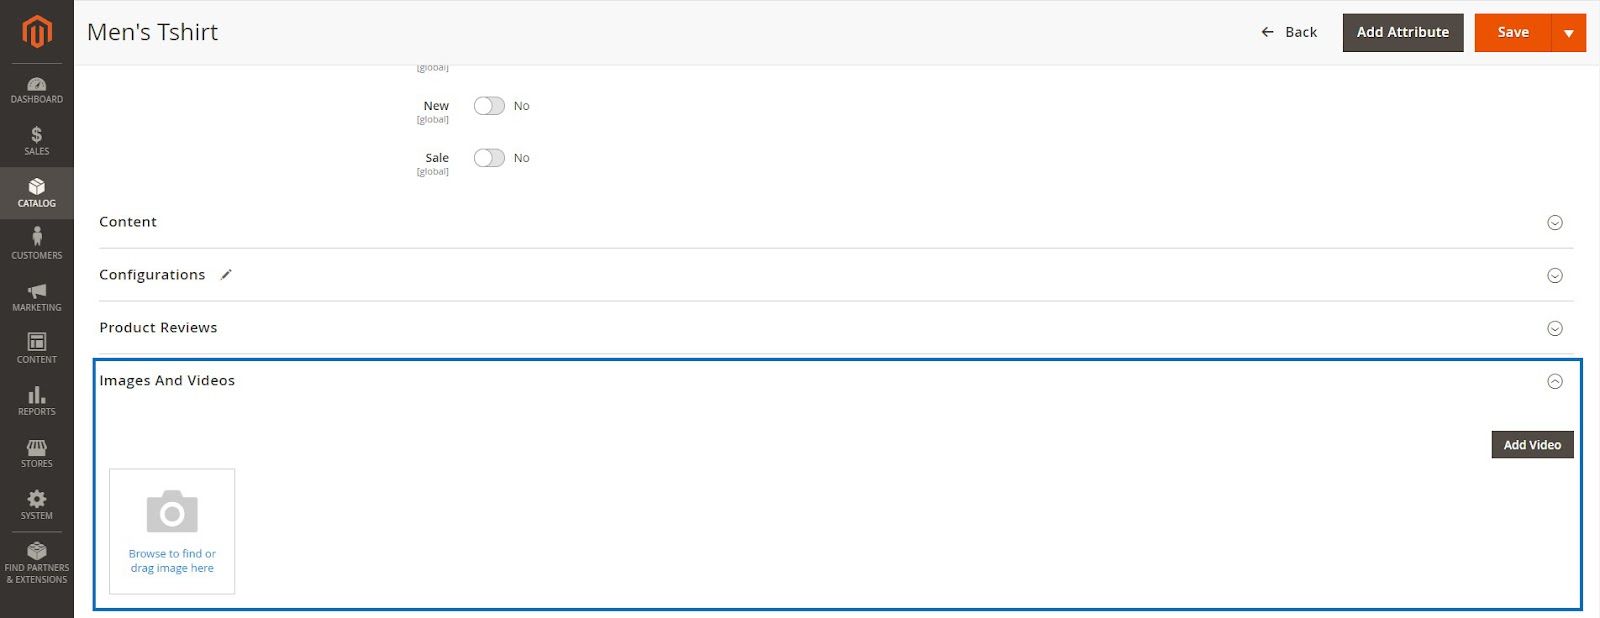
Expand the Images and Videos section and upload an image for the Magento 2 configurable product.
Step 7: Update the Optional Product Information
- Content: Add a brief product description in this section.
- Related Products, Up-Sells, and Cross-Sells: Assign products to recommend to customers viewing and purchasing the product.
- Search Engine Optimization: Customize the product URL and metadata.
- Customizable Options: Add or import custom options for the product.
- Products in Websites: Add the product to different websites if you’re running a multi-store setup.
- Design: Assign custom XML layouts to the product page or use the default layout.
- Gift Options: Allow your customers to add a gift message to their purchase and set the price for it.
Step 8: Enable and Save the Product

Scroll to the top and toggle Enable Product to Yes.
Now, click the Save button to complete the process to add configurable products in Magento.
Step 9: Configure the Shopping Cart Thumbnails

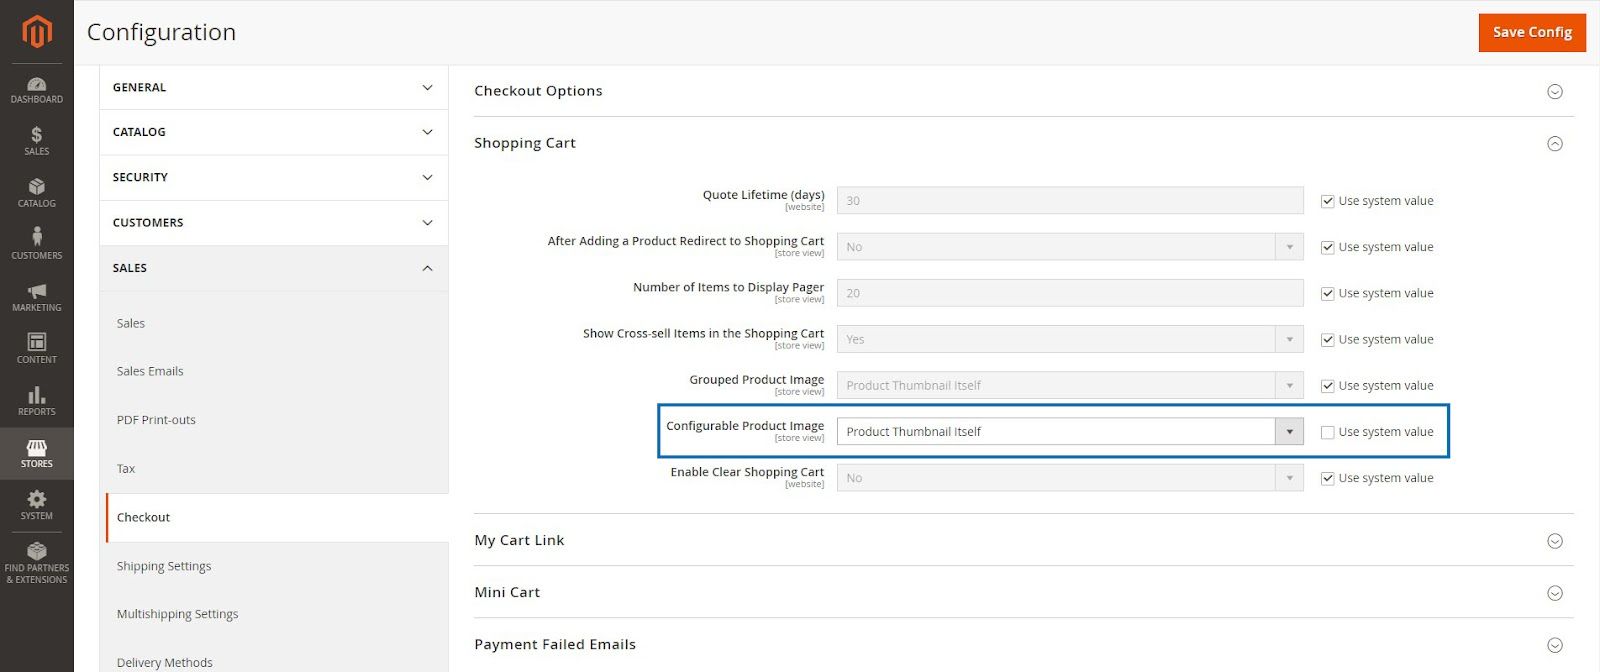
By default, Magento displays the parent configurable product’s image as the thumbnail on the cart and checkout pages. Updating this setting changes that behavior and shows the image of the selected product variation.
To configure shopping cart thumbnails, navigate to Stores > Settings > Configuration > Sales > Checkout.
Next, expand the Shopping Cart section and untick the Use system value checkbox besides Configurable Product Image. Update its value to Product Thumbnail Itself using the dropdown options.
To finish, click Save Config to complete the product listing.
Final Thoughts: How To Add Configurable Products in Magento 2
Repeat the steps described in this guide to add configurable products in Magento and build your online catalog. If you’re having trouble viewing the product on your storefront, make sure you refresh the Magento cache to display the latest data.
Managed Magento hosting by Nexcess eliminates all worries about caching and performance. Our hosting plans include multi-layered caching, fully optimized PHP, and a free CDN.
Experience the convenience of managed hosting with Nexcess. Check out our plans to get started today.

