

Statista estimates that the number of emails exchanged daily will increase from 319.6 billion in 2021 to over 333 billion in 2022. So if you haven’t already, it’s time to diversify your ecommerce marketing strategy and tap into this growing channel.
Magento’s core email functionality includes essential features such as responsive and customizable email templates. But if you want to leverage the true potential of email, you need a dedicated email marketing tool like Mailchimp.
In this guide, we’ll show you how to install Mailchimp for Magento 2 and configure it to transfer customer data securely.
Here’s what we’ll cover:
- 5 Reasons To Use Mailchimp for Magento Email Marketing
- Steps To Install and Configure Mailchimp for Magento 2
- Final Thoughts: How To Install Mailchimp for Magento 2
5 Reasons To Use Mailchimp for Magento Email Marketing
Here are five practical reasons to use Mailchimp for Magento email marketing.
1. Flexible Pricing Plans
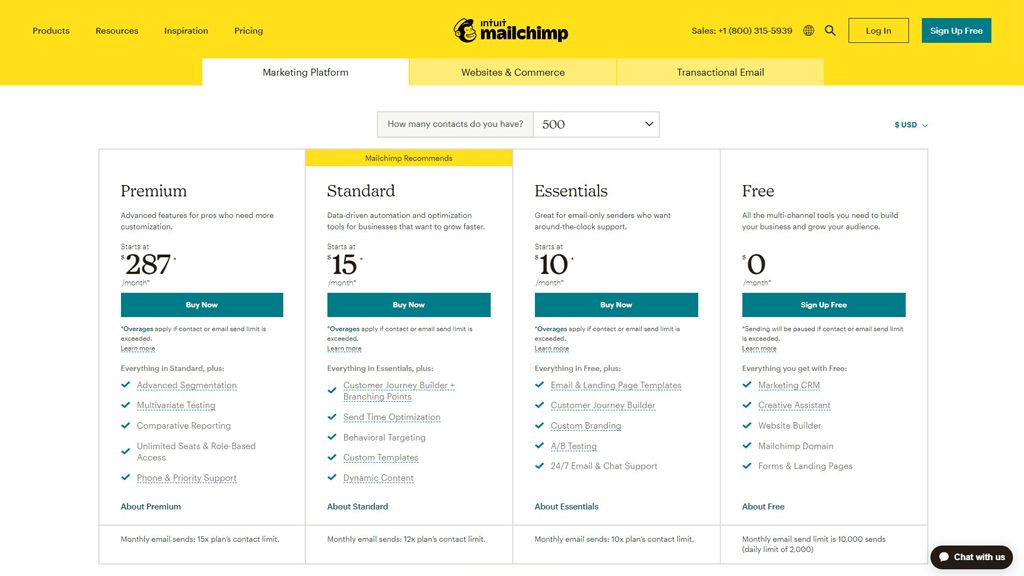
Mailchimp offers four flexible pricing plans — including a free one — that enable you to start even on a tight marketing budget. Mailchimp’s paid plans are priced based on the number of contacts you import into your account. That ensures you only pay for what you use.
2. Intuitive User Interface
Mailchimp offers an intuitive drag-and-drop email builder that allows you to design attractive marketing emails without code. It empowers you to create complex automation using its customer journey builder and market to customers at different stages of the buying journey.
3. Powerful Email Marketing Functionality
According to Datanyze, Mailchimp is the world’s most popular email marketing service with a massive 68.52% market share. That’s because Mailchimp provides some of the best email marketing features, including:
Audience segmentation.
- Customer surveys.
- Behavioral targeting.
- Pre-built email templates.
- Automation builder.

4. Multiple Support Options
Mailchimp offers multiple support options for both free and paid plans. Its free plan gives you access to a massive knowledge base of guides and complimentary email support for the first 30 days. Paid subscribers get access to the knowledgebase, email support, and live chat.
5. Integrations With Over 200 Apps and Tools
Mailchimp supports integrations with over 200 third-party apps and tools, including Zapier, Quickbooks, and social media platforms like Instagram and Facebook. So no matter which apps you use for your email marketing campaigns, Mailchimp will integrate with them.
Steps To Install and Configure Mailchimp for Magento 2
Here’s how you install Mailchimp for Magento 2 in five steps.
Note: Make sure you backup your server before you proceed. If you’re a Nexcess customer, you can create an on-demand backup from your Client Portal by navigating to Plans > Site name > Backups and selecting Create Backup from the main menu.
Step 1: Create a Mailchimp Account
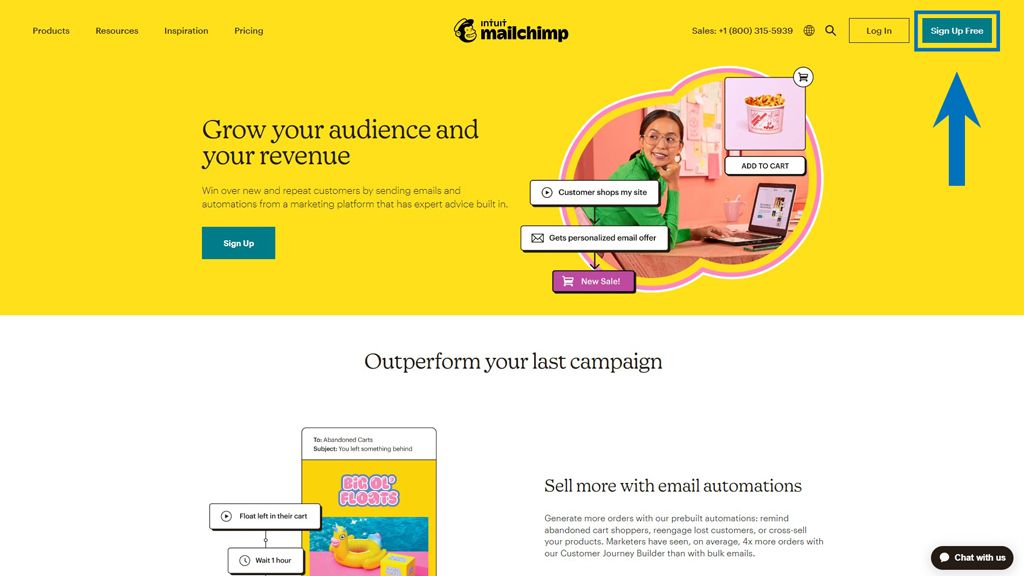
Create an account on the Mailchimp website by clicking the Sign Up Free button on the top-right corner of the screen.
On Mailchimp’s signup page, enter details, such as your email address, username, and password, and click the Sign Up button.
Follow Mailchimp’s guided signup process by verifying your email address, selecting a plan, and configuring basic account information.
After that, proceed to the next step.
Step 2: Install the Mailchimp Extension
Head to the Magento Marketplace and purchase the free Magento 2 Mailchimp extension.
Next, log in to your Magento server over SSH, navigate to the project root directory, and put your store in maintenance mode using the following command:
<code>

$ bin/magento maintenance:enable

</code>
This step ensures customers can’t access the storefront when you install Mailchimp for Magento 2.
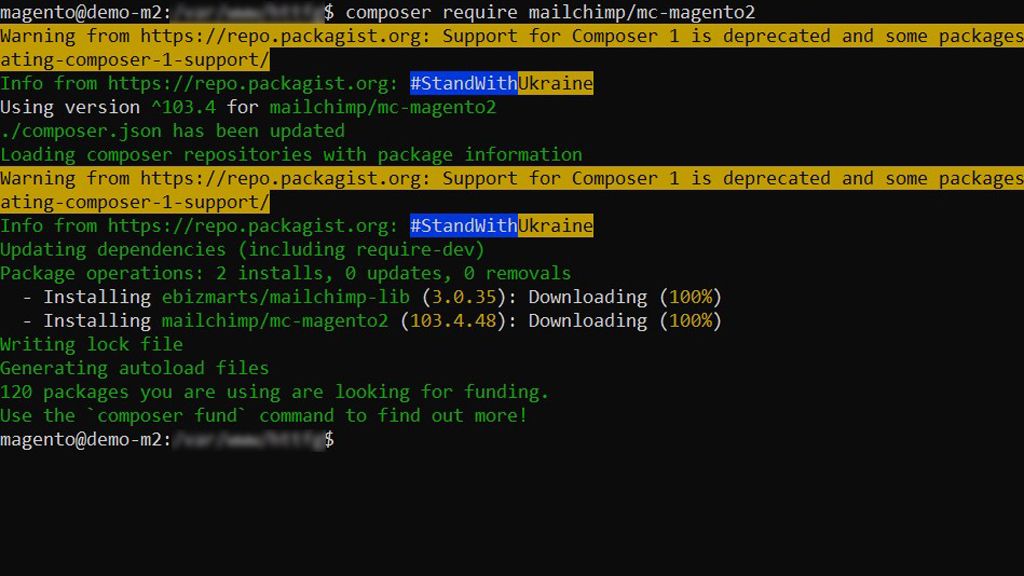
Next, update the composer.json file using the following command:
<code>

$ composer require mailchimp/mc-magento2

</code>
The above command installs the latest release of the Mailchimp Magento extension. If you’re using an older Magento version, you’ll need to modify the command and specify a compatible version number.
For example, if you’re using Magento 2.3, you’ll need to install release 102.3.48 as follows:
<code>

$ composer require mailchimp/mc-magento2:102.3.48

</code>
You can find the entire list of compatible releases on Mailchimp’s GitHub page. Once the command executes, you can verify the status of the extension using the vendor and component name as follows:
<code>

$ bin/magento module:status Ebizmarts_MailChimp

</code>
If the extension is disabled, you can enable it using the following command:
<code>

$ bin/magento module:enable Ebizmarts_MailChimp --clear-static-content

</code>
Finally, run the following commands to register the extension and clear the Magento cache:
<code>
$ bin/magento setup:upgrade

$ bin/magento cache:flush

$ bin/magento cache:clean

</code>
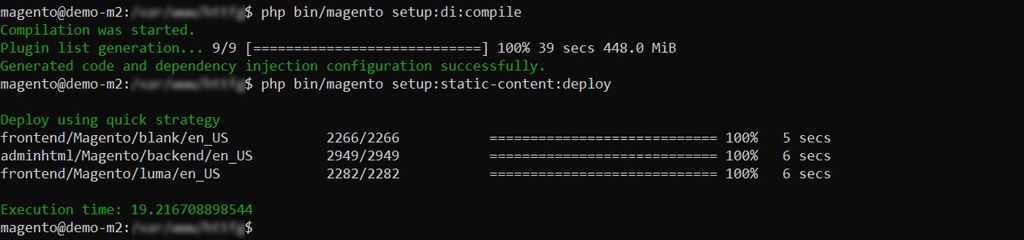
If you’re operating Magento in the production mode, you’ll also need to compile Magento code and deploy the extension’s static view files using the following commands:
<code>

$ php bin/magento setup:di:compile

$ php bin/magento setup:static-content:deploy

</code>
After this, you can disable the maintenance mode using the following command:
<code>

$ bin/magento maintenance:disable

</code>
That’s it. We’ve successfully installed Mailchimp for Magento 2. Now, let’s configure it to sync data from Magento.
Step 3: Connect Your Magento Store With Mailchimp
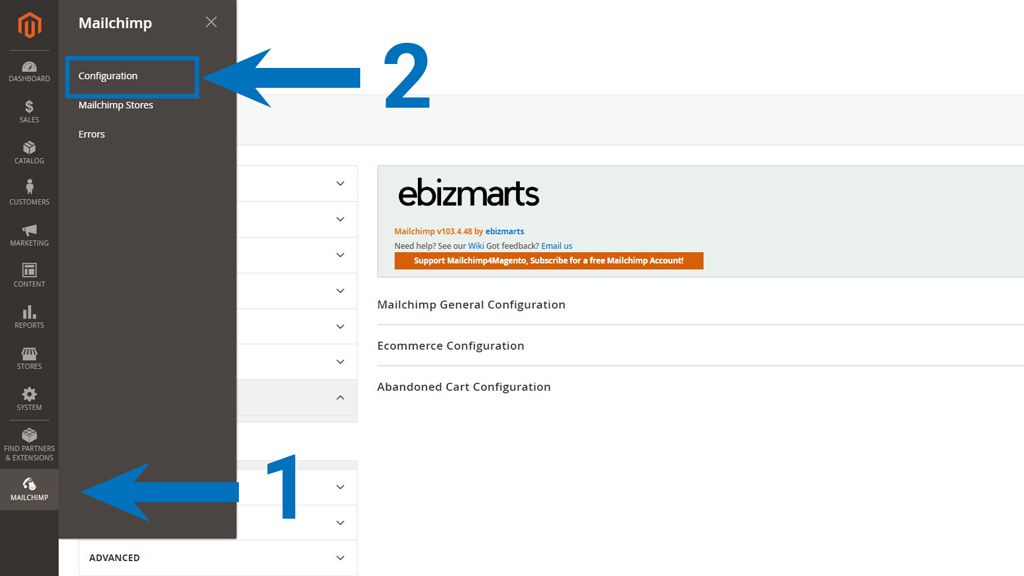
Log in to the admin panel to connect Magento 2 with your Mailchimp account and navigate to Mailchimp > Configuration.
Expand the Mailchimp General Configuration section and enable the extension by setting Enabled to Yes.
Click on the Get API Credentials button.
Enter your Mailchimp account username and password in the popup window and click Log in.
Next, click the Allow button to permit the extension to access your Mailchimp account and synchronize your ecommerce data. After authorizing access, you’ll see a confirmation message and the Mailchimp API key.

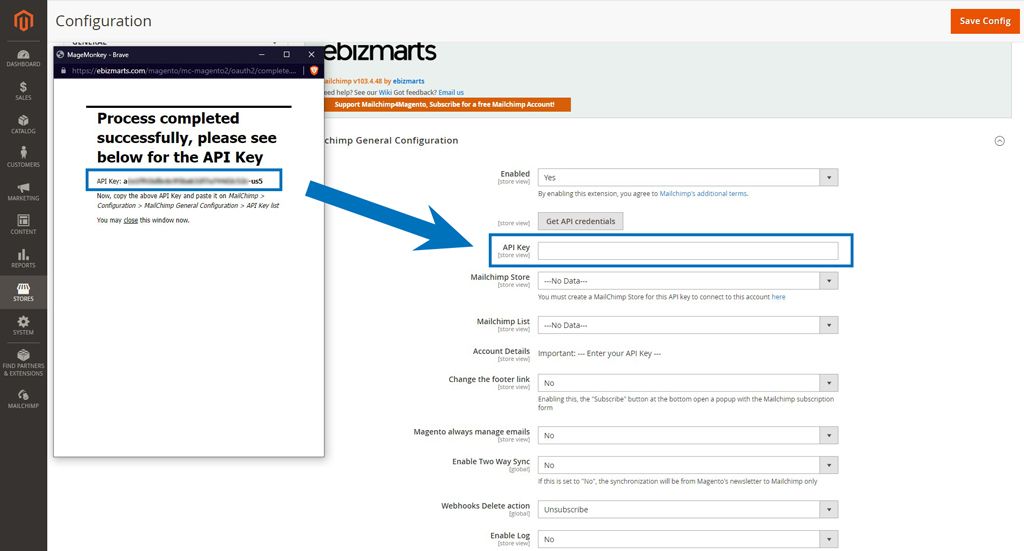
Copy and paste your key in the API Key text area in the Mailchimp General Configuration section of the Magento admin panel.
Click Save Config to save your changes and close the popup window.
Step 4: Create a Mailchimp Store in the Admin Panel
Before sending data from your Magento store to your Mailchimp account, you need to create a Mailchimp store to categorize it. That way, you can use the same Mailchimp account to collect customer information from different sales channels or ecommerce stores.
Navigate to Mailchimp > Mailchimp Stores inside the Magento admin and click on the Create New Mailchimp Store button on the upper right corner of your screen.
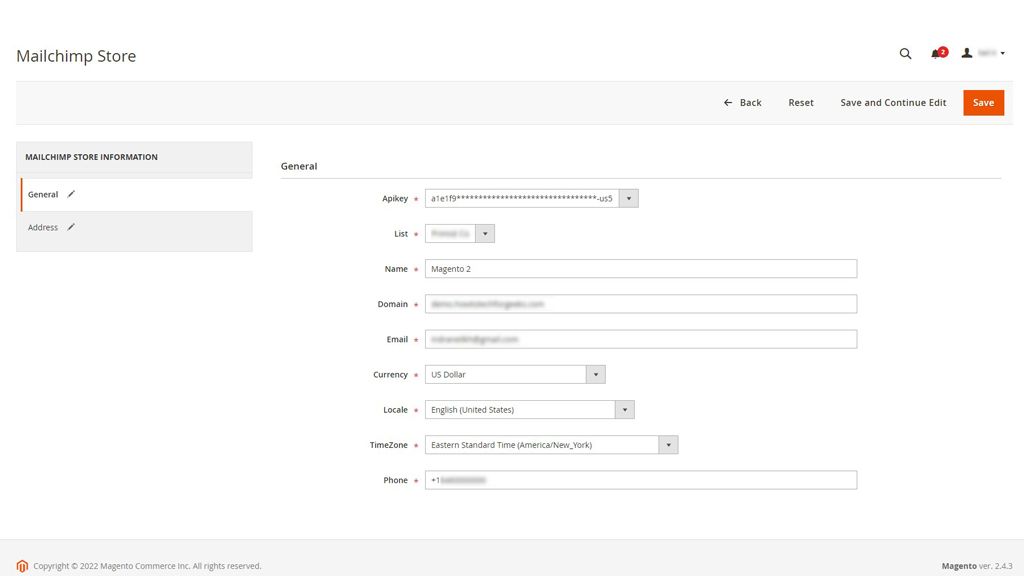
Enter your business information, such as its name, domain, and address, on the Mailchimp Store page and click Save to create your Mailchimp store.
Once the store is created, you can verify it by logging into your Mailchimp account, navigating to Integrations > Manage > Ecommerce > Magento, and clicking on Manage your sites.
Step 5: Configure Mailchimp Settings Inside Magento 2
Now it’s time to customize ecommerce-specific settings to Mailchimp for Magento.
Navigate to Mailchimp > Configuration in the Magento admin and expand the Ecommerce Configuration section.

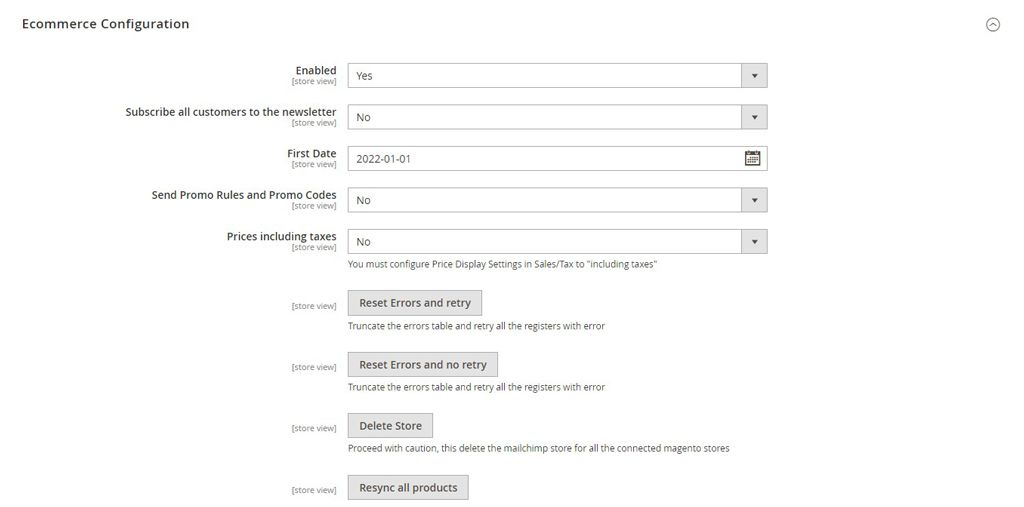
Use the drop-down menu to set Enabled to Yes, and use the date picker tool beside First Date to choose the date after which you want to sync your data with your Mailchimp account.
You can also configure settings to send promotional codes and display prices, including taxes. If you prefer to configure those at a later time, use the default settings and proceed with the Magento 2 Mailchimp configuration process.

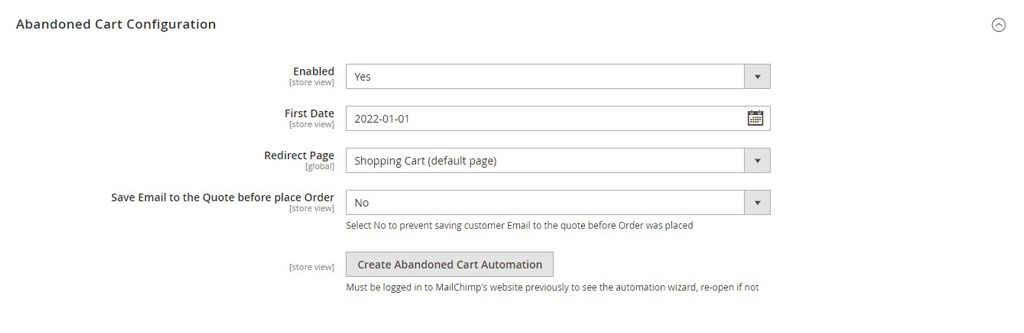
Expand the Abandoned Cart Configuration section and set Enabled to Yes to share cart abandonment data with your Mailchimp account. Use the First Date input to choose the date after which you want to share abandoned cart data with Mailchimp.
We recommend configuring cart abandonment emails because data collected by the Baymard Institute reveals that over 58% of U.S. online shoppers abandoned a cart within the last three months. Sending abandoned cart emails will help you drive conversions and sales.
Once you’ve assigned preferences for Abandoned Cart Configuration, click Save Config to complete Magento 2 Mailchimp configuration.
Note: Magento relies on cron to perform automated tasks such as synchronizing your store data with your Mailchimp account. You will need to configure Magento cron to ensure Mailchimp collects data from your store automatically.
Final Thoughts: How To Install Mailchimp for Magento 2
We’ve shown you how to install Mailchimp for Magento 2 and automate data transfers between your store and Mailchimp account. But that’s just the first step.
Here’s what’s next: you can build a campaign in Mailchimp to offer personalized product recommendations. After that, you can design automations to target customers at different stages of their buying journey.
Need more tips to help your business grow?
Here’s one more: sign up for Managed Magento Hosting with Nexcess and simplify hosting your Magento store. We’ll handle server security and optimization so you can focus on growing your online business.
Browse our plans to learn more.

